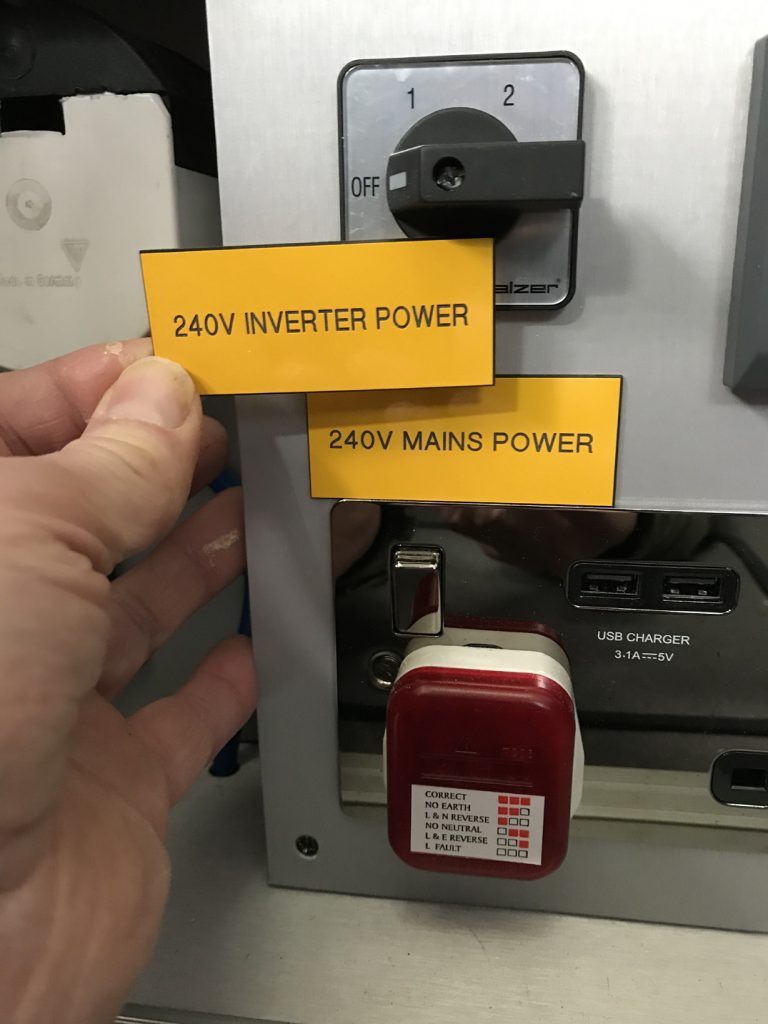
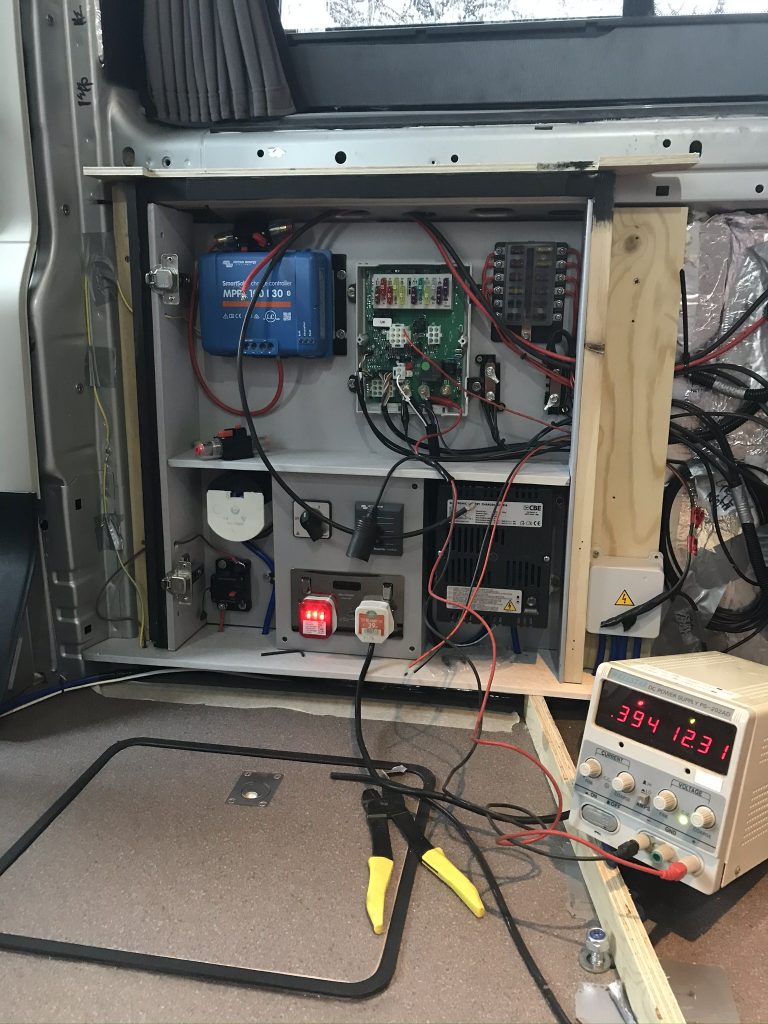
3 Red Lights: The three red lights on the panel below indicates that we now have 240 volts Mains Power (for the first time). The 3 Red Lights are basically a 240 3 Pin UK Plug, when all three lights are displayed it means that the circuit is correctly wired. If any one of the lights is off it means a different thing like incorrect polarity, no earth etc. This plug is not only for testing, it will stay inside the vehicle all the time the van is on the road.
Why keep a Test plug in the Van permanently? This is because in some European Countries (France) they can wire their plugs in reverse to the UK meaning the UK negative is live. The Plug will detect any reverse polarity and explain what it means via the light (one light, two lights etc). I keep a set of reverse polarity Hook-Up Cables in the van at all times. You can buy reverse polarity Hook-Up cables on the internet. To use in Europe, unplug the 3 Pin Power Test Plug from the van and Plug into the European Electricity Feed “BEFORE” plugging any Power into the Van. This Plug will correctly identify the Polarity so that you can use the appropriate Hook Up Cable.
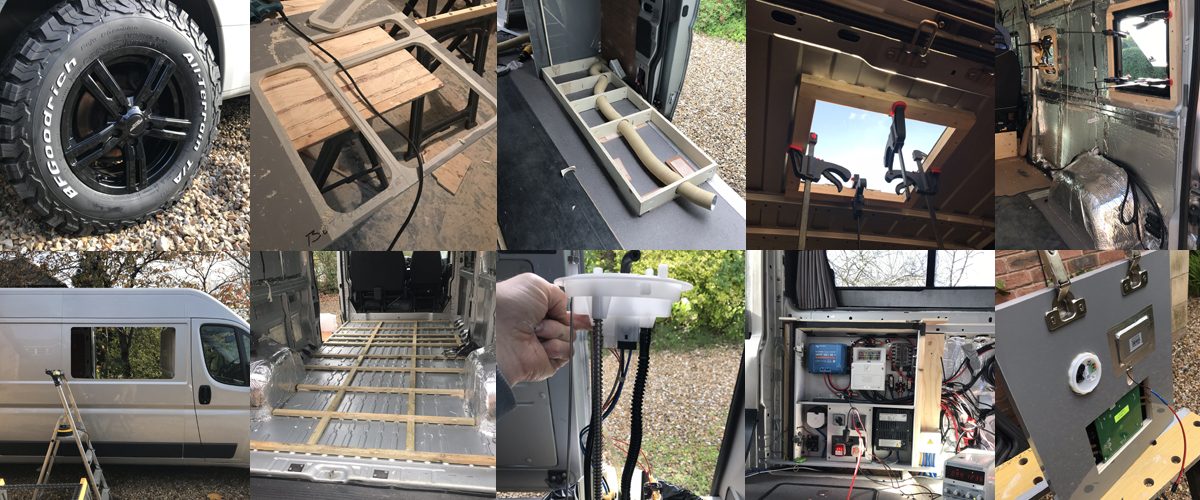
Below: I have connected a Bench Power Supply to my electrics so I can test them and see what current is being drawn.
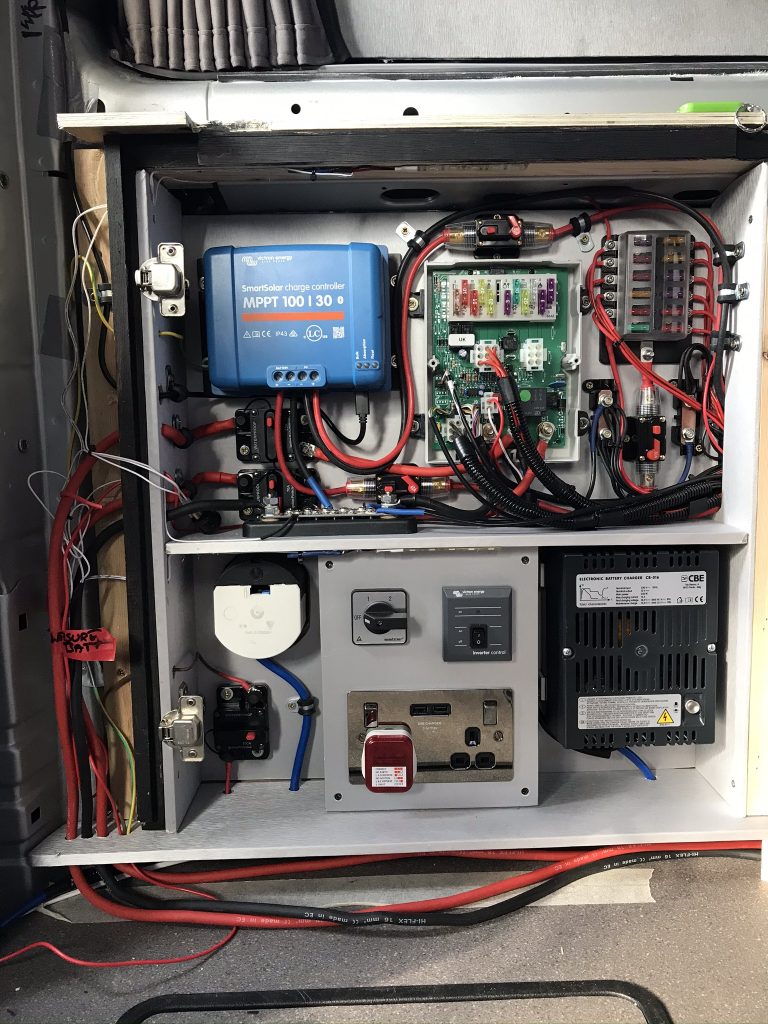
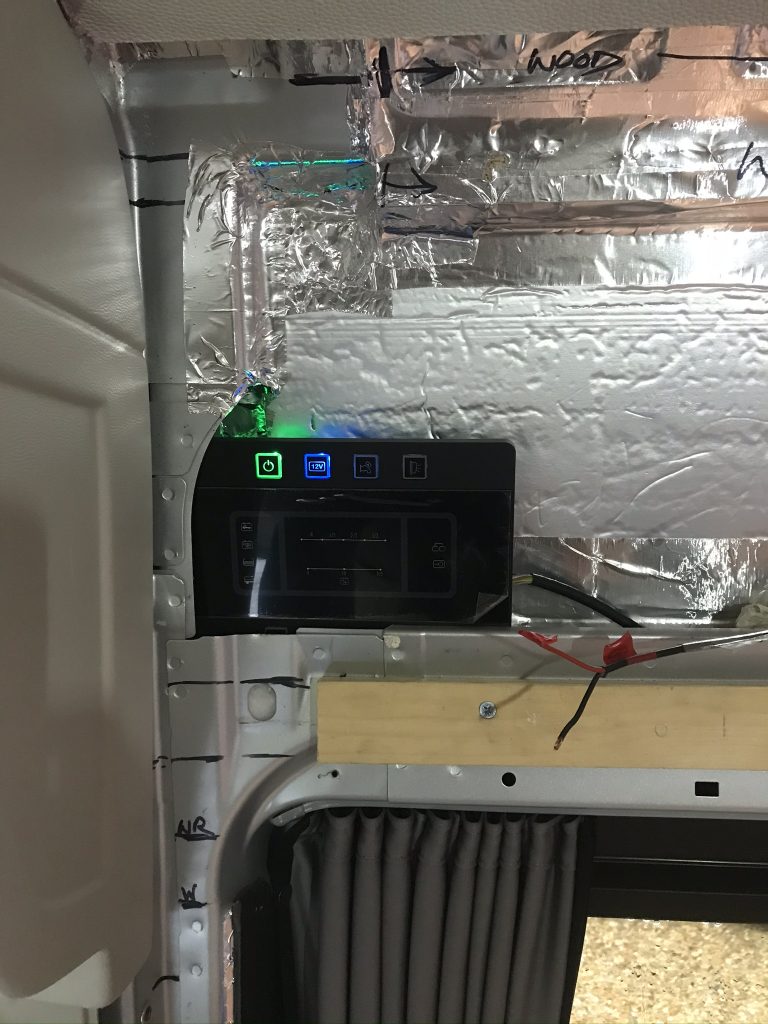
Below: The CBE Control Panel is working for the first time although not all the parts are connected to it yet.
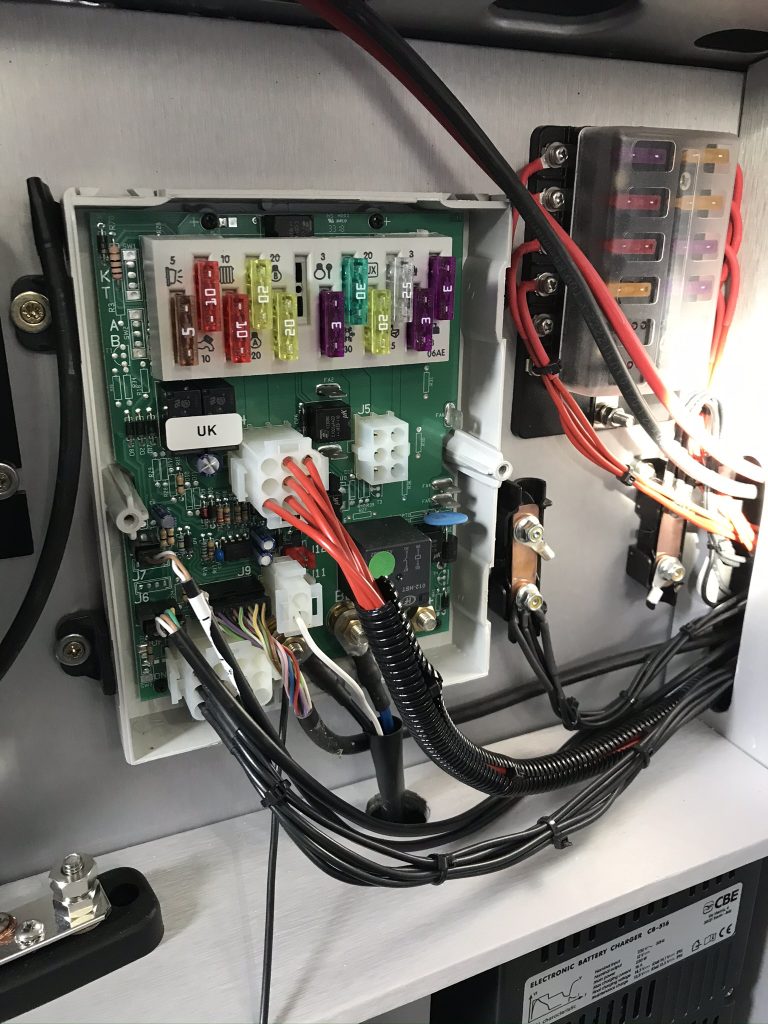
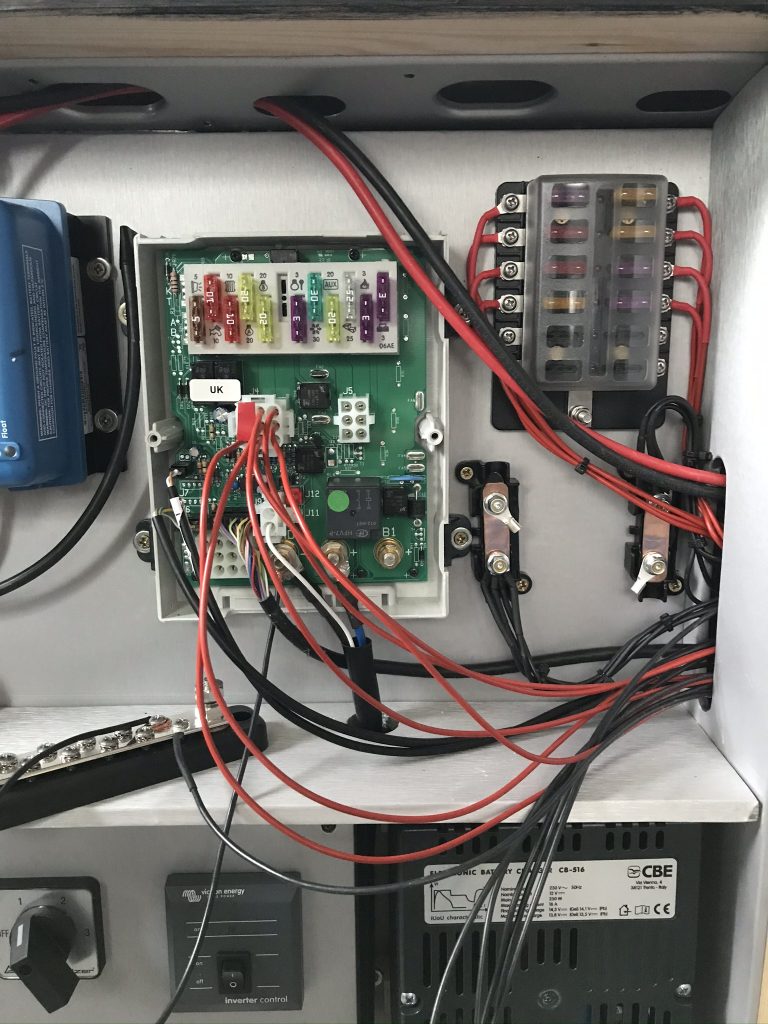
Below: Inside the CBE 12 volt control panel. The red cables are the 12 volt power feeds to various applications like the Internal Roof Lights, Awning Lights, Fridge etc.
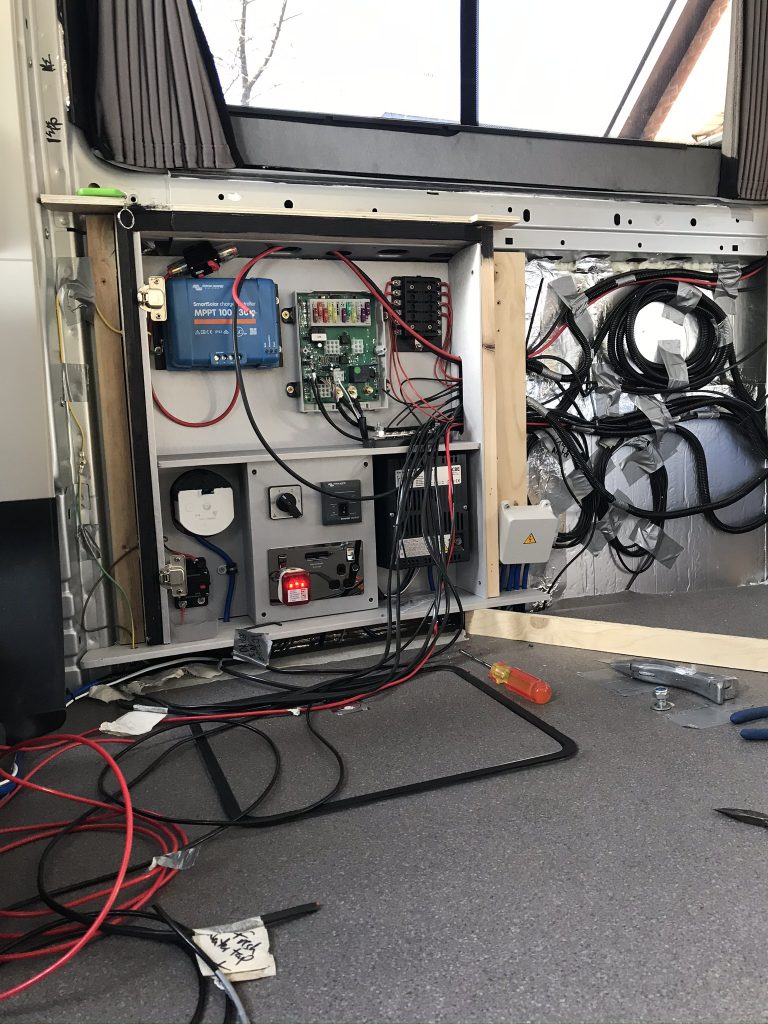
Below: On the right I have added a 12volt fuse box. The CBE is fine but a little limited to how many 12 volts devices you can have. Therefore I have added a second box. Many connections will be wired into the van before the final panels are added and many cables will be spare. Its better to have plenty of spare cables and electrical outlets than it is to try and add them after the van is completed.
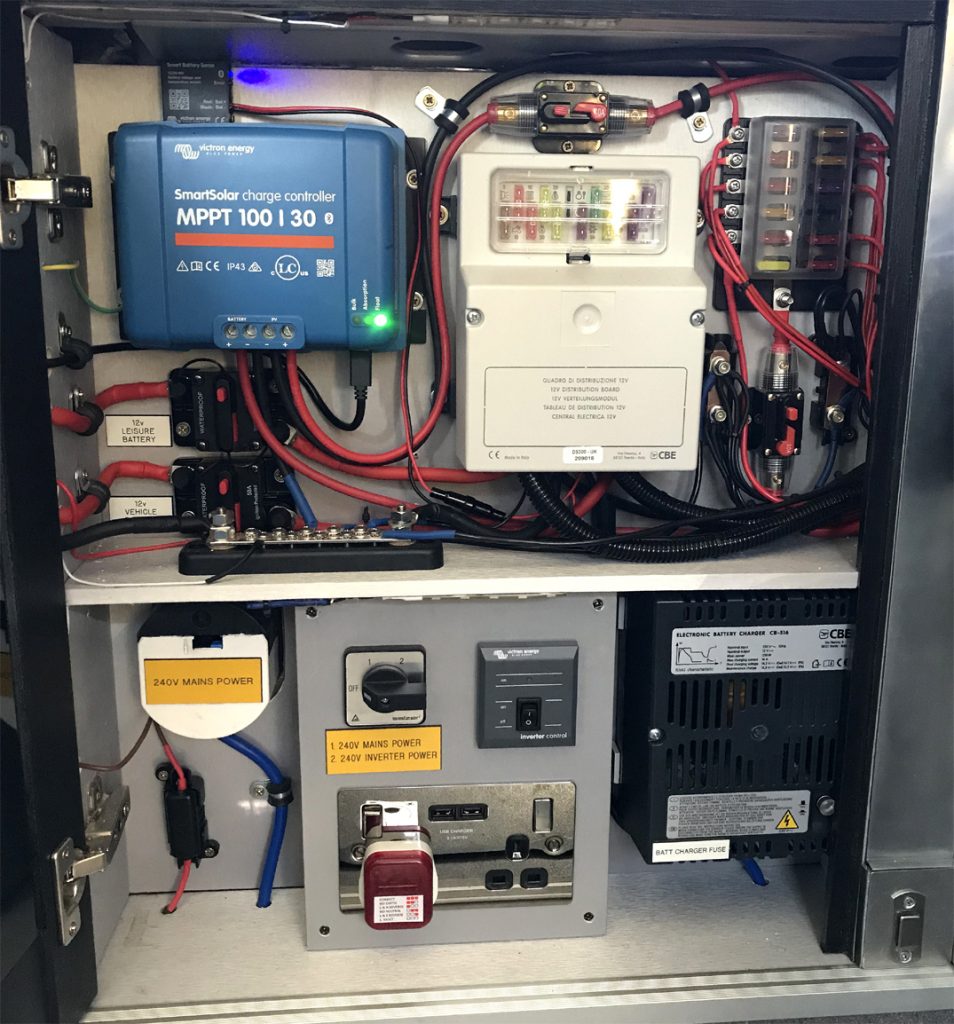
Below: I have added a small LED Green light it just makes it look a little more interesting especially at night. I now have 240 volts and 12 volts working simultaneously.
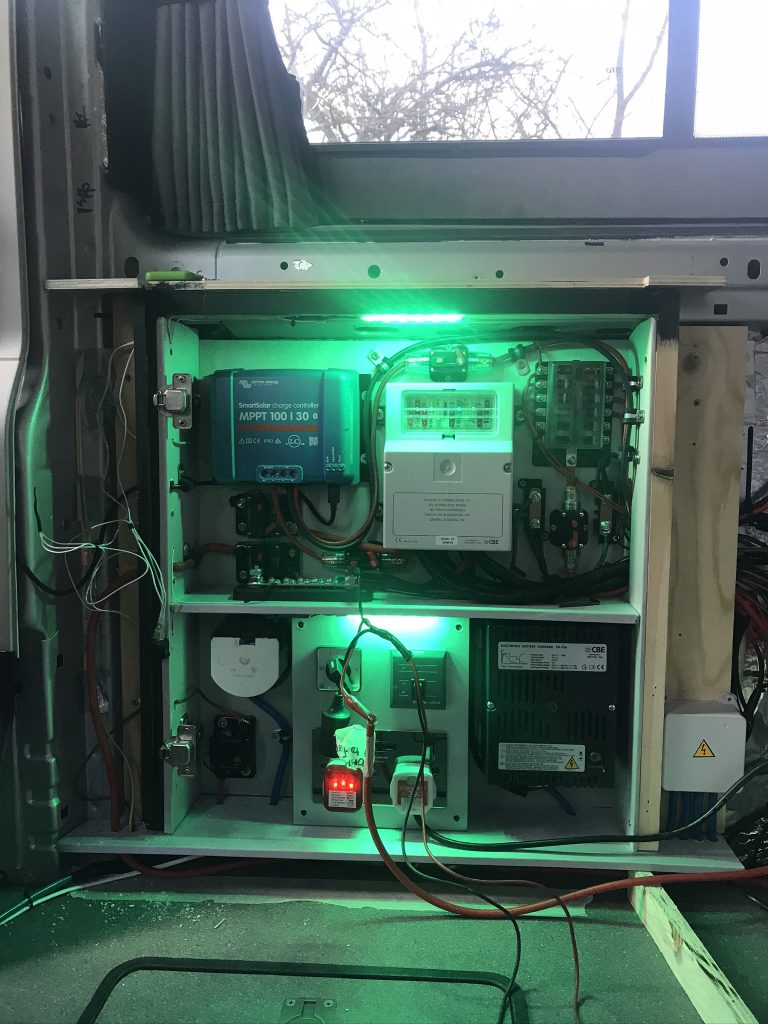
Below Circuit breakers galore: I have added circuit breaker fuses, this type can be reset. I will carry spare fuses but rather than have to remove and replace a regular fuse this method allows the circuit breaker to be reset.
The advantages of circuit breakers: If you look below I have a 40 amp circuit breaker on the feed from the solar panel to the Victron MPPT Box, this allows me to totally disconnect the solar panel energy before it reaches the Victron box, I can also disconnect the power as it leaves the box before it reaches the battery. Also every part of the electrics can be turned on or off.
Prepared For Lithium Batteries: Although I am not adding Lithium at this stage I will add them later (see LifePo4 in the column on the right of this page) the battery to battery charger (not shown) is set -up for lithium (I will show later). Many LifePo4 Batteries now come with a built-in BMS (Battery Management System) which is basically a circuit-board with temperature censor, and charging cut off, many also have Bluetooth Monitoring. Charging a lithium battery in zero temperatures could kill the battery. Even with a BMS and a temperature sensor in place the solar charger will try to put a charge into the battery without you knowing. The battery should sense what is happening and protect itself but by having circuit breaker fuse you can disable the solar charger or any part of the electrical system by the flick of a switch or in this case a press of a button.