Fits the Fiat Ducato and Citroen Relay as well
As I planned to install a combi heater/hot water system and a diesel cooker its was important that I also installed a direct feed from the Peugeot Boxer Fuel Tank. I could of course used a separate independable plastic fuel tank but why do this when the Peugeot Tank is fairly easy to access?
Two Diesel Appliances = One Pipe Line or Two? I decided on two because if one was to fail it would end up taking out the Hot Air Heater, Hot Water and also the Cooker. Also as I would be fitting one pipe line I might as well fit another at the same time.
Do Dual Fuel Lines fit on the Peugot Boxer Fuel Tank? Yes, but you need to be careful where you fit them as shown below.
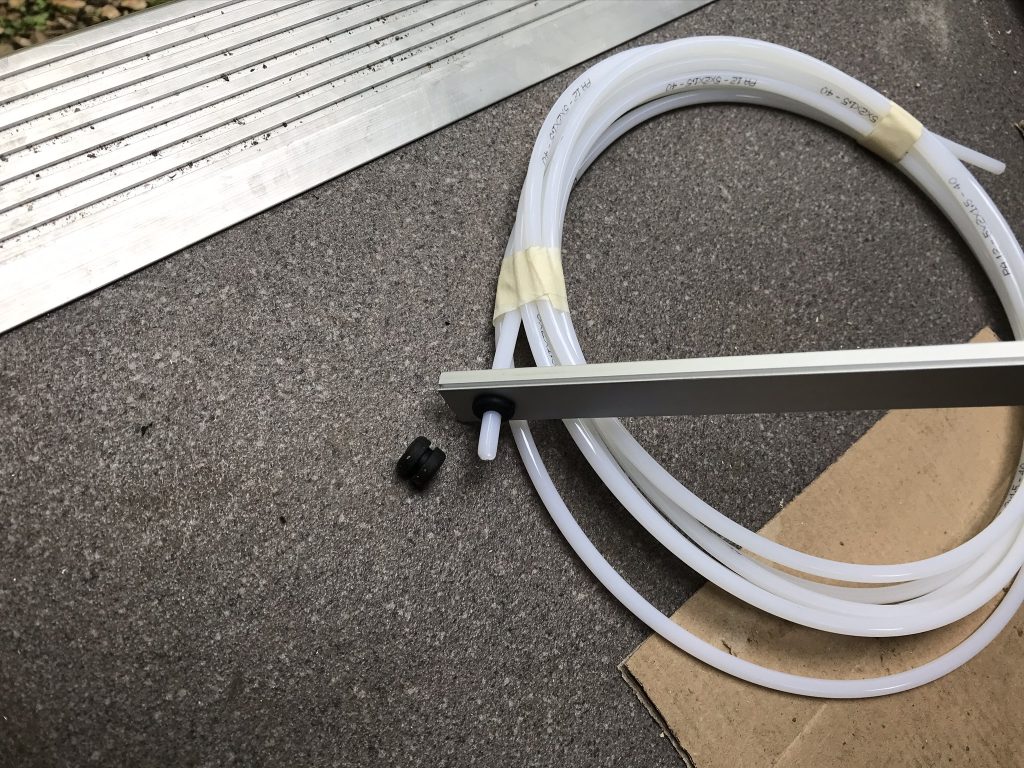
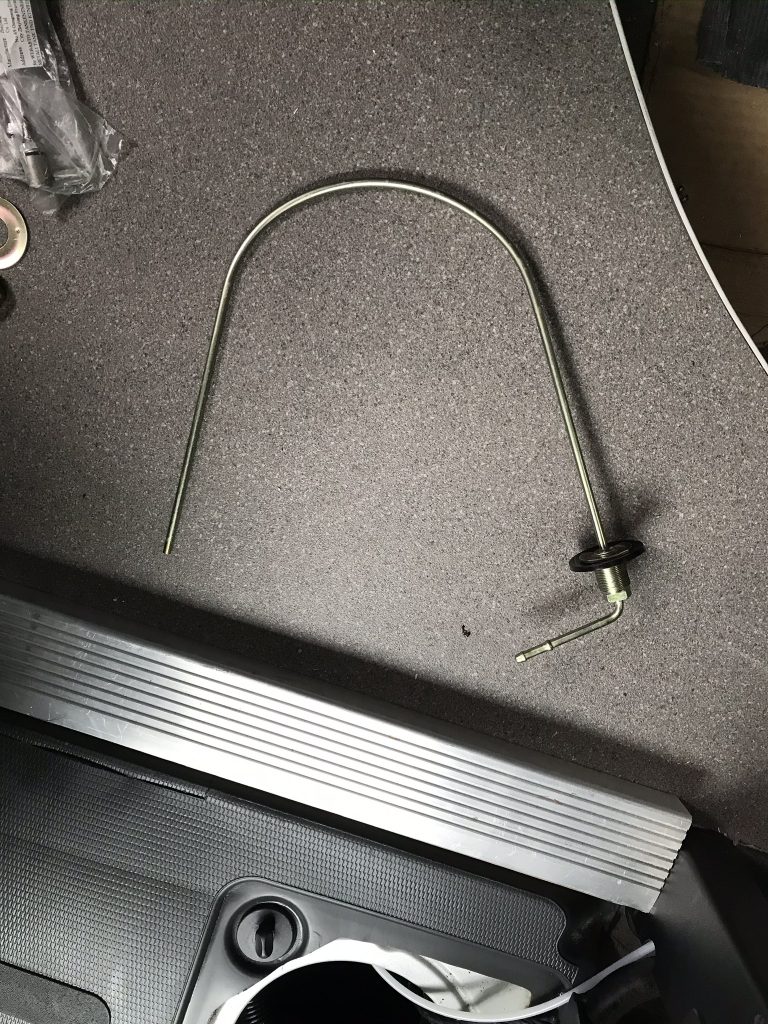
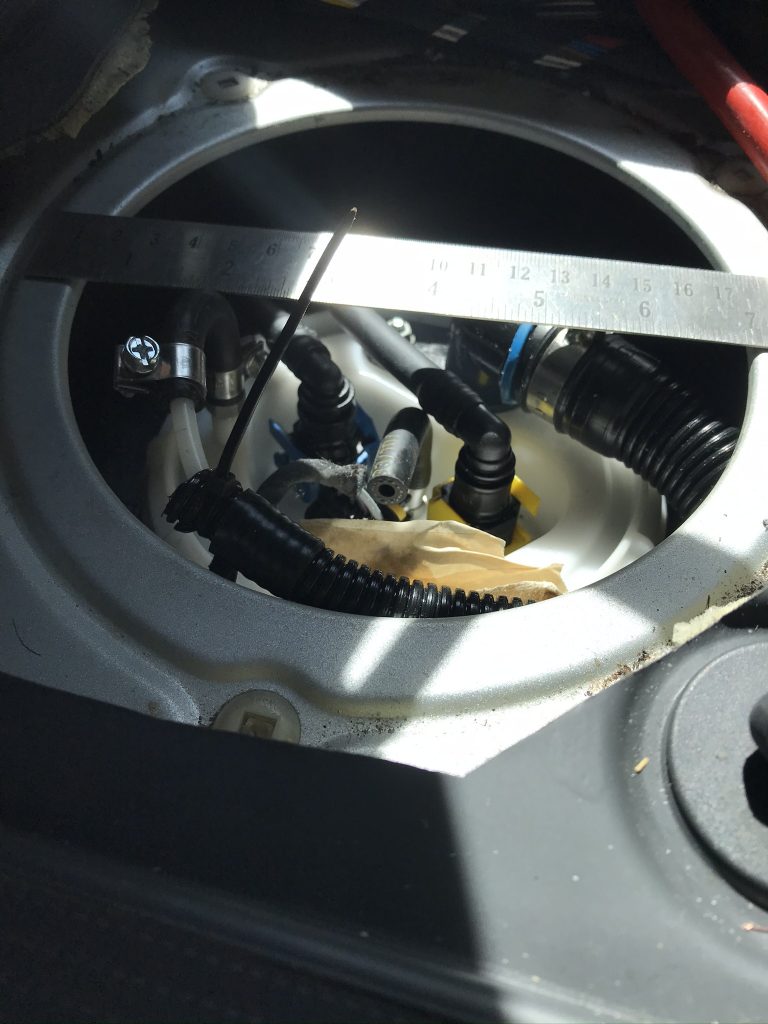
Below: Shows my fuel line, I have a spare piece of metal that I used to test the fit of a rubber grommet that I plan to use between the metal vehicle floor and pipe. I will feed two pipes under the vehicle one for the heater and one for the cooker.
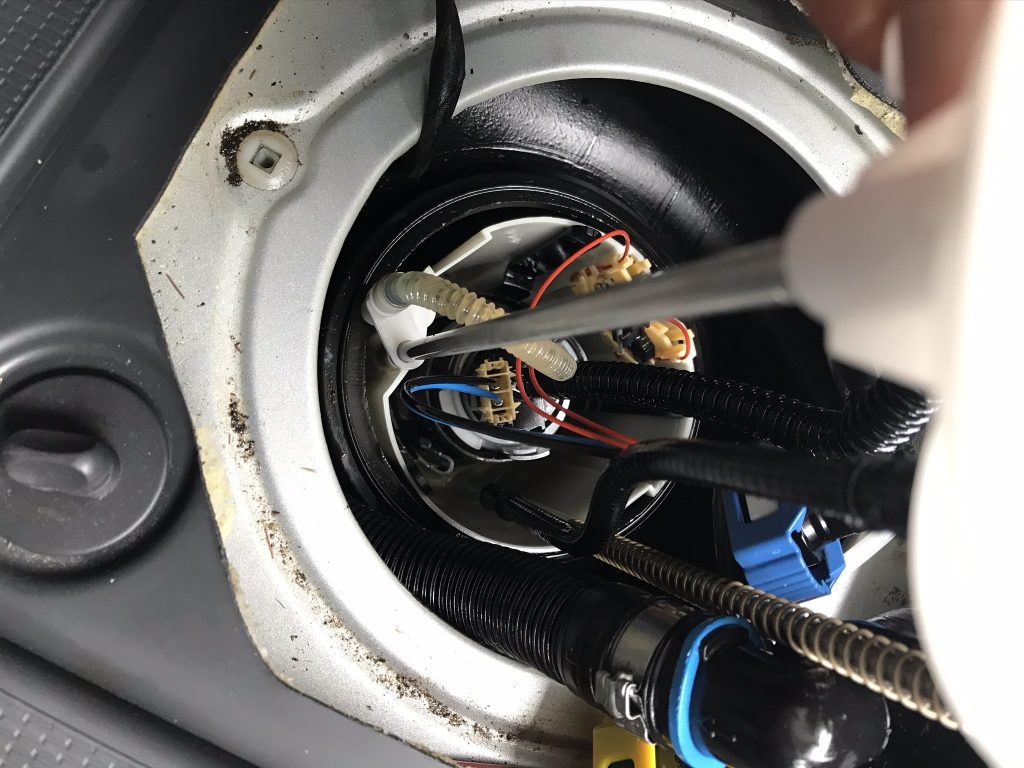
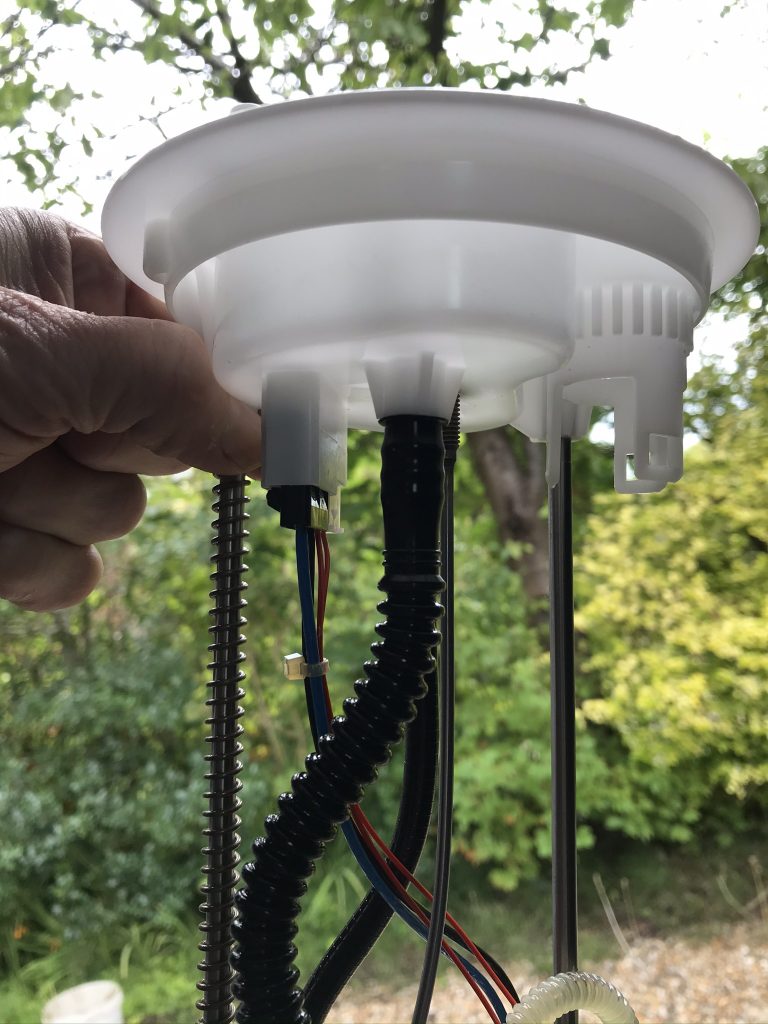
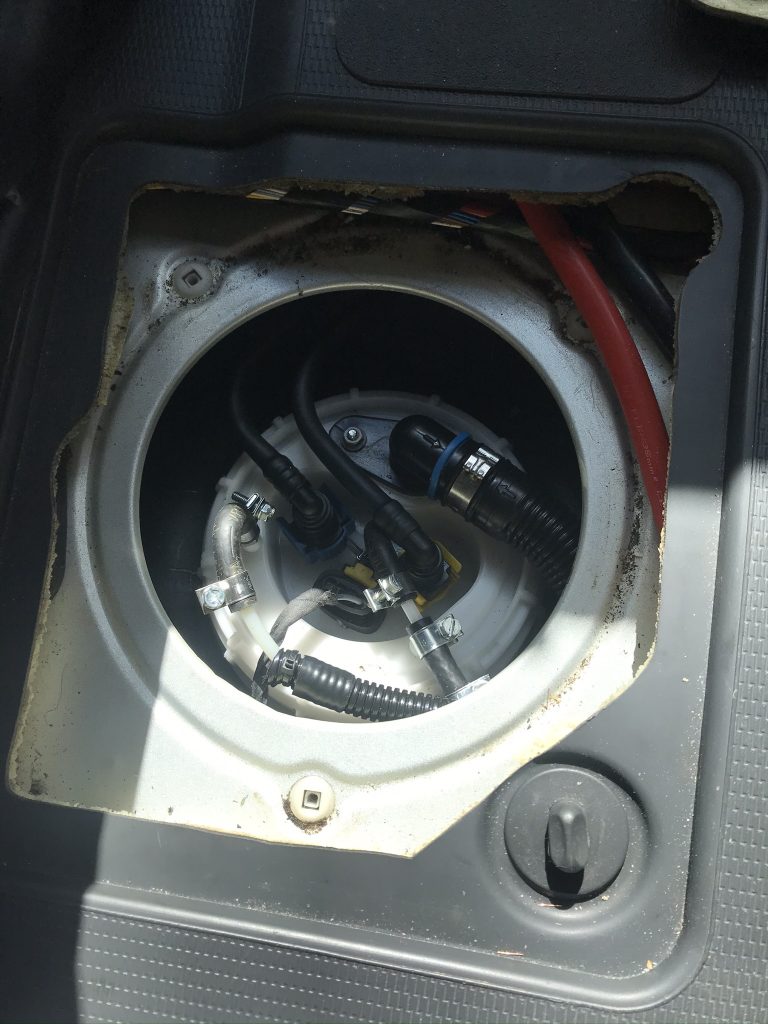
Below: The Peugeot Boxer, Fiat Ducato, Citroen Relay, fuel tanks are very easy to locate and gain access to simply remove the small floor panel opening next to the passenger seat and the access point to the fuel tank is below (inside the vehicle). Its location means you do not have to go under the vehicle and remove the tank, wonderful. You can see the new fuel pipe (white) sticking up prior to being connected
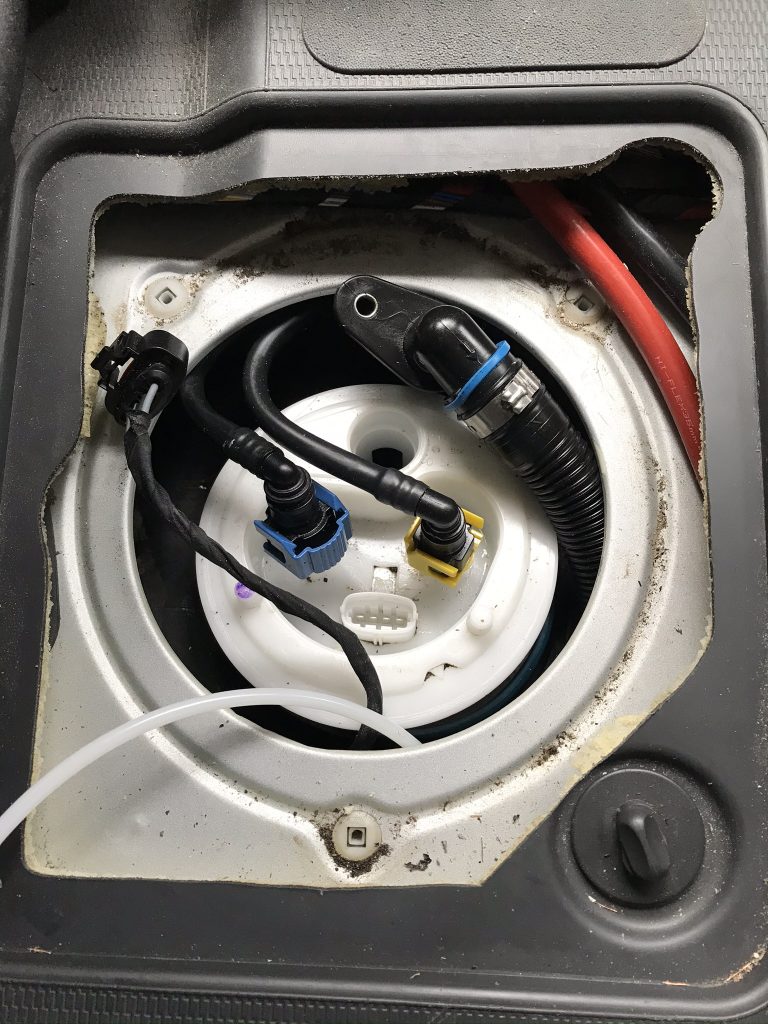
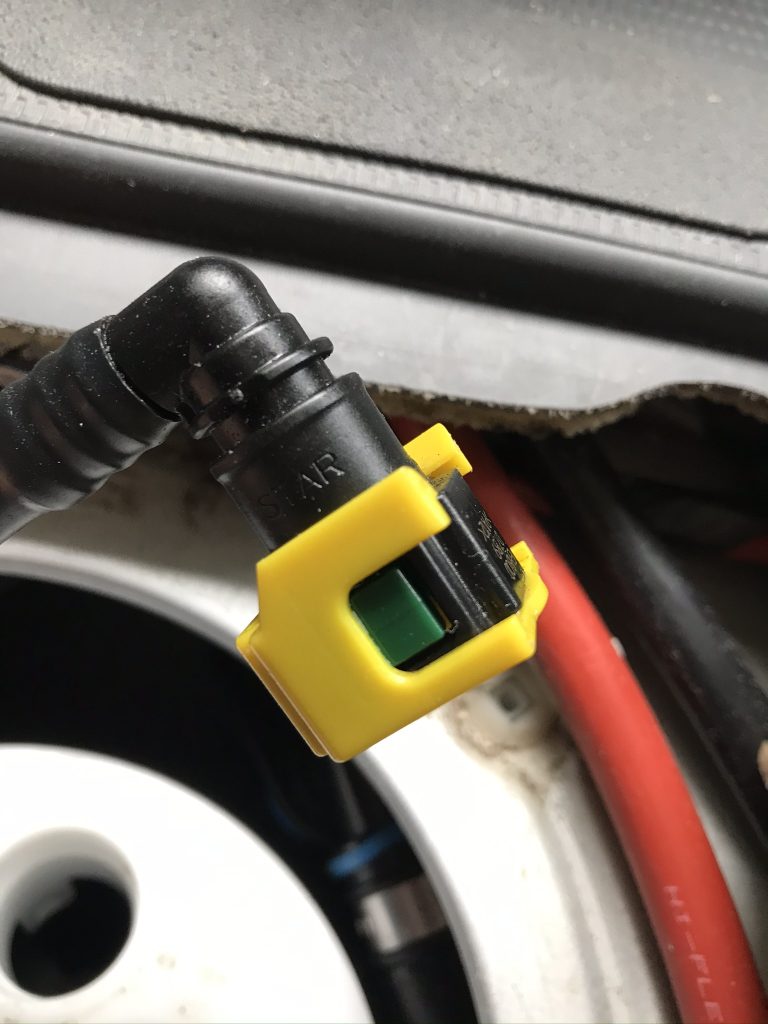
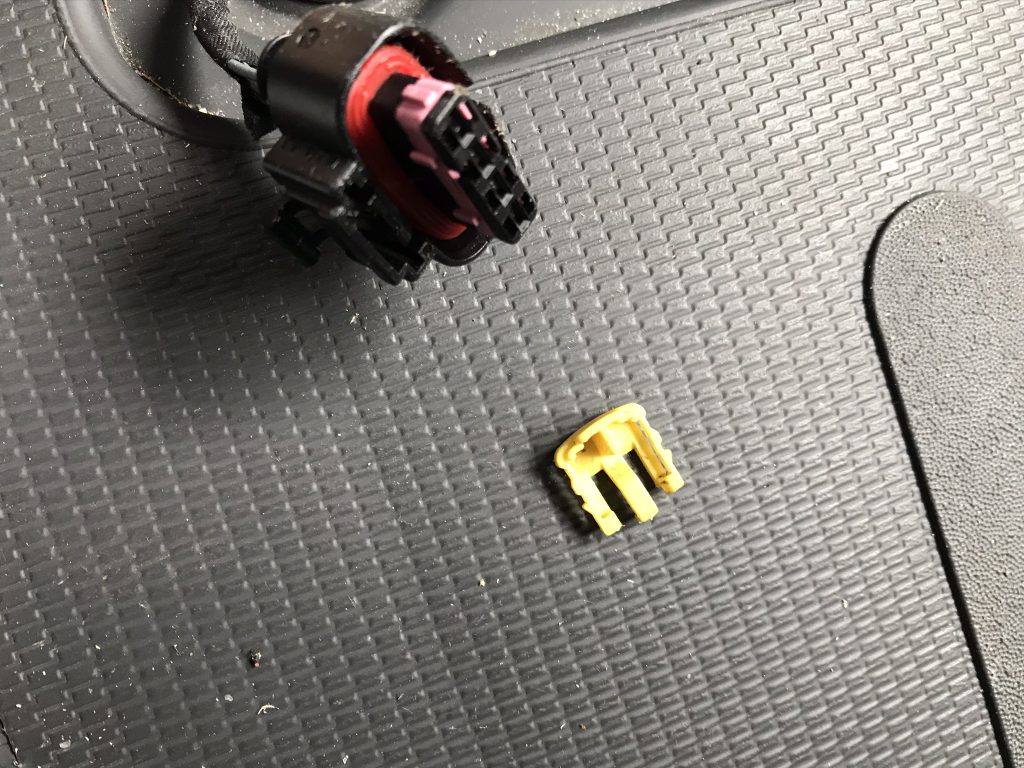
Below: I have taken a few images of the various attachments to the tank. Most click in place and are locked with a small sliding clip that stops them coming loose. Make sure you slide the clips back to remove the plug-in fit.
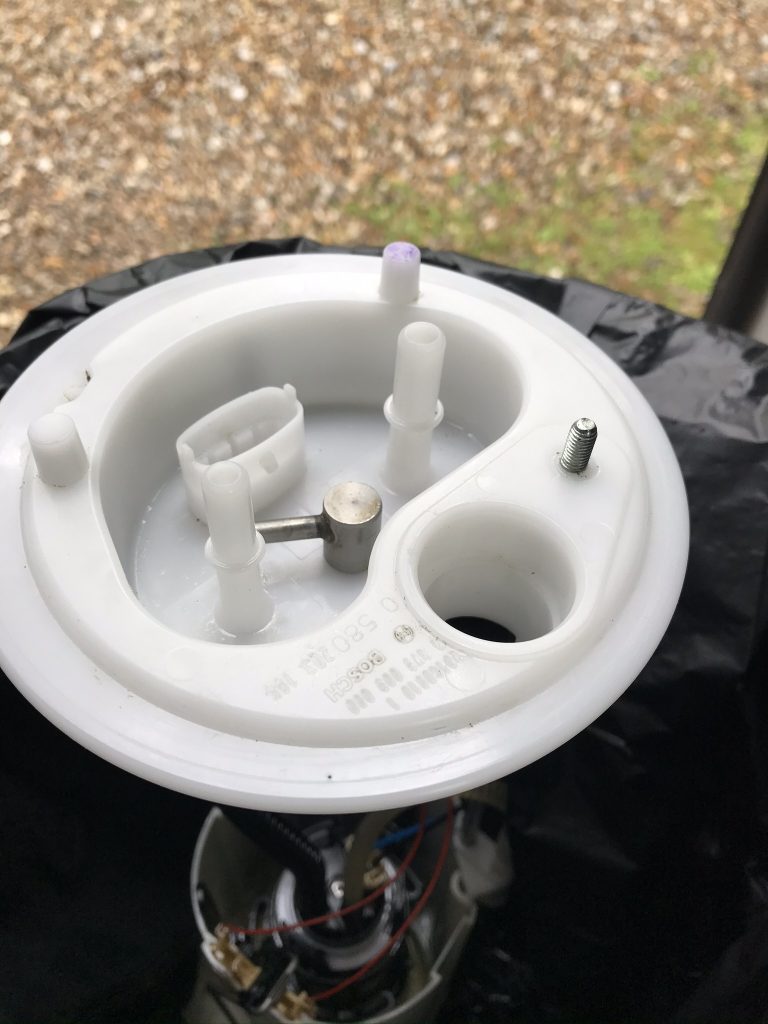
Below: The first problem. This fuel pick-up pipe that came with the kit was unsuitable. It was never going to fit, the 90 degree bend meant it would interfer with the other attachments on the tank.
Below: The Tank Lid Removal didnt go well. I have seen people remove these Tank Lids using Mole Grips and Wood. Their lid cannot be as tight as mine. I tried everything from an axe to a shotgun and I couldnt move it. It was super tight, in the end I had to buy a tool from Amazon see below.
Fuel Pump Lid Tank Cover Remove Spanner Adjustable Wrench Tool
As soon as the Tool arrived I fitted it and the Tank Lid still wouldn’t turn, this thing was super tight. I was about to get some dynamite and thought of blowing the tank up but instead I decided to give it one last try with the same long leverage bar and….. its started to turn, I couldn’t believe it. I was using 500kg of pressure from my arms, about the power a JCB puts out on full revs. In other words or if English isn’t your first language, I had to use all my strength just to remove it. I wasn’t tight it was “over tight” for sure.
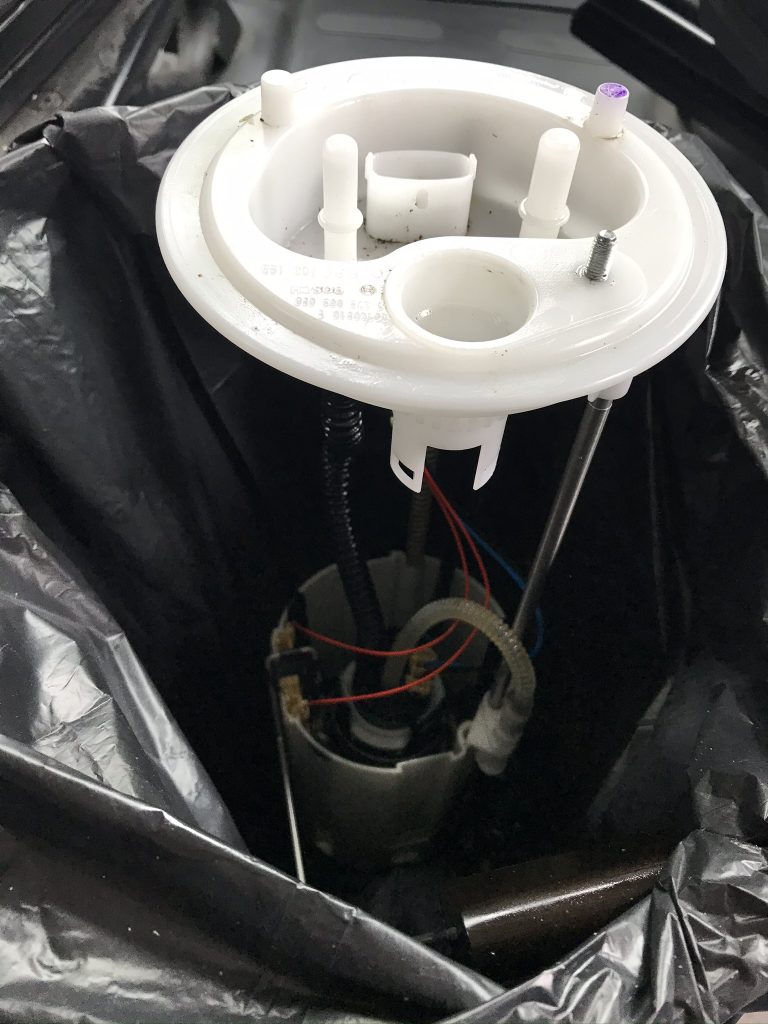
Below: A big round of applause, the Fuel Tank is finally open.
Below: I prepared a clean bucket with a clean bin liner to put it in
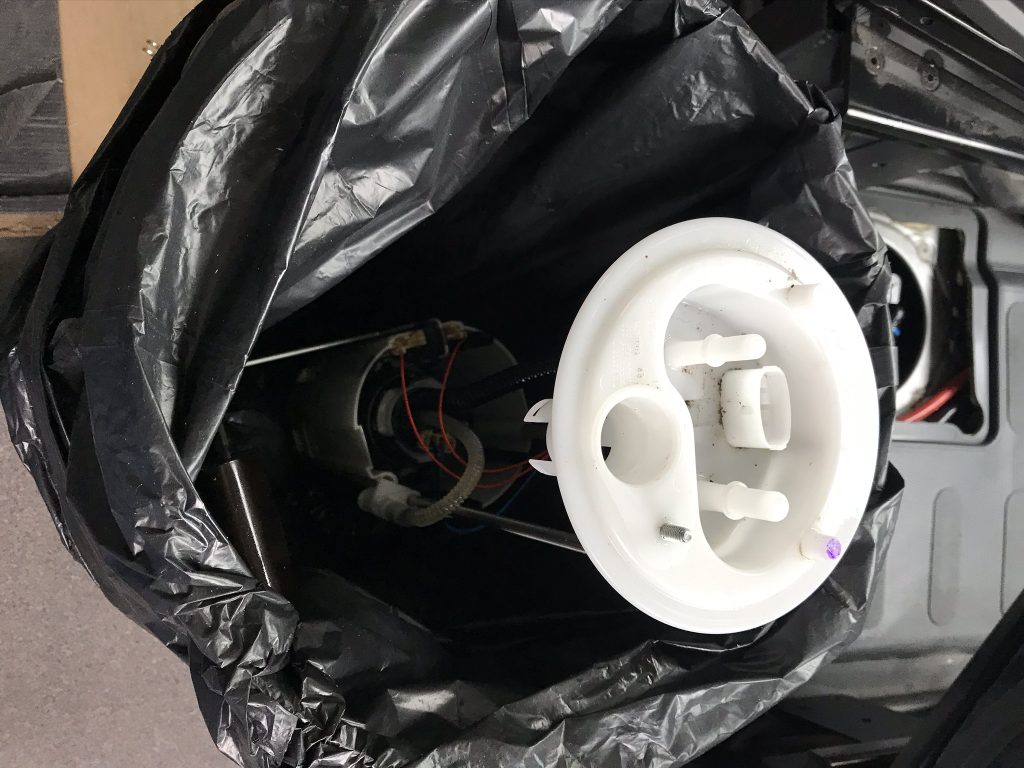
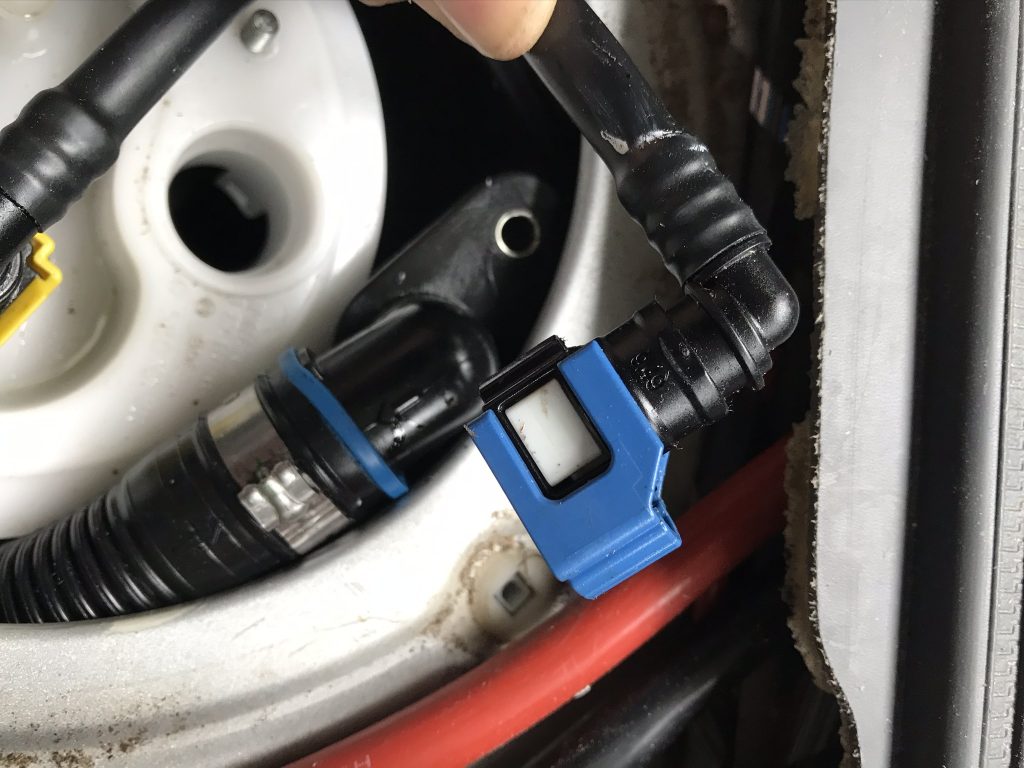
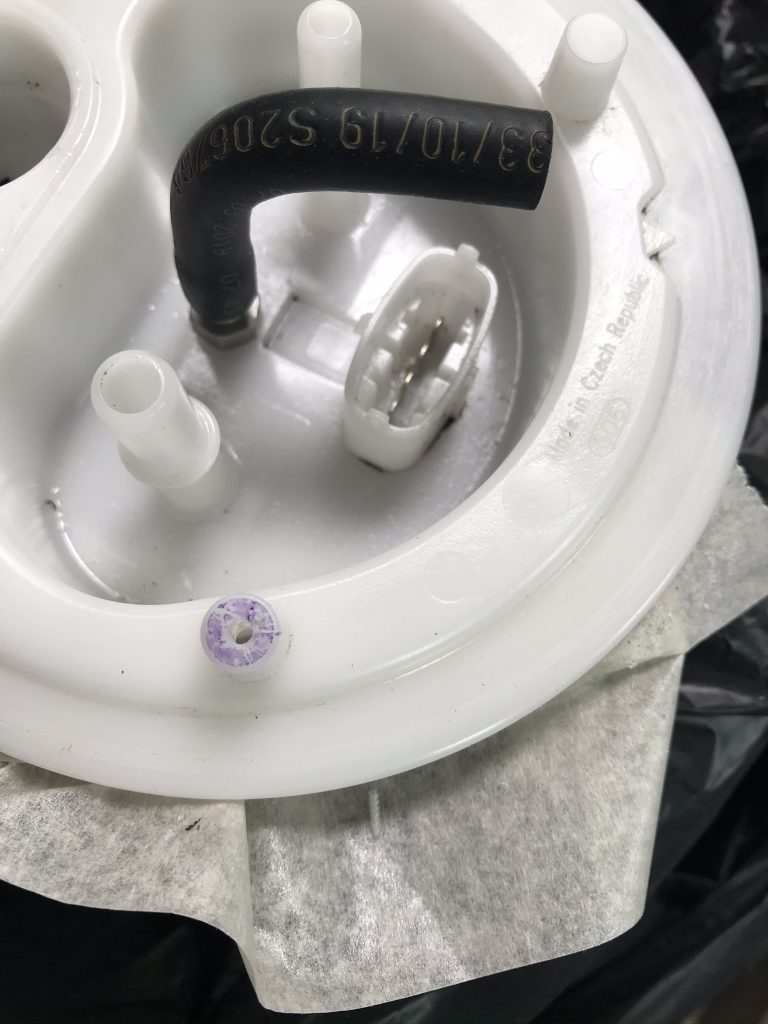
Below: The second fuel pipe didn’t fit. I bought another from EBay and guess what? That didn’t fit. What I mean by this is that the pipe catches the fuel line attachments. Looking at the image below it looks like its going to fit. The problems arises when you attach the Peugeot Fuel Pipes whilst they press on, you cannot use the Locking clip to lock them in place. The locking clips slides in and out and there is nowhere for it to go.
Solution Problem Solved: I had to order two Webasto Fuel Standpipe Kits – Fiat Ducato Part Number: RMB7654A from Butler Tecknic (link and address below). The price was £48.19 each. The EBay version was £9.18 each and in my opinion it was just as well constructed, if anything the EBay version was a little better. But only the Webasto version would fit, maybe there is an EBay version that is straight. I looked on EBay but at the time I couldnt find one. Only soloution, to bite the bullet and pay the money (4 times the costs of EBay version).
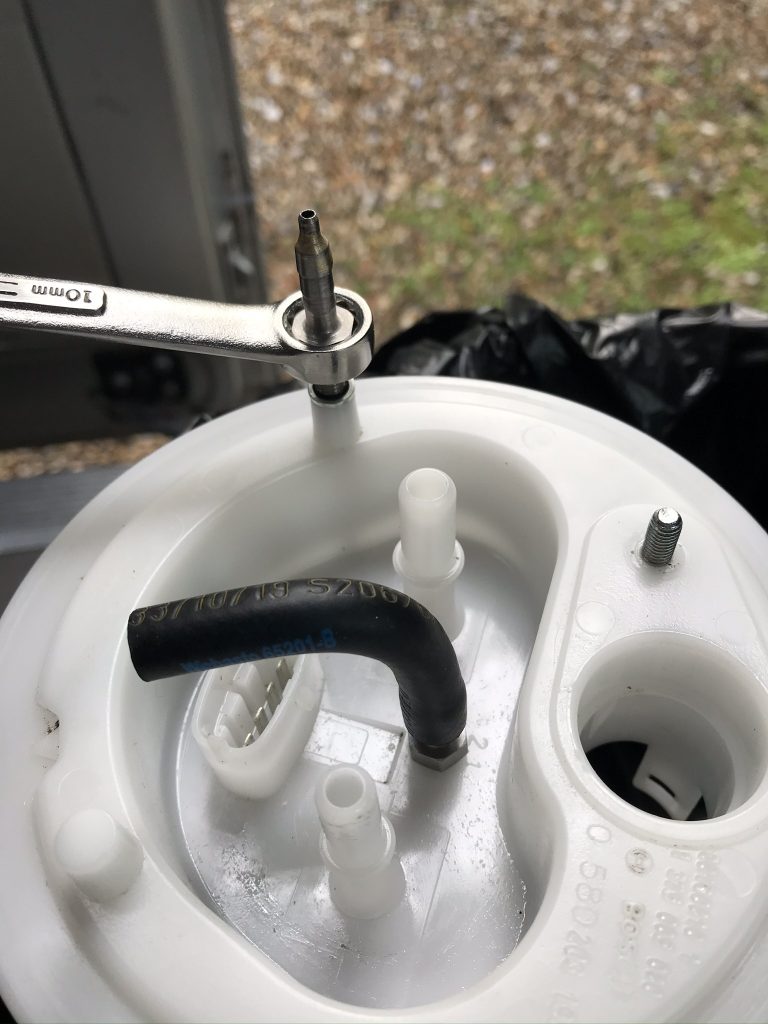
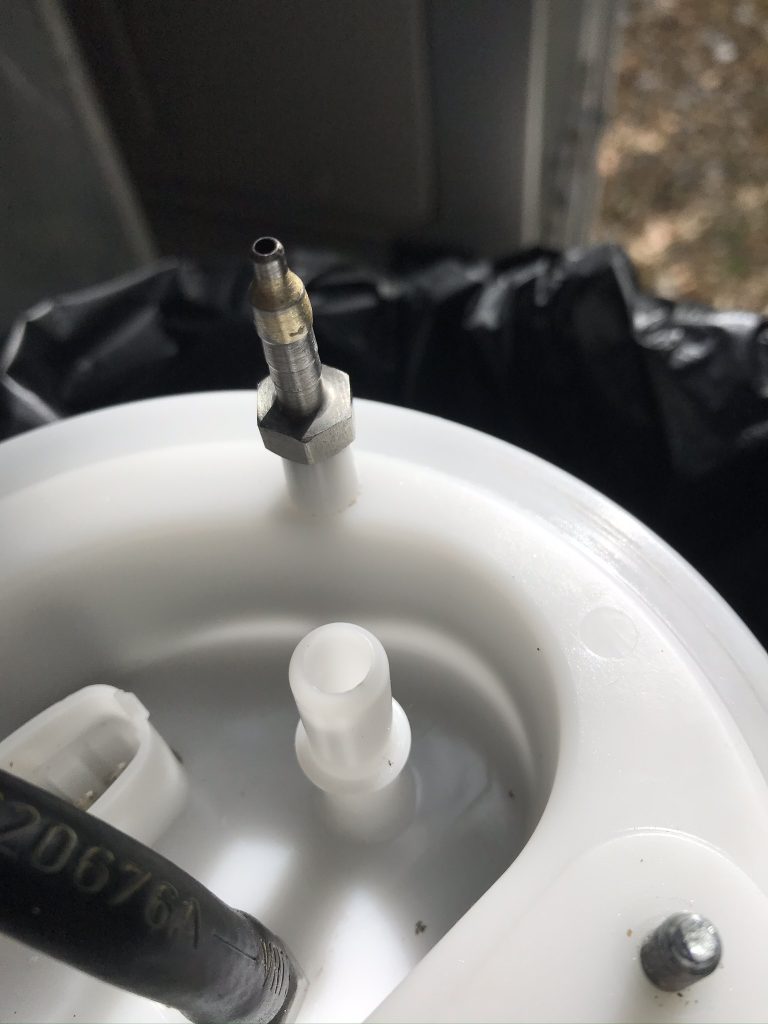
Below: The Webasto Fuel Standpipe from Butler Tecknic. I am testing the fit of this pipe on a piece of metal. Unlike the EBay pipes the Webastoe “self taps” into the plastic, I think it required a 4.5 or 4.7mm drill bit (check it I may be wrong). I didnt want to drill the hole over size so I tested the fit on a piece of metal to make sure it wouldnt fall through the hole. Its ok to drill the hole undersized but you mustn’t drill it too large, start small if you are not sure.

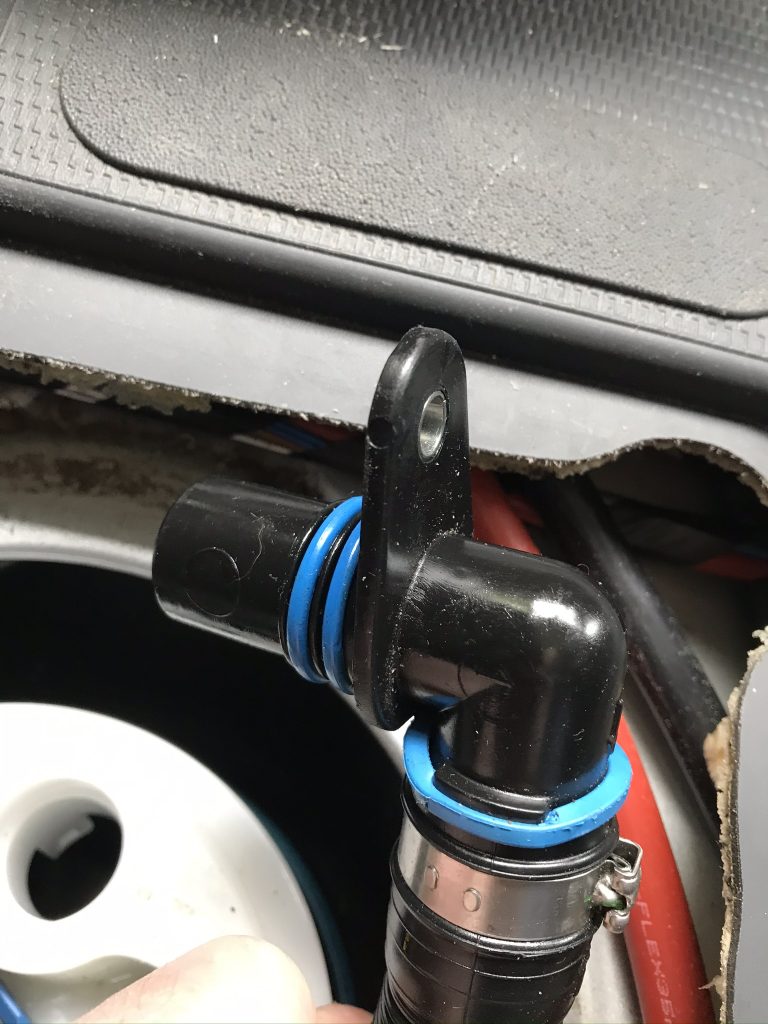
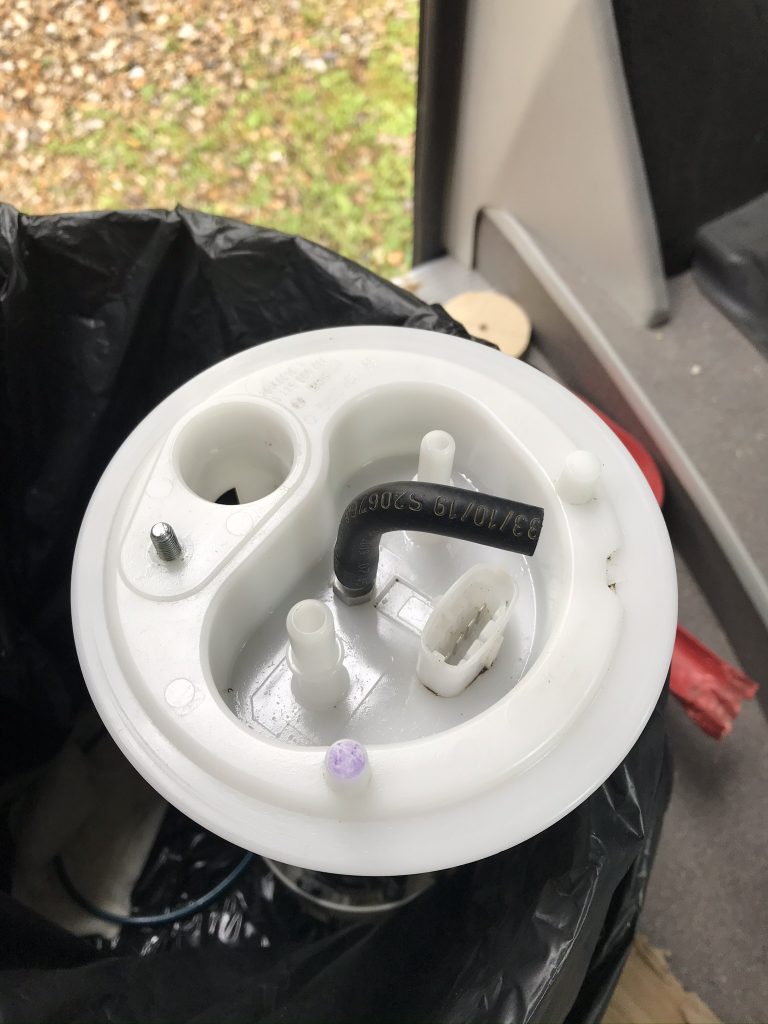
Below: The pipe is threaded (self tapping) into the top of the tank. Here you can see the 90 degree rubber pipe. Webasto recommend I fit the pipe in the Tall White piece of plastic that is sicking up in the image. I didn’t do this as I need to fit two pipes and I had already drilled a hole in the Tank Lid. The Webasto Pipe below is also secured with a locking nut on the opposite side just to make sure.
Below: Now to fit the second pipe using the method Webasto recommend. I’ve drilled the hole (4.7mm I think, check, its on the instructions) and I am screwing it in place.
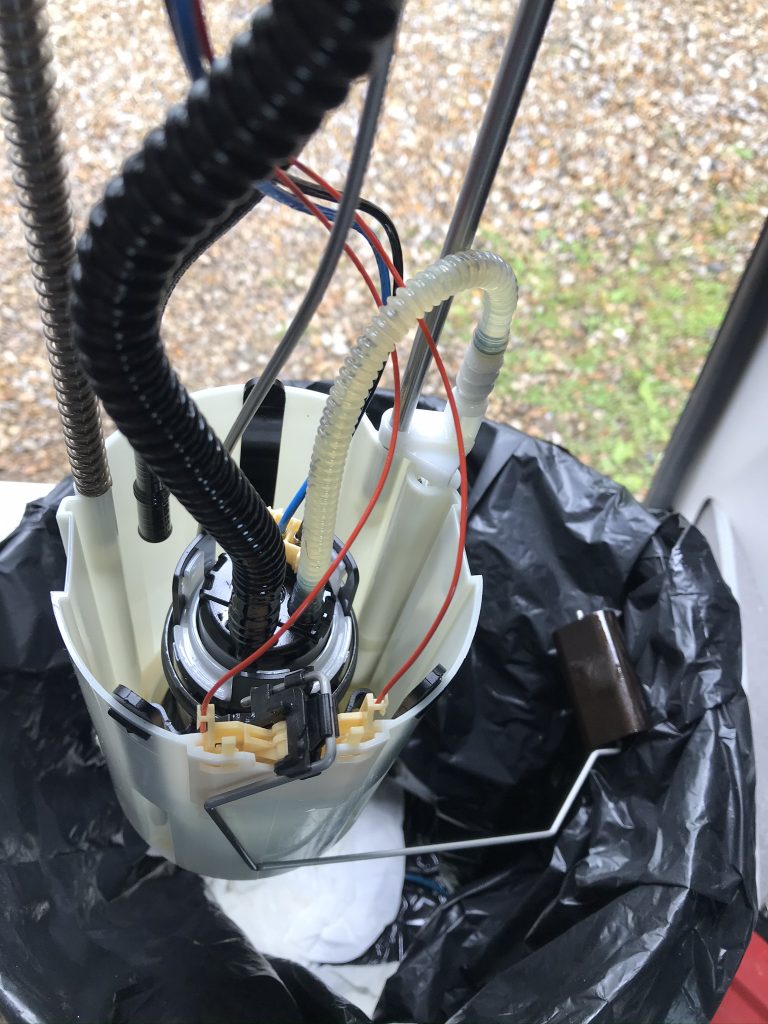
Below: Two pipes fitted now its time to start the assembly
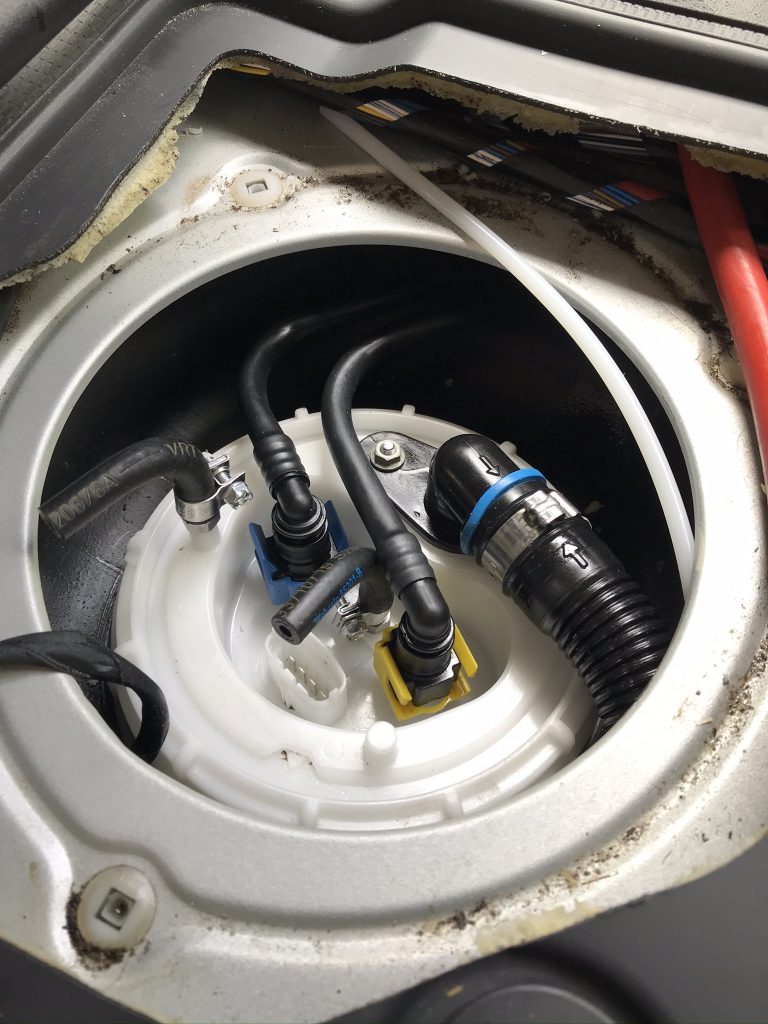
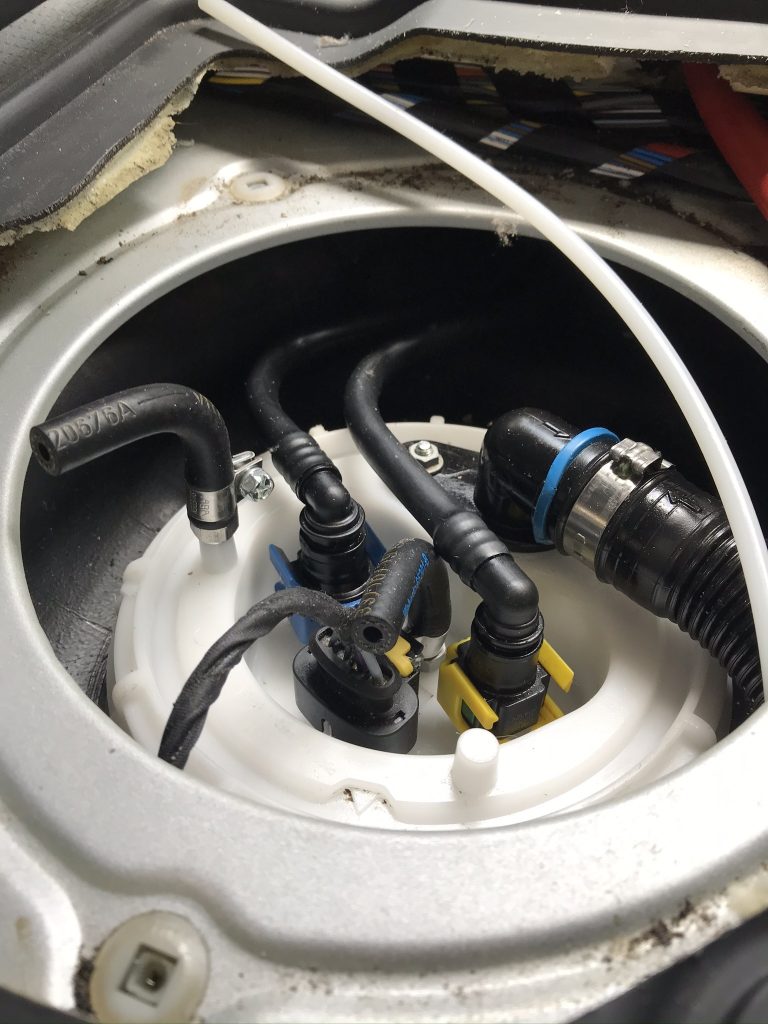
Finally: Both pipes are fitted. I now have twin fuel lines attached to the Peugeot Boxer Fuel tank, one for the diesel cooker and one for the diesel heater and hot water heater.
Webasto Fuel Standpipe Kit – Fiat Ducato Part Number: RMB7654A
BUTLERBUS TECHNIK LTD
Tillbridge Road Garage
Sturton-by-Stow
Lincoln LN1 2BP
United Kingdom
Telephone: +44 (0)1427 787121
Fax: +44 (0)1427 787120
EMAIL:
Heating Technical Dept. Stephen Winter – steve.winter@butlertechnik.com
General and Sales Enquiries – sales@butlertechnik.com
https://www.butlertechnik.com/webasto-fuel-standpipe-kit-fiat-ducato-p153