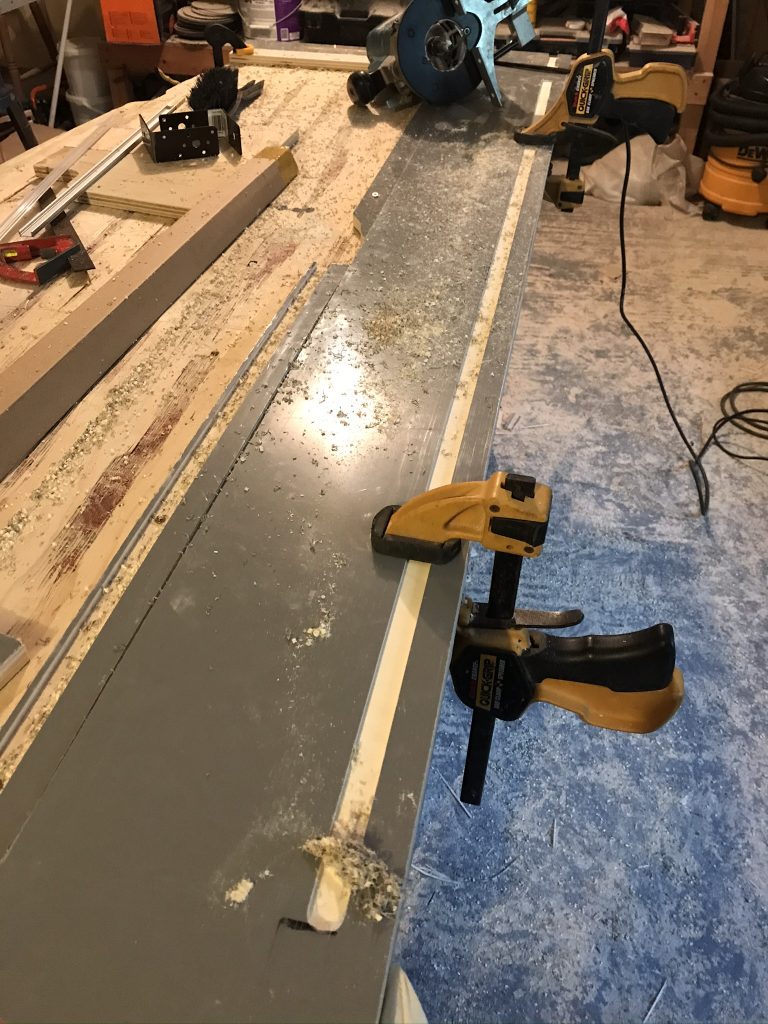
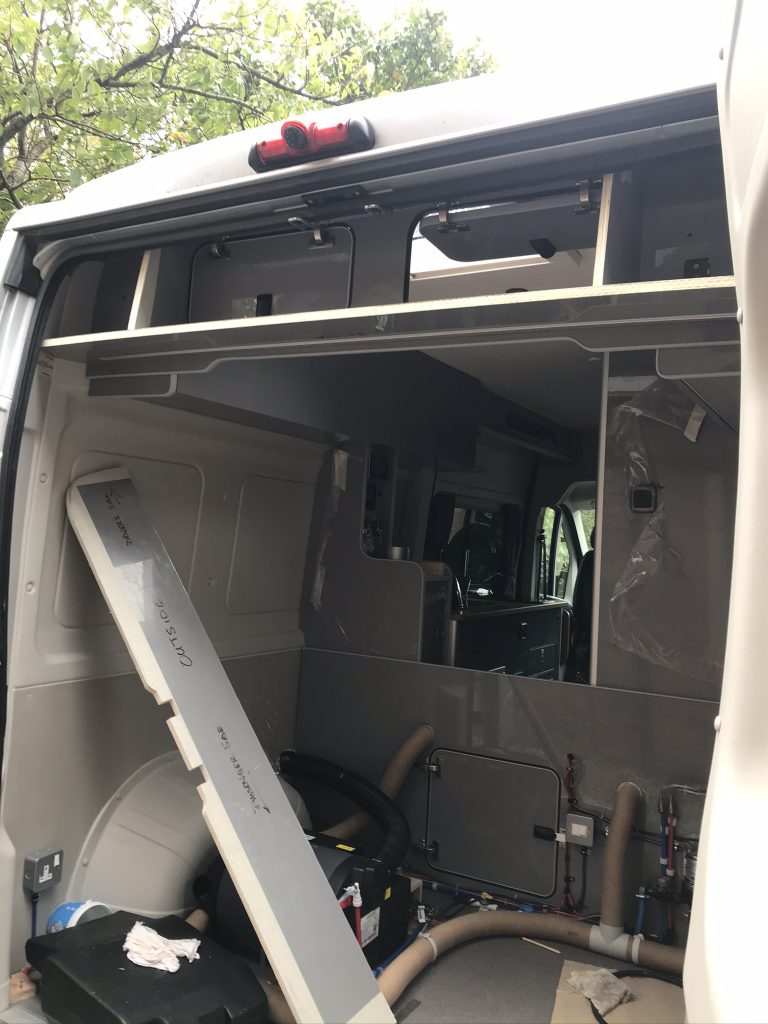
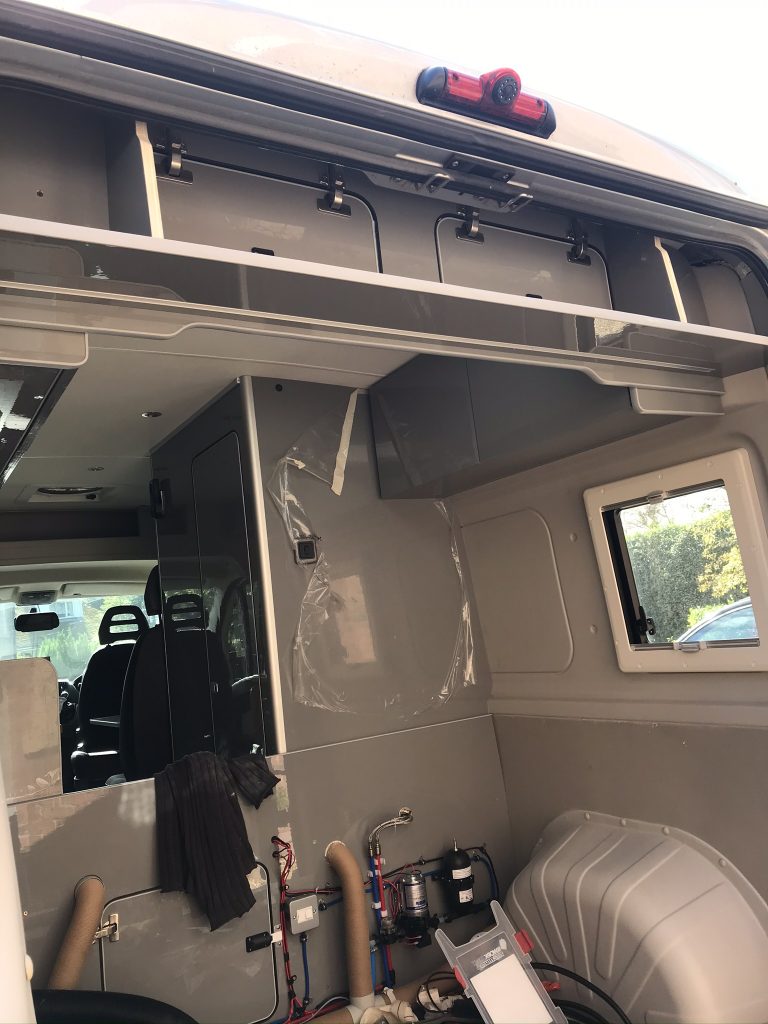
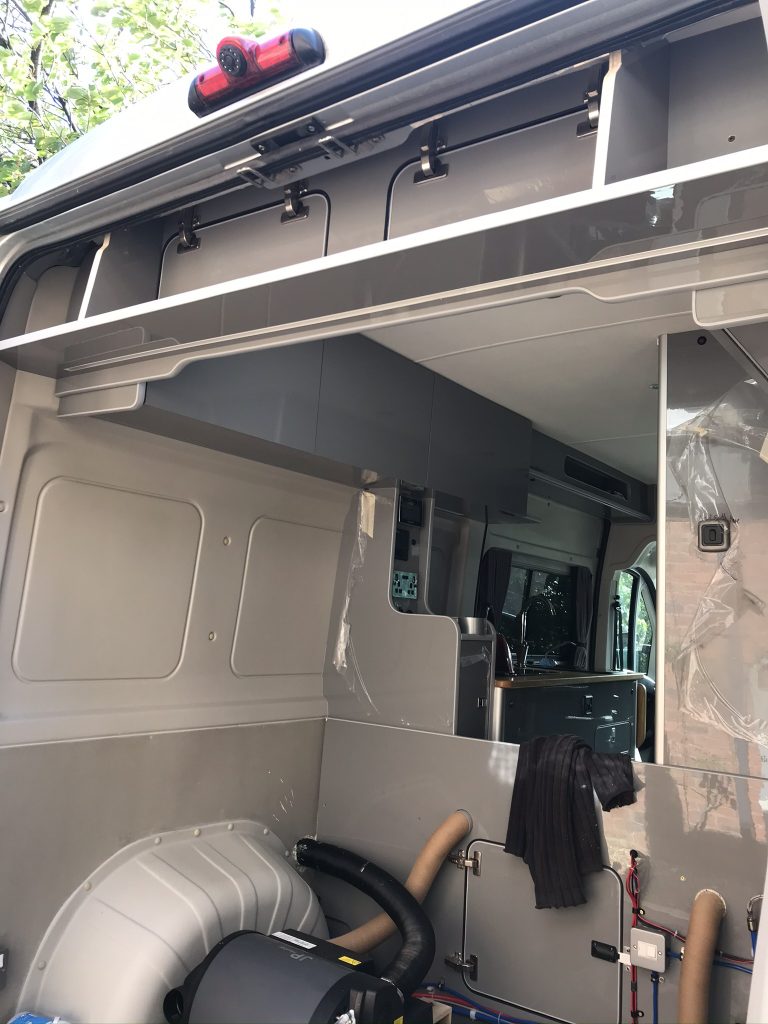
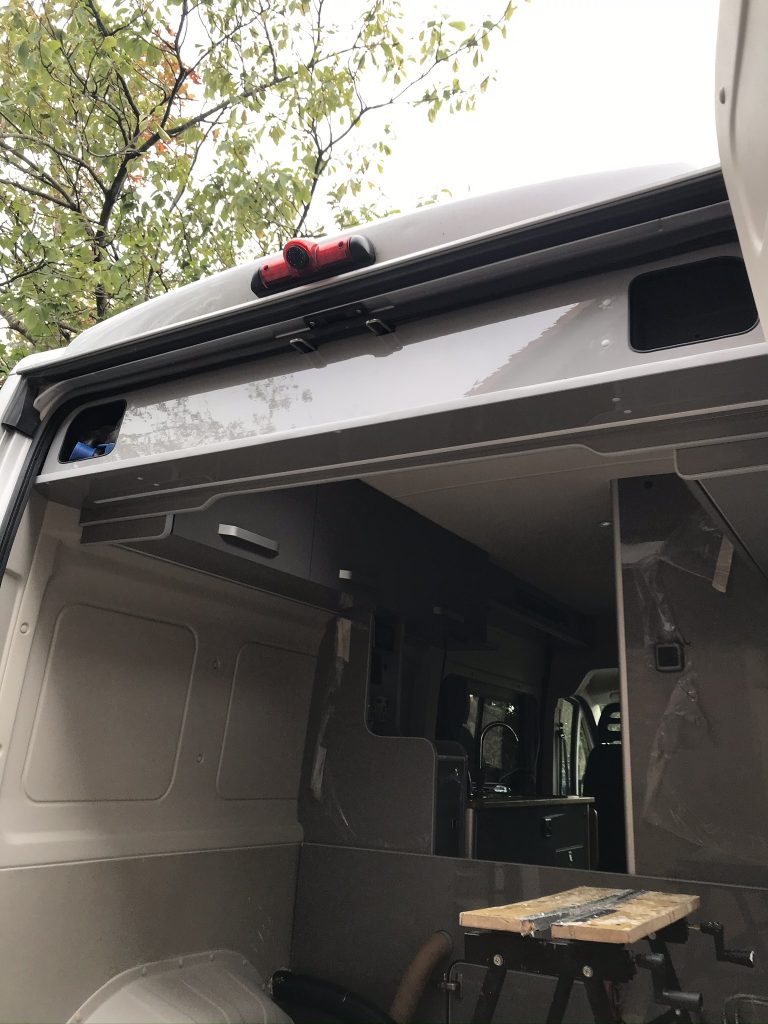
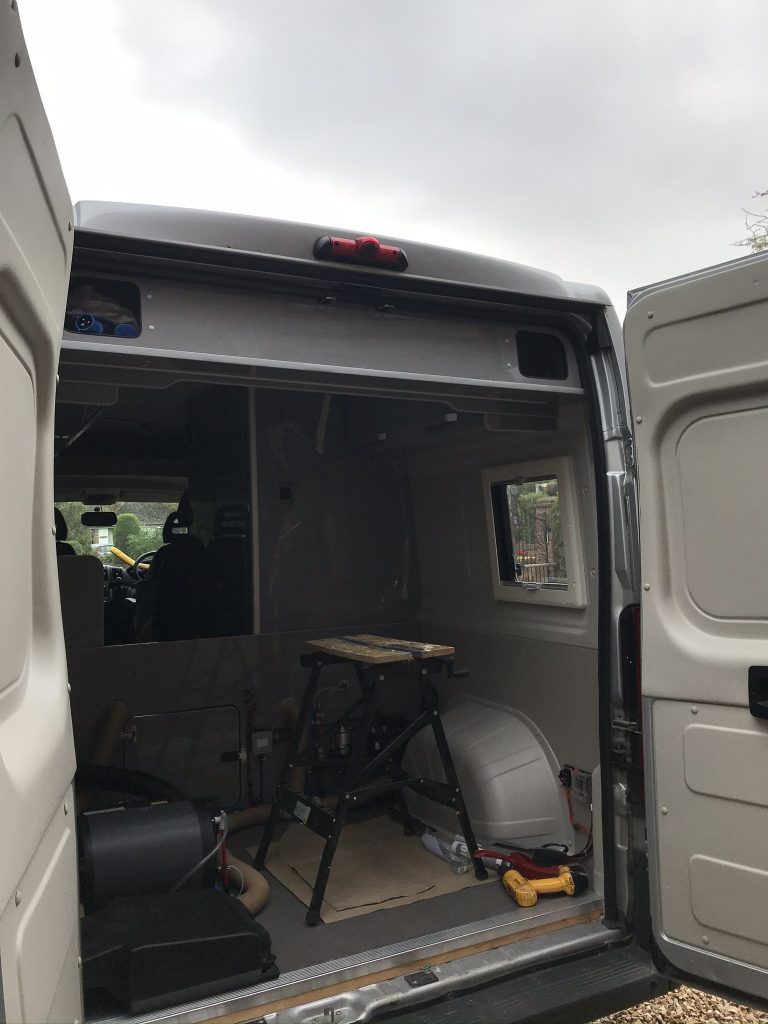
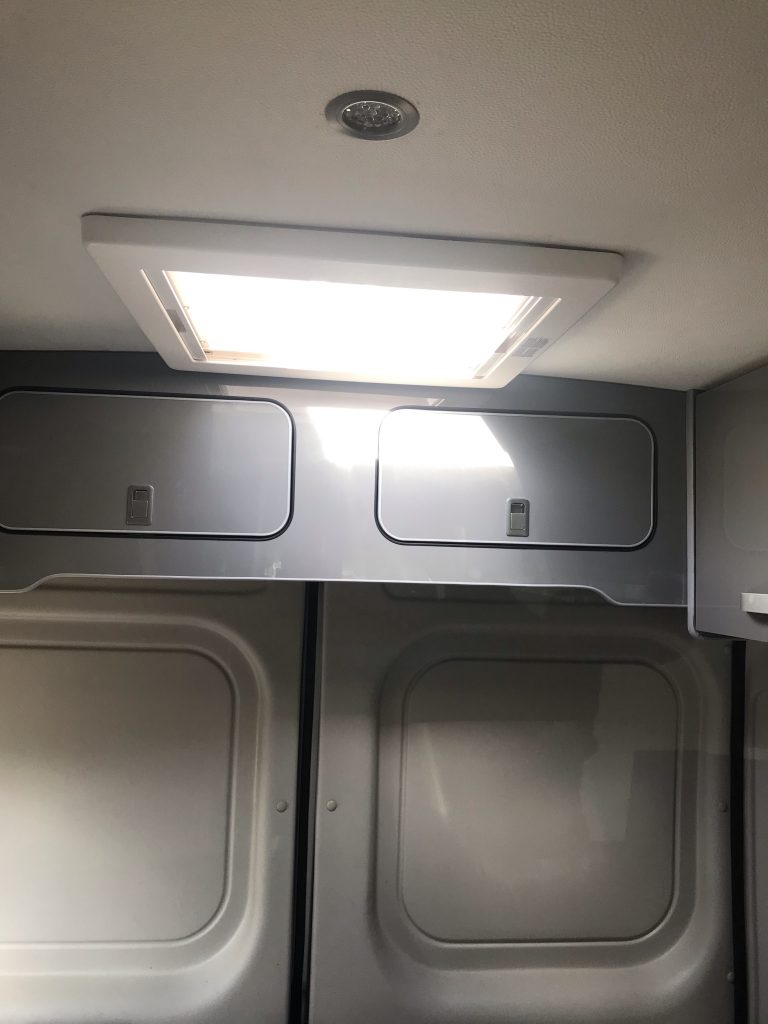
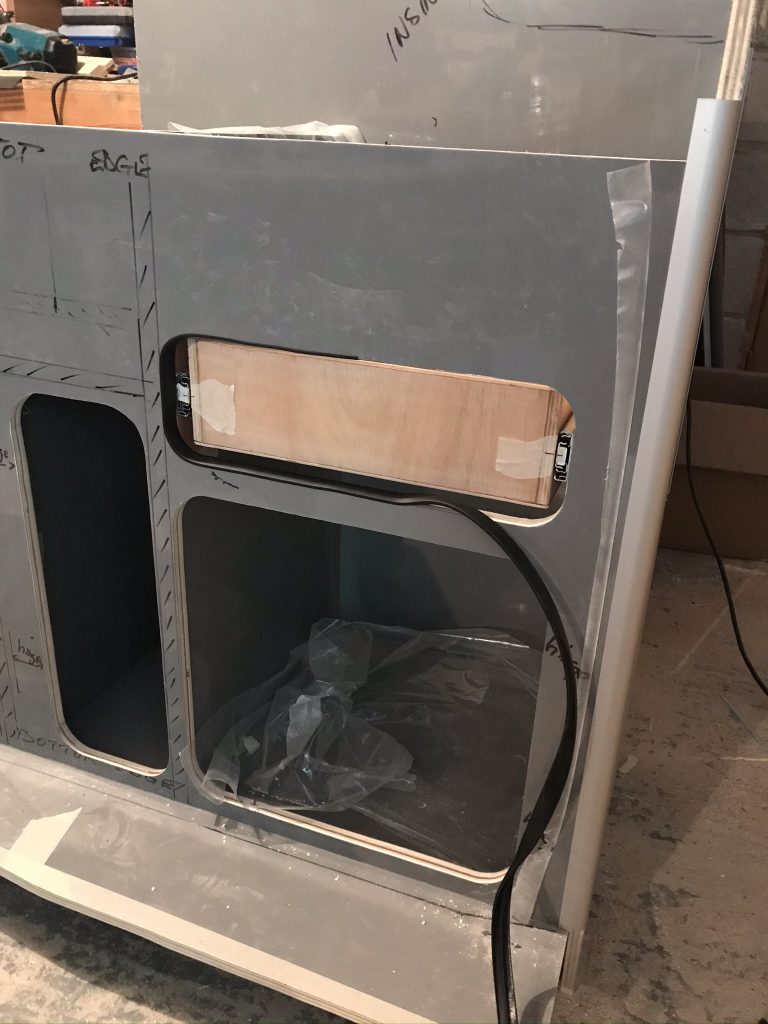
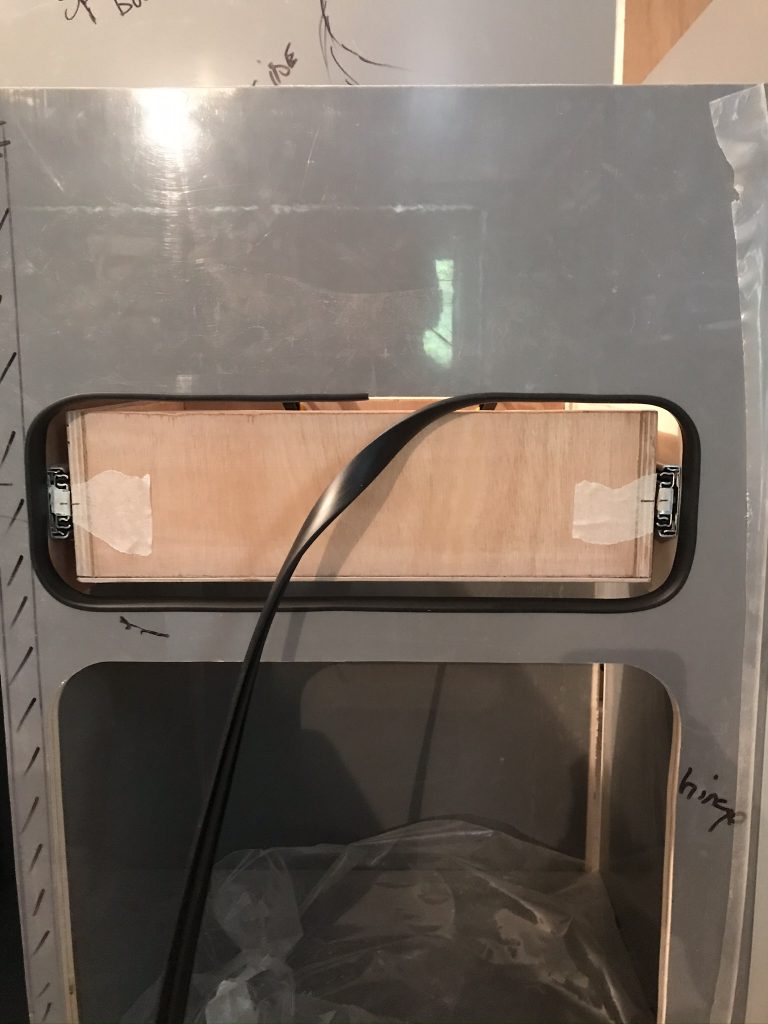
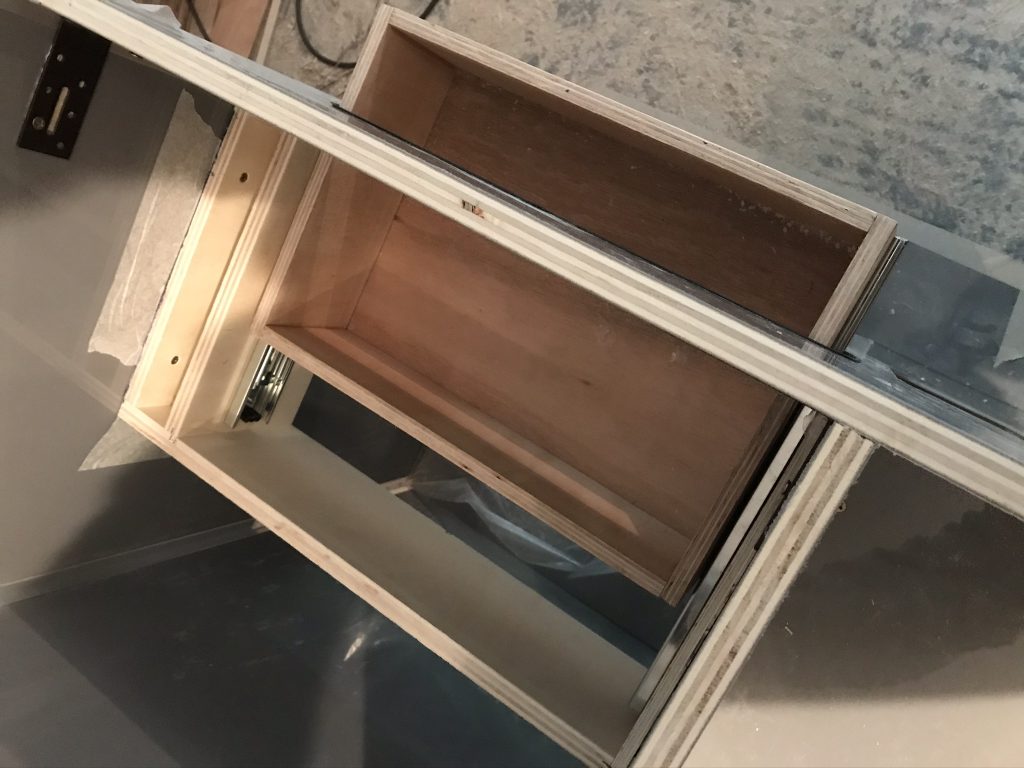
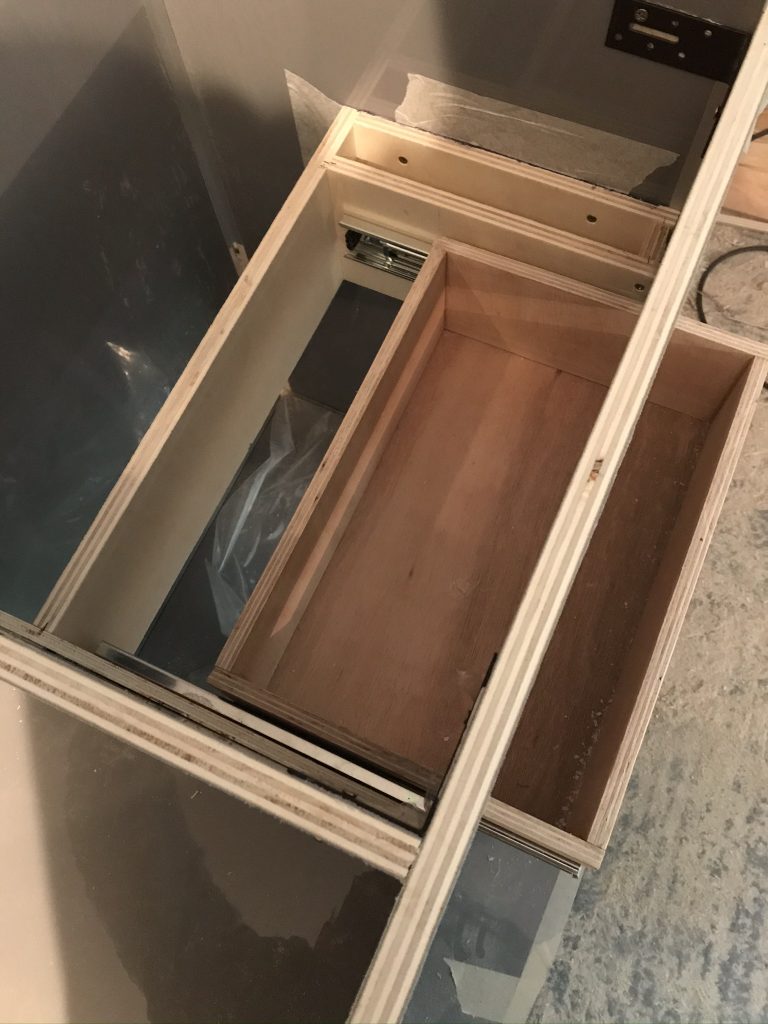
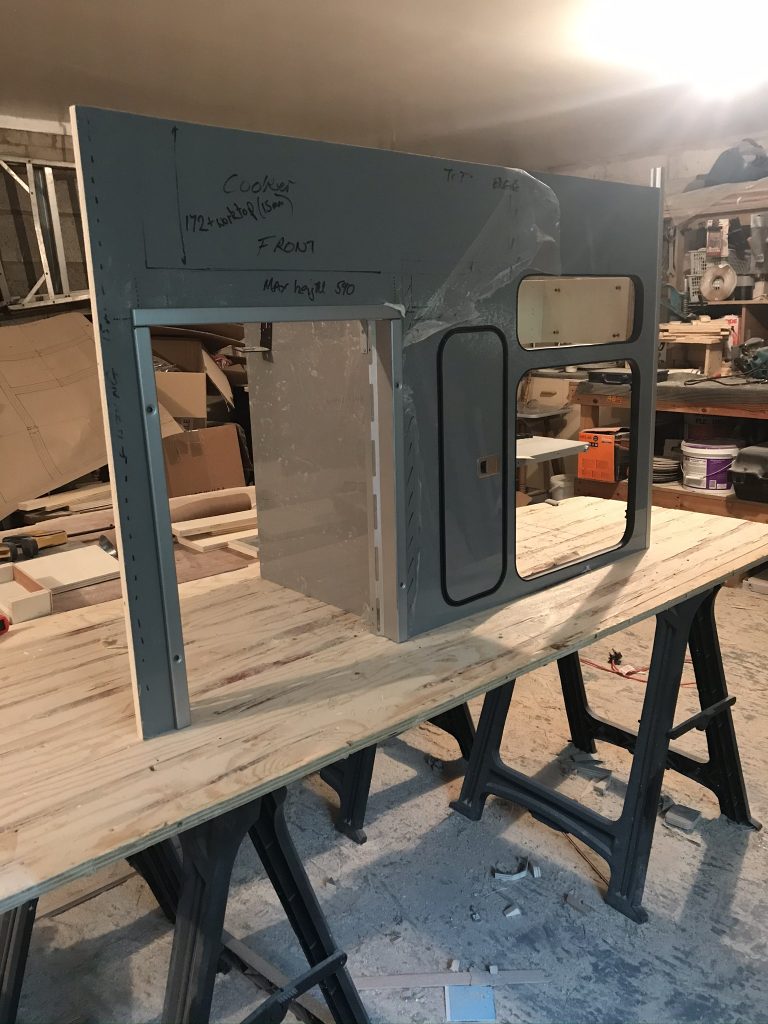
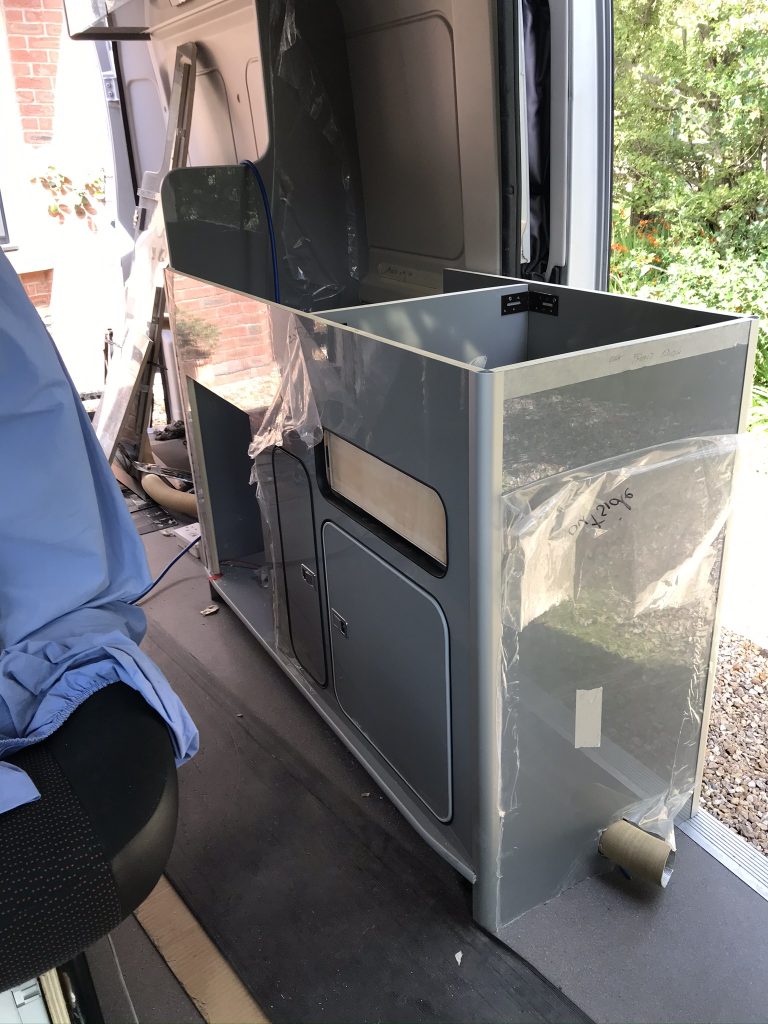
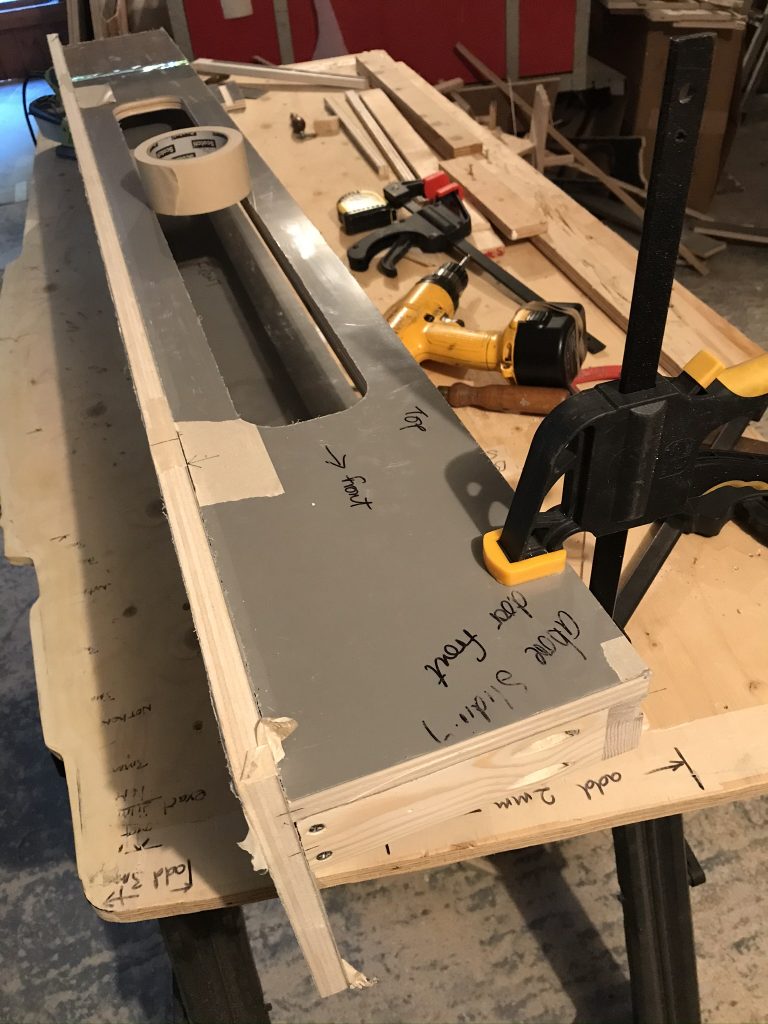
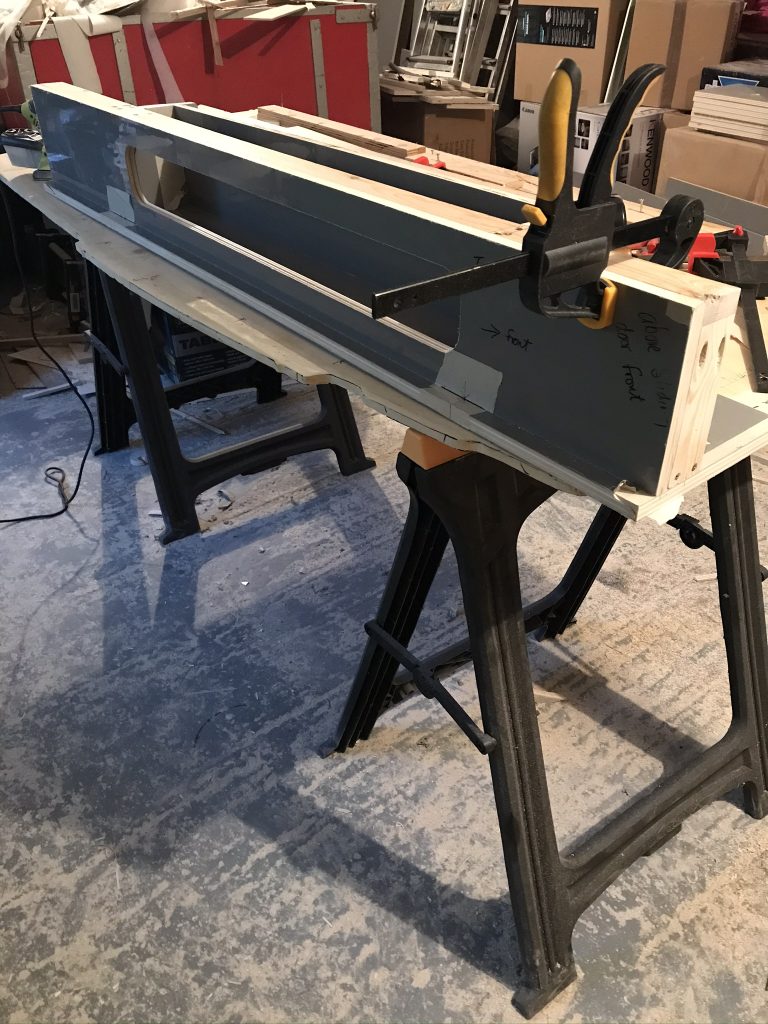
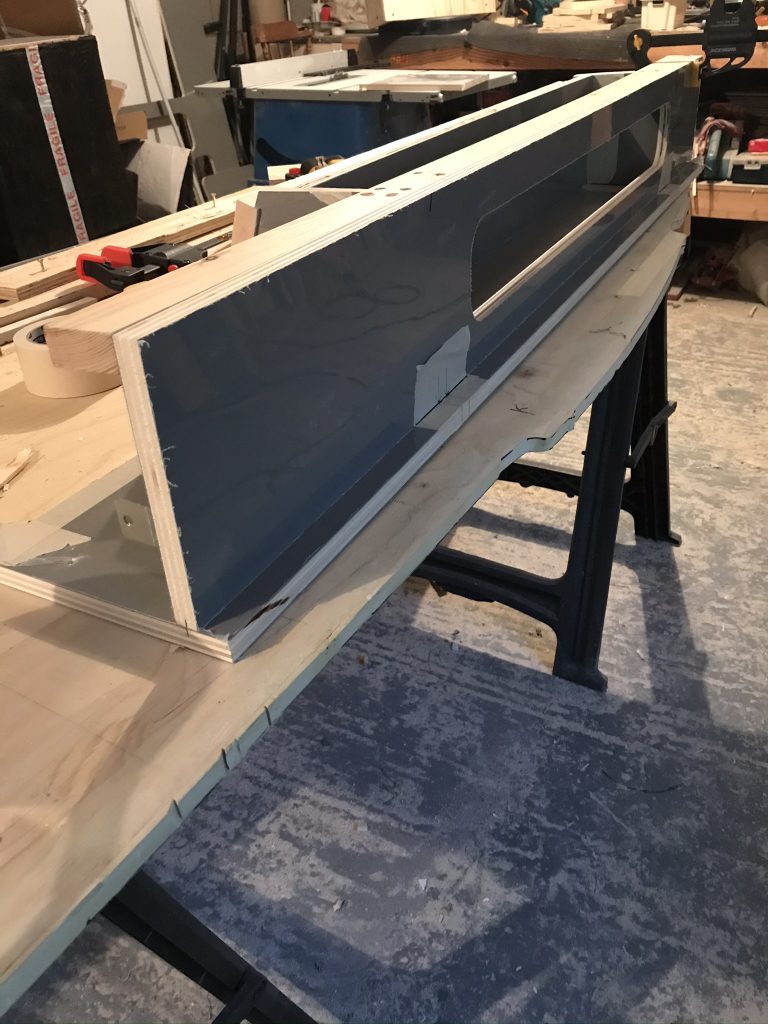
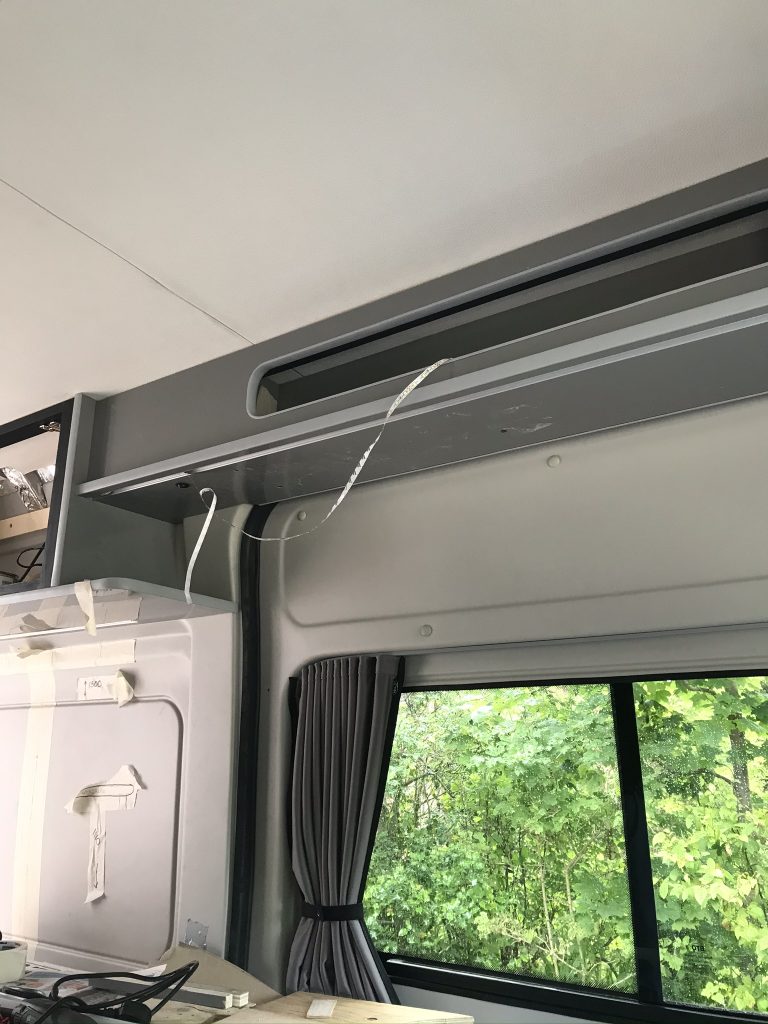
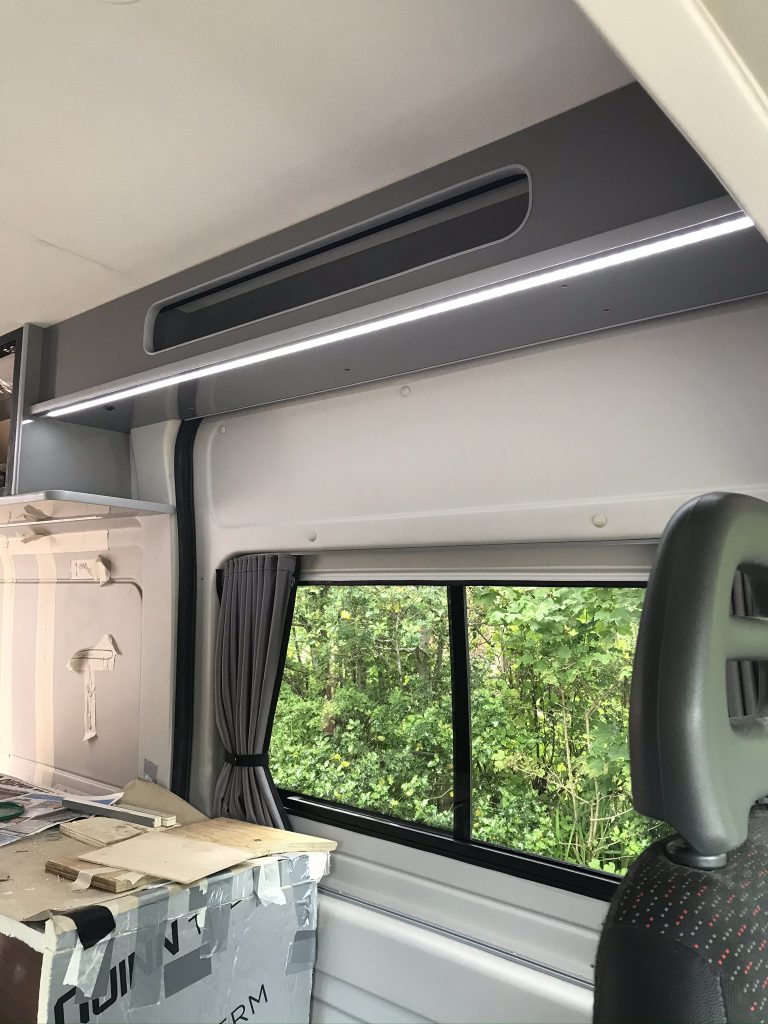
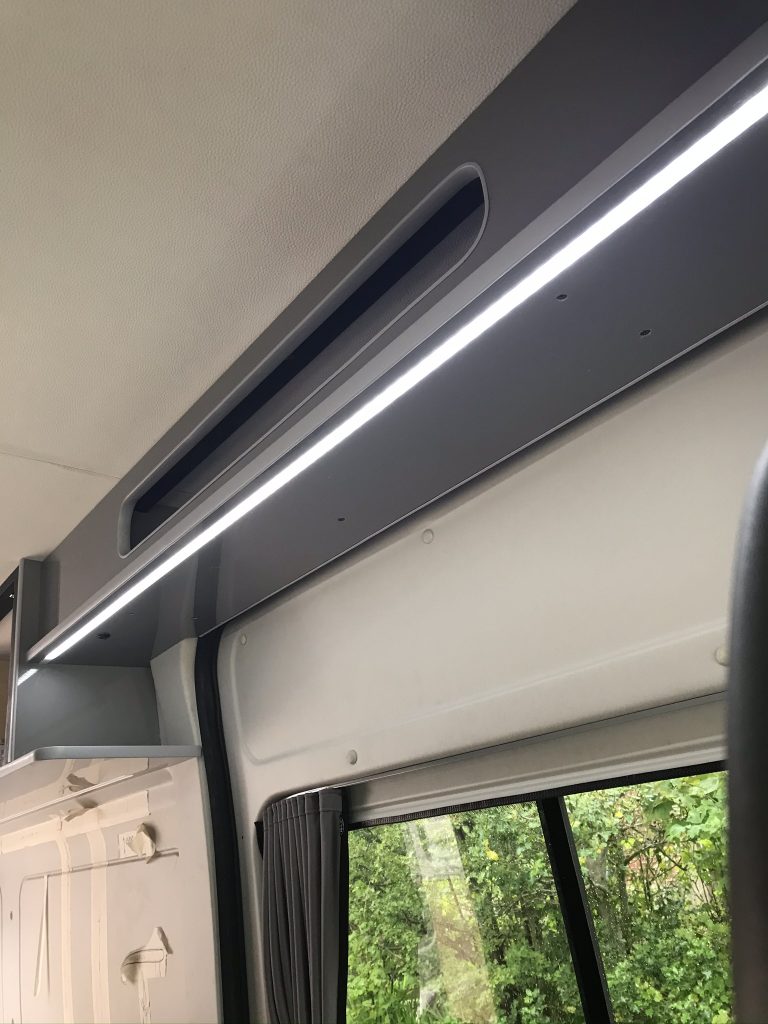
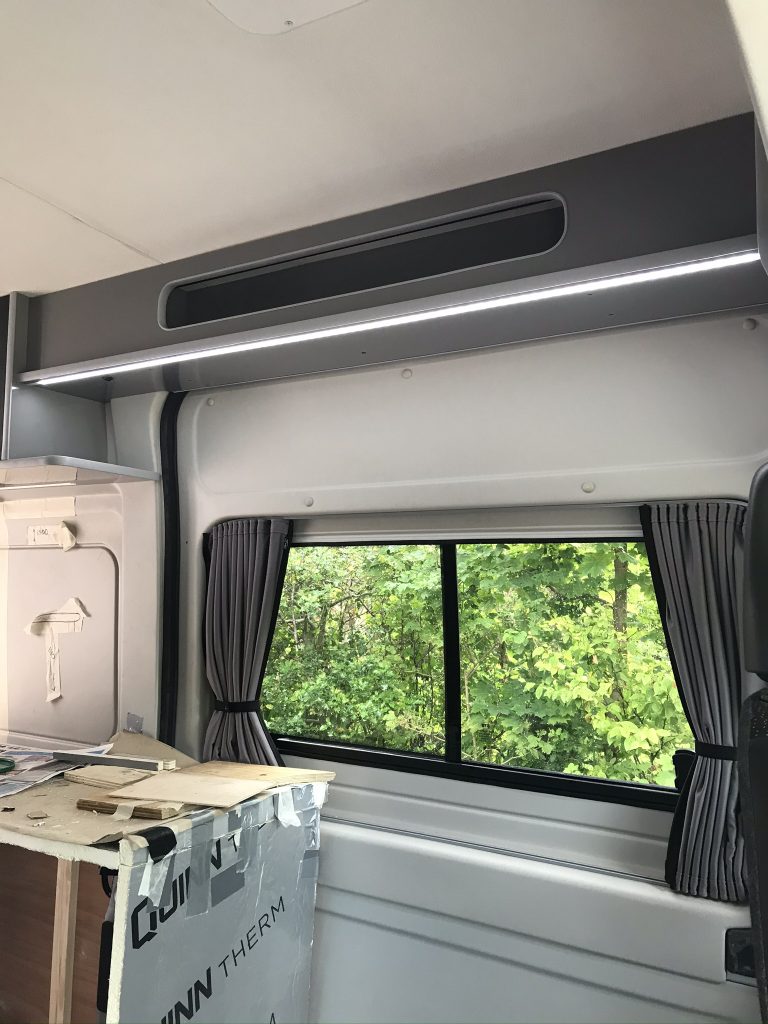
Internal and external cupboards in one: This section covers the building of the internal cupboards at the rear of the van above the bed. Because there are deep corners on either side and areas within the cupboard that may not be easy to access, without stretching ones arm, I decided to make them internal as well as external (front and back). In short, two cupboards inside the van and two “pockets” at the back of the van facing outside, accessible only when the rear doors are opened, ideal for hook-up cables, shoes, rope etc.
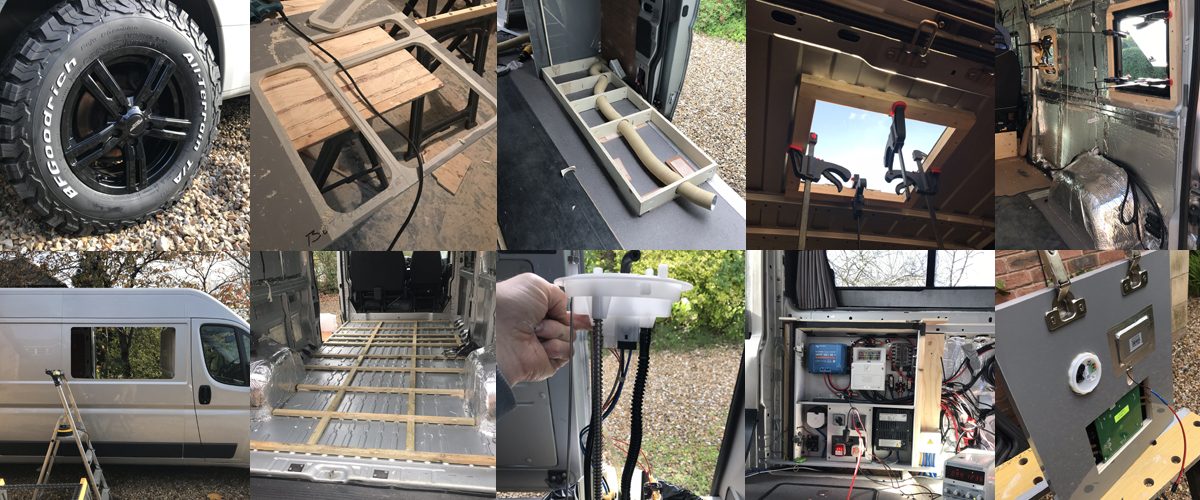
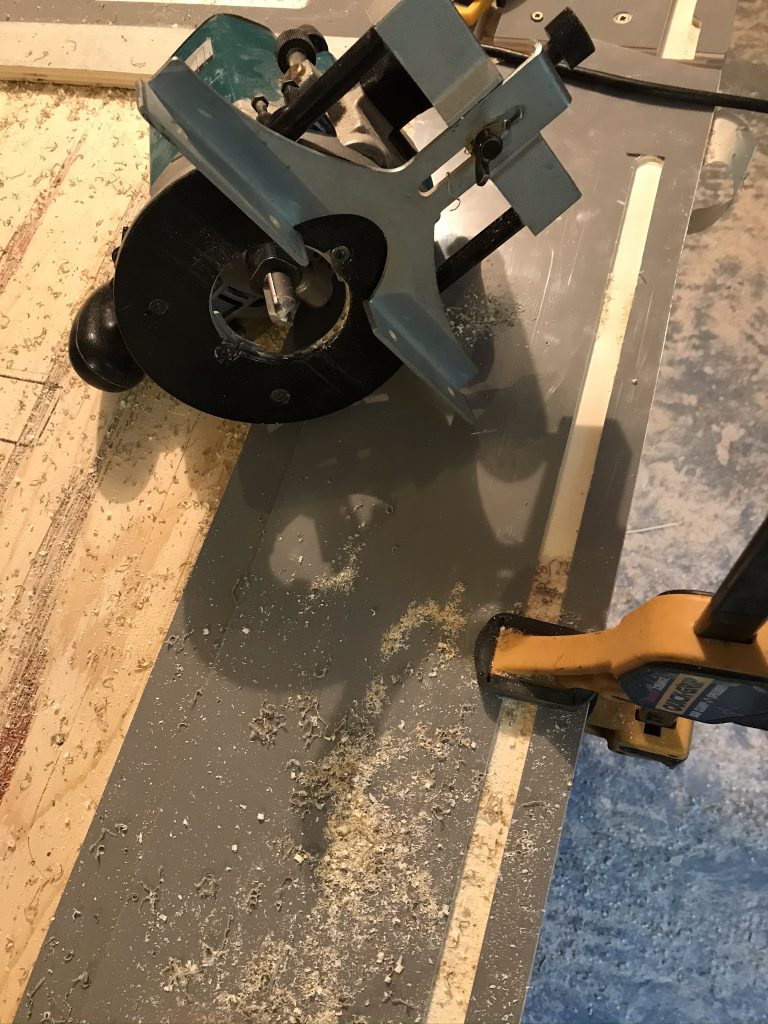
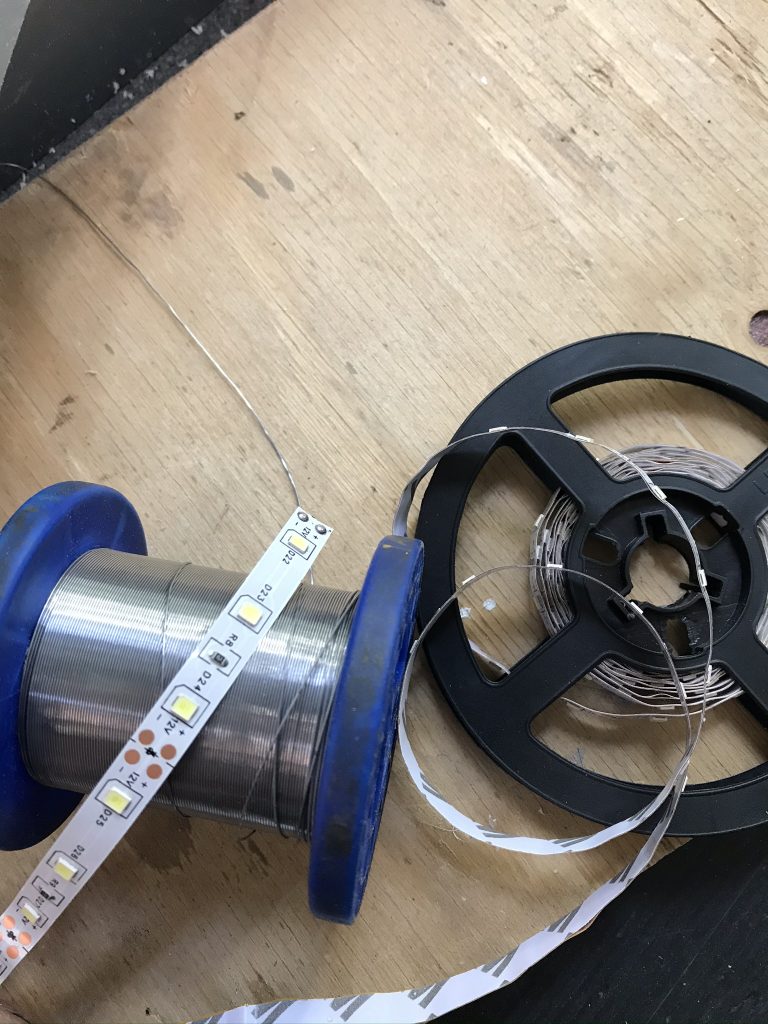
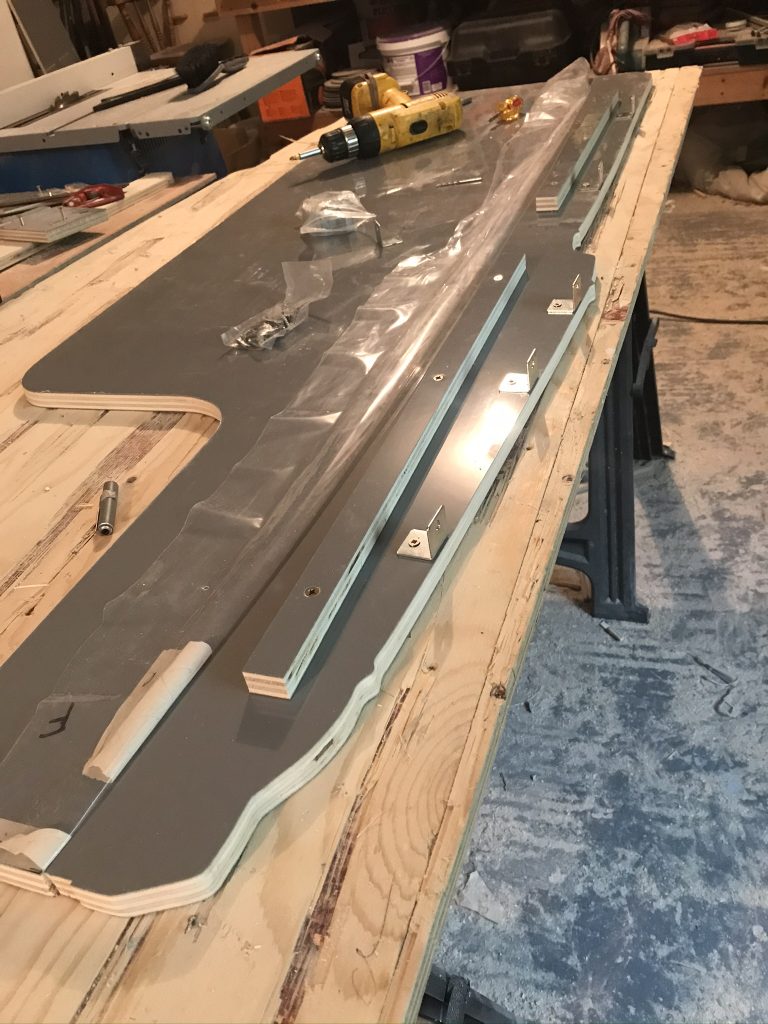
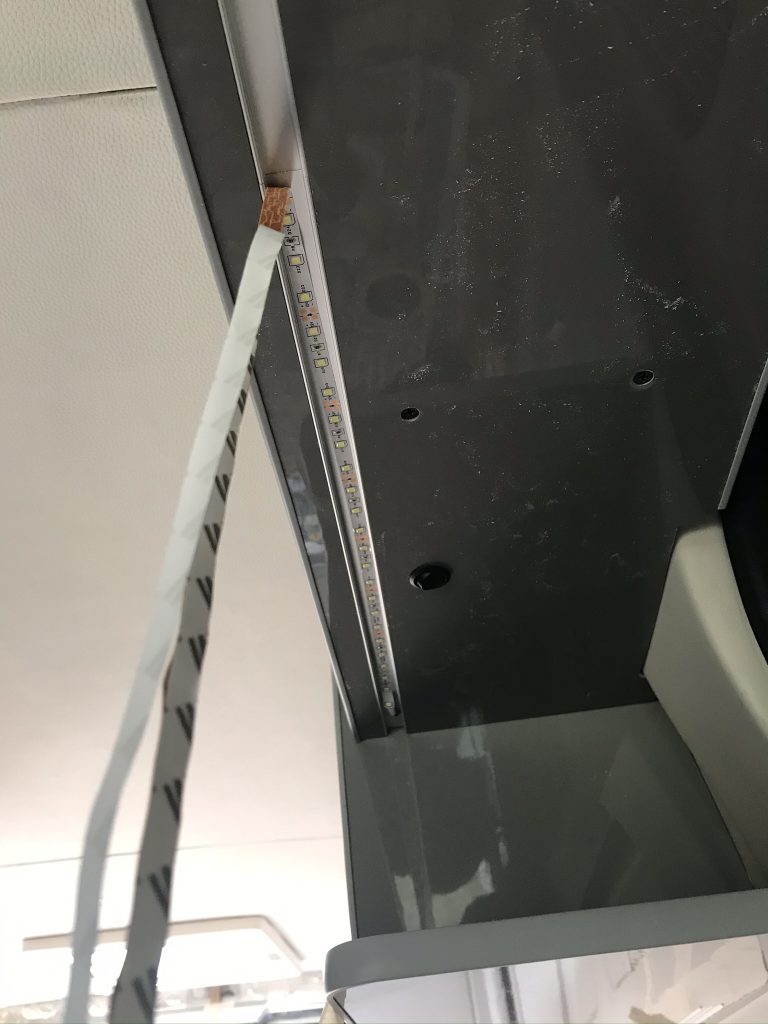
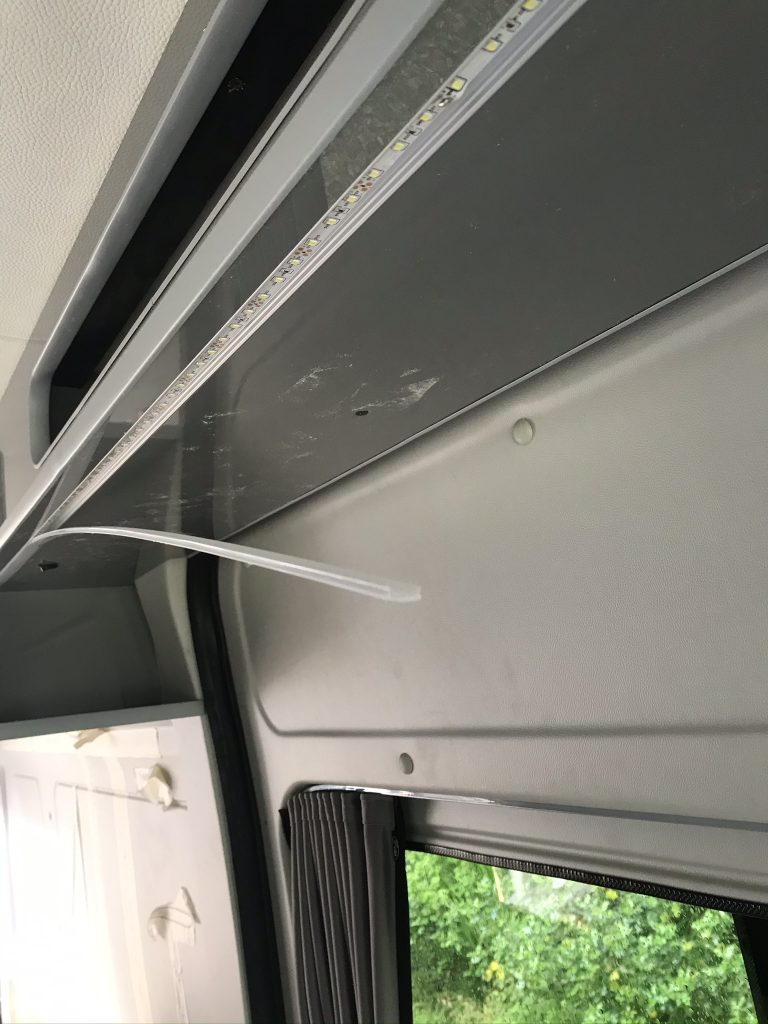
Below is the base panel of the cupboard, I am using a router to cut a slot for the recessed LED Lighting.
I looked at buying the Truma Combi Diesel Air and Hot Water Heater and at over £2400 I was put off with the price. It seems the diesel version was a lot more expensive than the gas version. I looked around online for alternatives and came across JP Heaters in China. There are many diesel heater manufacturers in China, many sell on EBay and produce simple small heaters for around £100, I didnt want this type and I don’t think JP sell on EBay.
A quick word: I received no discount for this article nor am I paid by JP in anyway, either financially or with parts. The same applies to all items mentioned in this website. Below is an unbiased article.
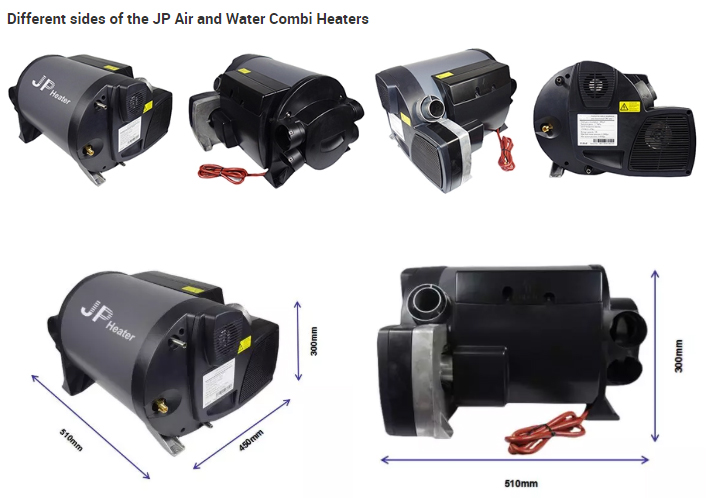
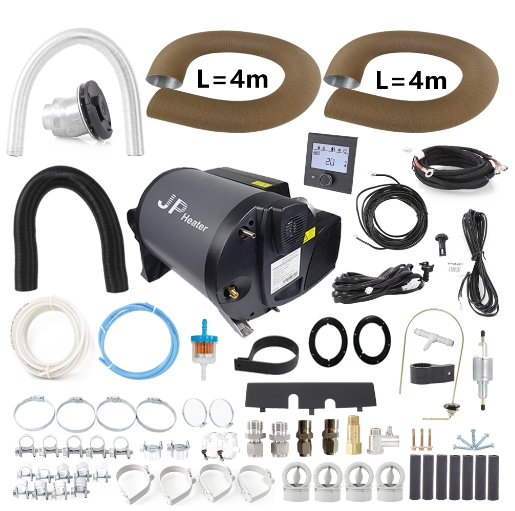
According to their websiteJP Heaters have been making diesel heaters for over 20 years. I was surprised to find that they made a diesel heater almost identical to the Truma Combi Heater. In fact many of the JP parts can be swapped with Truma Parts. However, I was more surprised to find the price was $990 US Dollars for the full kit minus the shipping. That made me wonder, could it be any good, would it be reliable would I have problems?
Time for some homework: I decided to look around online to see what others have said but I could find very little, the diesel heater hadnt been around for long enough in the U.K. The Australians rate it highly but I couldnt find a single person in the UK that had bought one.
The Big Gamble….. I decided to take the plunge and buy one. Have I made the right decision?
Warranty: I sent an email to “Selina” at JP Heaters and asked about warranty, reliability, shipping etc. Selina assured me that the product comes with a 12 month warranty. But there are no distributors in the UK and if it did have to be sent back then that would be expensive. Maybe most parts are changeable with the Truma maybe I can get the spares to fit if I need them. Selina assured me they would try and diagnose any issues “if” I had a problem and send a replacement part or replace the unit if its within the 12 month warranty.
The Buying Process: As soon as I confirmed by email that I wanted to buy, JP sent me an invoice. Payment was sent by bank wire transfer, it took three days to be confirmed as having arrived in JP’s bank account.
Amazing Speed: Now this is were it gets fast, super fast. I ordered and paid on the Tuesday, payment was confirmed on the Friday and then I received a Whatsapp message from Selina to say, the parcel was now with FedEx. Now that is fast. I didnt give Selina my Whatsapp number just my mobile, she must have looked me up and sent me a message with FedEx tracking.
Paid Tuesday, Shipped Friday Delivered Monday: I was completely surprise when a FedEx van pulled up the following Monday with my heater, I have had parcels from the UK take twice as long. The speed of service was superb.
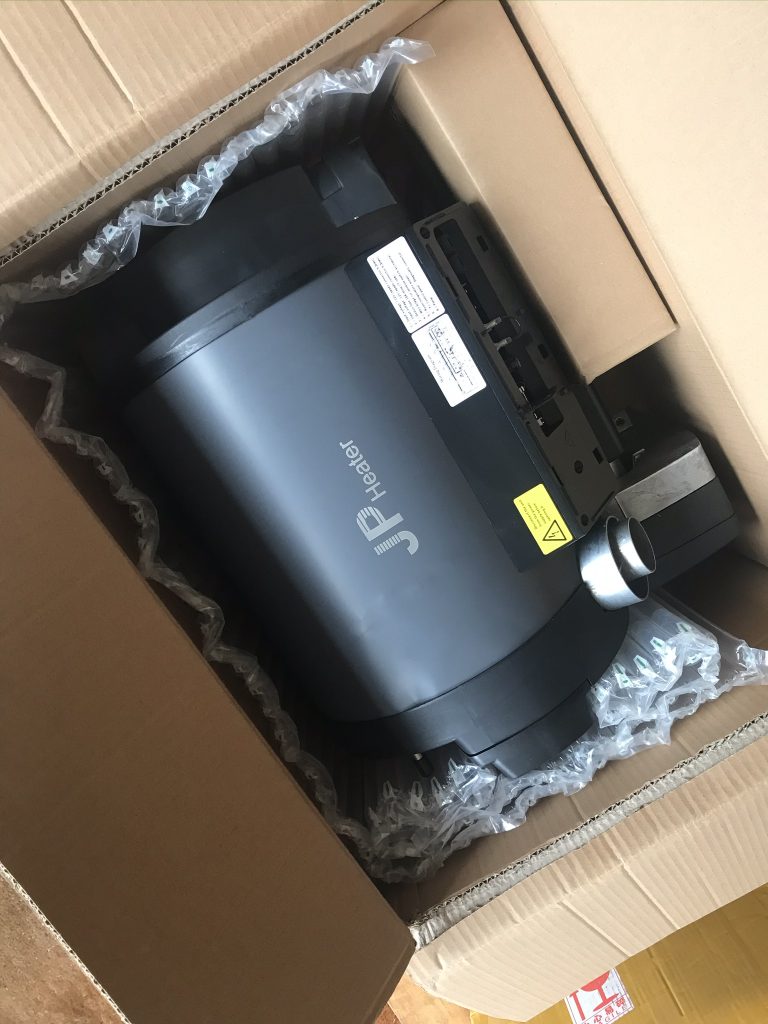
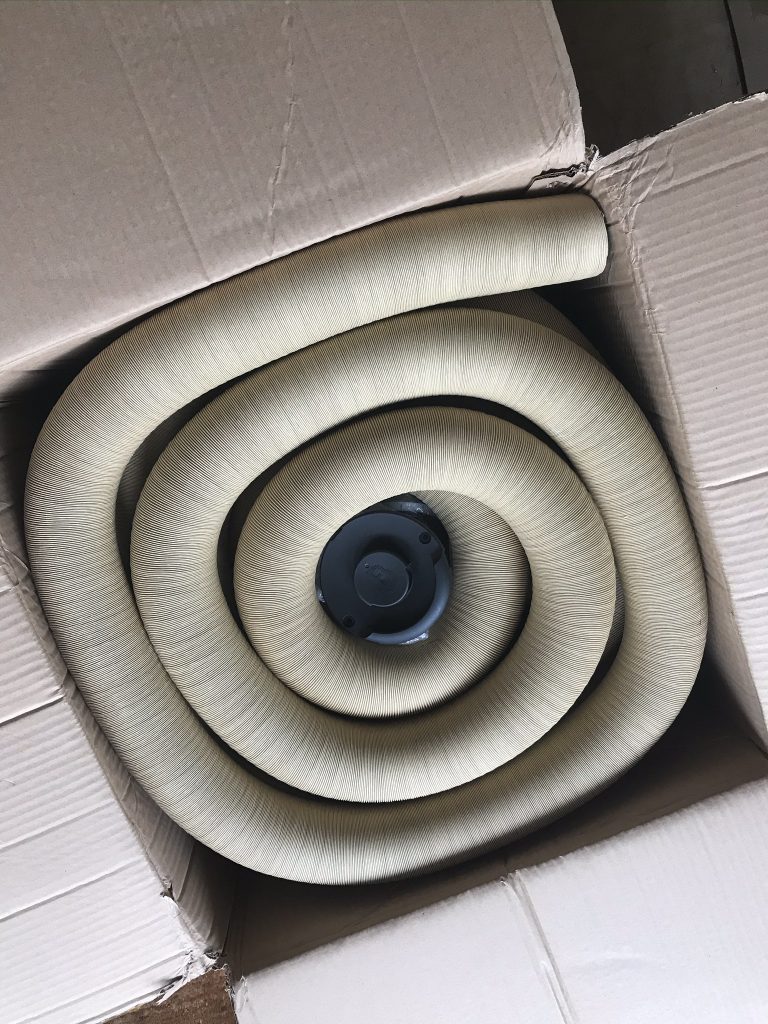
Its arrived: One large Box containing two smaller boxes. Everything was included, its a full kit, even the ducting pipes are part of the kit (I had already gone and bought a set). Only small issue was a small dent on the top of the heater, but thats nothing, I am not bothered about that.
Has it been a success? The big question, the quick answer is YES. I must be fair and say that I haven’t had it a long time and I have tested it only a few times. So far everything has worked fine. The first time I installed it, it took three attempts to start. This was because it took some time for the fuel to be pumped from the tank at the front to the heater at the back of the vehicle. I could see the fuel line was empty so I knew what was happening. As soon as I could see fuel enter the fuel filter I knew it was getting close to starting. Within moments of fuel entering the Heater, the system fired up.
Its quiet: Some diesel heaters can be noisy, I have to say this one isnt totally silent but it is fairly quiet I cannot see anybody complaining if they were parked up next to my van and I had the heater switched on. Its far too quiet.
Does it work and is it Hot? Yes again, the heating system is superb as I expected and the water is hot, nice and hot as you would expect in a shower.
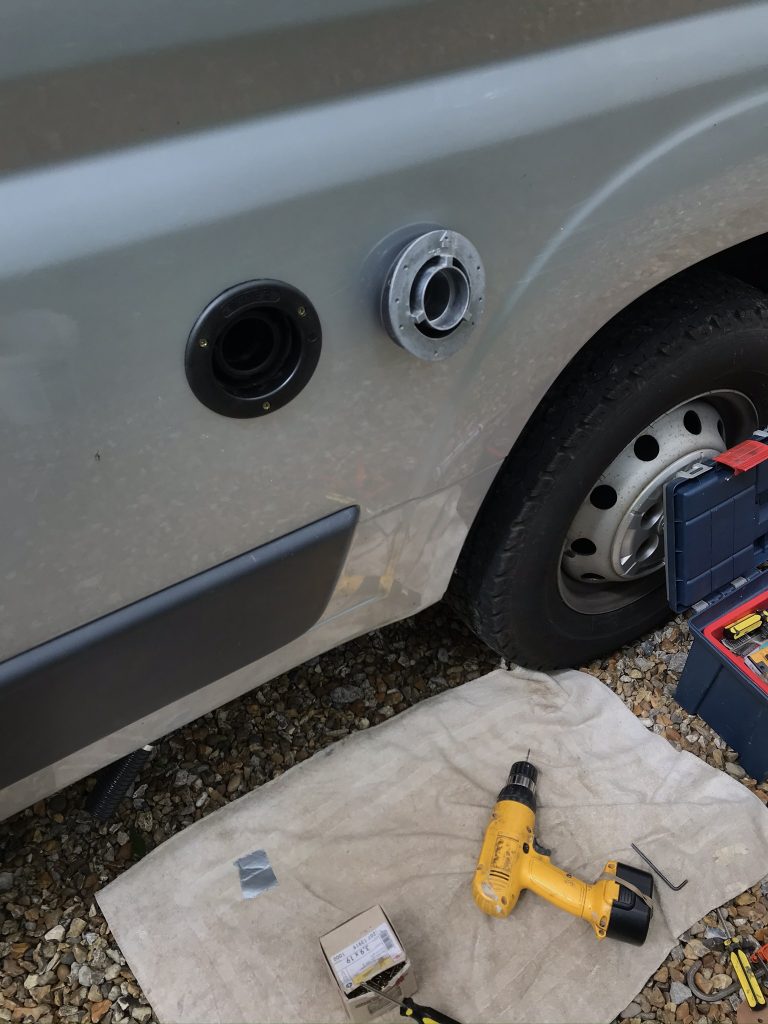
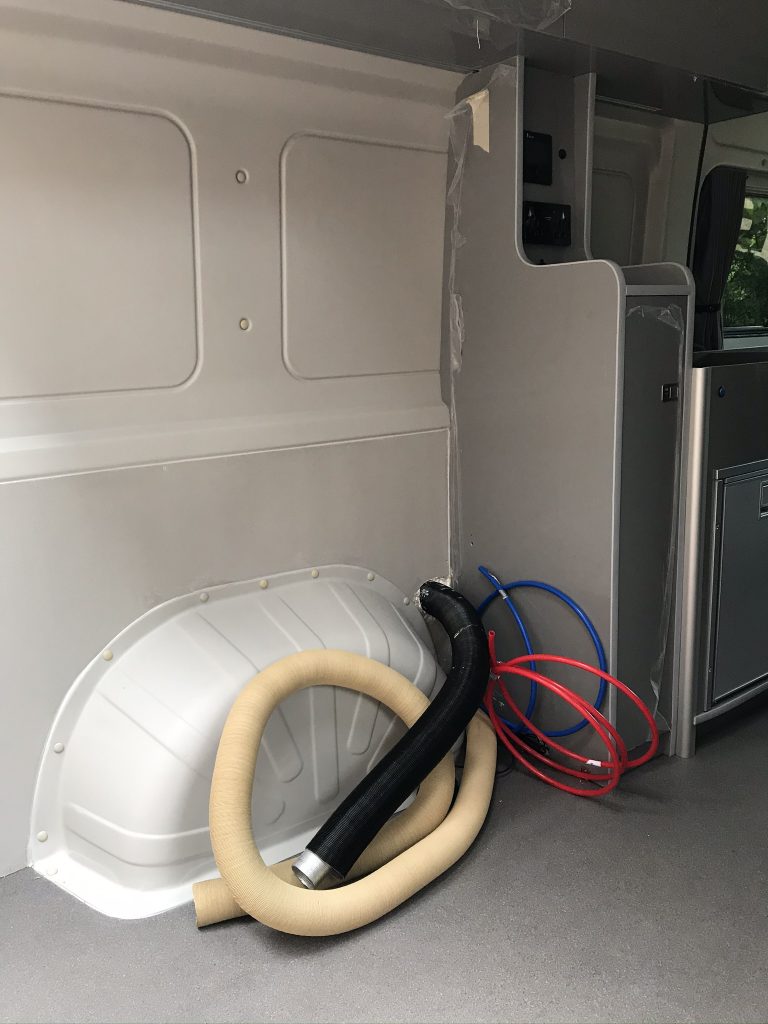
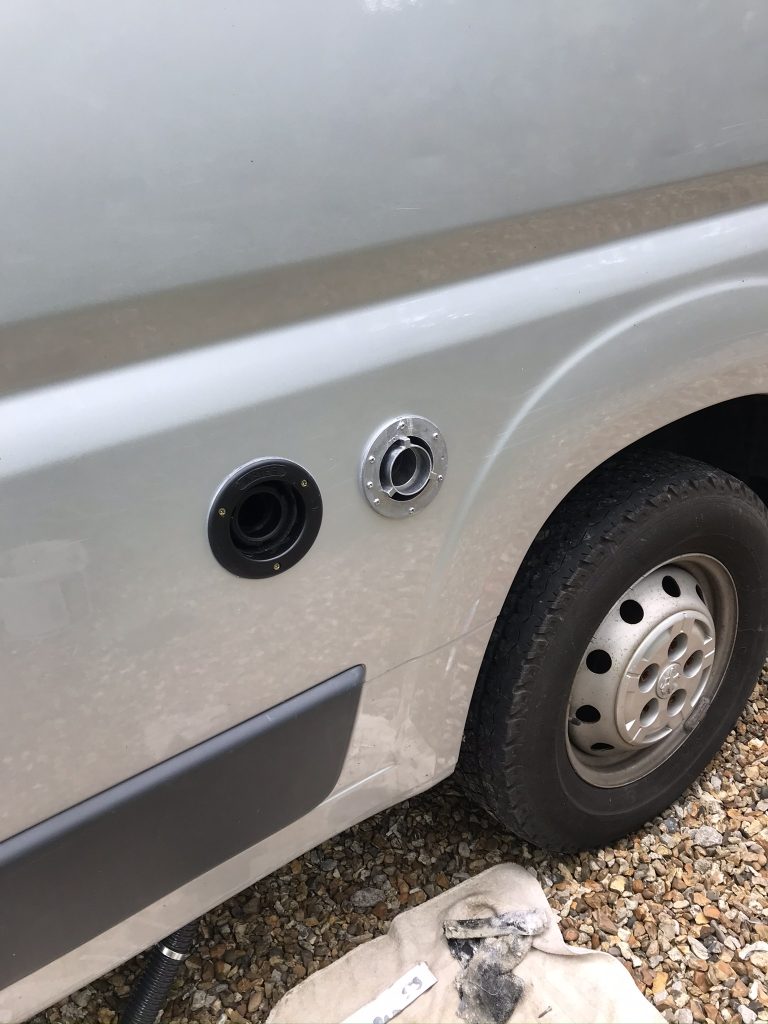
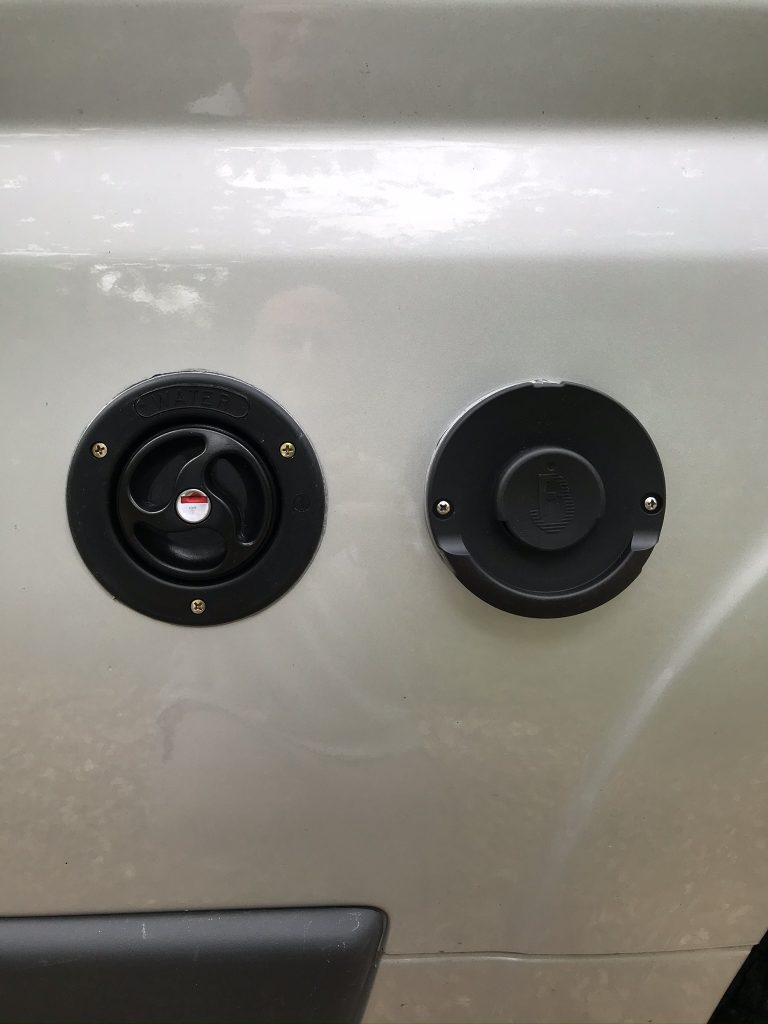
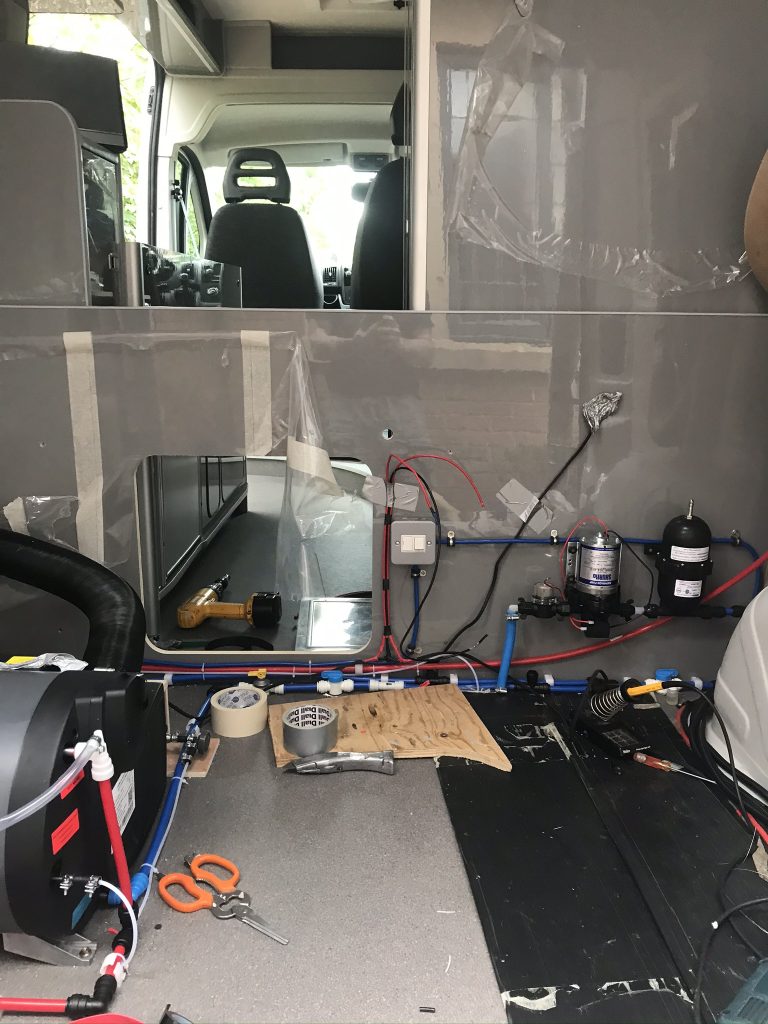
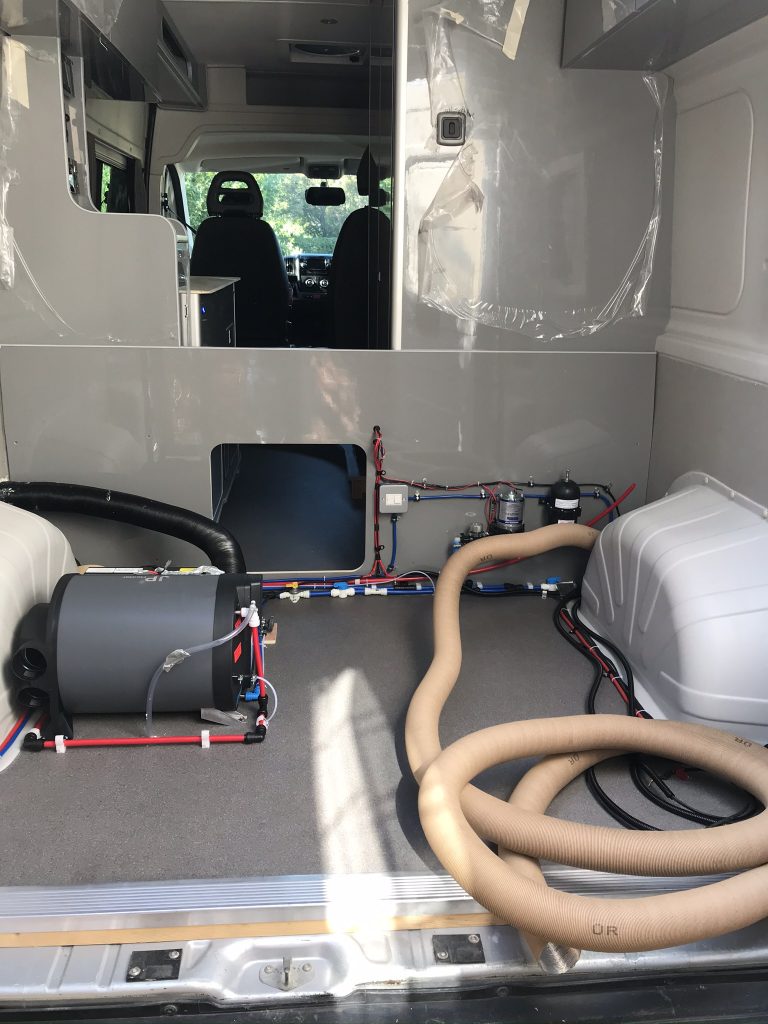
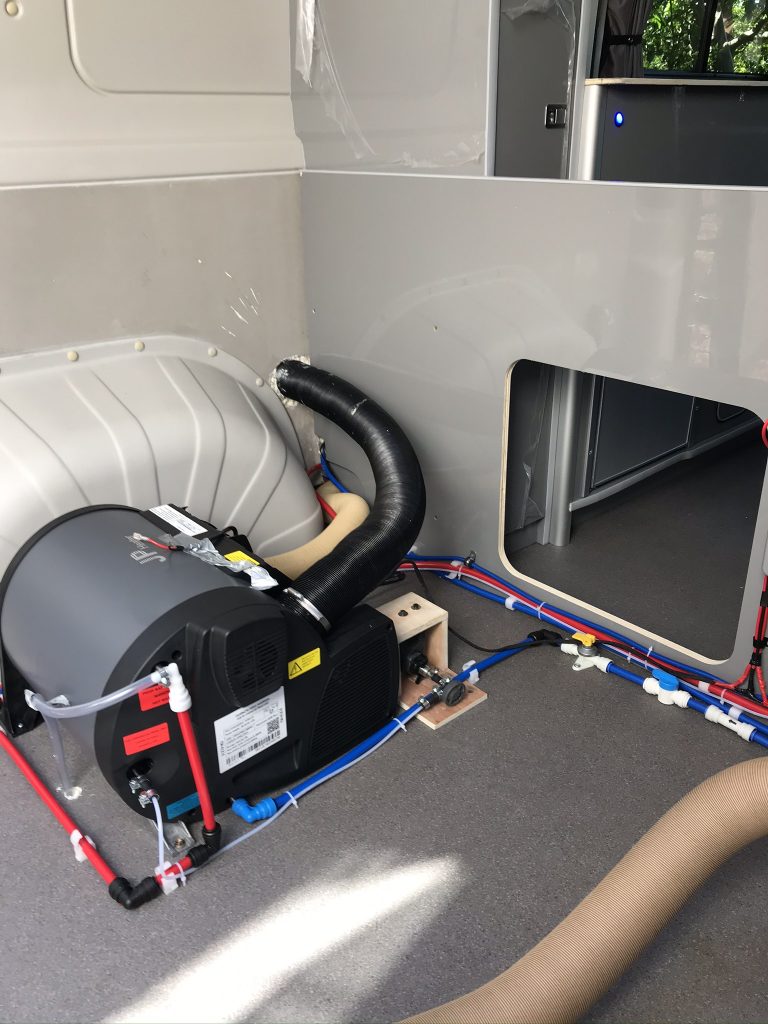
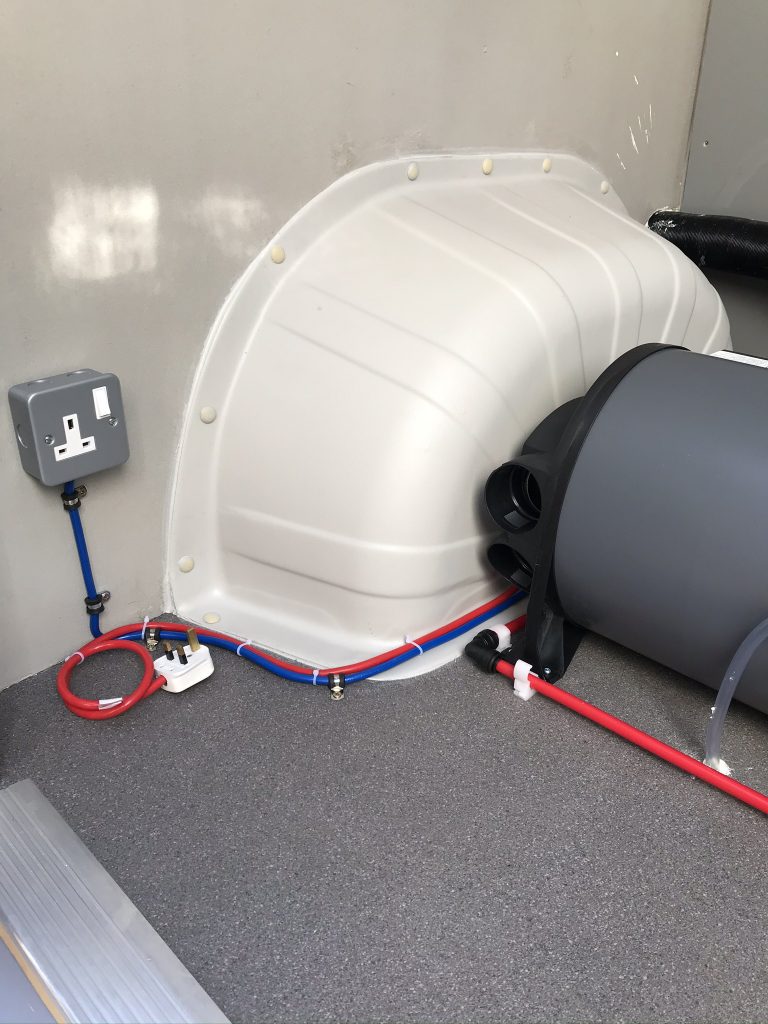
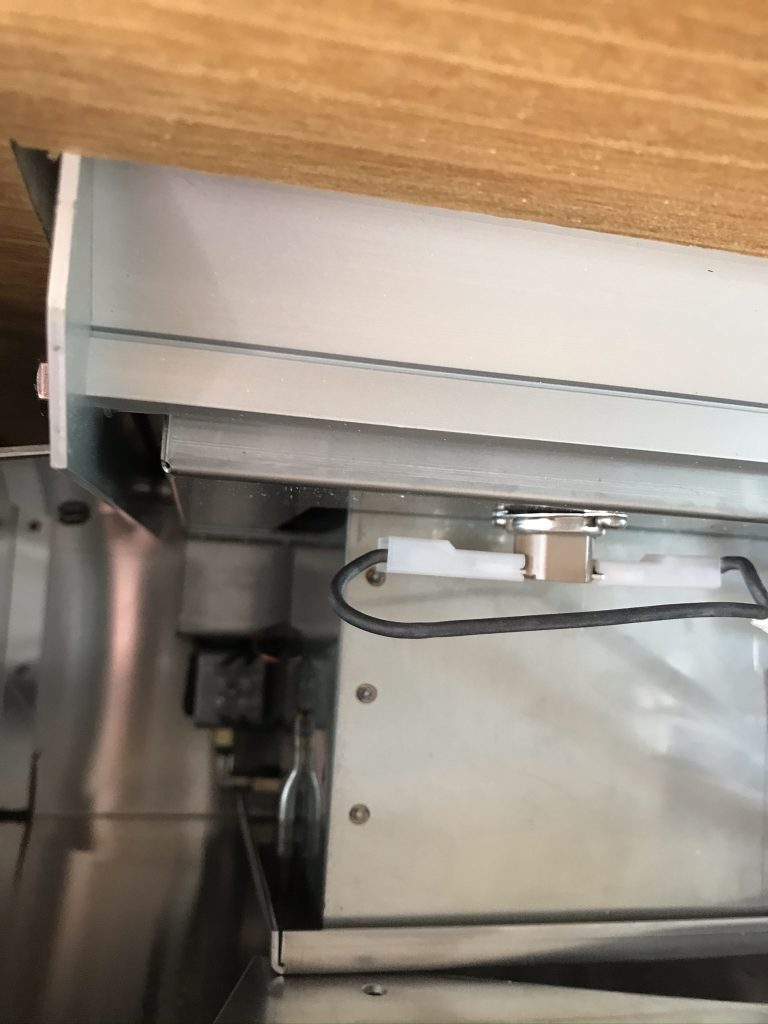
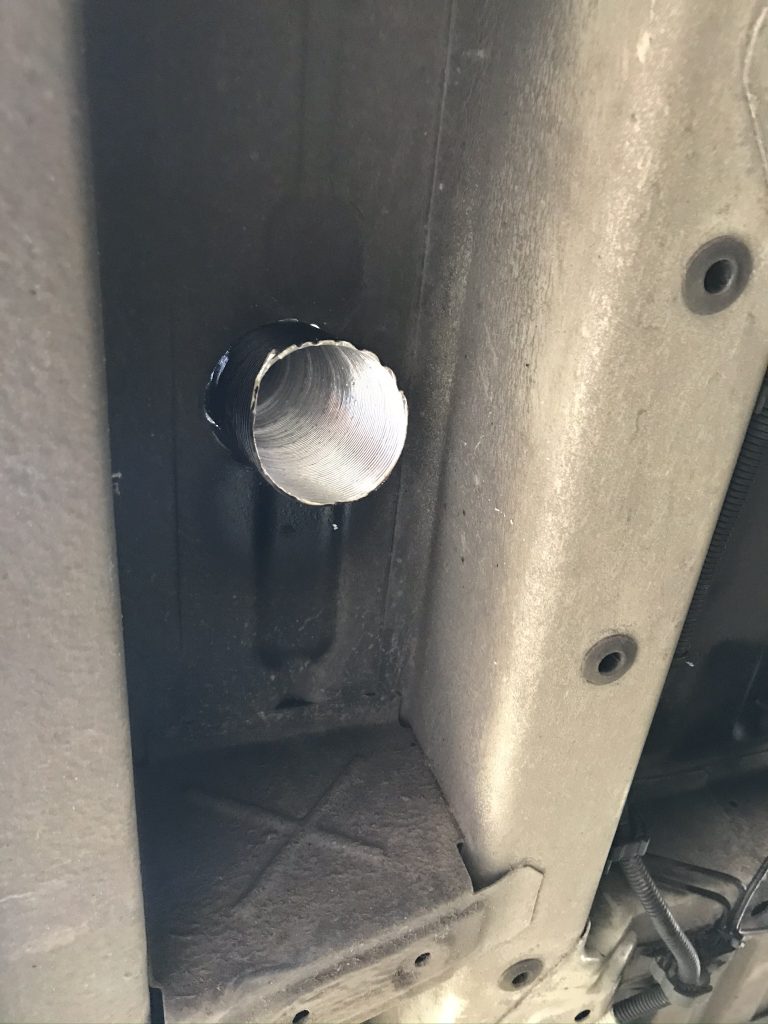
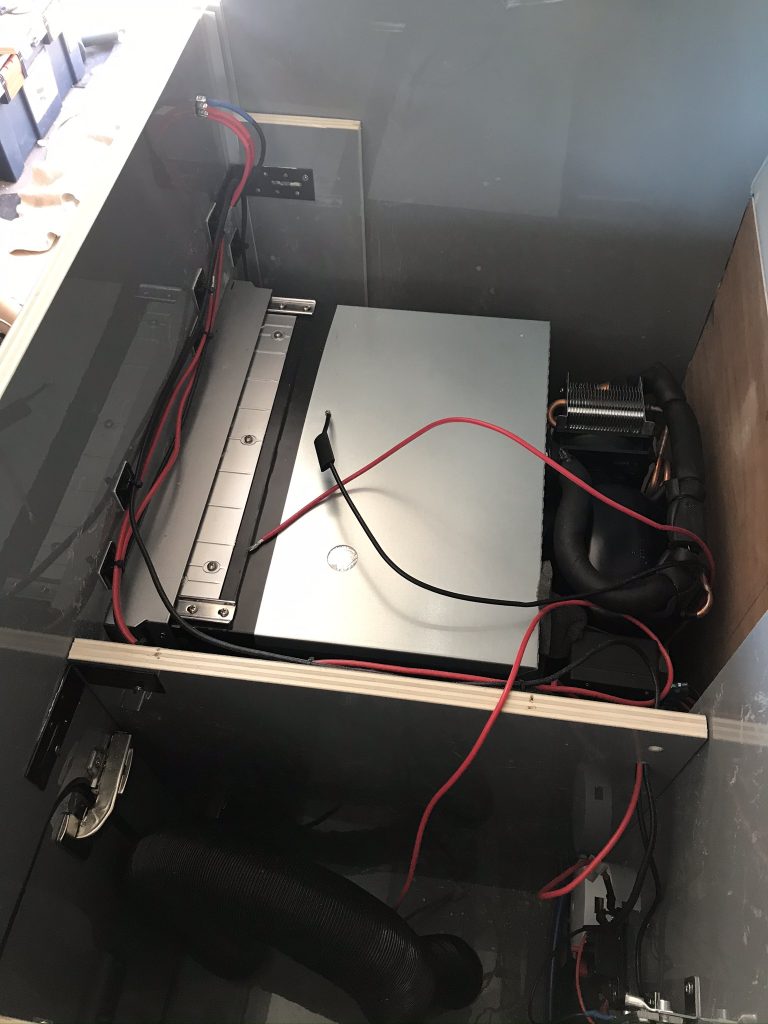
Below: The first task for me was to fit the Exhaust and Air intake Pipe (combined) this system is very similar to the Webasto Cooker exhaust and air intake. The exhaust is a stainless steel pipe inside an outer pipe air flows both ways. The opening on the left is the water intake and not part of the JP Heater.
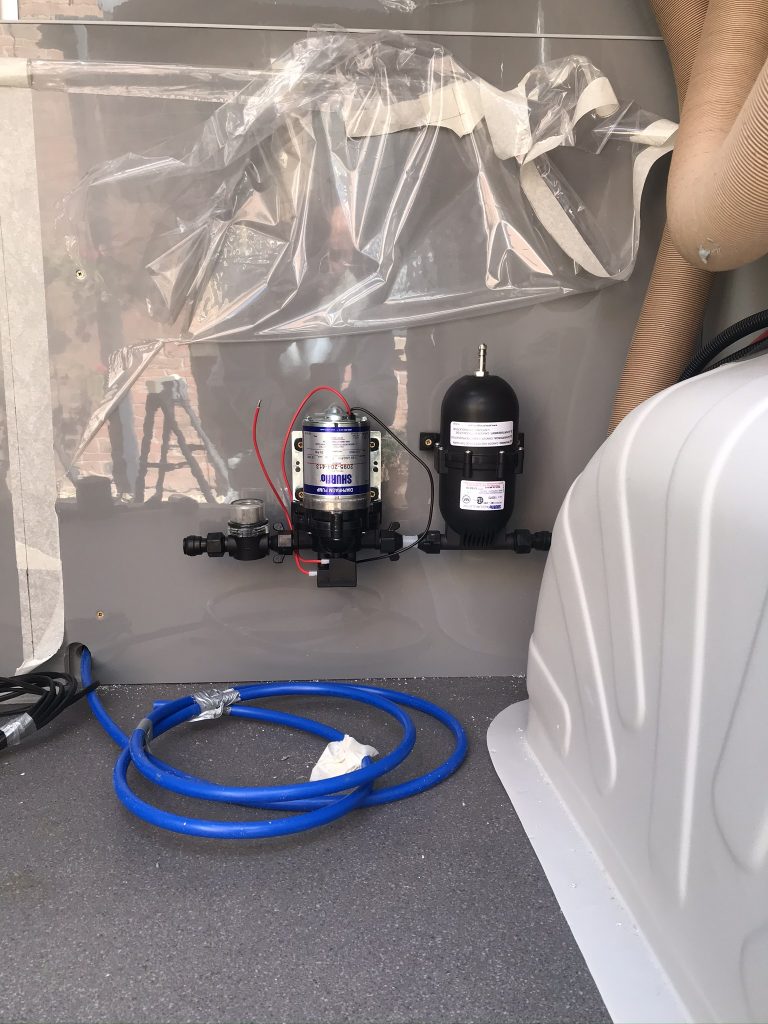
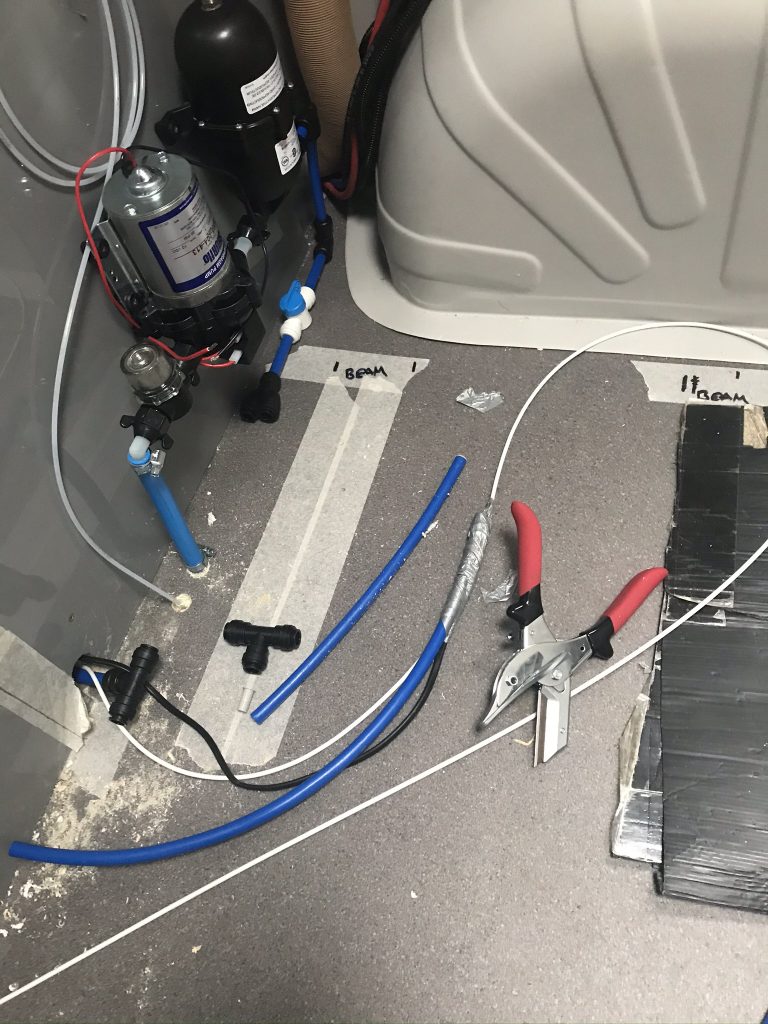
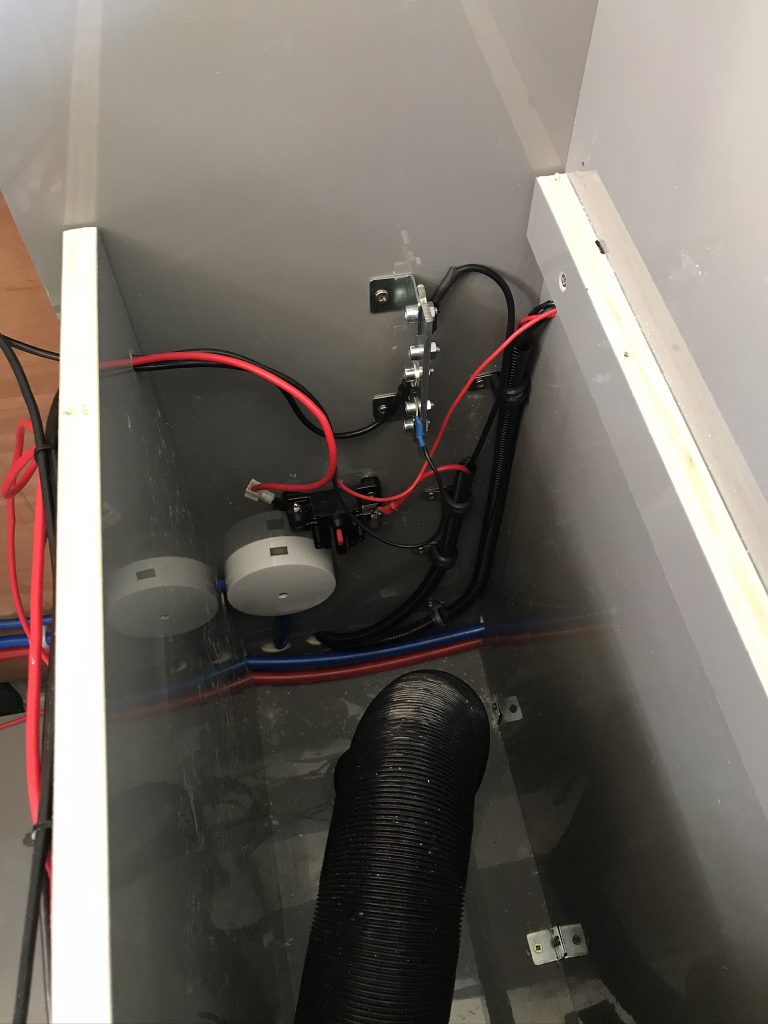
Below: I need to get a water supply to the Heater, I have installed a Shurflow Pump and Accumalator.
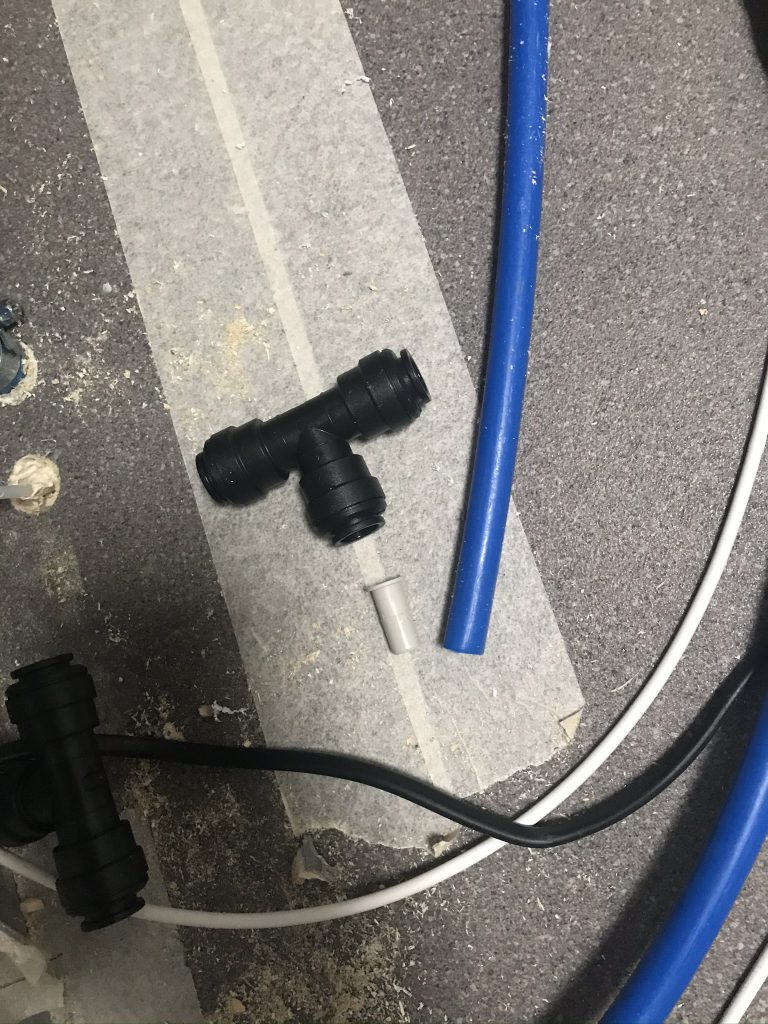
Below: I am using John Guest 12mm pipe with 12mm push fittings
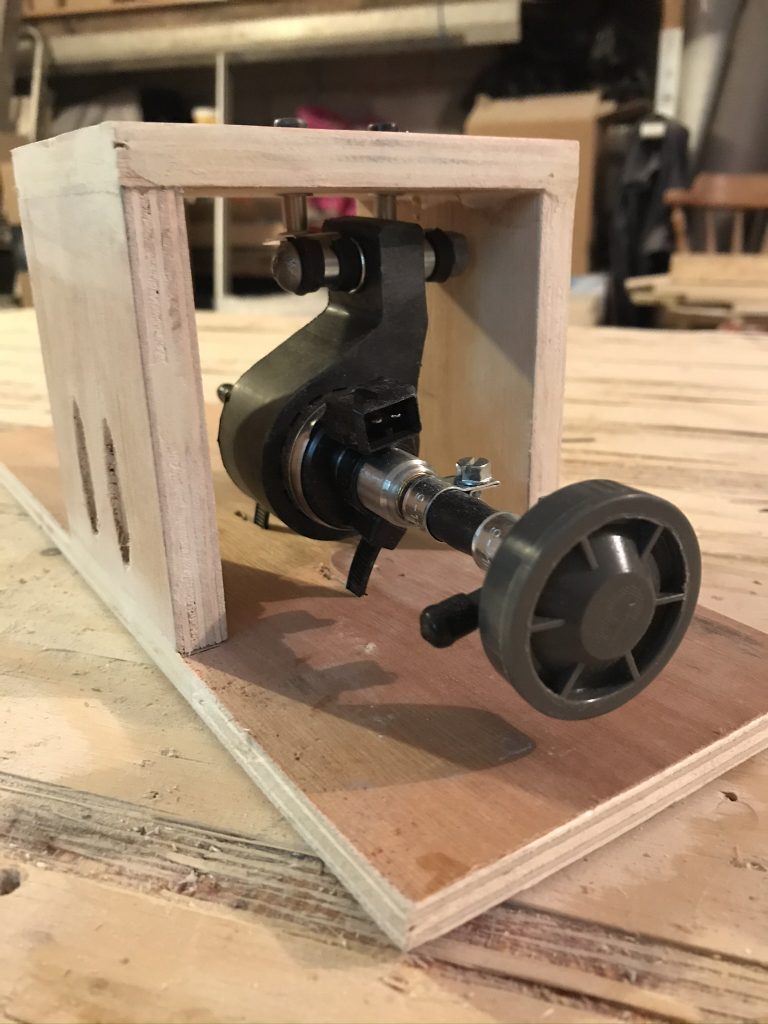
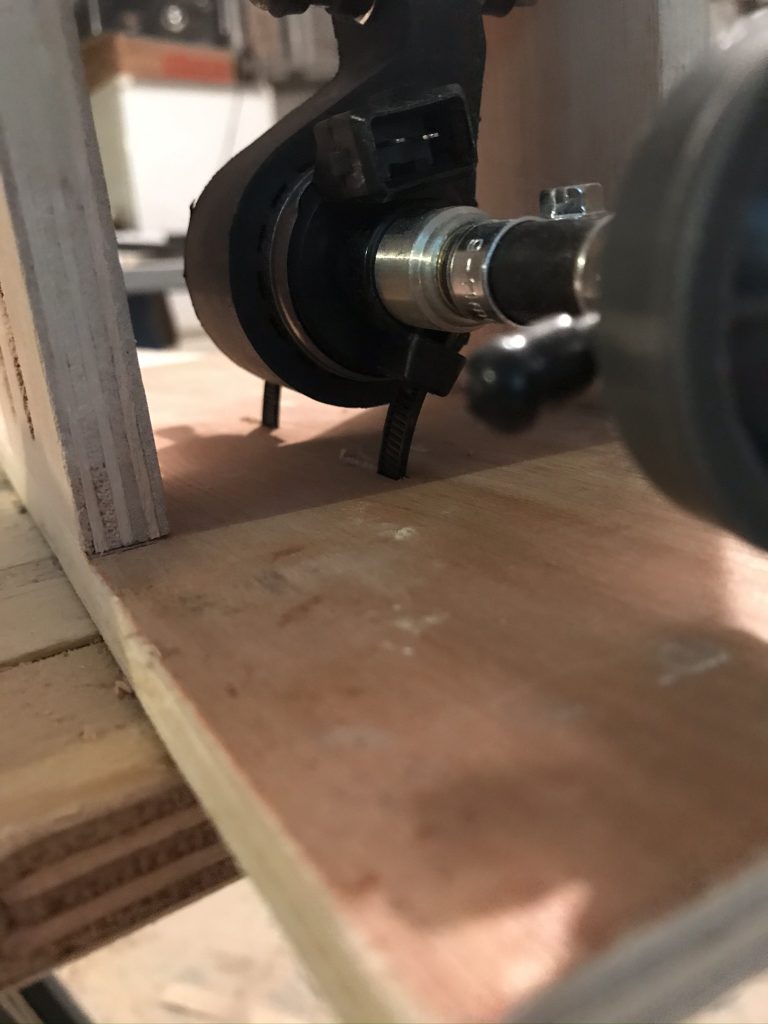
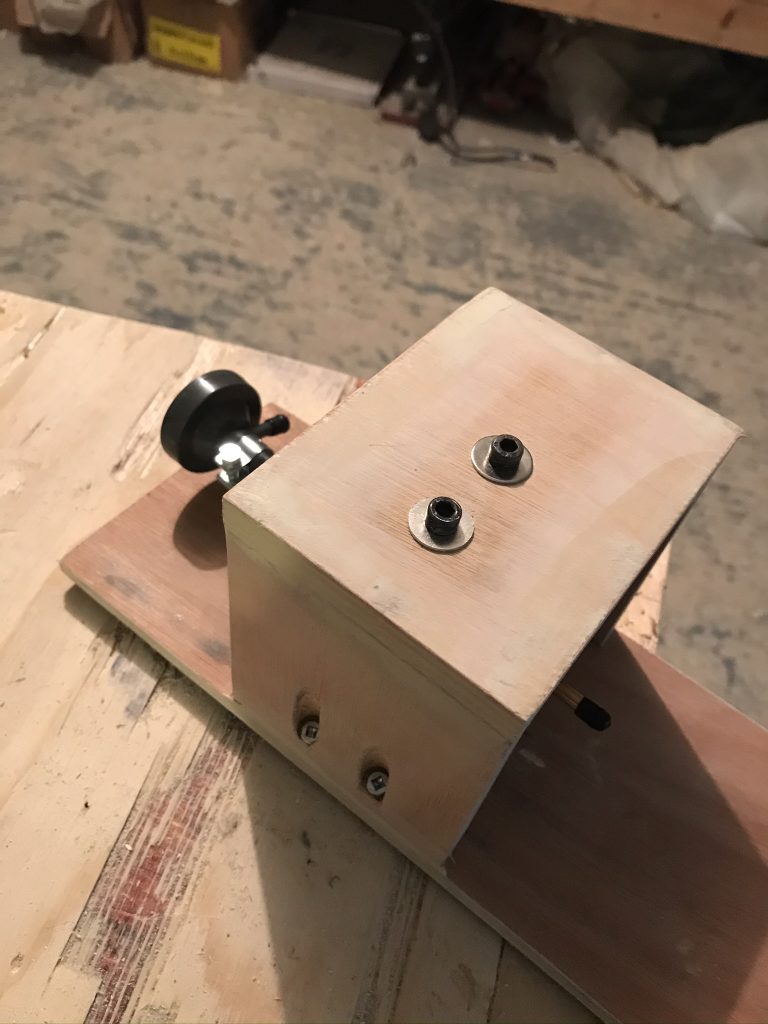
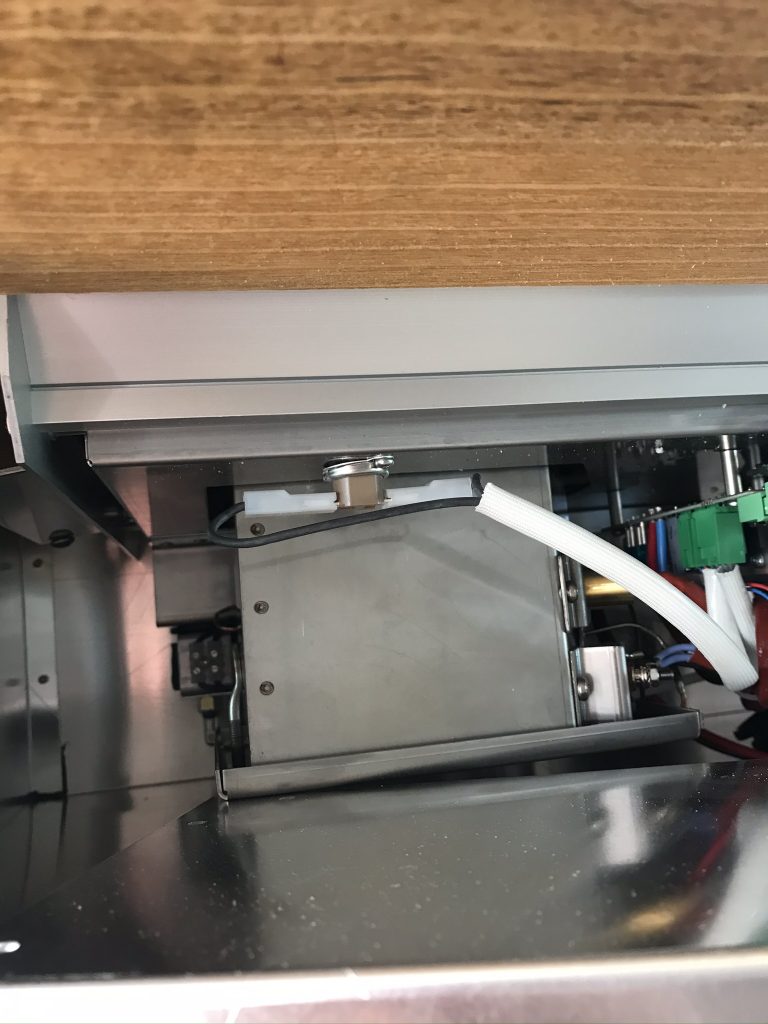
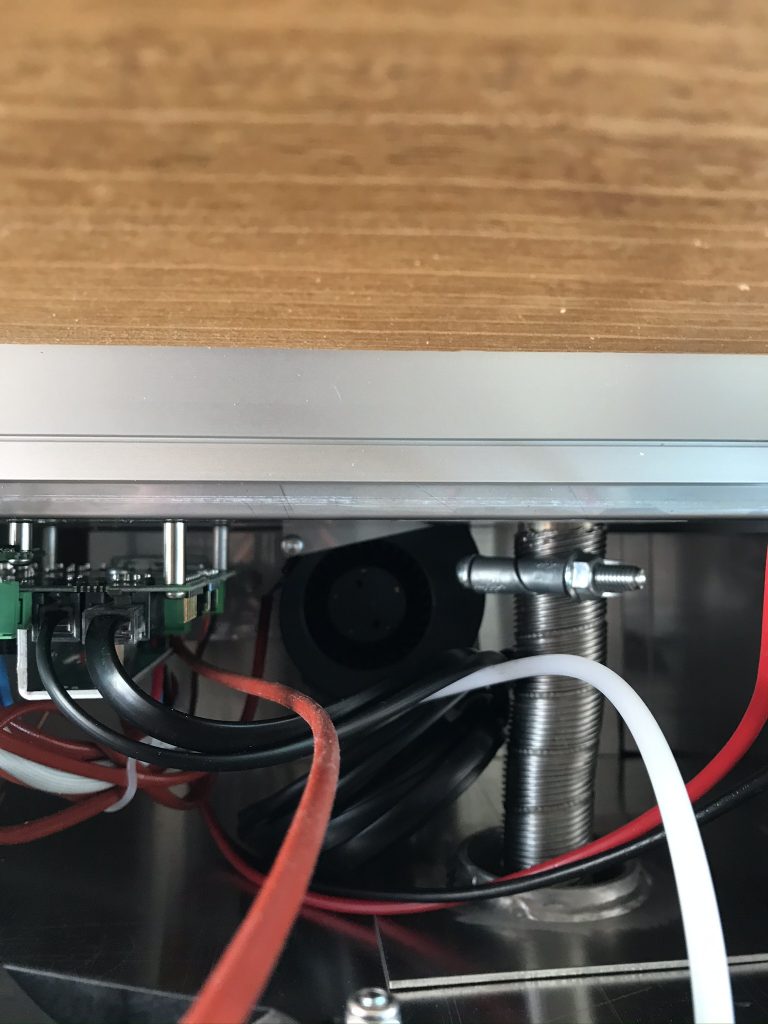
Below: making a frame for the fuel pump. This type of pump can make a loud clicking sound when screwed down firm. I decided to build it in this frame to reduce noise then house it inside a sound insulated box. It’s actually quiet before the sound box has been made, the frame seems to be working well, just a gentle quiet clicking can be heard. Once inside a sound box and under the bed it will not be heard.
The yellow leaver below is so that the system can be drained in winter. I added a “run off valve” on the Hot Water output.
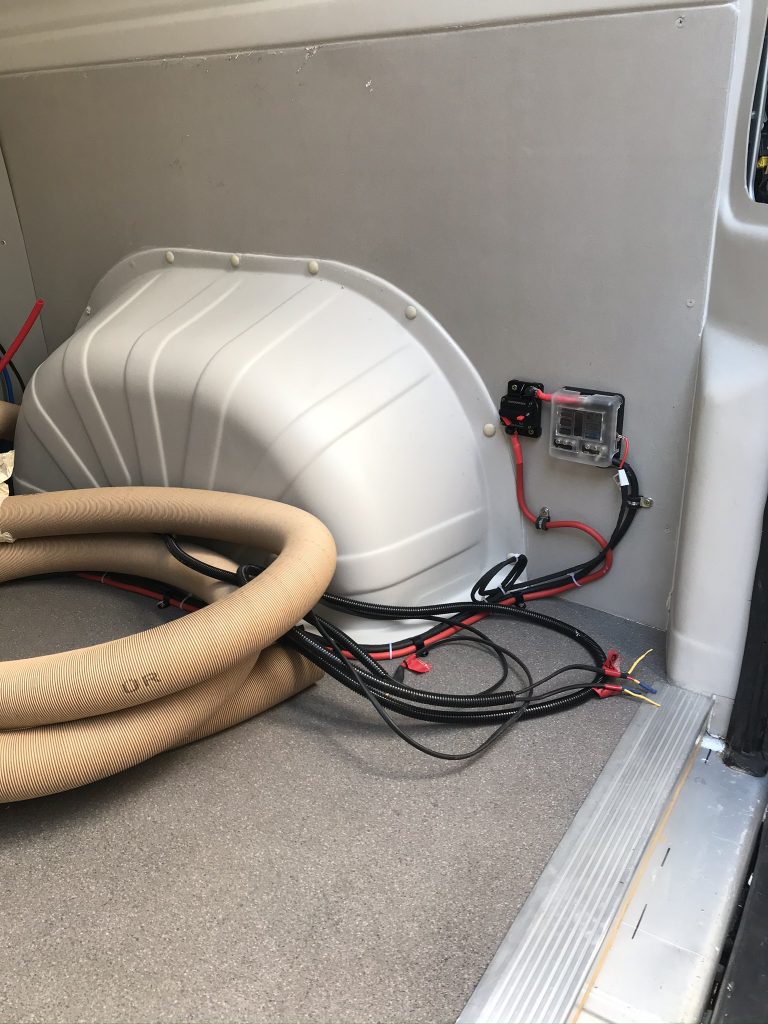
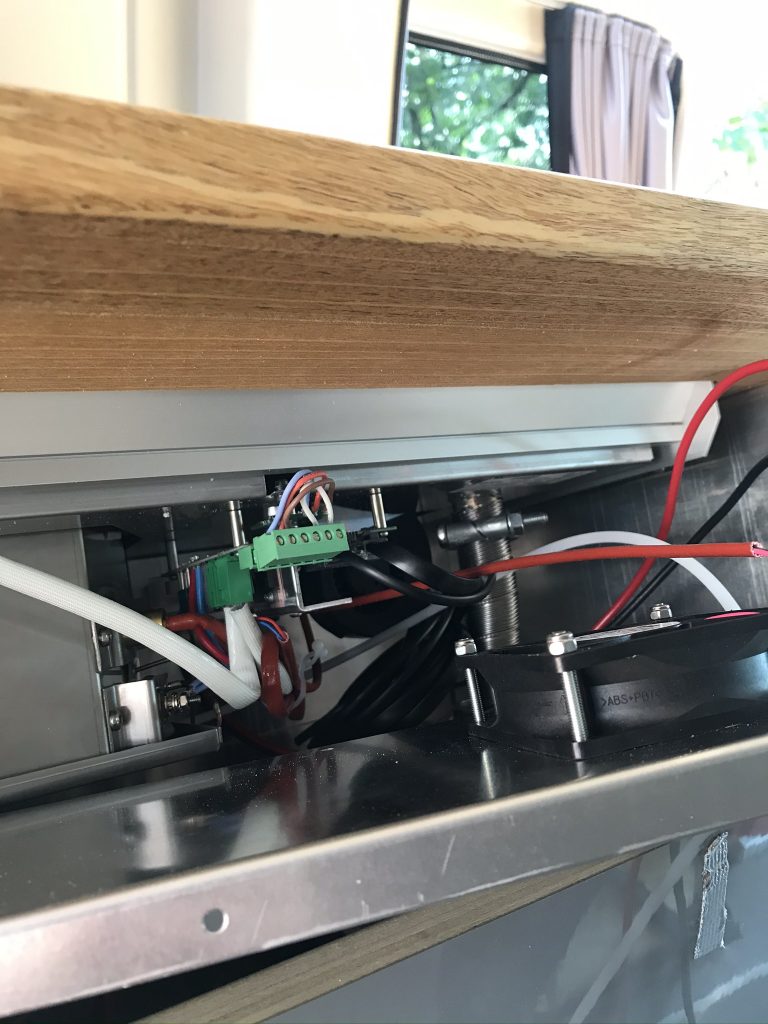
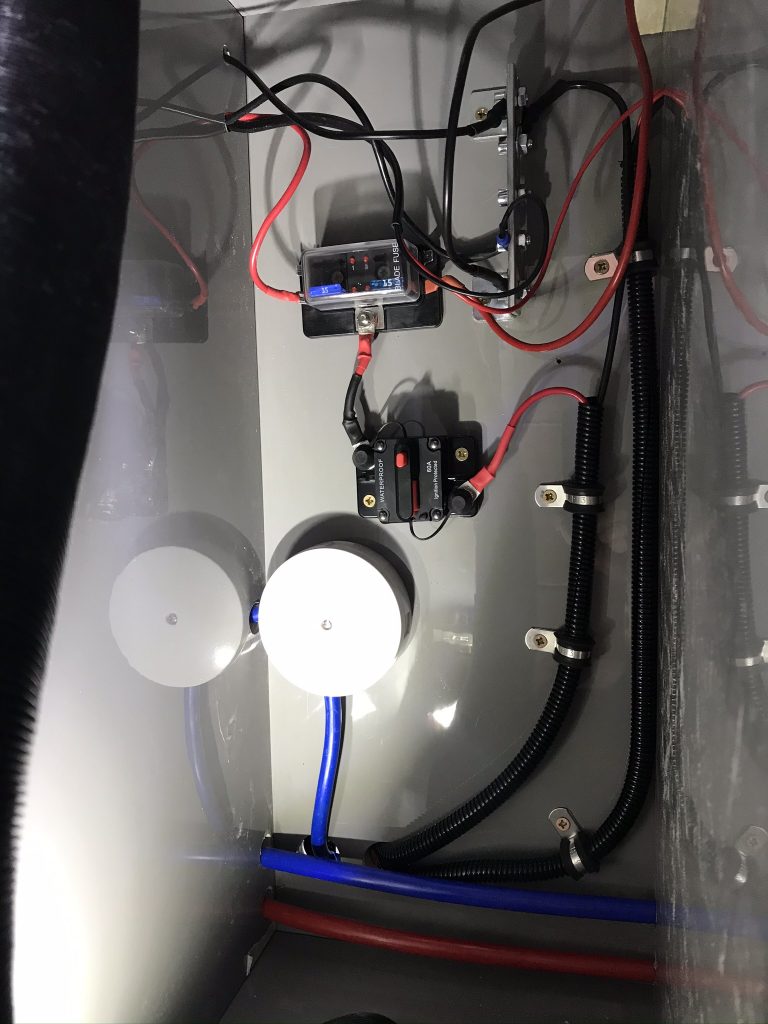
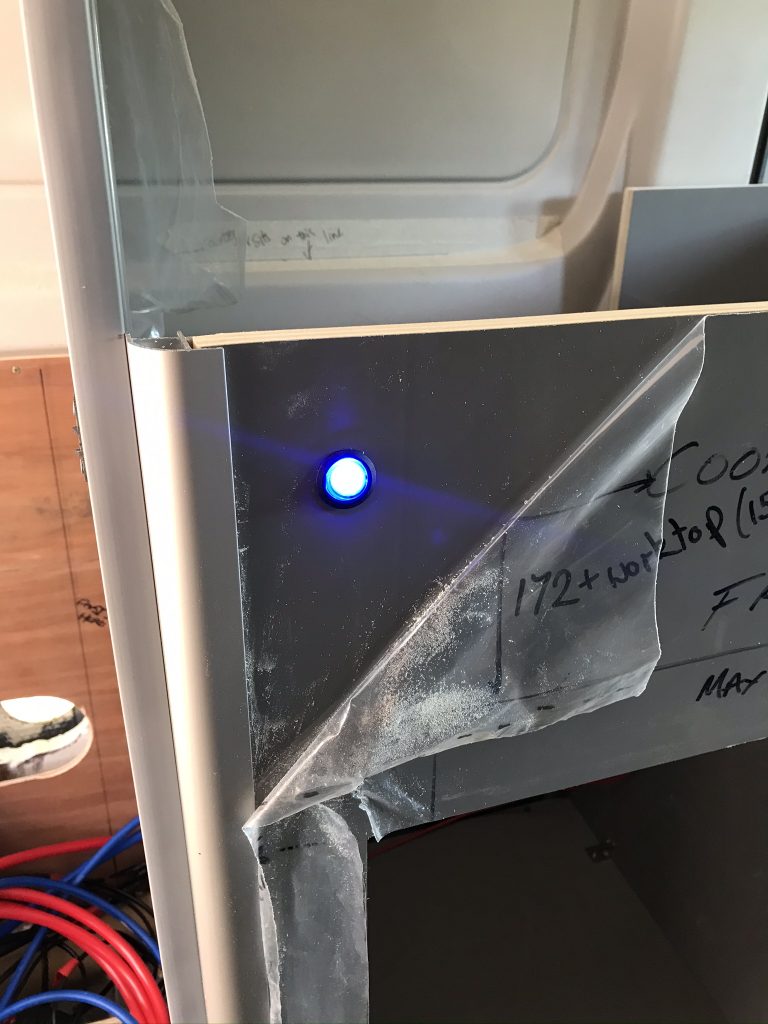
Below: I have given the heater its own small fuse box with breaker. I also added a 25 amp rated on/off switch with blue led inside the vehicle so that I could cut power if I ever needed to.
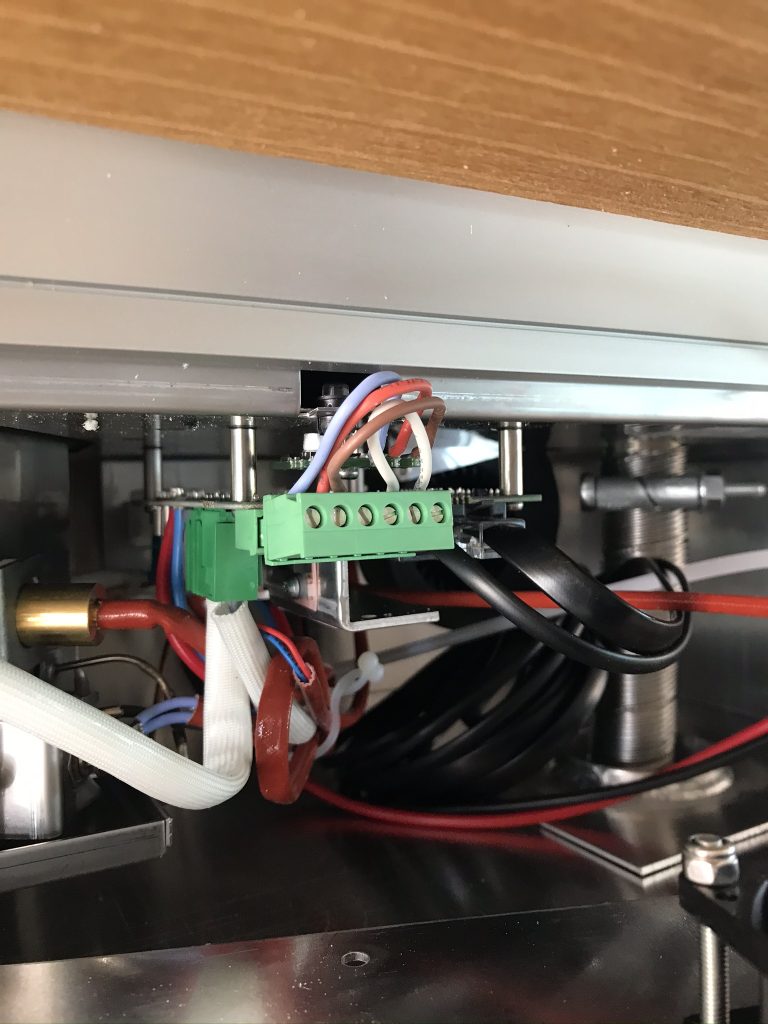
Below: The JP Heater also runs off 240 volts mains electricity supply if required.
Starting The JP Heater for the first time (what to expect)
Dont worry if there is smoke. Often this is normal for a first time installation. Below is a video from a JP Heater that a friend of mine installed. He made this video of it starting for the first time. He was concerned at first about the smoke but after 20 minutes of use it cleared (see other video below).
The JP Heater in use (note how quiet it is and almost no smoke at all). Some of the background noise is actually a passing tractor, note the video at the end its very quiet.
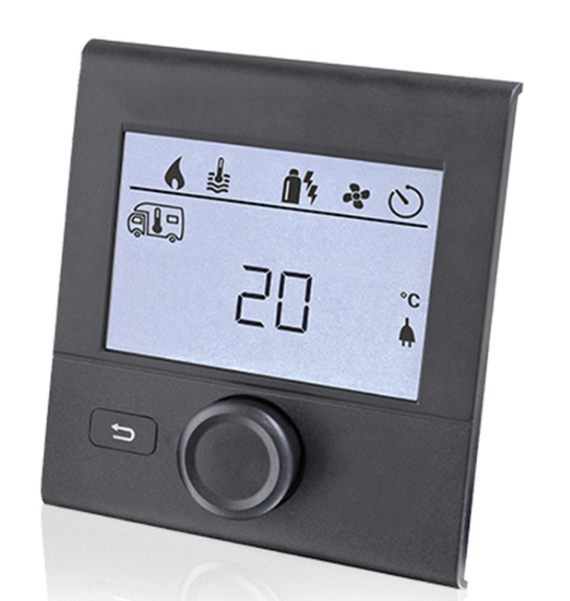
Screen First Time setup.
Its quick easy to setup the heater via the screen for the first time. In fact theres very little you need to do. The screen has a default setting, the fuel source is set to GAS. Even if your JP Heater is Diesel powered you still keep this setting on GAS ( do not use Mix1 or Mix2). Firstly check your heater is set to Gas (Fuel Source) then select the Vehicle icon (temperature) and turn this so its higher than the current temperature inside your van. Note how quiet the heater is inside the van as shown in the video, also note that its very difficult to hear the pump clicking (because its not screwed down on to a hard surface). I have placed the temperature sensor about mid height in the van away from any heater outlets, this seems to work fine. The ECO Fan setting (shown in the video below) is the heat output via the fan, theres also Low, High and Boost (basically the fan increases to blow more hot air).
Did you know? When you select the “Heater Mode” you also get hot water. When you select the Hot Water Mode you get hot water of course but no heater. This is so that in summer you can have plenty of Hot Water without having to turn the heater on.
Power Consumed at Startup
Below shows that around 6 to 12 amps are used at the startup phase, a lot is probably consumed by the glow plug. This then decreases significantly after the startup phase or after about 3 or 4 minutes. (see video below)
After Startup (low power consumption)
Below the video shows the power consumed after the startup phase. This is relatively low, in fact the video was filmed in spring and the weather was quite sunny . As you can see the solar energy was being used to run the heater. (The background noise is traffic not the heater)
How easy is it to get spare parts?
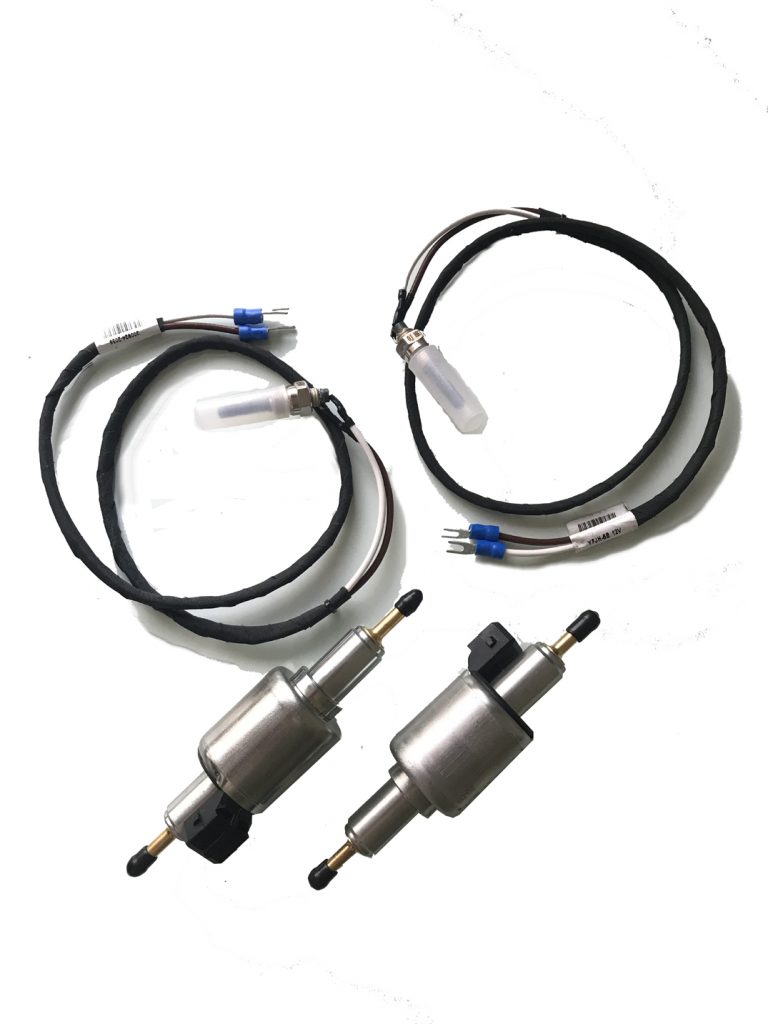
It seems very easy, I was told that spare parts are readily available from JP. I decided to test this. Probably the most common items to fail are the Glow Plug (too much soot) and maybe the Diesel Pump (although pumps can also last a very long time). I ordered a couple of spare Glow Plugs and Pumps (one set for a friend of mine) and it took just over a week to arrive here from China using FedEx. (Parts shipped Wednesday 10th March 2021 – Arrived Monday 15th March)
Spare Parts Costs: Pump $27.50, Glow Plug with Lead and Plus $29.50, Shipping by Fed Ex $55.00 (prices quoted March 2021).
Note: The Diesel Pump above is very quiet. My pump is fitted inside the vehicle and is under the bed, the clicking sound is so faint that it can hardly be heard. If you have a Diesel Heater with a noisy pump then I would recommend upgrading it to the JP Pump its worth the $27.50.
JP 6KW Diesel Combi Air & Water Heater
Contact: selina@jpchinatrade.com (usually replies within 24 hours)
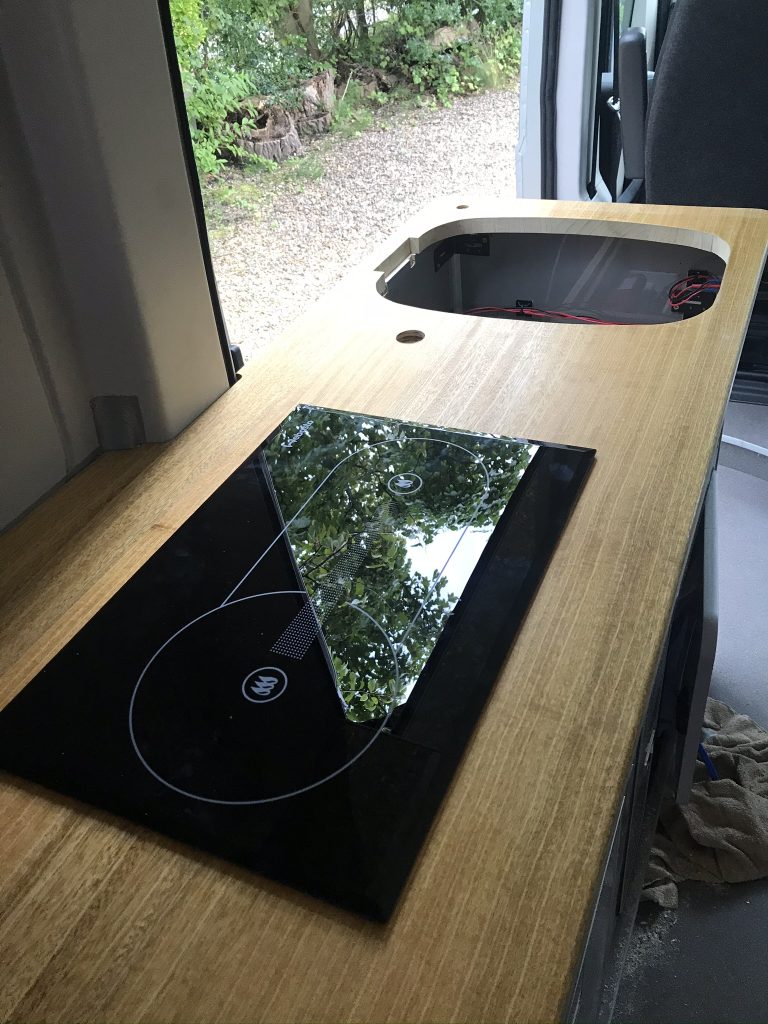
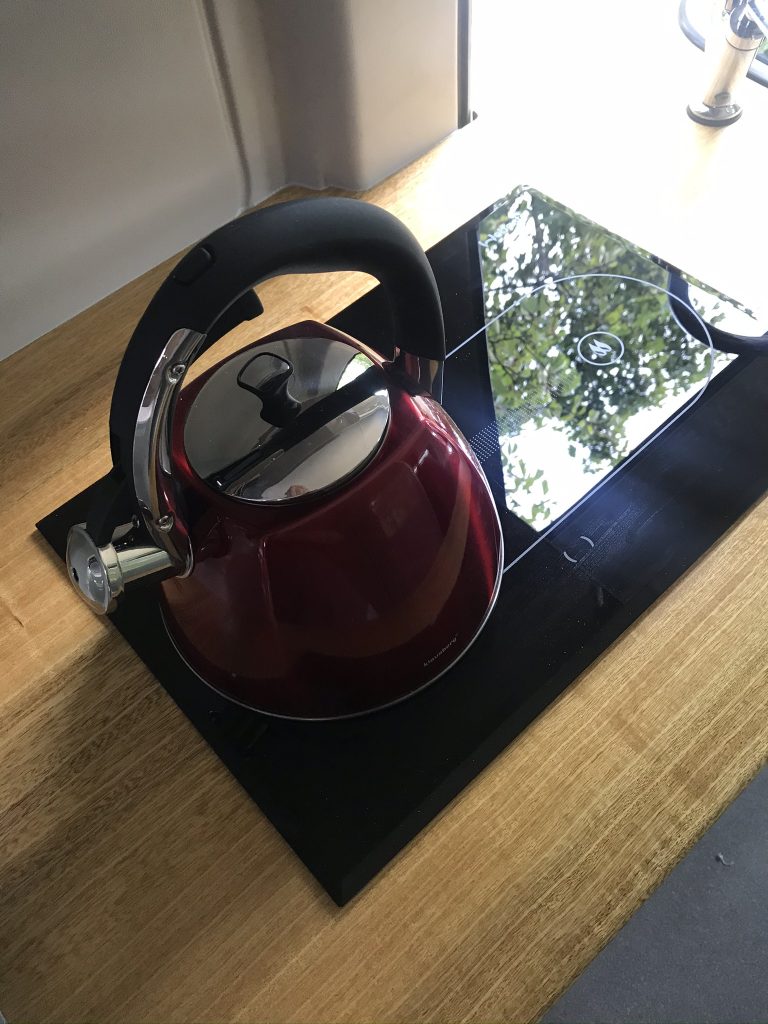
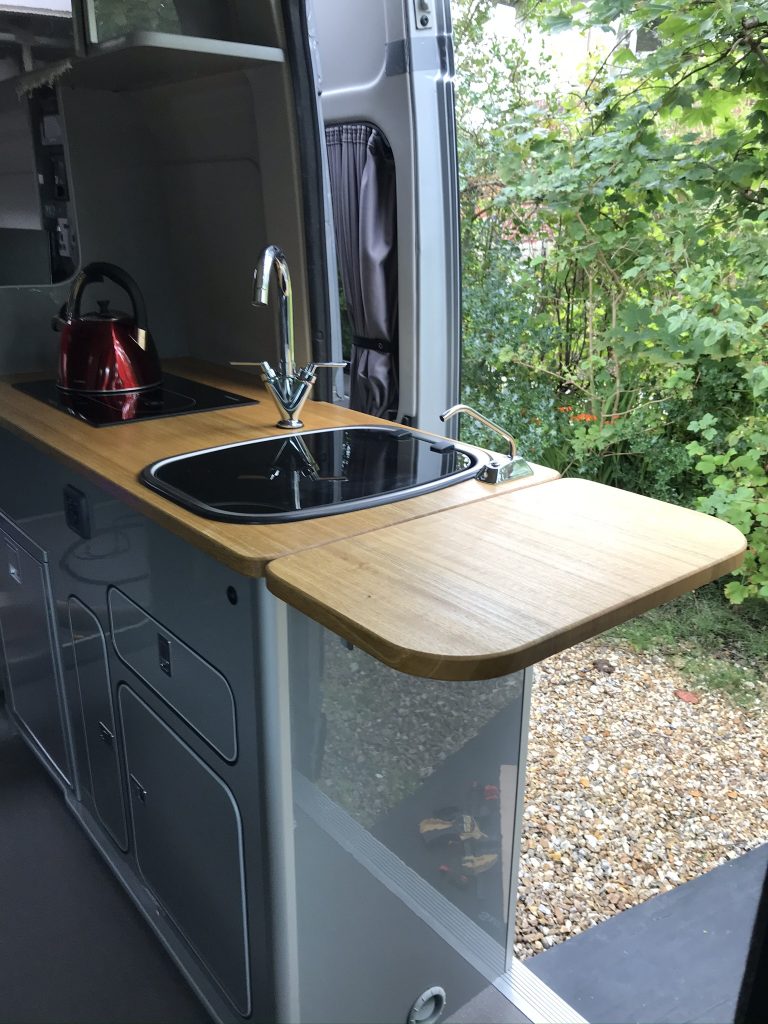
The Webasto Diesel Cooker is a beautiful and neat piece of equipment to have inside a camper van. Its compact and efficient but perhaps not as fast as gas. It takes around 12 minutes for it to get really hot, so to make a pot of tea takes about the same time. However, its very quiet, super easy to keep clean and as a bonus, it can also be used to warm the vehicle (not that we need it to).
The glass surface has a main heating section and a second section that keeps food warm. Its very easy to use, a simple press of a button and a temperature dial, thats all there is to do.
Because I have a direct fuel line to the Peugeot Boxer Fuel tank, I never need to worry about fuel. In fact there is no LPG Gas on this vehicle. Everything is either diesel or electric powered.
After fitting for the first time it took a few minutes for the fuel to make its way through the pipes and for the cooker to start. However, it pretty much started the first time and I was surprise just how quiet it was. Its a superb piece of equipment. It isn’t cheap at around £1000 but I feel its worth it.
Details on how the fuel pipe and exhaust pipe were fitted can be found in “Building the Kitchen Part 2“
Mellor Online, 139 Manor Road, Ossett, West Yorkshire, WF5 0LQ
Below: I have used a higher rated light switch (rated 25 amp) for the compressor refrigerator. The light reminds me its switched on
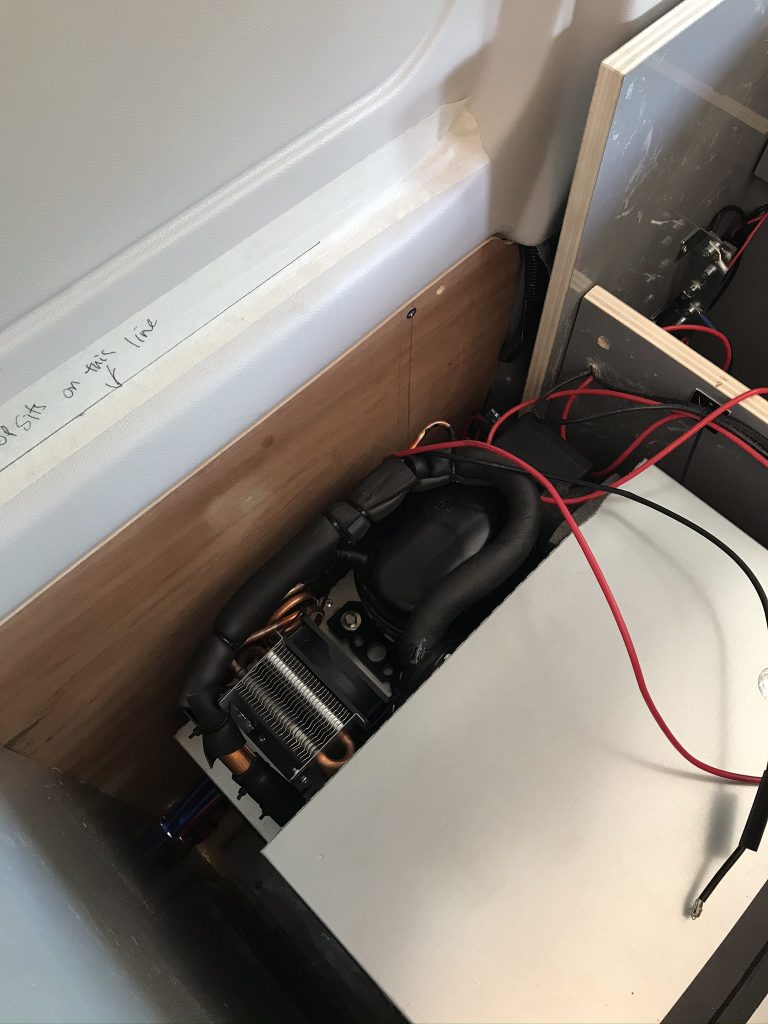
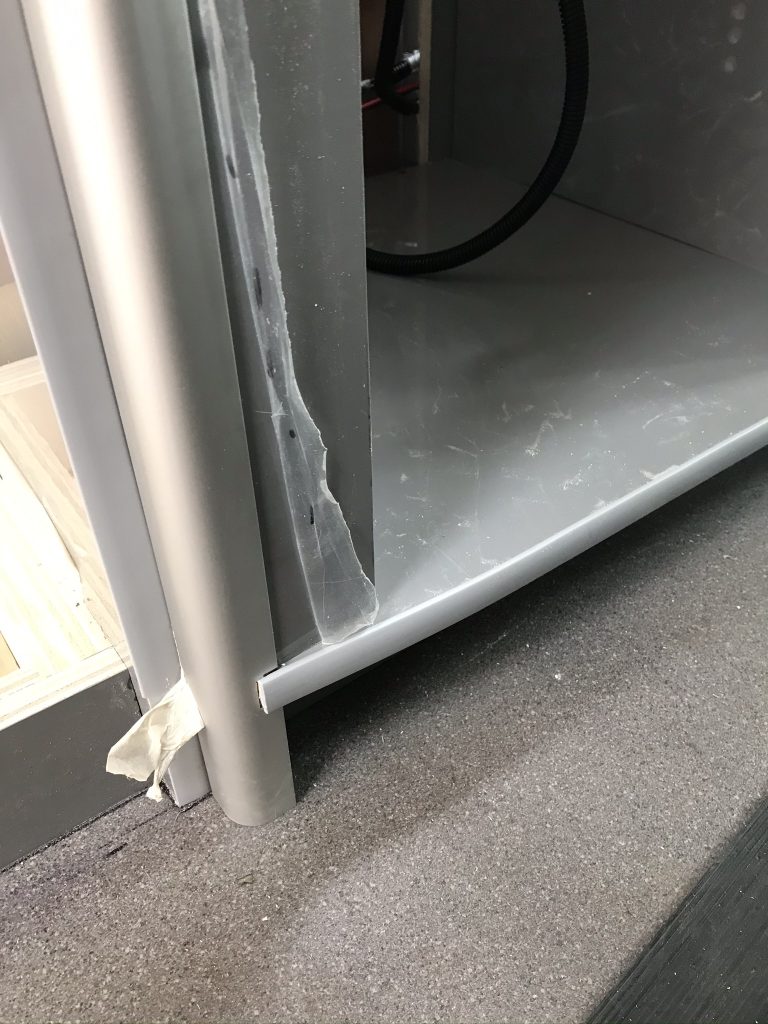
Below: Space is tight but there is little I can do. I have left a gap running down the side to the door for airflow.
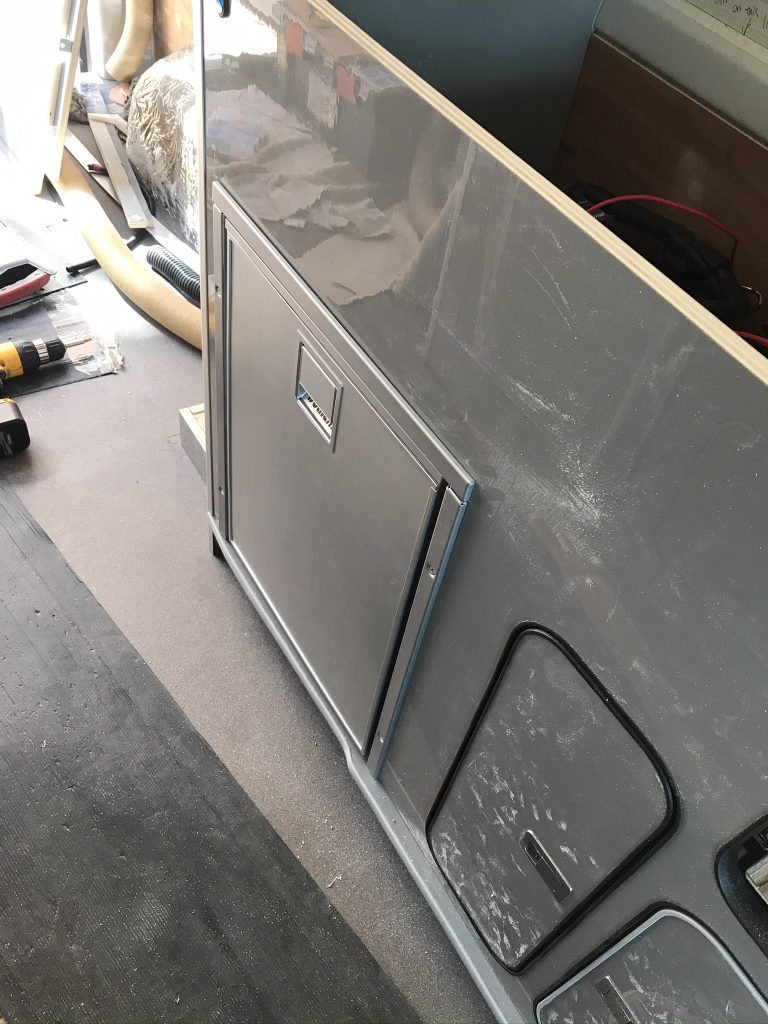
Below: The websato compressor fridge is fitted so that the door opens to the back of the van for ease of use (it can be reversed).
Below: The kitchen drawer is fitted and works well. It has a nice EVO Design catch on it so it wont ever slide open.
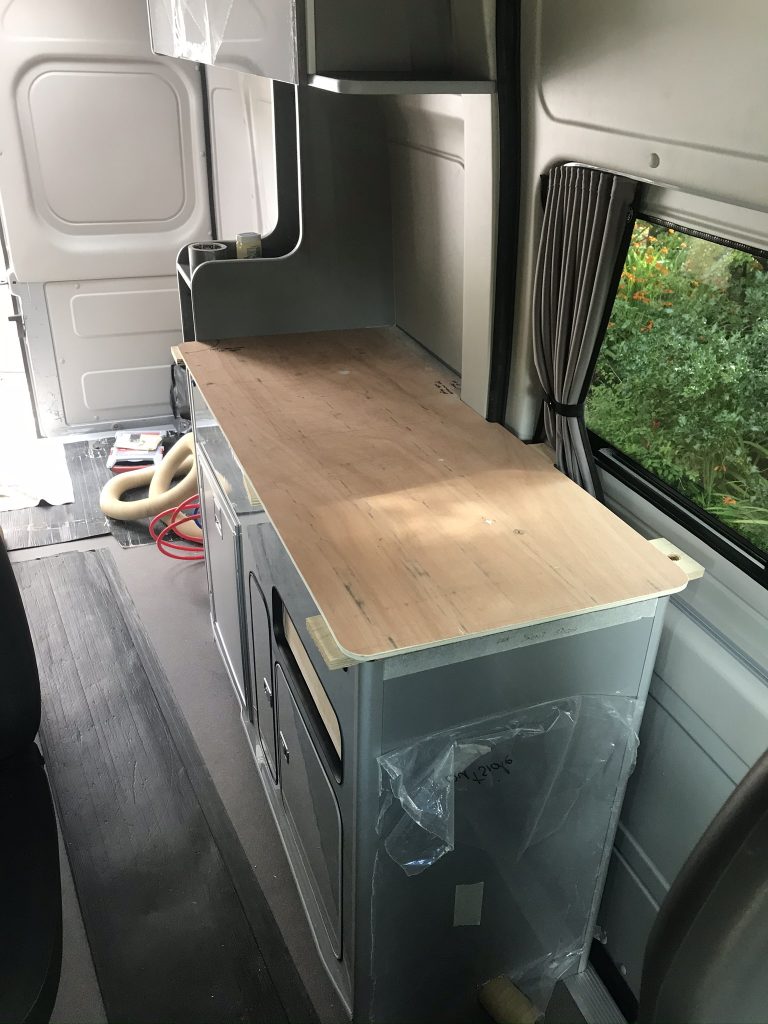
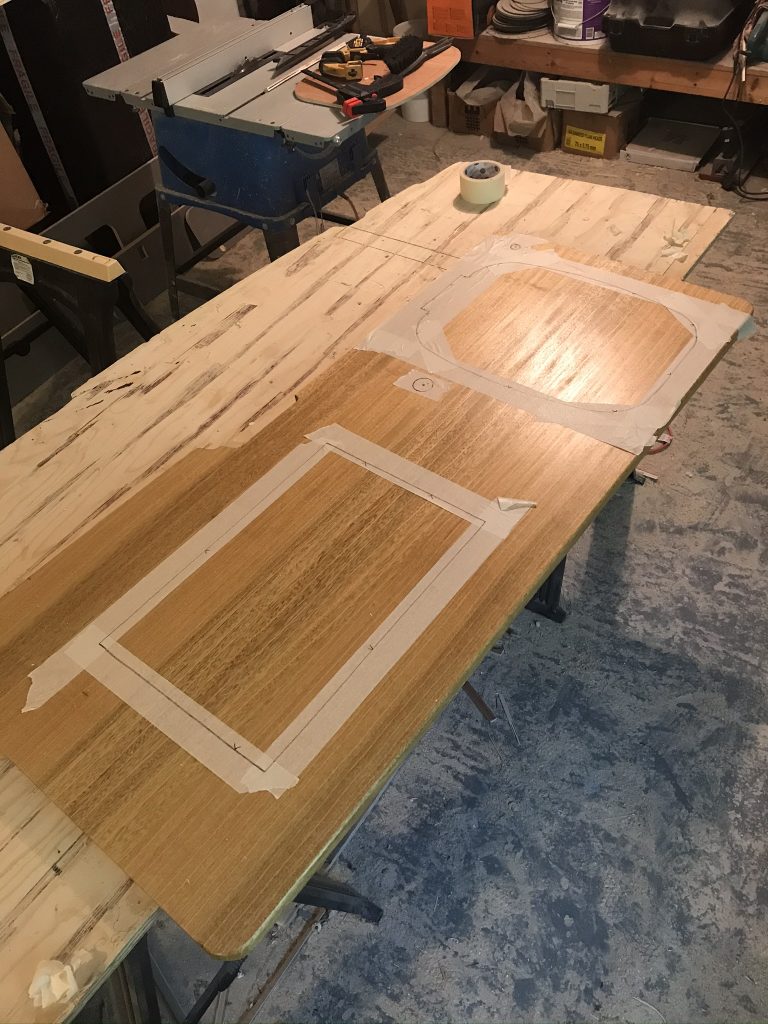
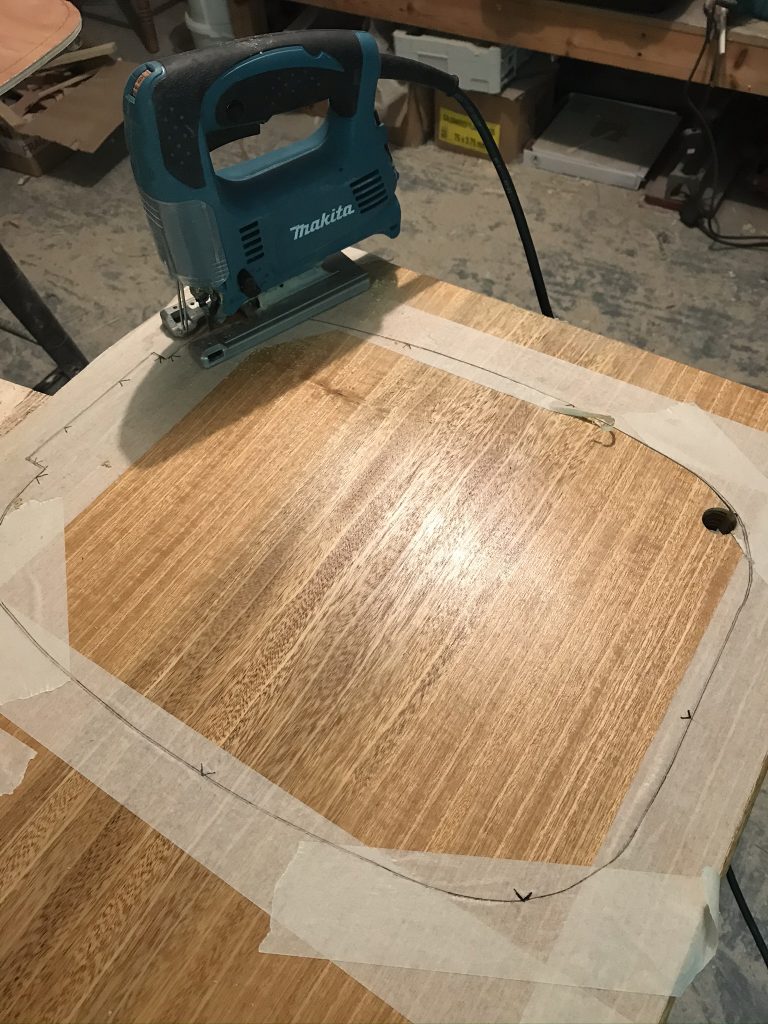
Below: The template for the work top.
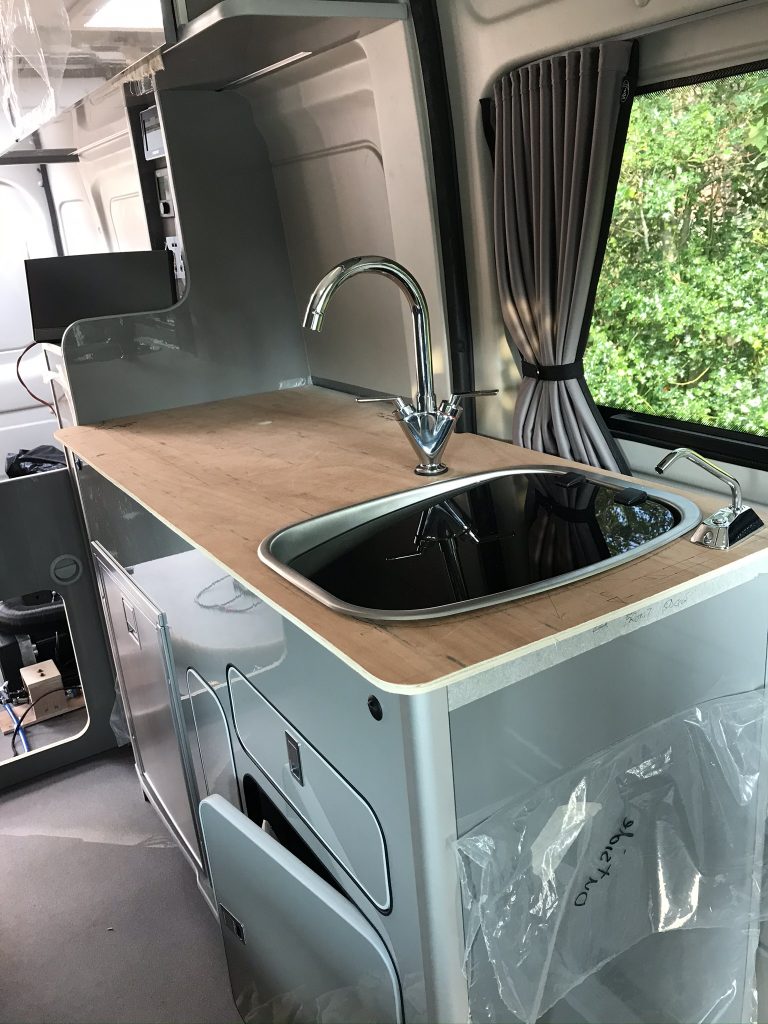
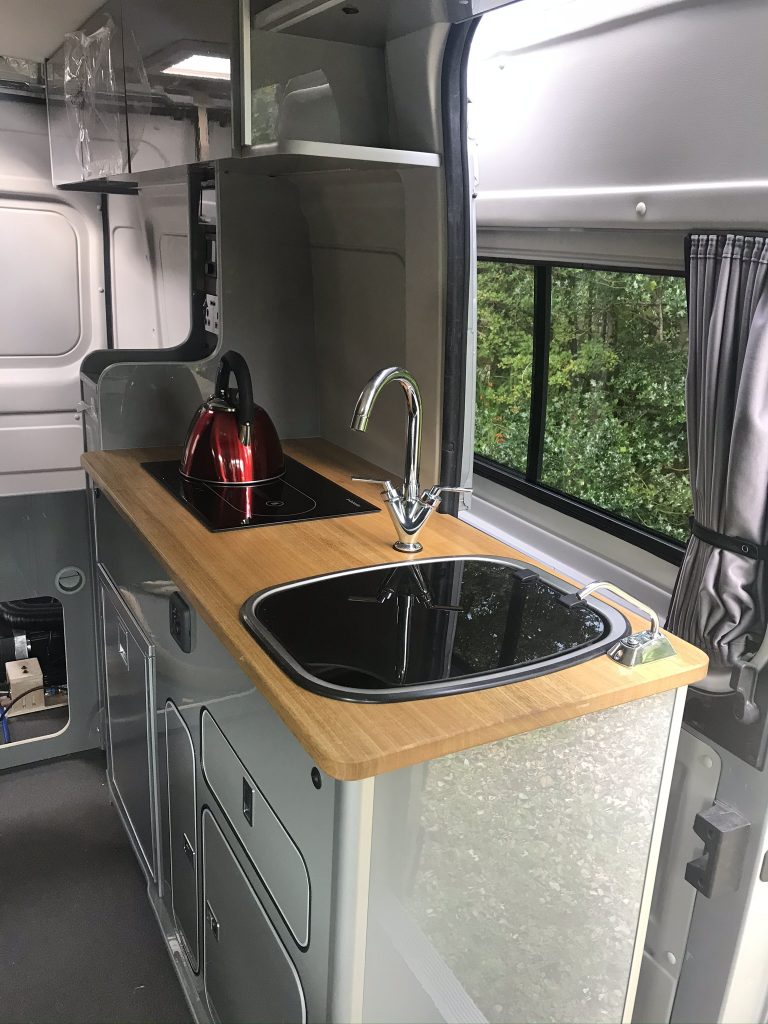
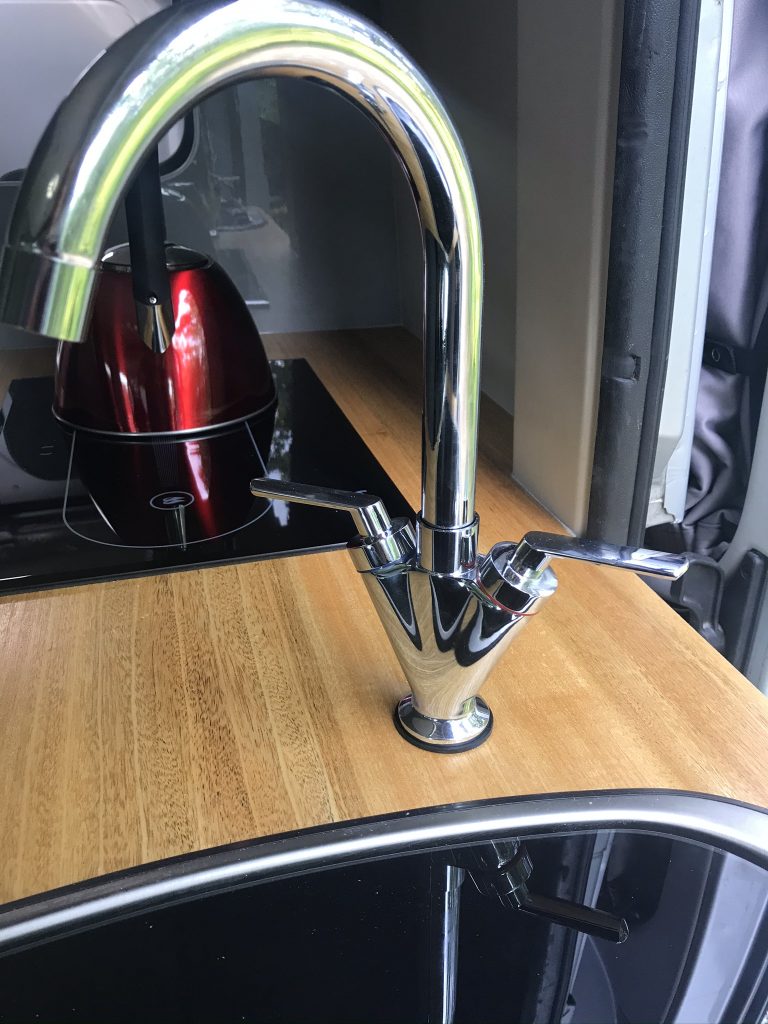
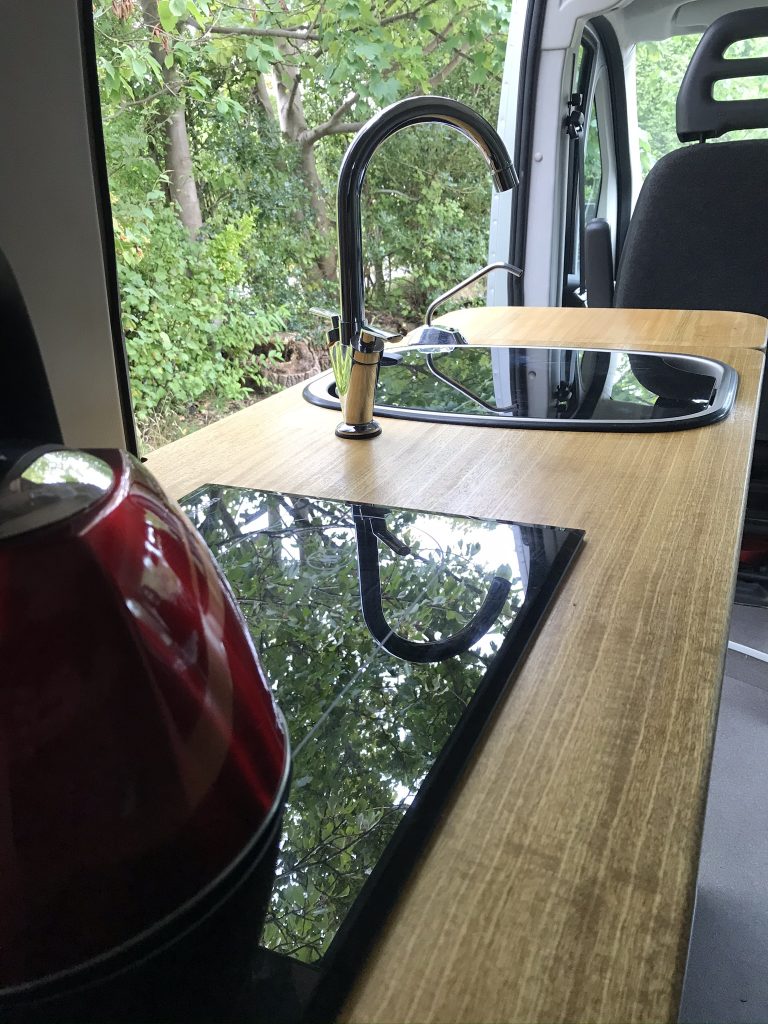
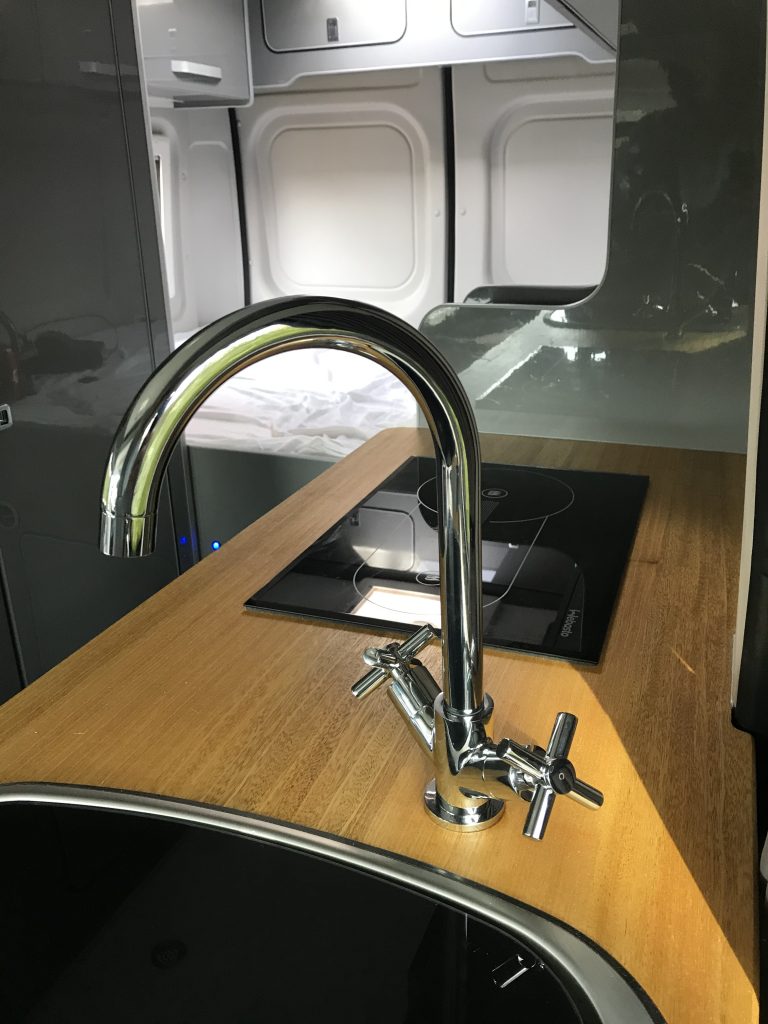
WARNING A TICKING TIME BOMB: At the time of fitting the Tap in the image below I didn’t know that this Tap would nearly cause very costly damage to my van. Its was advertised as Solid Brass. In fact it was very poor quality die-cast zinc. To see what happened when the temperature dropped to freezing see the column on the left (or below on a Tablet or Smart Phone) and look for “Worst Items To Avoid” at the bottom of the column. Its dangerous, dont make the same mistake as I did.
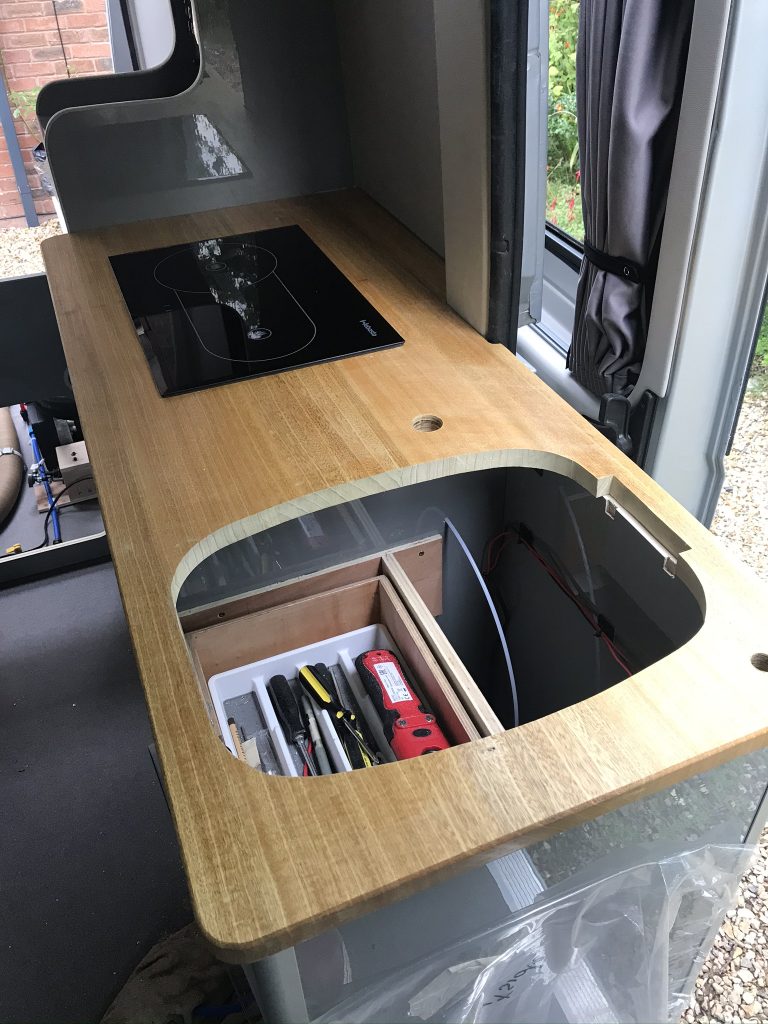
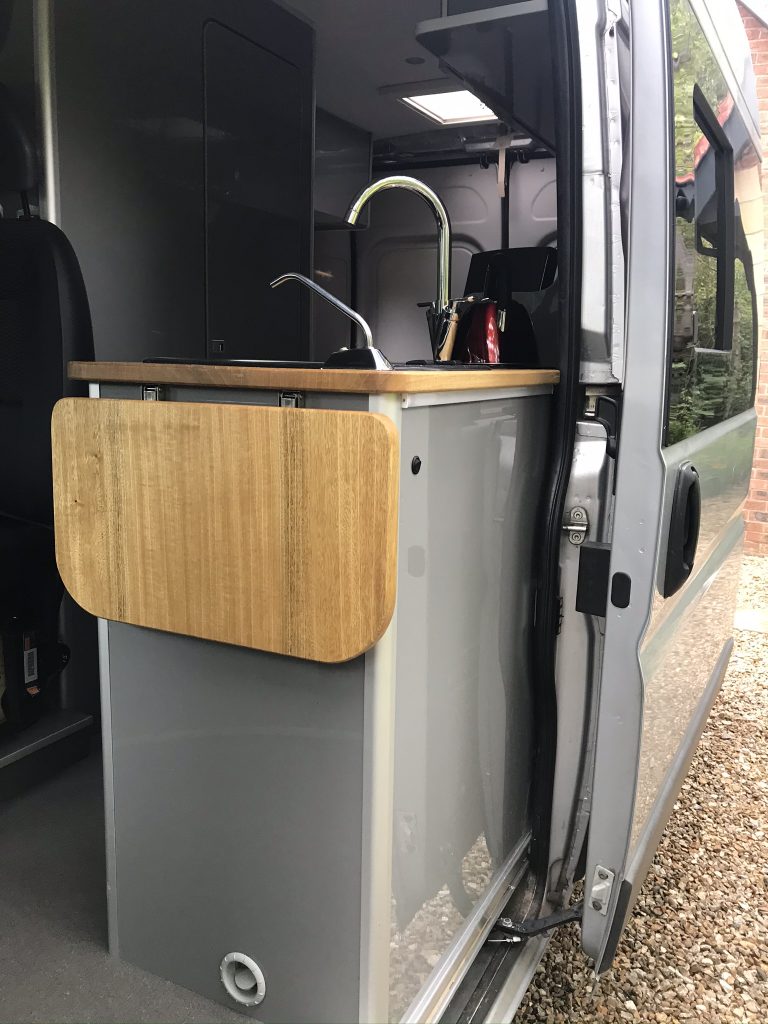
Below: Now to fit the solid wood top which has been made out of two sections of timber joined and bonded together in a workshop nearby, this was beyond my capabilities and well worth getting a local company to do it. They made an excellent job, really first class.
KLAUSBERG 7258 Whistling Kettle 3 L Stainless Steel Red induction / STOVE TOP
Update: The Tap shown above was removed and destroyed. It should never have been sold. See the column on the left (or below on a Tablet or Smart Phone) and look for “Worst Items To Avoid” at the bottom of the column.
Three in one. Its time to add the Kitchen, with Compressor Refrigerator, Sink and the Webasto Diesel Cooker. The Webasto Cooker build and assembly is shown in a separate category.
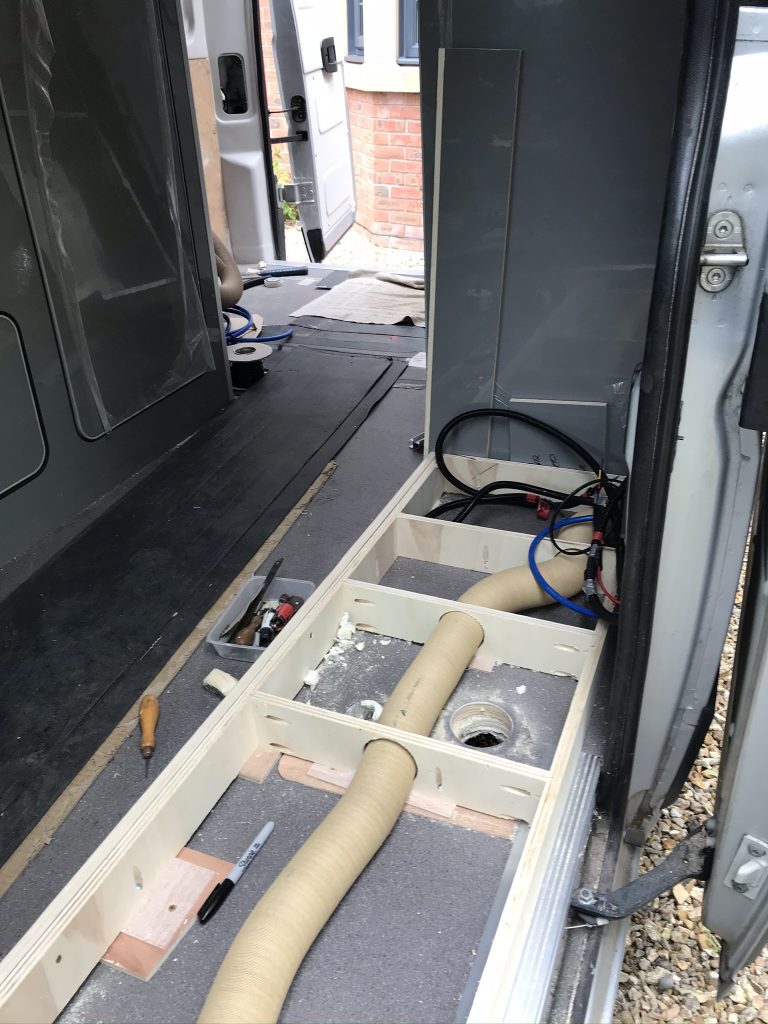
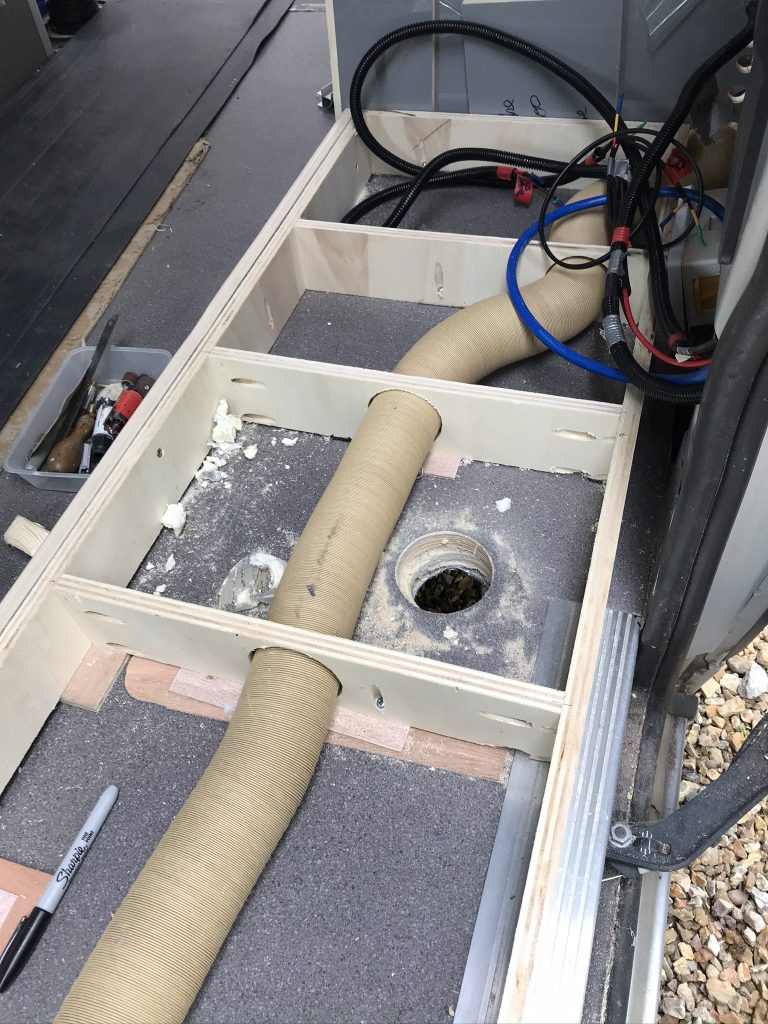
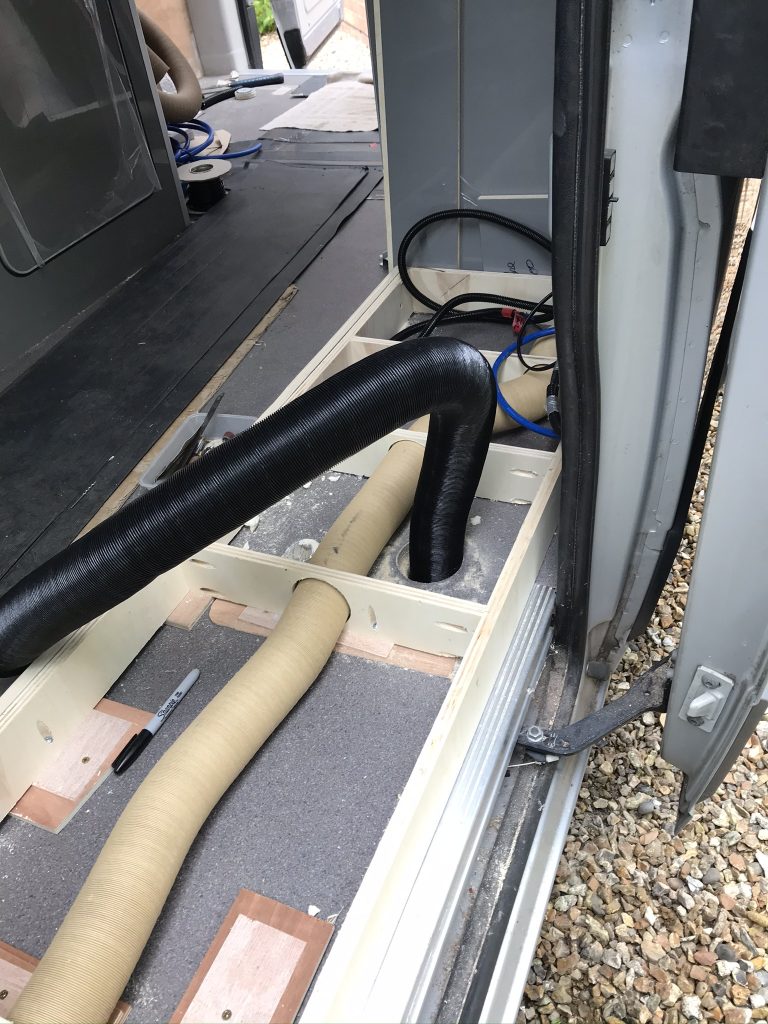
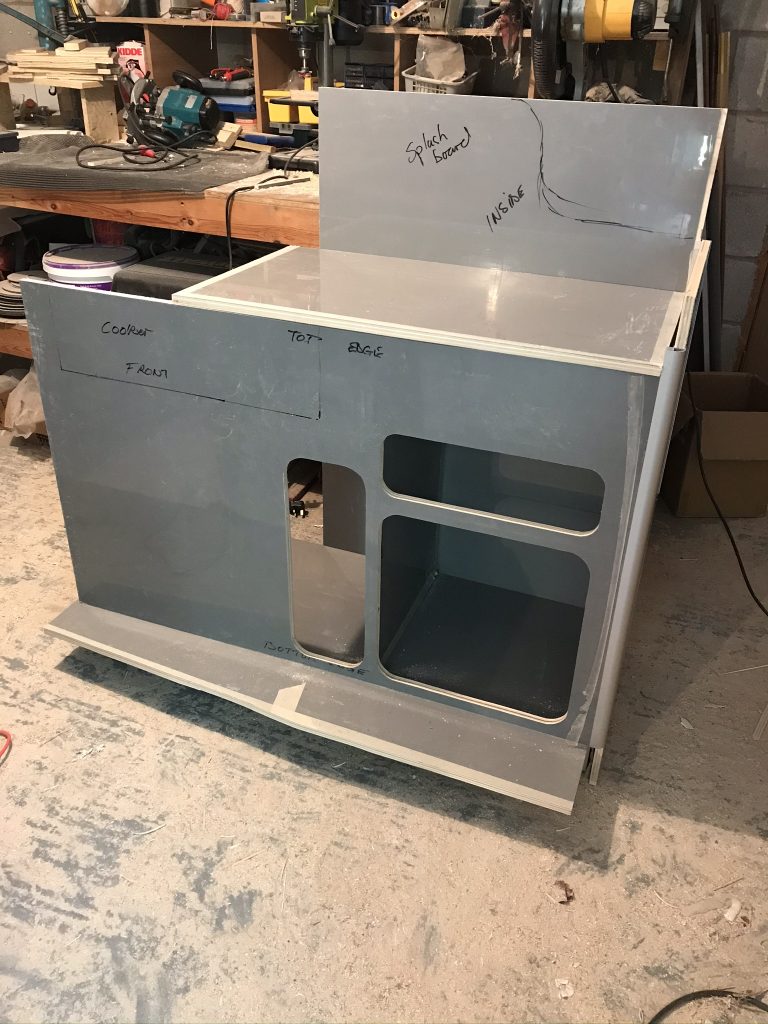
Below: I have started by building the base and making sure its level. Before I can add the kitchen unit I need to make sure I have fitted the heating ducts, cables and fuel line for the diesel cooker. I also plan to have a foot recess around the base of the kitchen unit, this is common on kitchen units, its so that when you stand against them you dont need to lean forward, your feet go slightly under the unit, it will be shown later below.
Below: I have started to cut some of the panels.
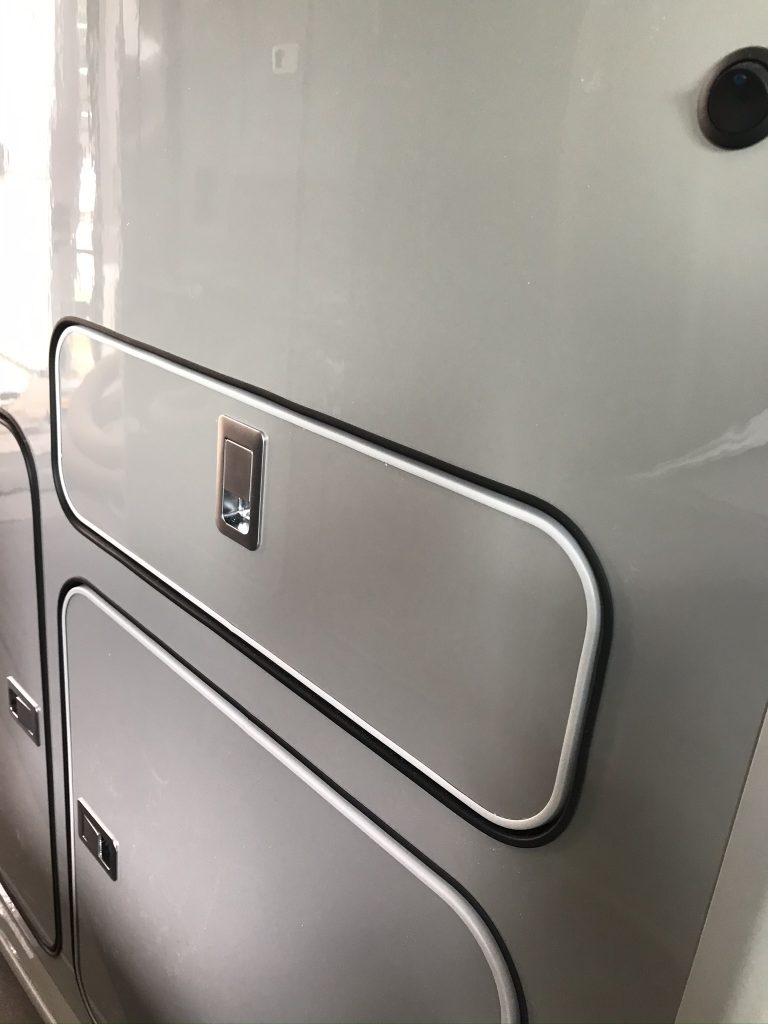
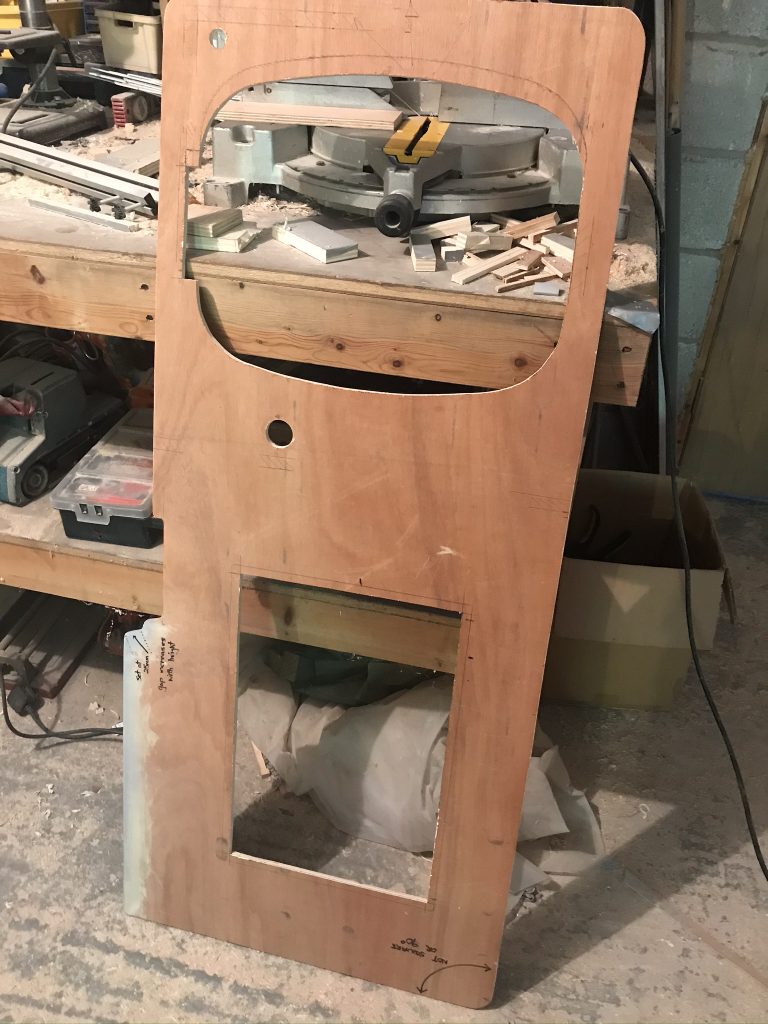
How to get the doors flush mounted. There are two ways (A) make a simple jig and router with a 8mm cutting tool, this will form the hole and also the door at the same time. I didnt want to make all these jigs so below I have marked out the area (B) and I will cut each section carefully whilst trying to save the off-cut as the door. Try to keep the main panel as perfect as possible, if you mess up then make sure its the door because you can always make a door from some scrap wood.
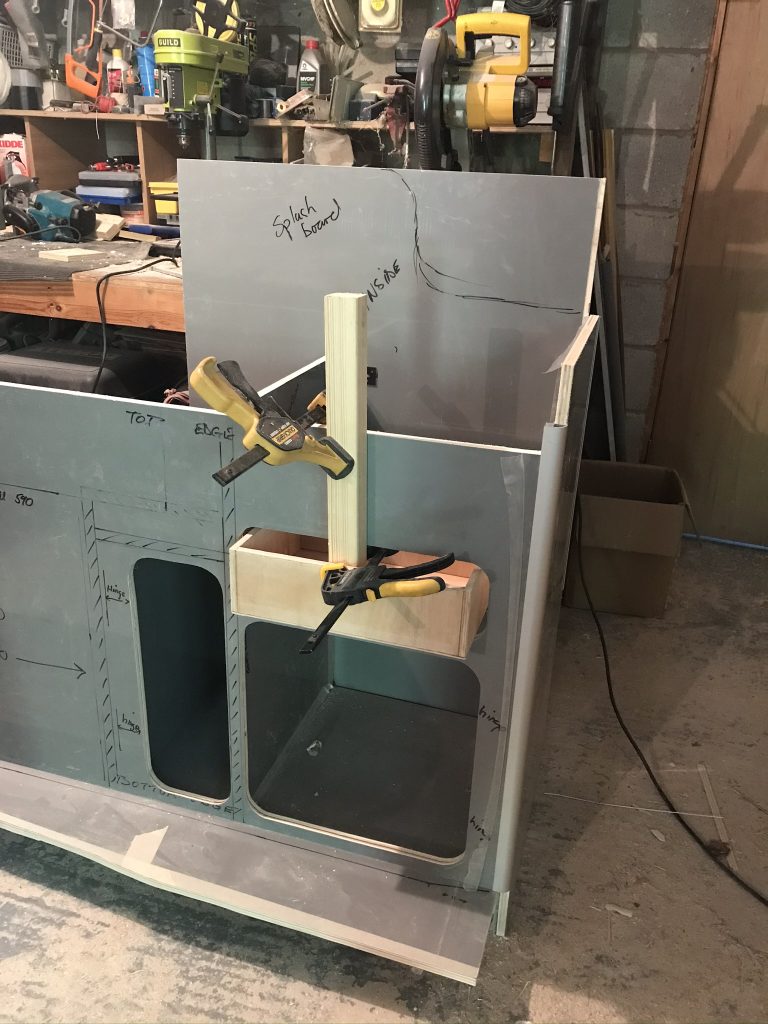
Below: I am building a sliding drawer for knifes, forks and spoons.
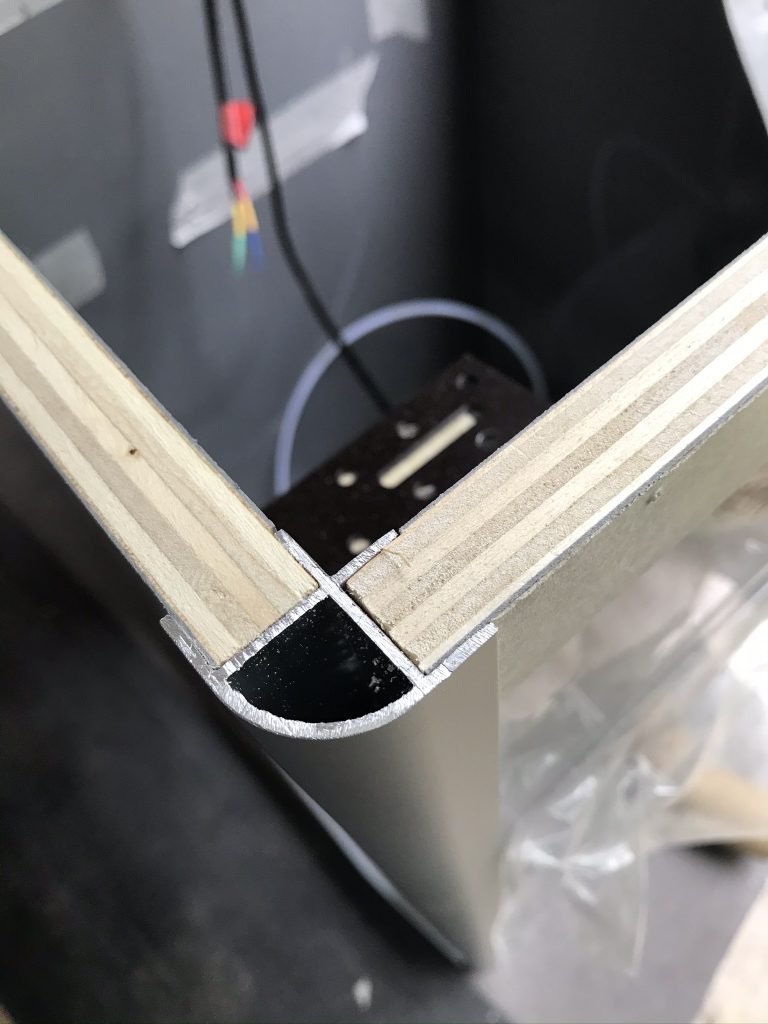
Below:Dont forget 8mm will give you a nice fit. I am about to test it with T Trim on the unit and on the drawer. Throughout this build I have mixed two colours of T Trim, Black for the main panel and grey for the doors.
Below: This is were your draw needs to be dead centre, fit the drawer front last as you can adjust the fit.
Below: The cutout for the compressor fridge is made. I plan to use a 12v compressor fridge without gas and without 240 volts. The fridge frame is being fitted below.
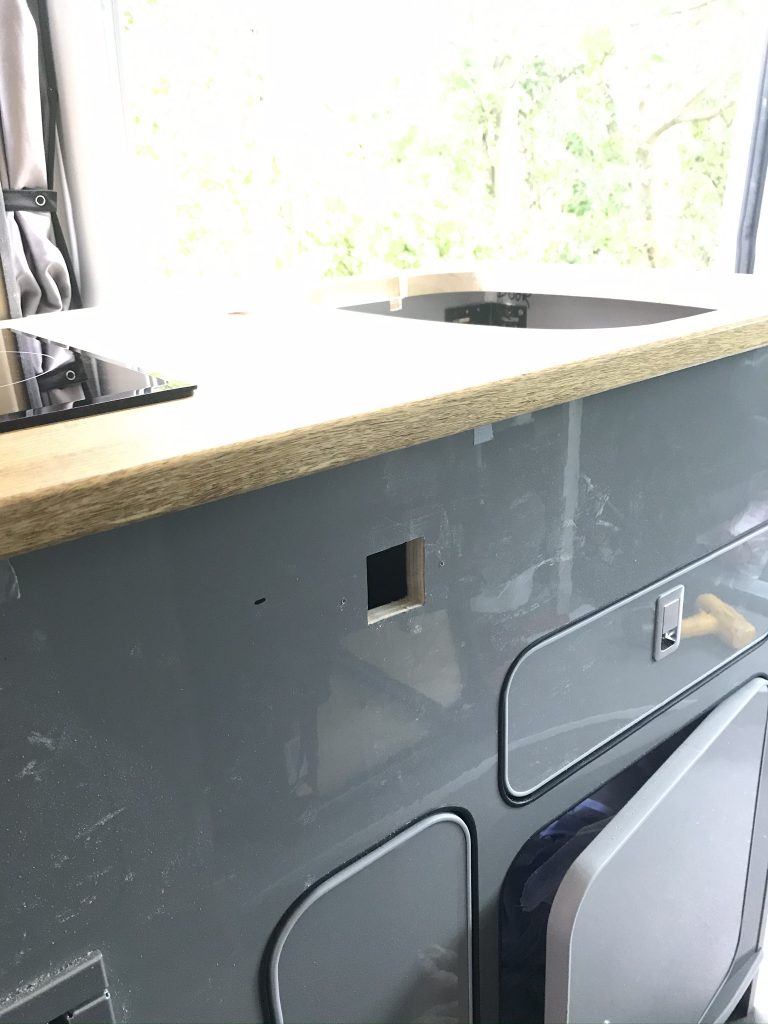
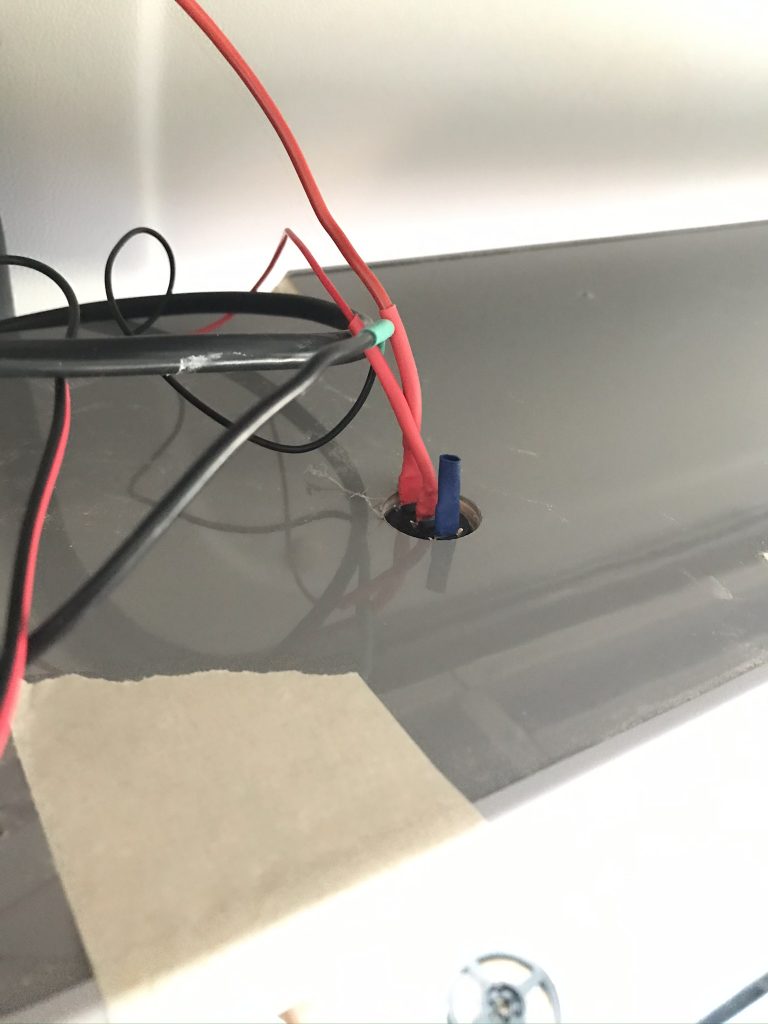
Below: recessed kick board, this is where your feet go when you stand at the kitchen. I will add an under counter light strip later.
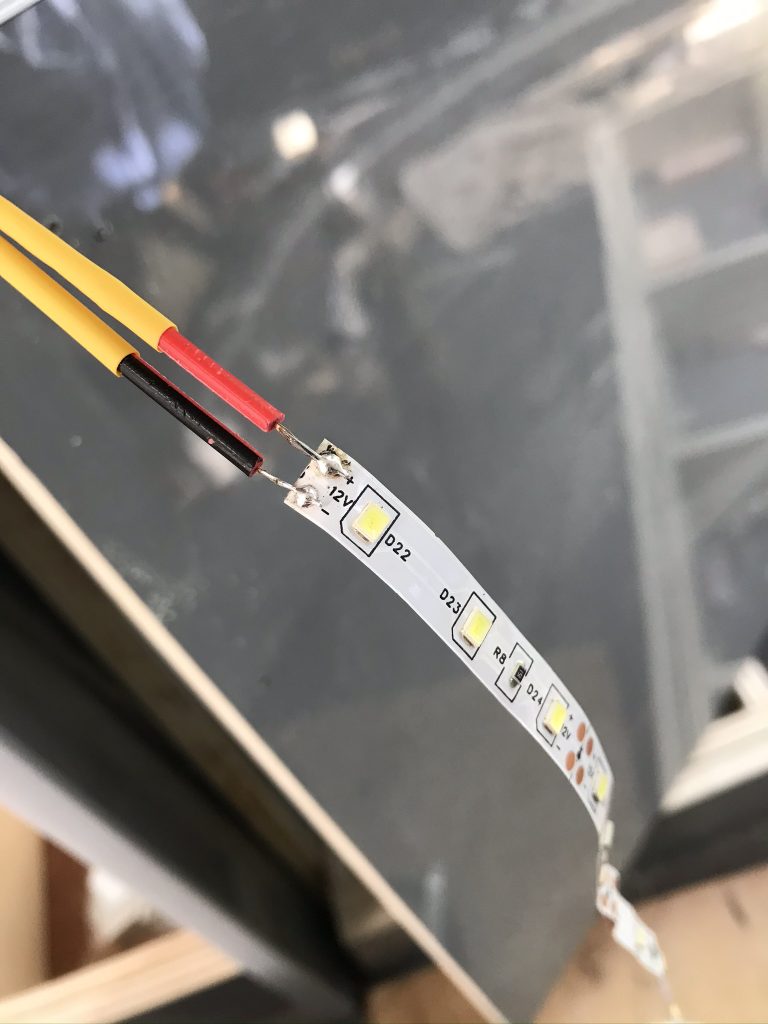
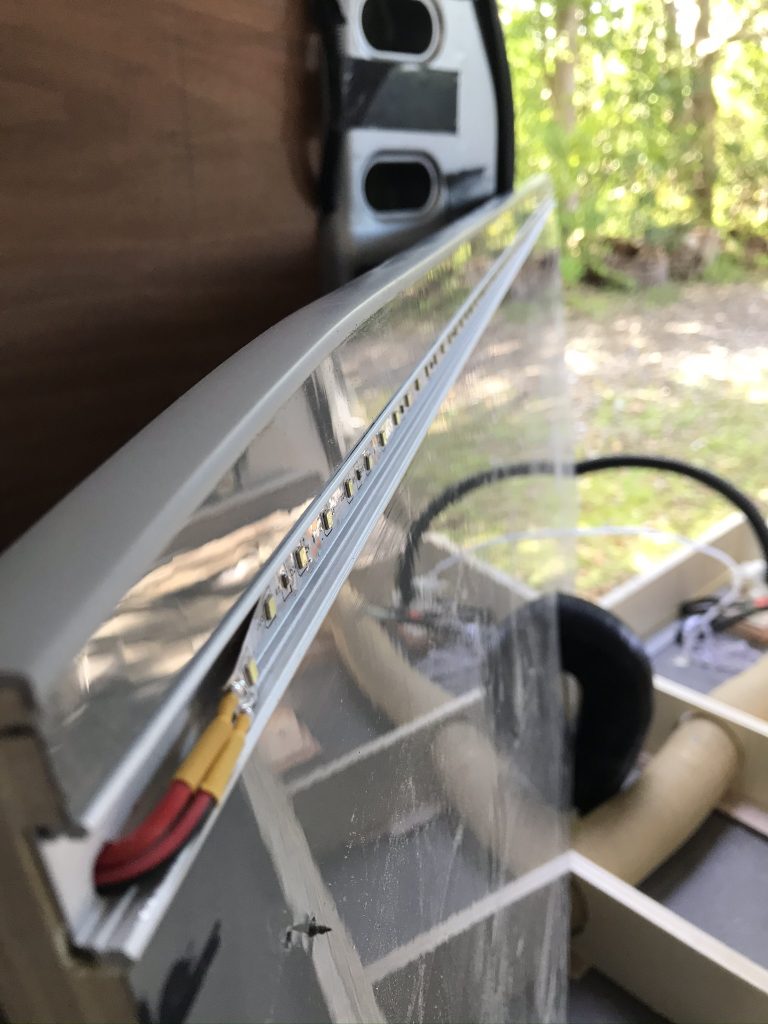
Below: Another light strip this one is situated at the front of the kitchen unit so that it faces outside the vehicle. There is a switch so you can turn this light on at night time when you get in the vehicle.
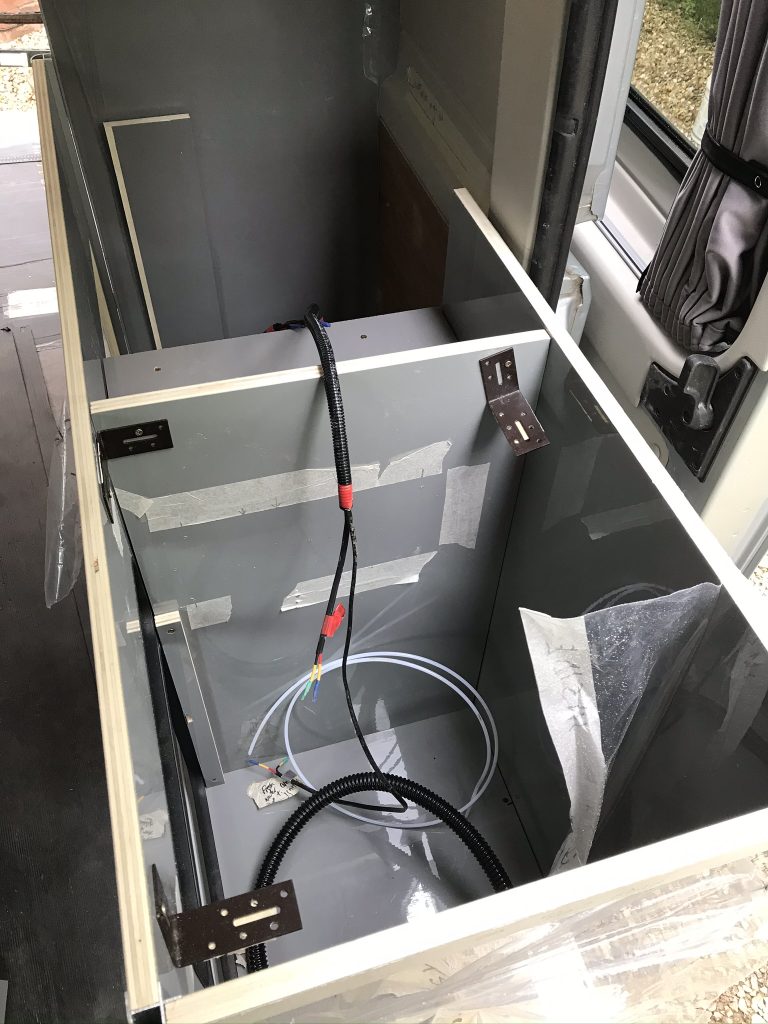
Below: The Diesel Cooker exhaust Pipe is fitted. Cables for the Refridgerator and Cooker are fitted. A separate mini fuse box is fitted. Most wires are not connected at this stage.
Below: Testing the fit of the refrigerator. There needs to be adequate space for airflow, space is tight.
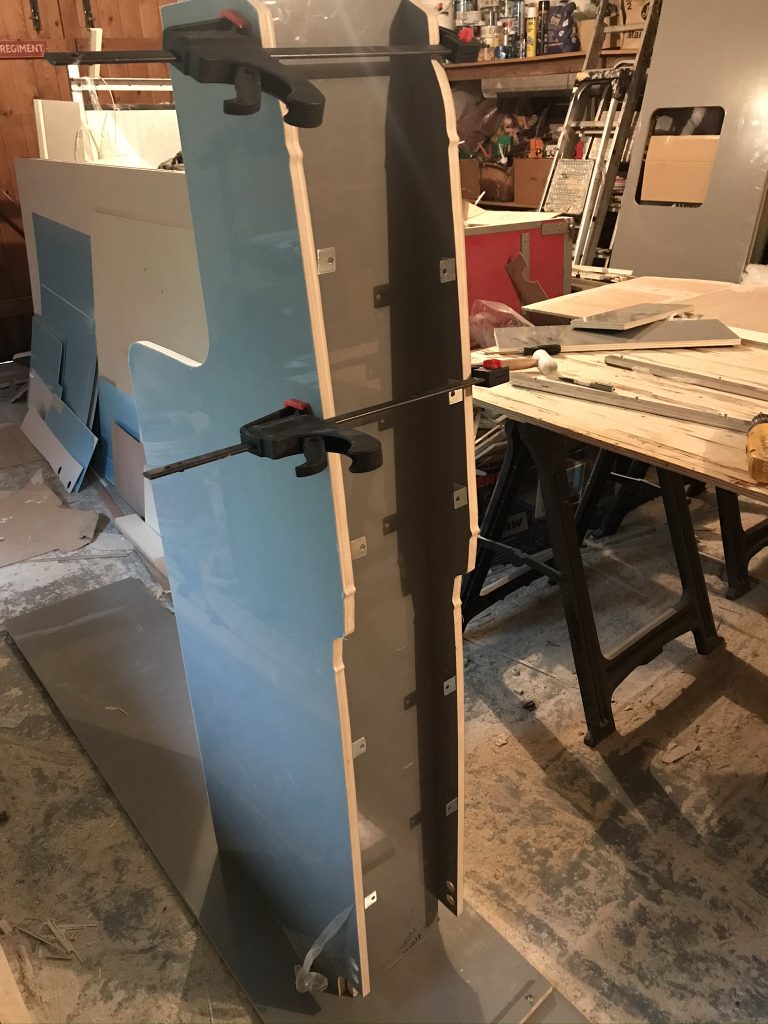
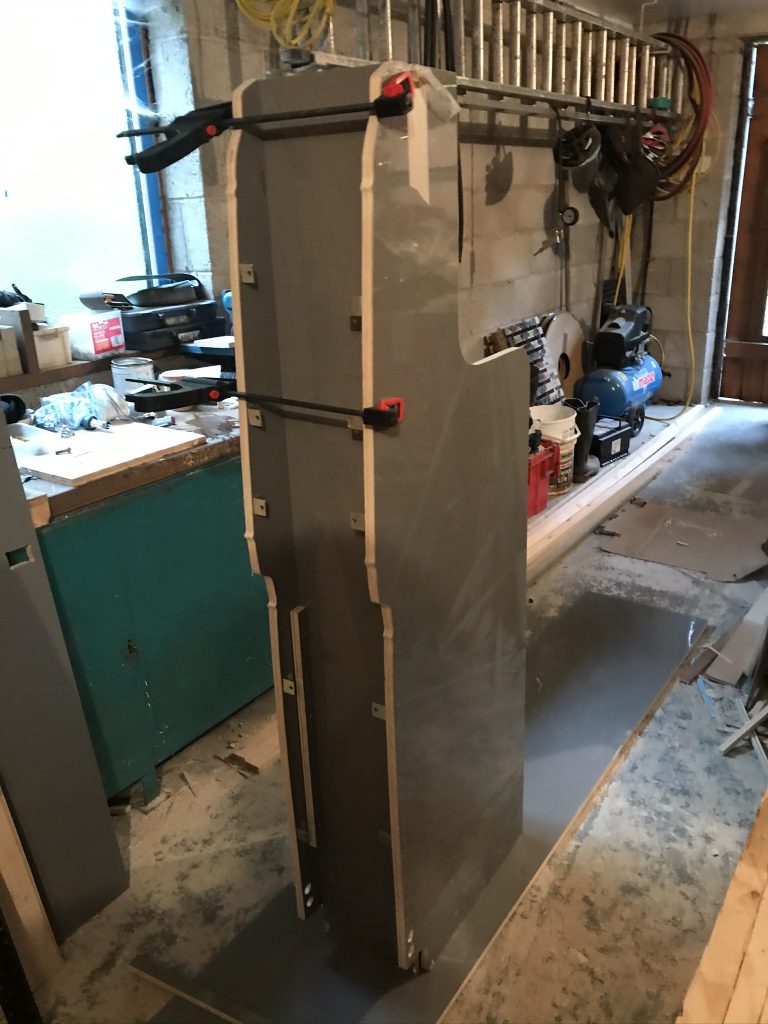
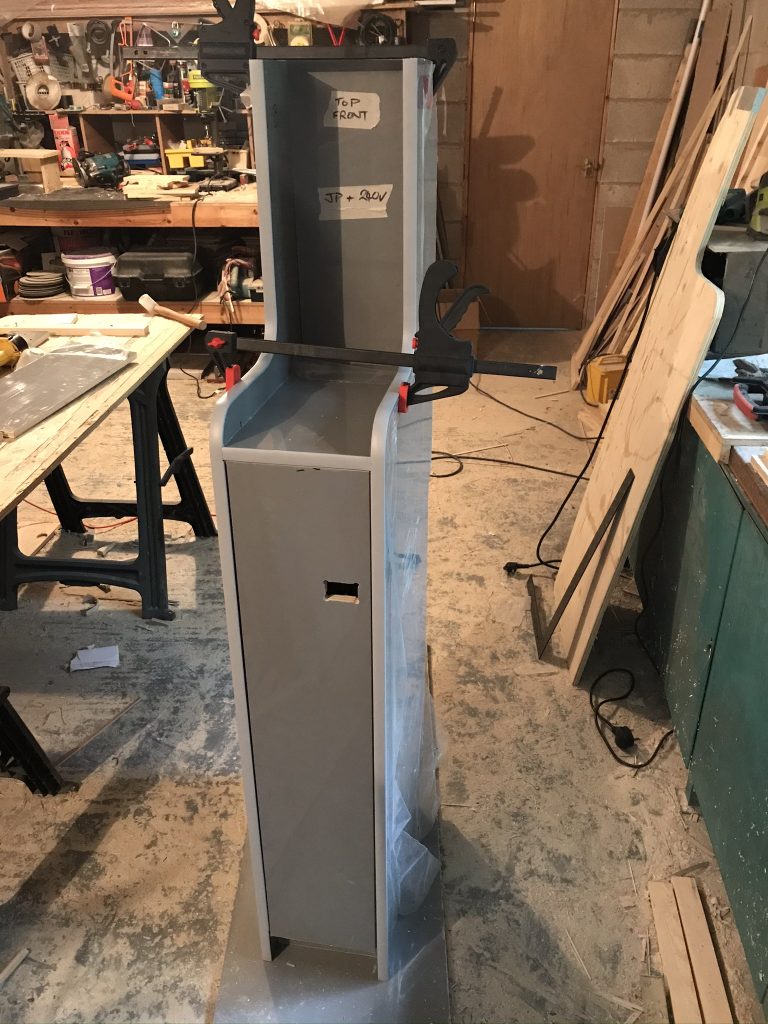
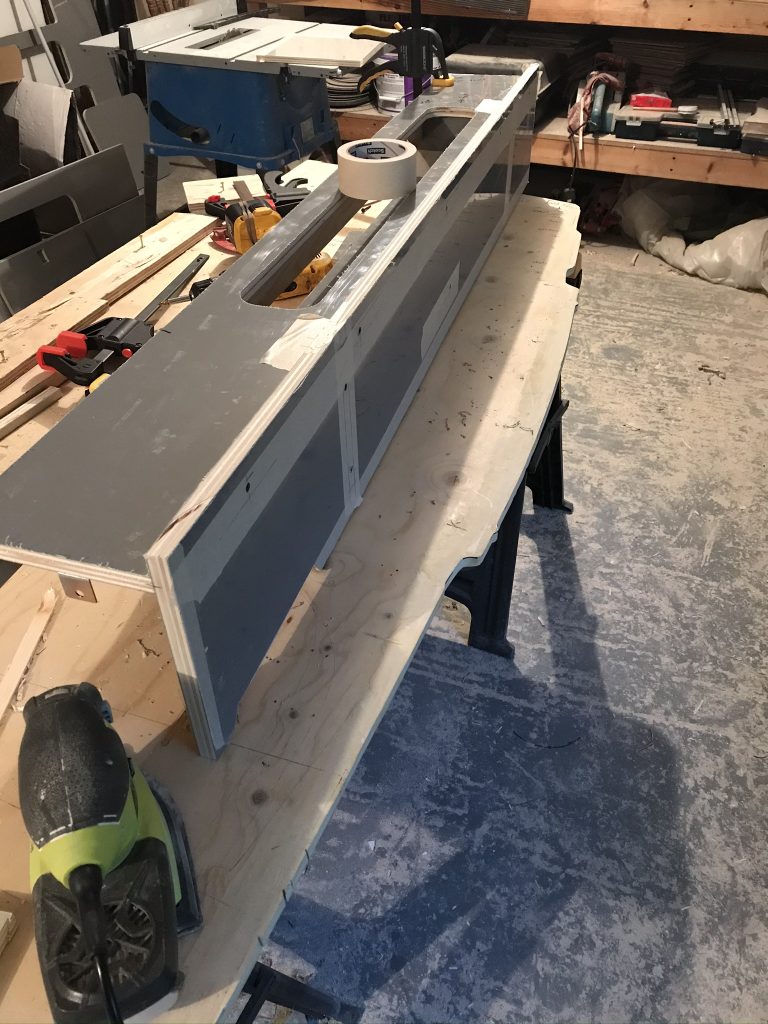
I wanted a small wardrobe to hang a couple of coats and maybe store a few items. I decided not to make the wardrobe tall as it would restrict light around the bed. I have seen such wardrobes before and in a small van, the bed area did look a little isolated especially as the beds are often blocked by the shower room on one side. The plan is to leave the area open a little, not block the bed in so that if anyone was to lie on the bed they would be able to watch a TV, say from the dining area.
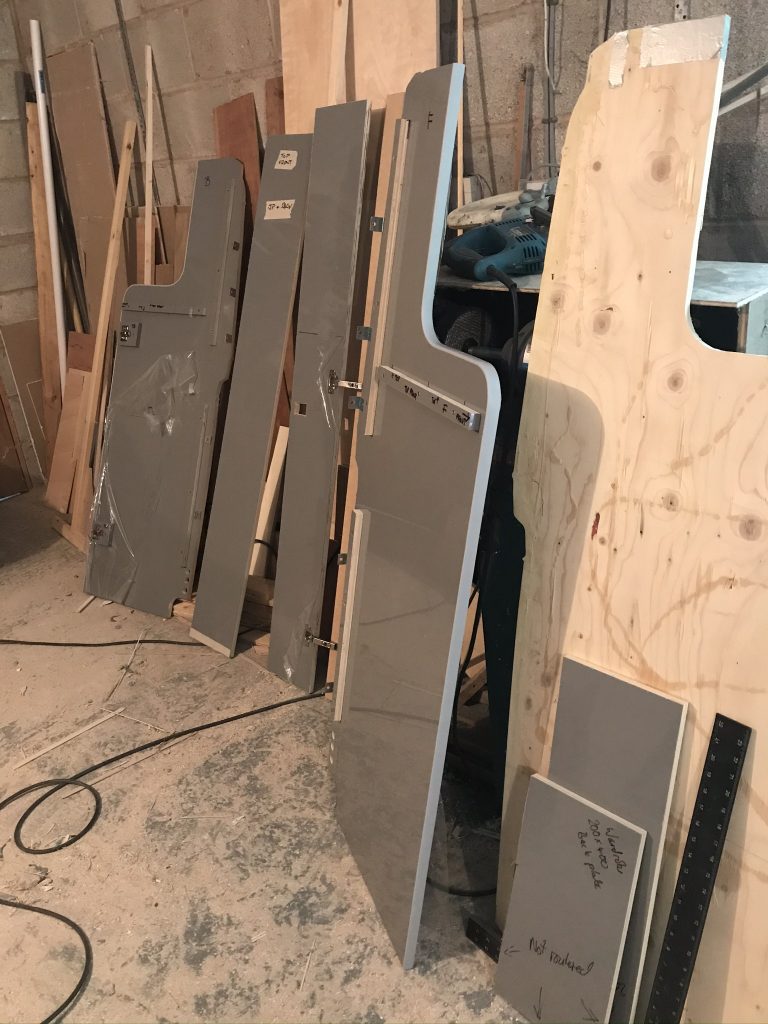
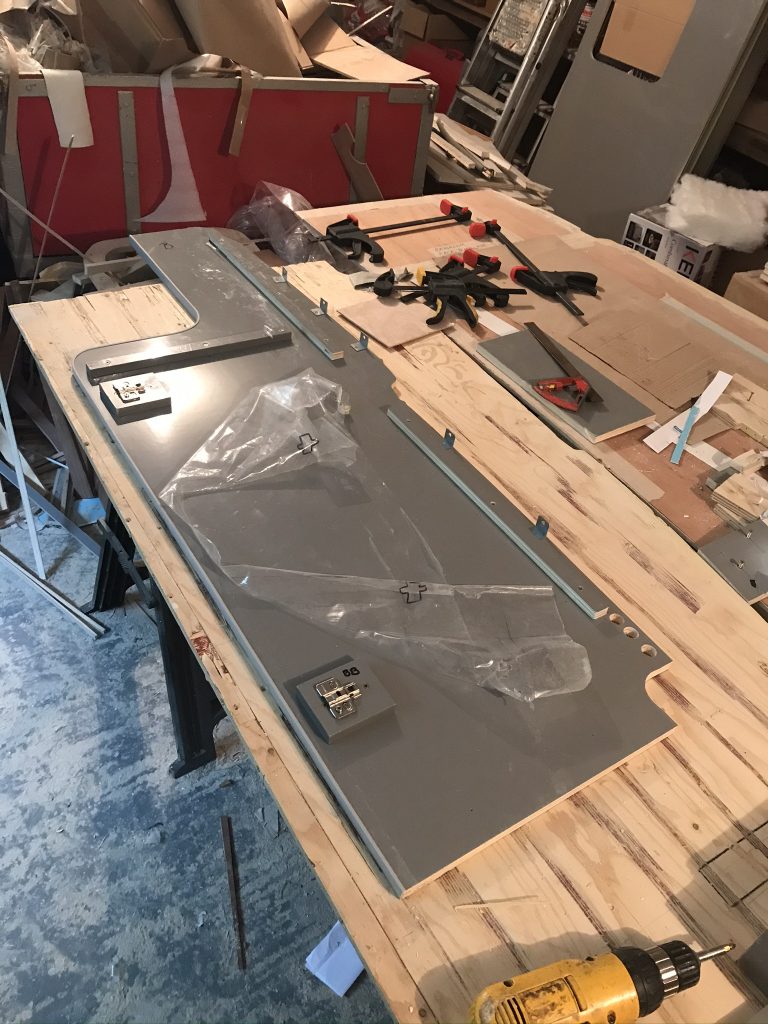
Below: the unfinished wood on the right is the template I made, some of the pieces next to it are almost finish, below I will show the stages in making the wardrobe. I always start by making a mock-up or templates. Laminated wood is expensive, its too costly to cut it wrong.
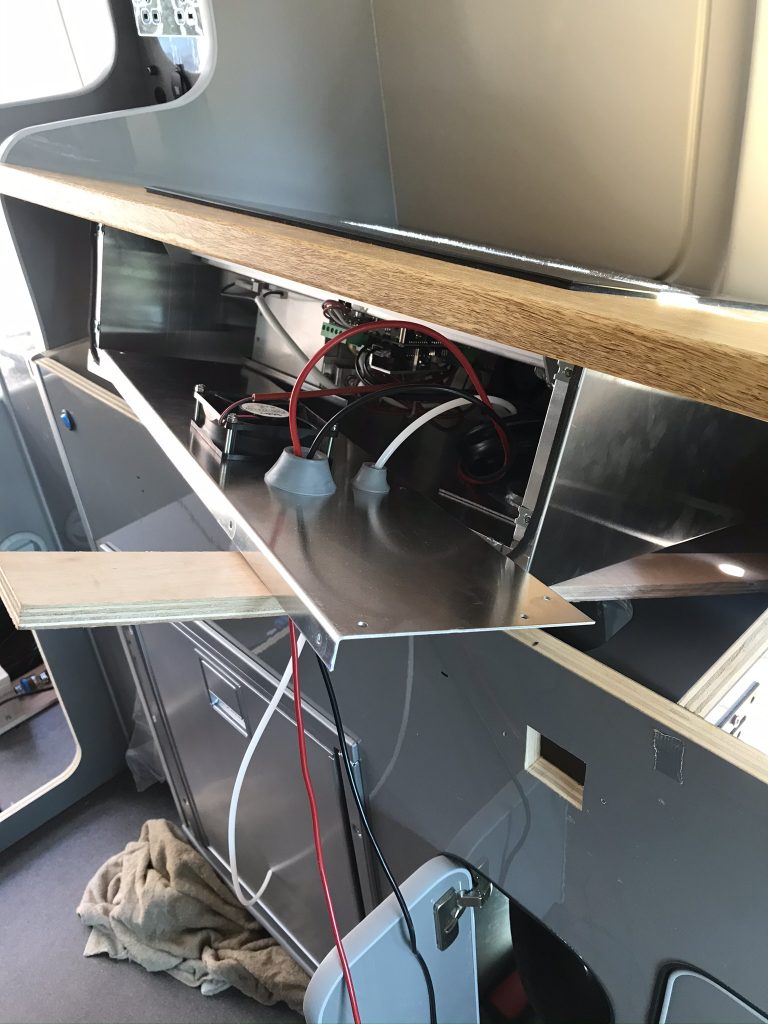
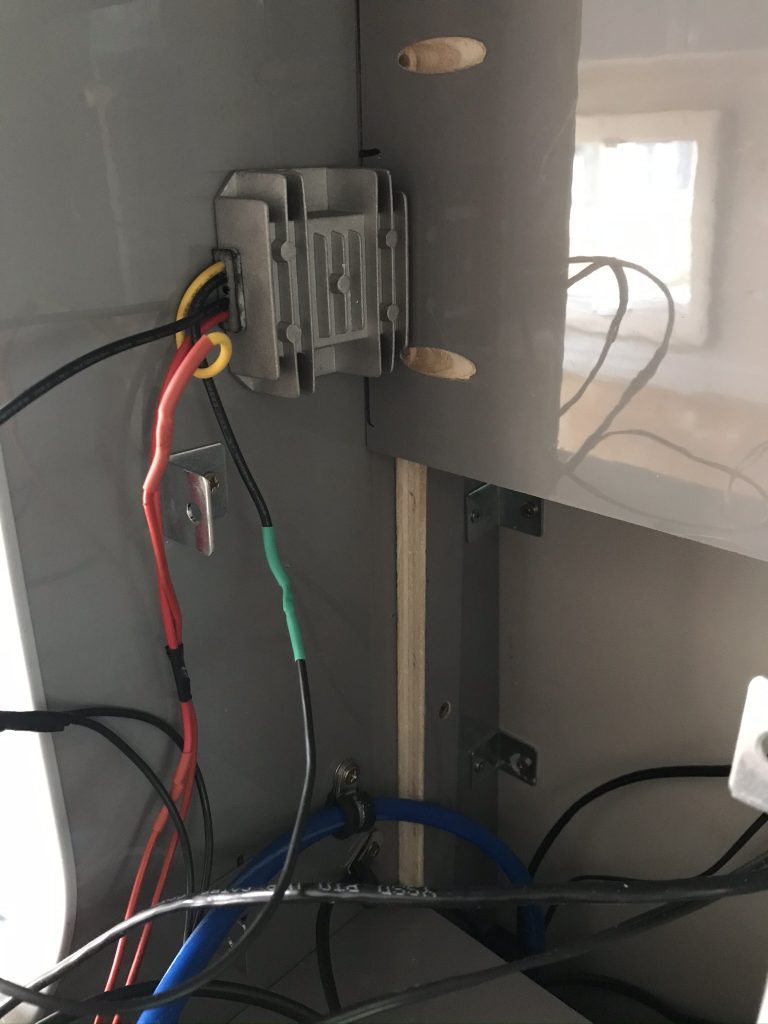
Below: This is a 12v to 5V Step Down Converter. I have 240v, 12v and 5volts charging points inside this campervan. What I needed was the facility to use 5v with a small DC Plug as quite a few devices dont use USB and rely on 5volts.
DC 12V/24V to 5V 10A Step Power Converter Buck Voltage Regulator Module
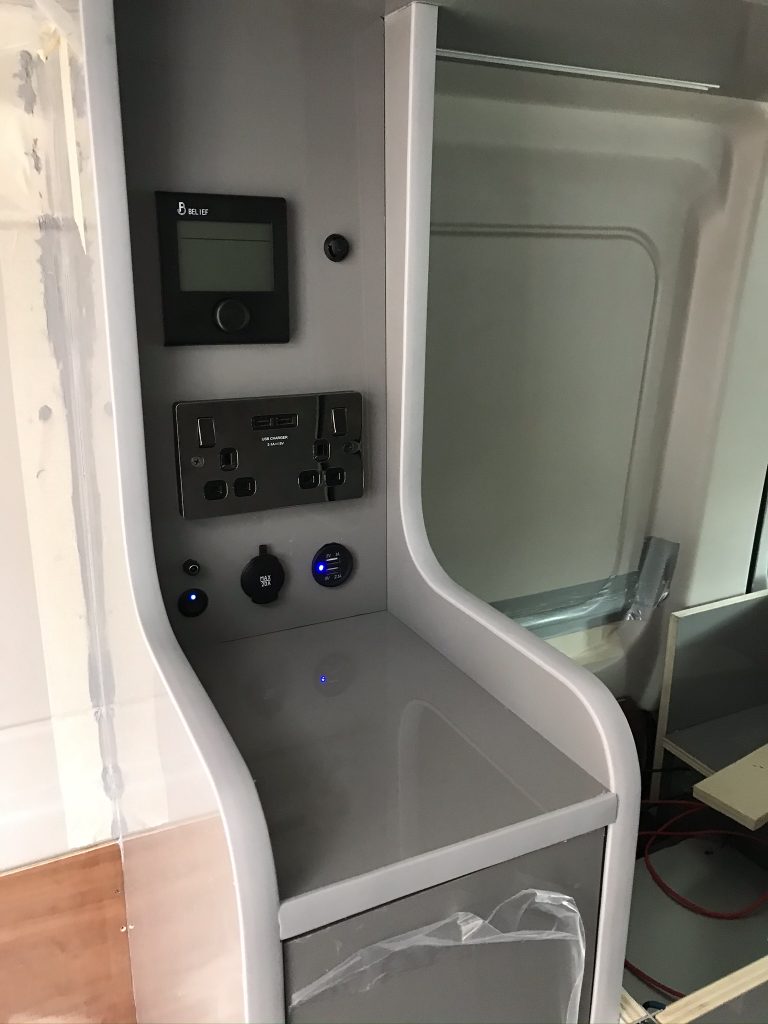
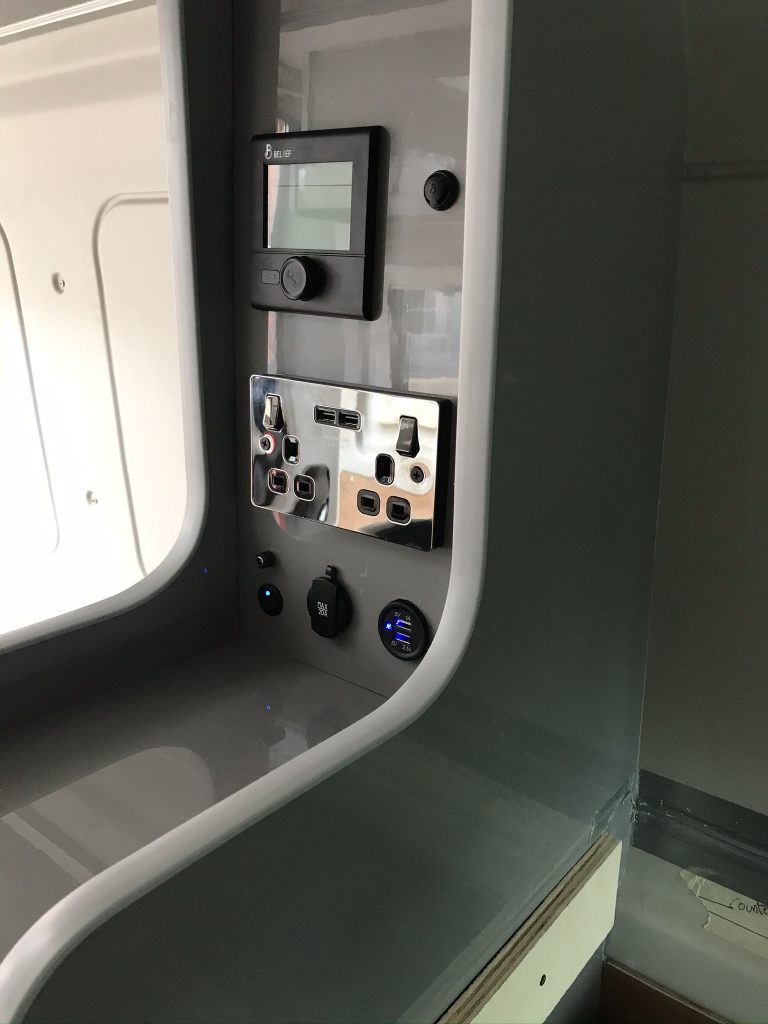
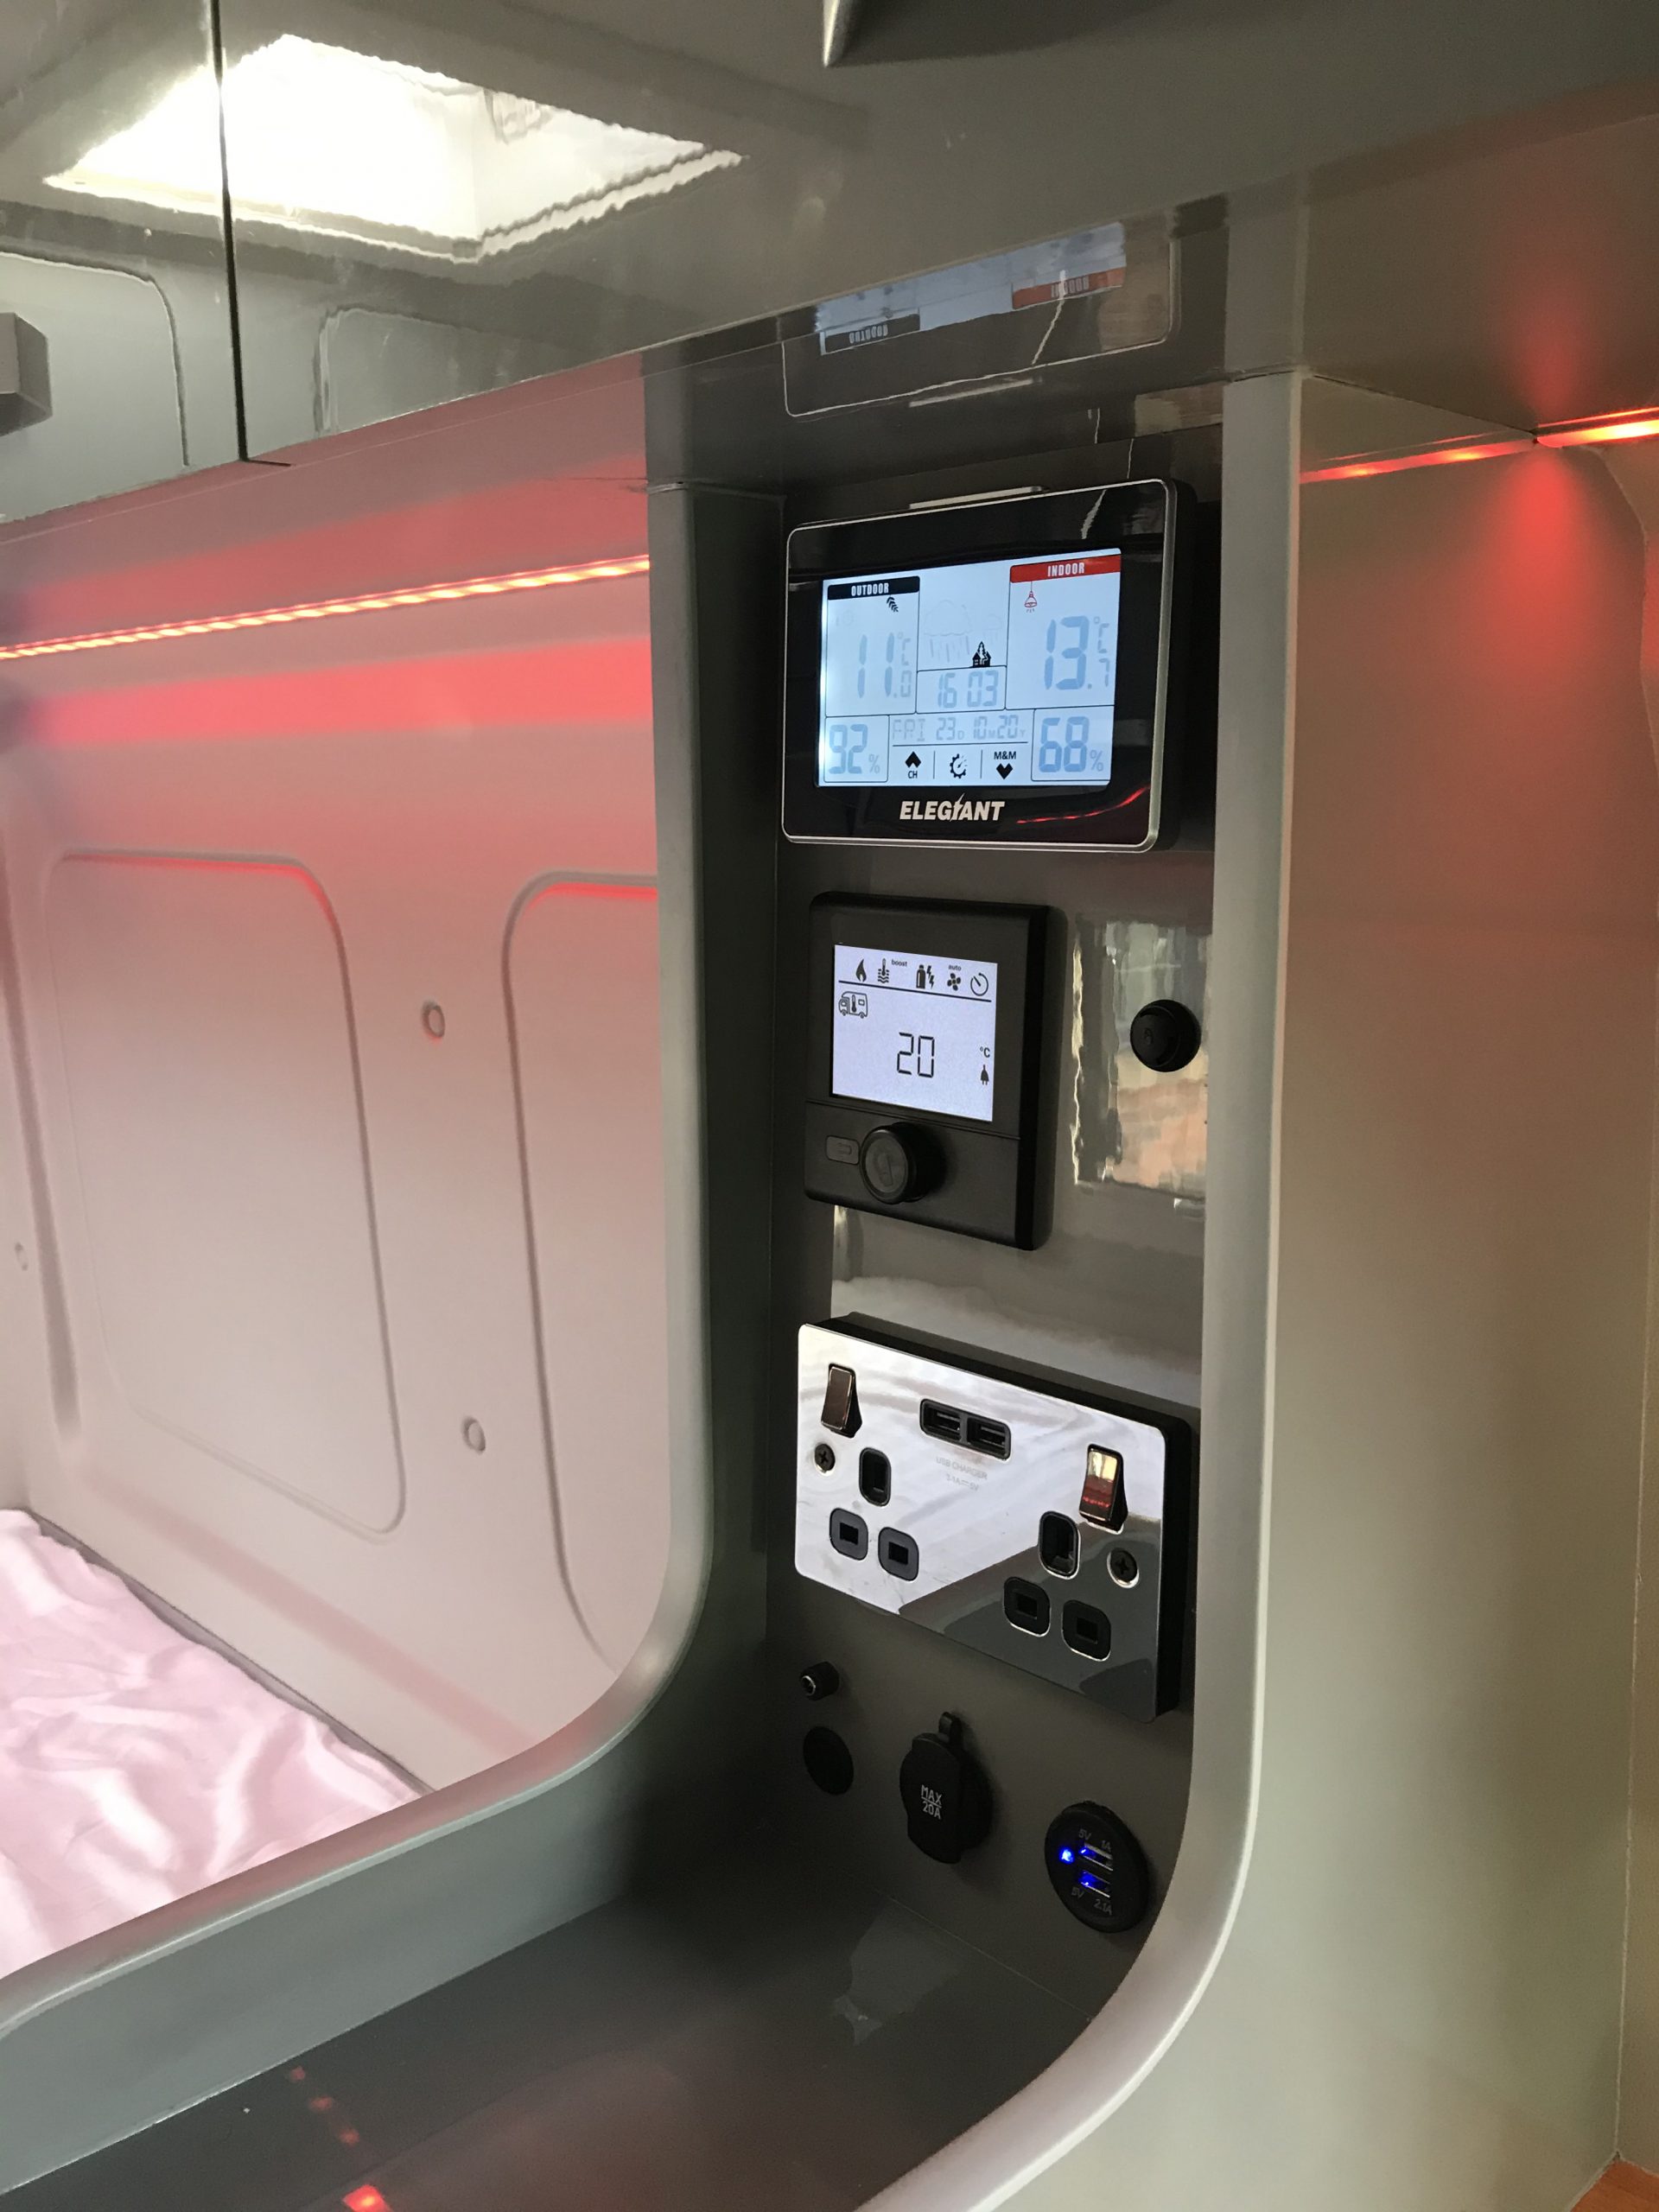
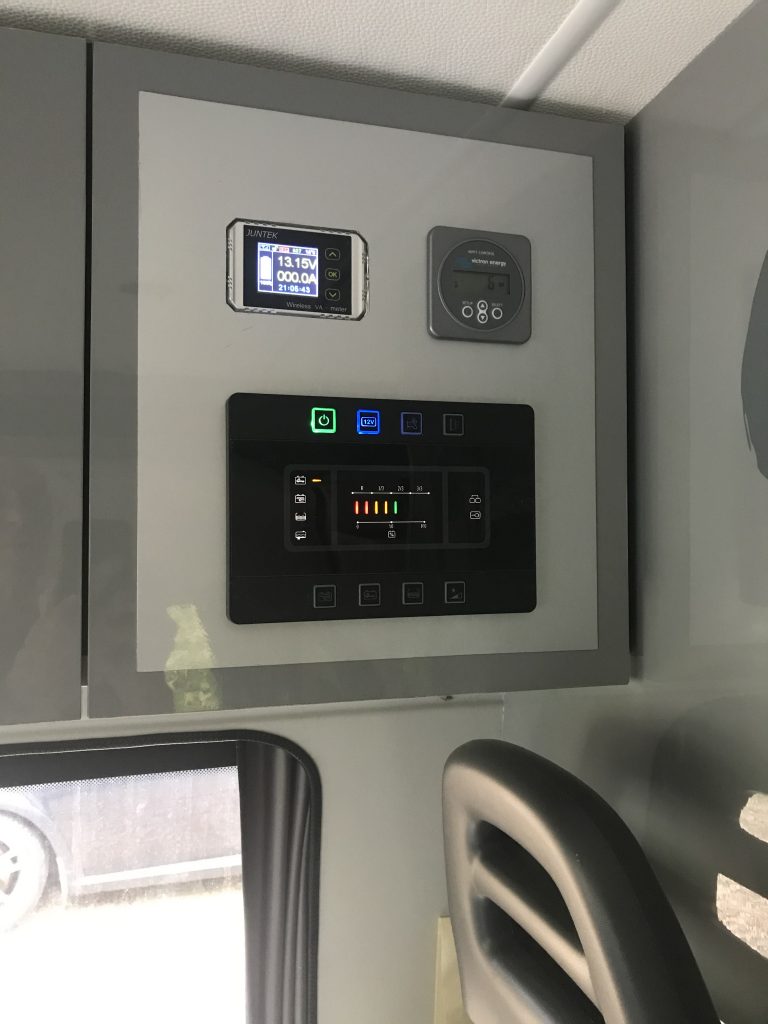
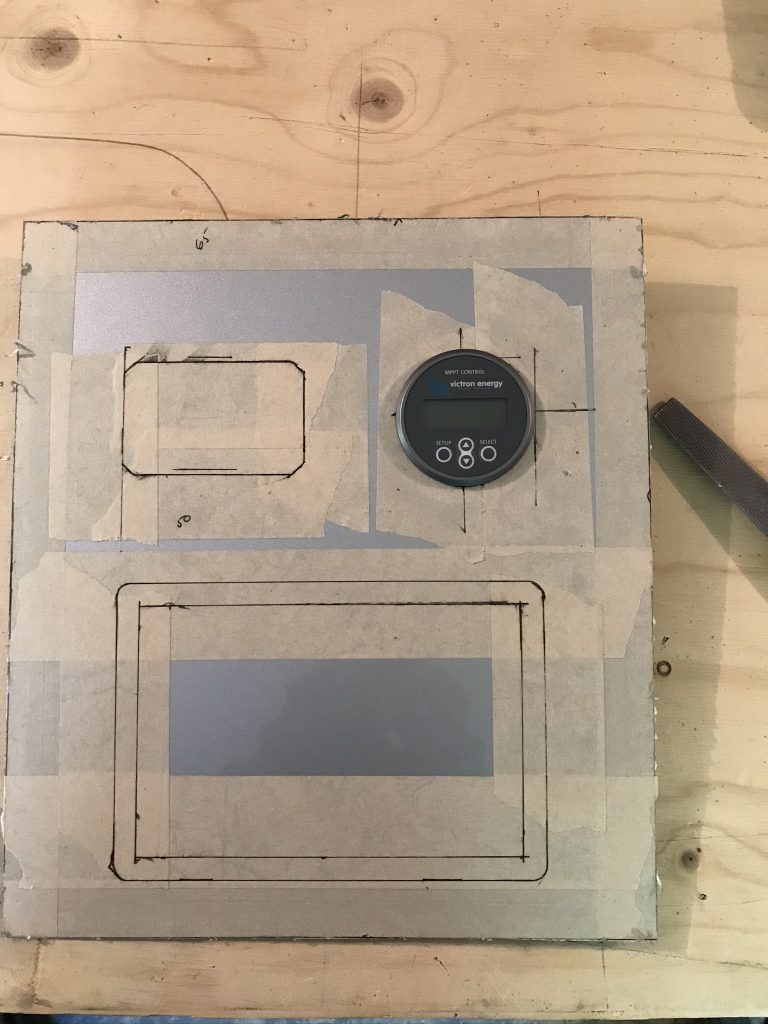
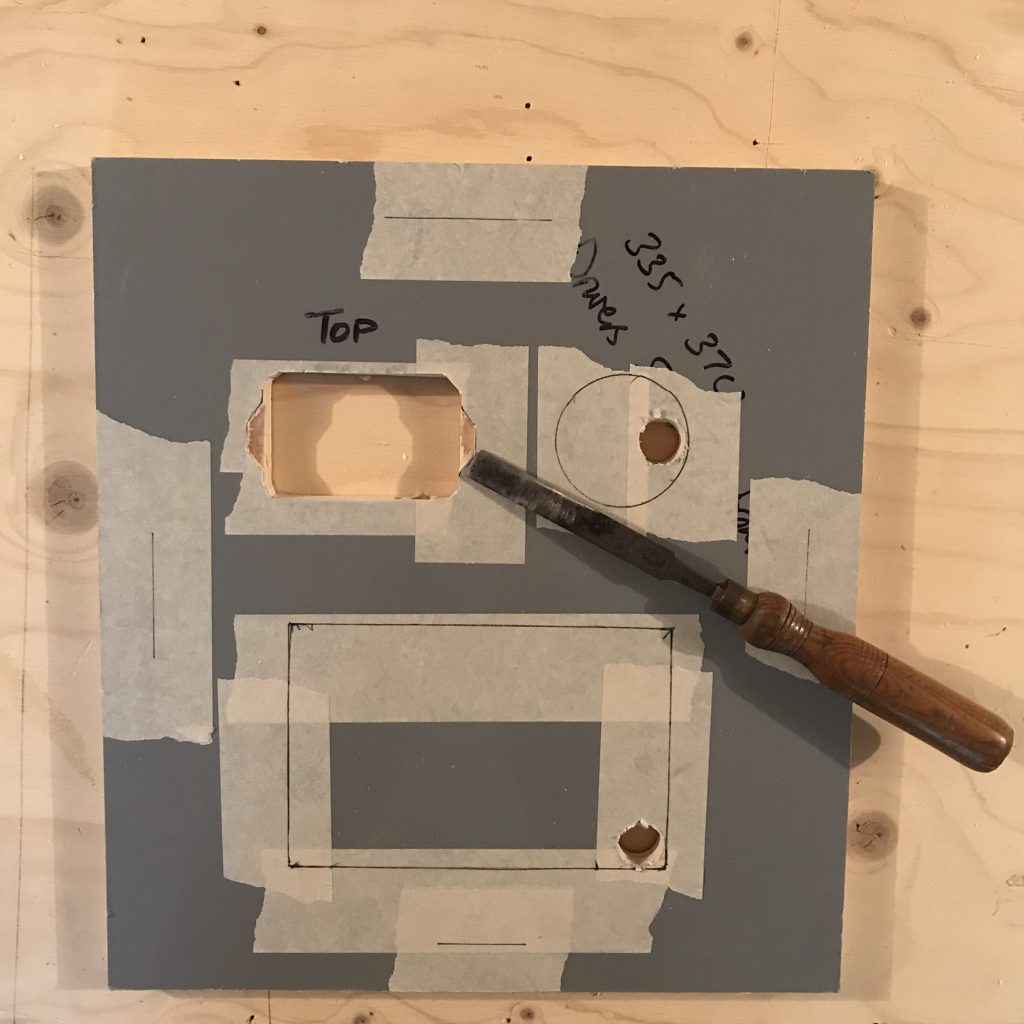
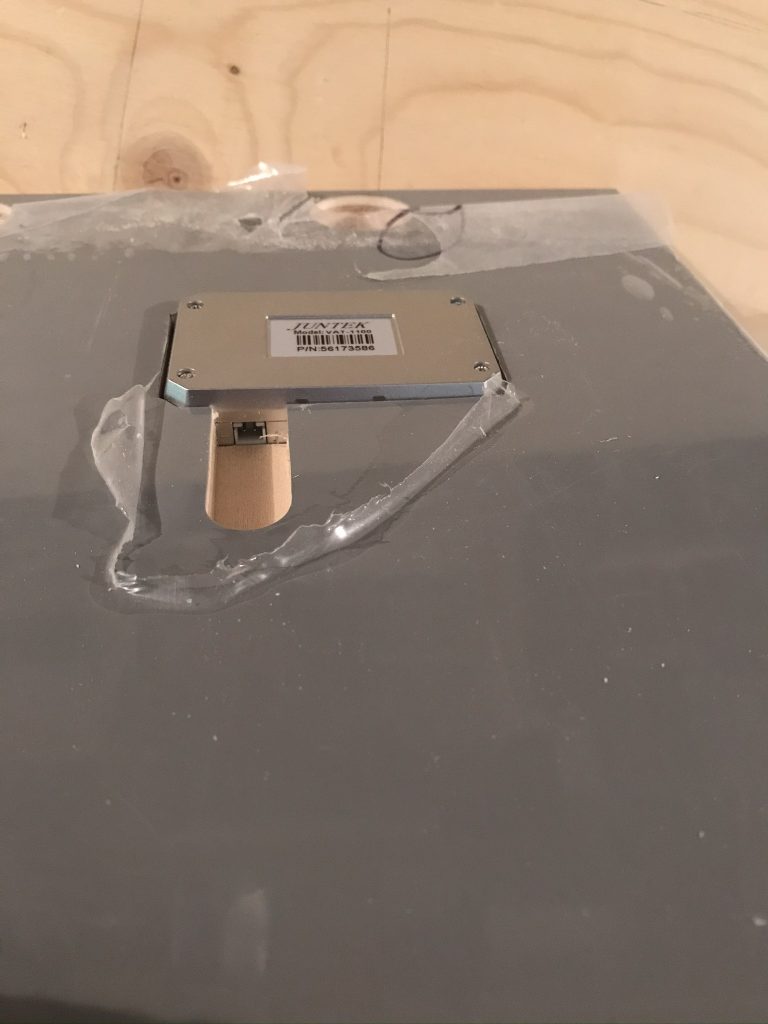
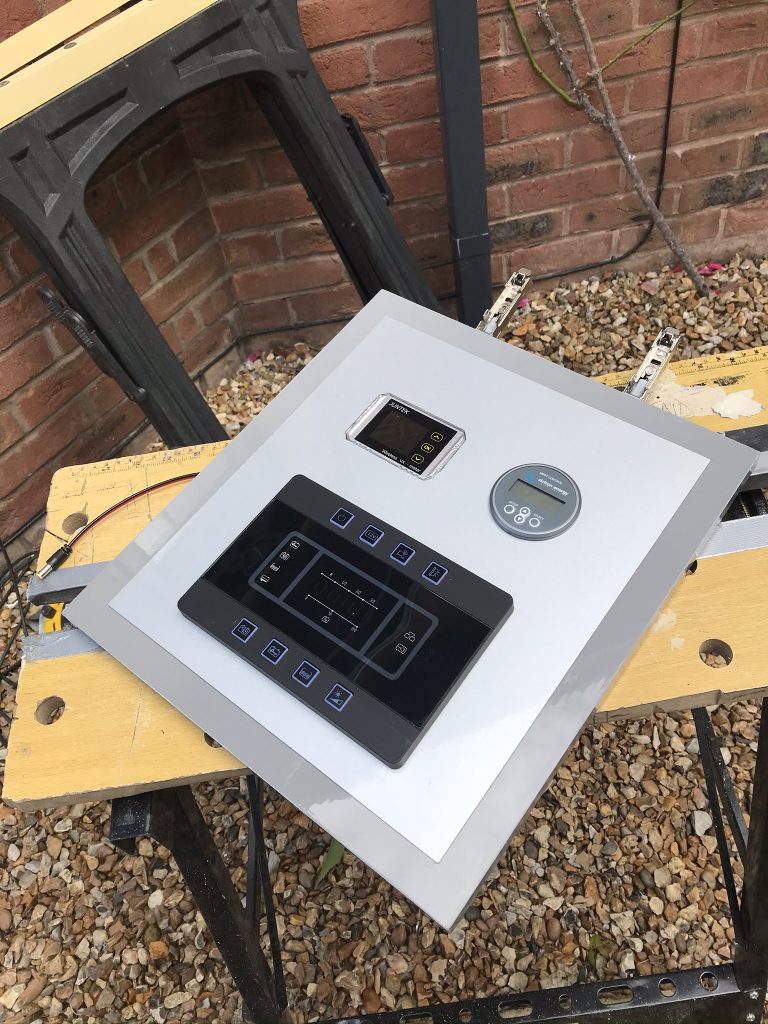
Below: 240v plugs, USB Power Point, Cigar Lighter Power Point, 5V DC Jack Power Point, Heater Control Panel, Heater Temperature Sensor, Outside and Inside temperature and weather station
DC 12V/24V to 5V 10A Step Power Converter Buck Voltage Regulator Module
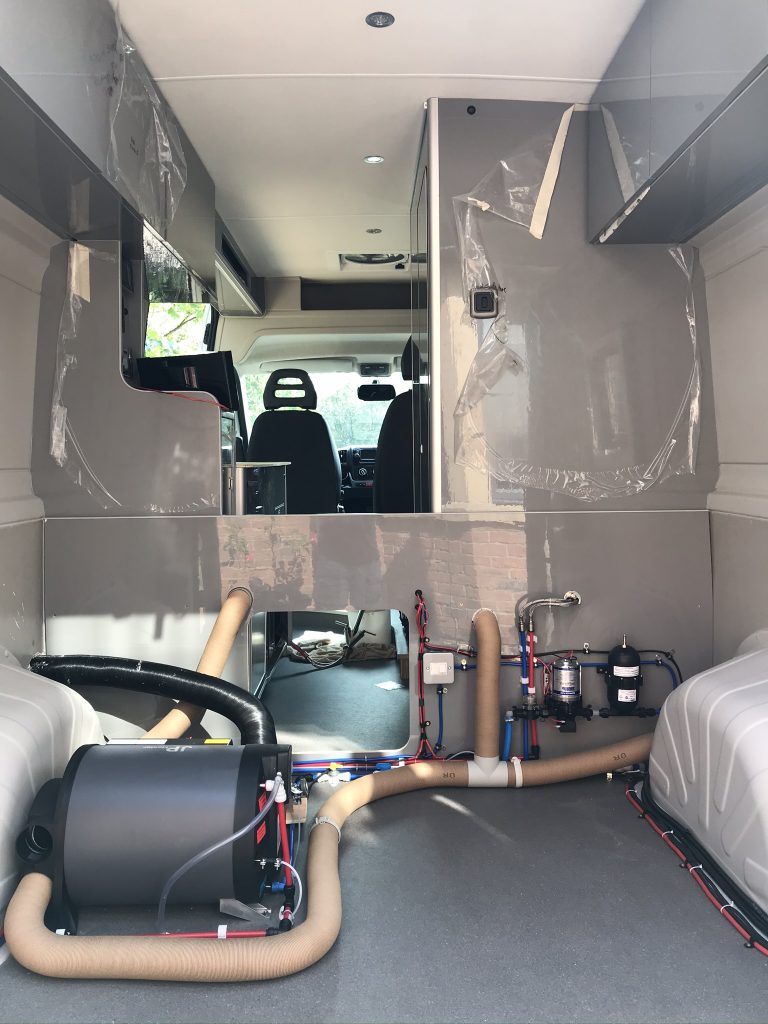
As I planned to install a combi heater/hot water system and a diesel cooker its was important that I also installed a direct feed from the Peugeot Boxer Fuel Tank. I could of course used a separate independable plastic fuel tank but why do this when the Peugeot Tank is fairly easy to access?
Two Diesel Appliances = One Pipe Line or Two? I decided on two because if one was to fail it would end up taking out the Hot Air Heater, Hot Water and also the Cooker. Also as I would be fitting one pipe line I might as well fit another at the same time.
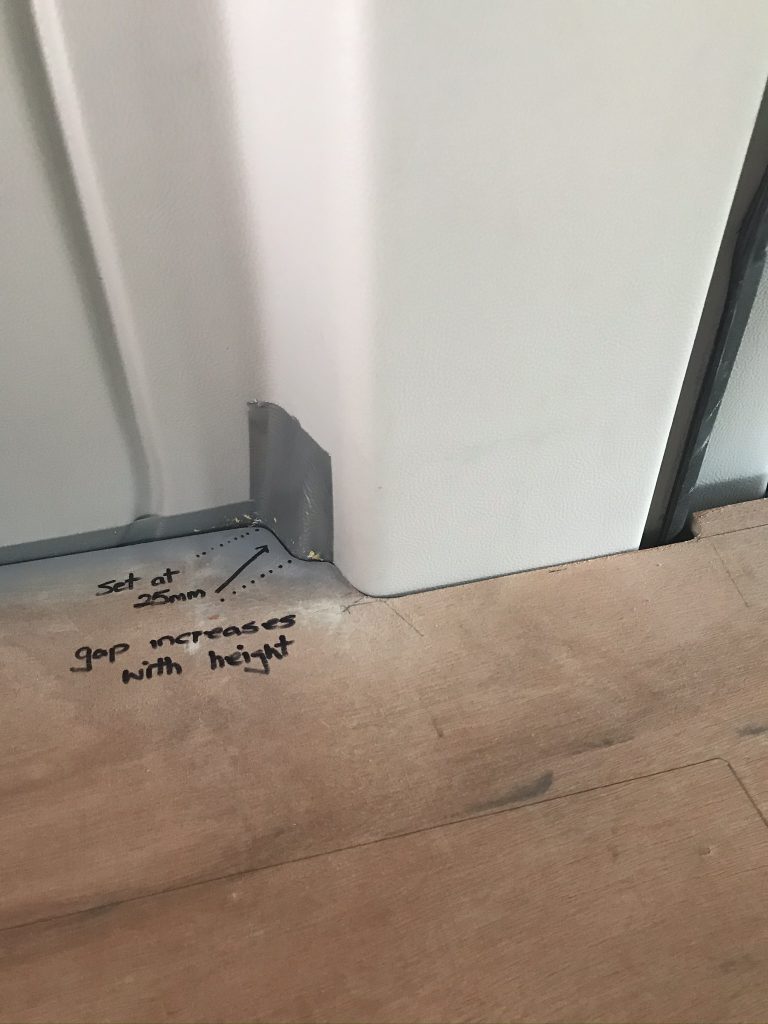
Do Dual Fuel Lines fit on the Peugot Boxer Fuel Tank? Yes, but you need to be careful where you fit them as shown below.
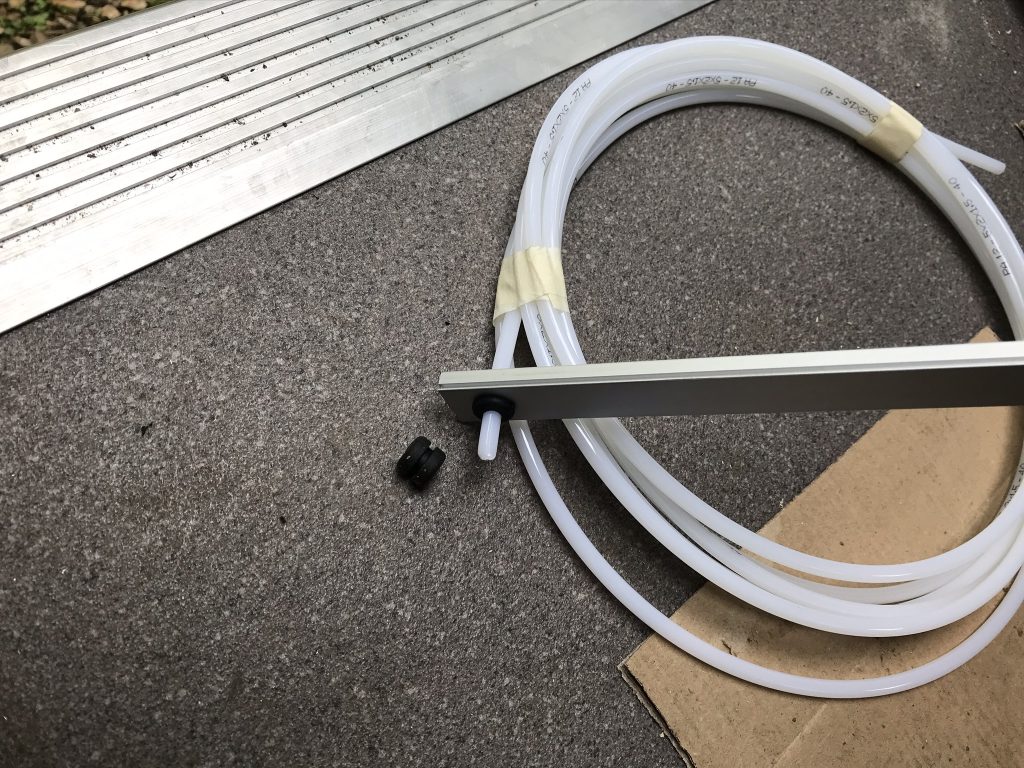
Below: Shows my fuel line, I have a spare piece of metal that I used to test the fit of a rubber grommet that I plan to use between the metal vehicle floor and pipe. I will feed two pipes under the vehicle one for the heater and one for the cooker.
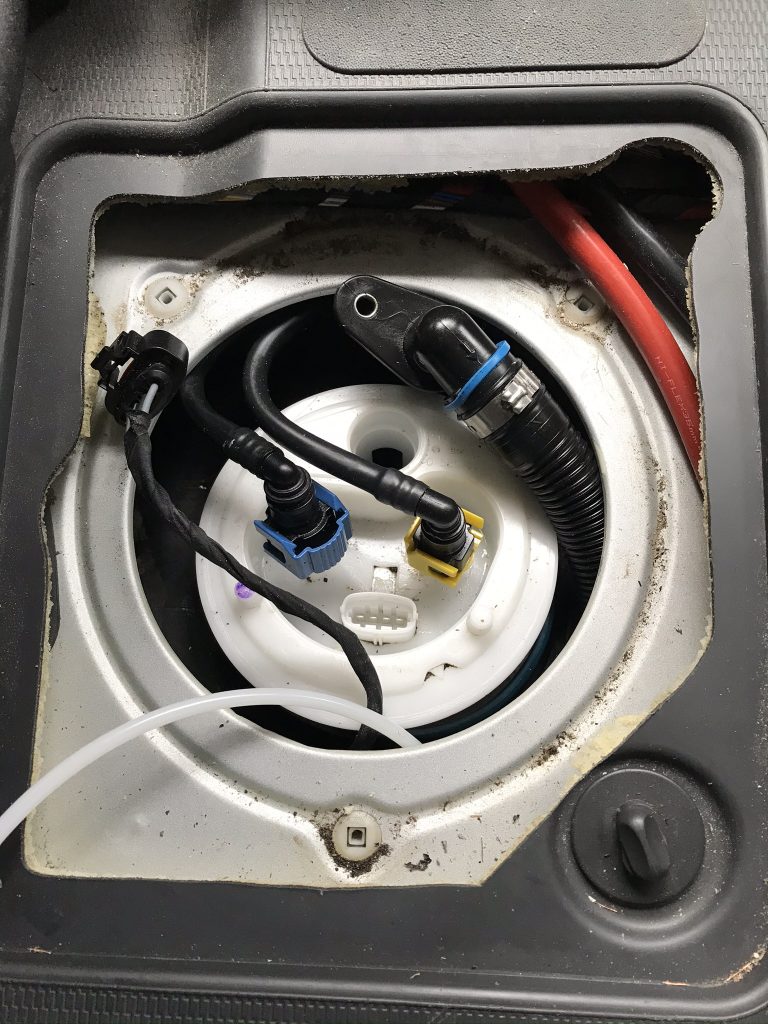
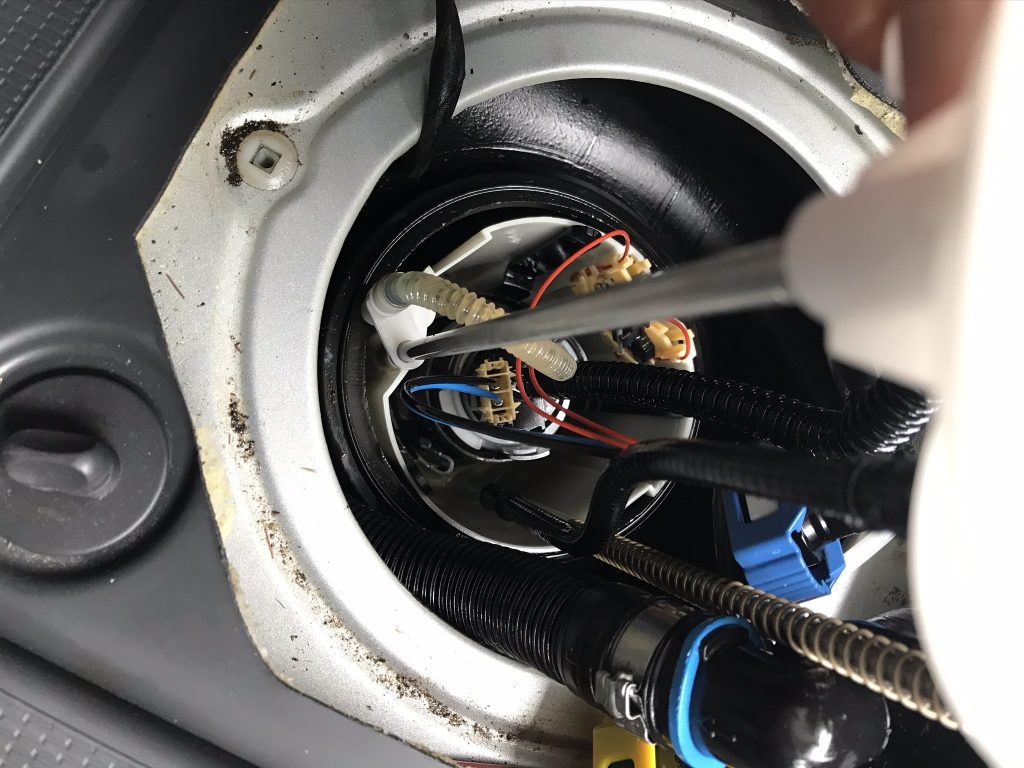
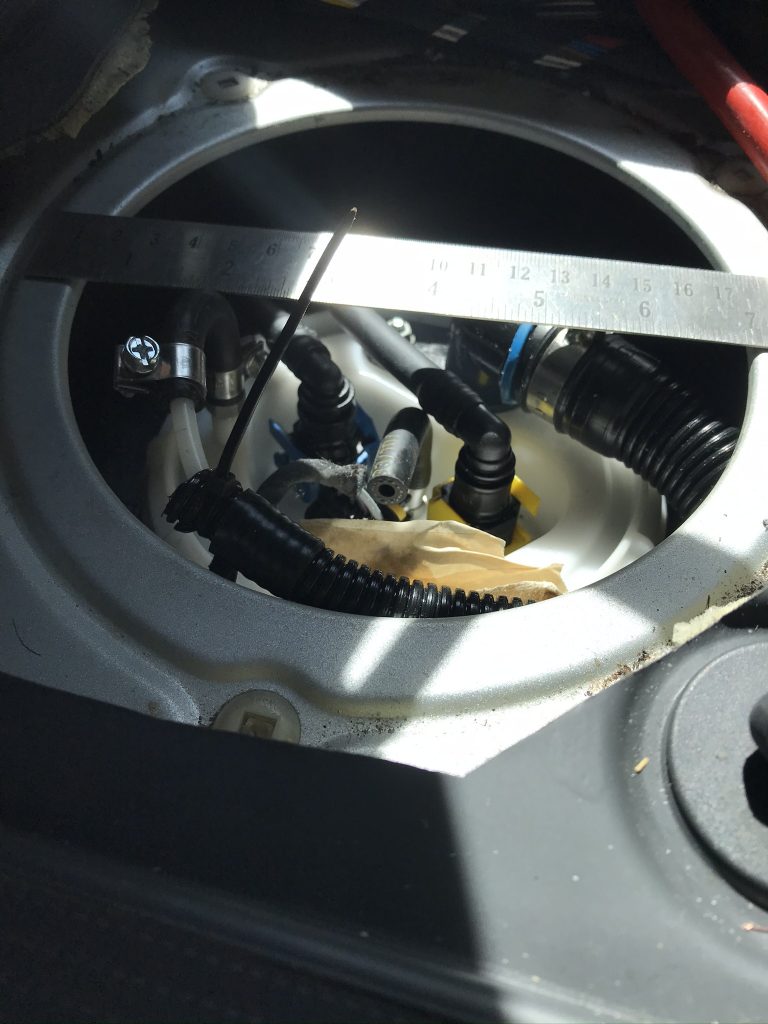
Below: The Peugeot Boxer, Fiat Ducato, Citroen Relay, fuel tanks are very easy to locate and gain access to simply remove the small floor panel opening next to the passenger seat and the access point to the fuel tank is below (inside the vehicle). Its location means you do not have to go under the vehicle and remove the tank, wonderful. You can see the new fuel pipe (white) sticking up prior to being connected
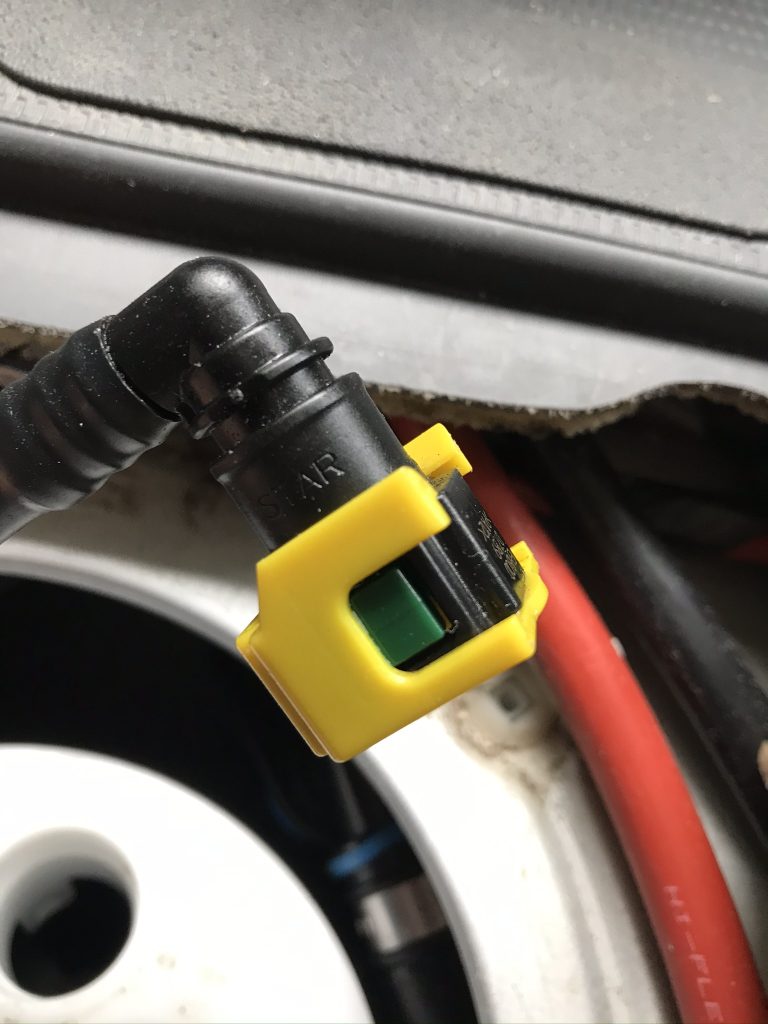
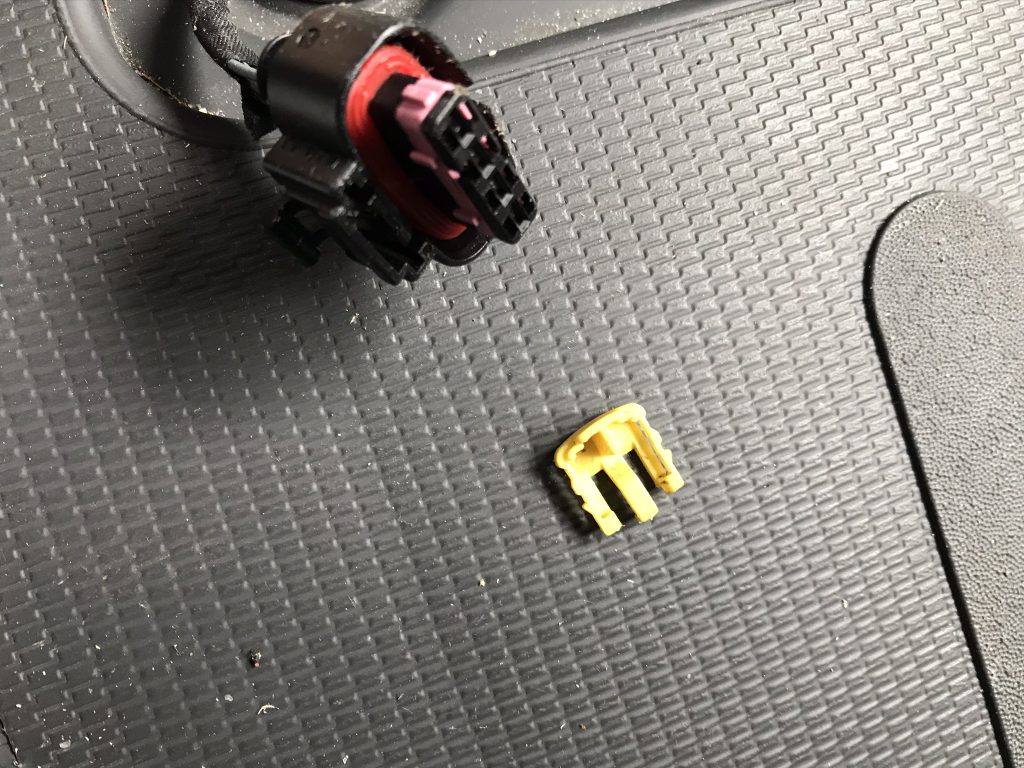
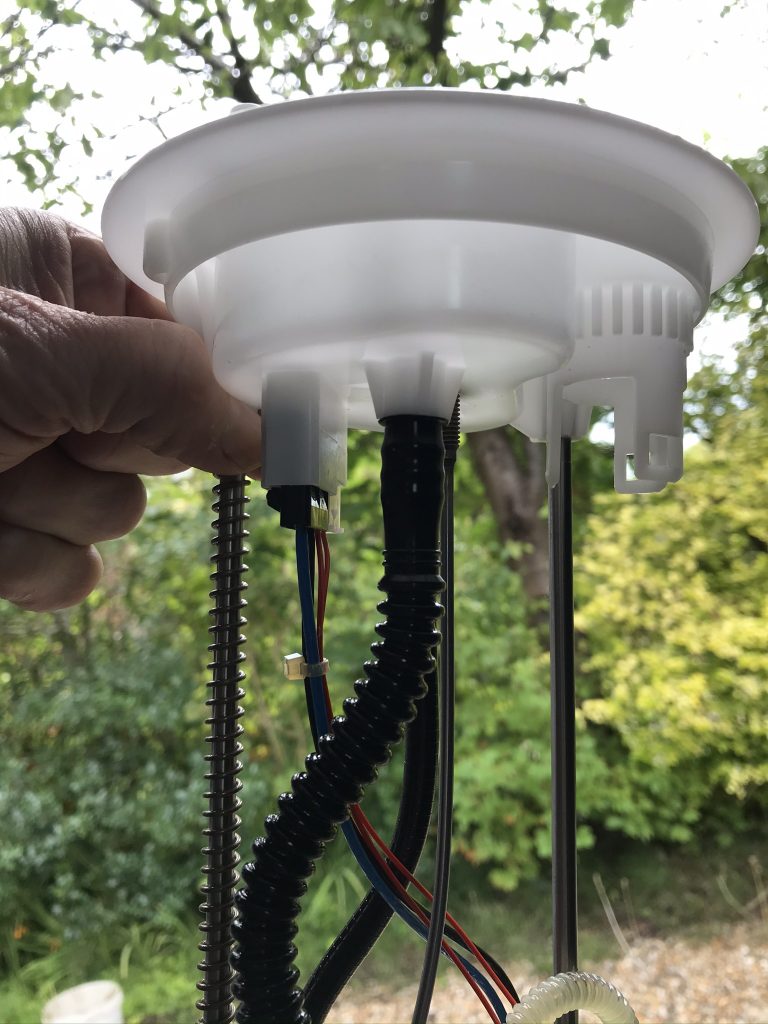
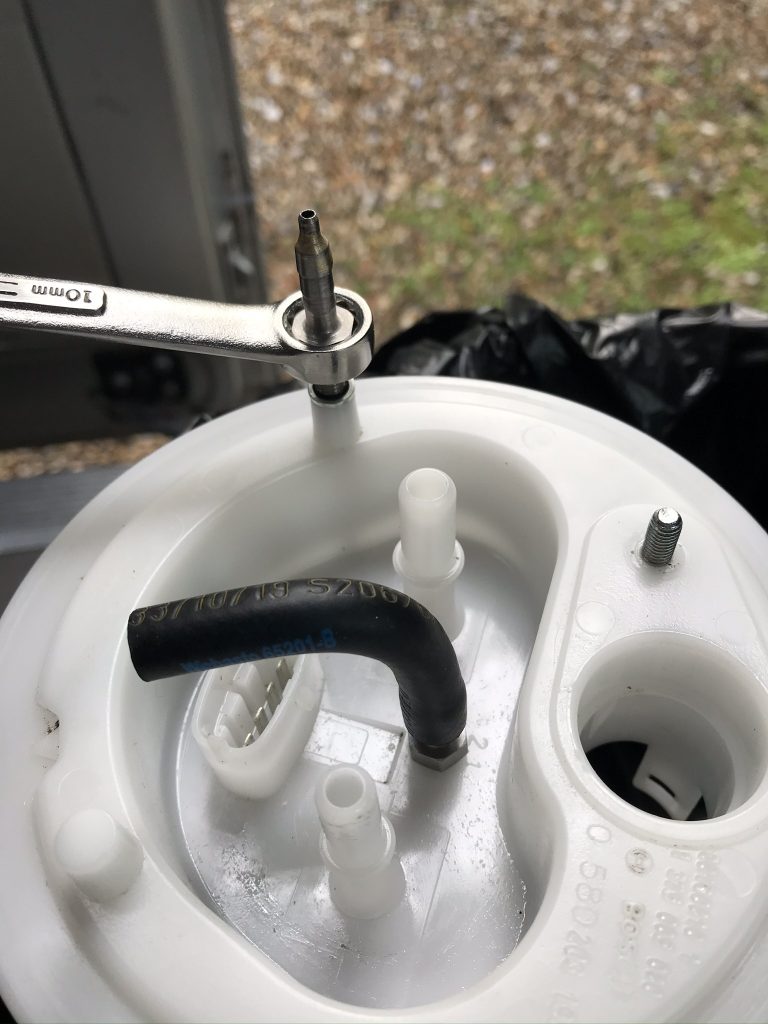
Below: I have taken a few images of the various attachments to the tank. Most click in place and are locked with a small sliding clip that stops them coming loose. Make sure you slide the clips back to remove the plug-in fit.
Below: The first problem. This fuel pick-up pipe that came with the kit was unsuitable. It was never going to fit, the 90 degree bend meant it would interfer with the other attachments on the tank.
Below: The Tank Lid Removal didnt go well. I have seen people remove these Tank Lids using Mole Grips and Wood. Their lid cannot be as tight as mine. I tried everything from an axe to a shotgun and I couldnt move it. It was super tight, in the end I had to buy a tool from Amazon see below.
Fuel Pump Lid Tank Cover Remove Spanner Adjustable Wrench Tool
As soon as the Tool arrived I fitted it and the Tank Lid still wouldn’t turn, this thing was super tight. I was about to get some dynamite and thought of blowing the tank up but instead I decided to give it one last try with the same long leverage bar and….. its started to turn, I couldn’t believe it. I was using 500kg of pressure from my arms, about the power a JCB puts out on full revs. In other words or if English isn’t your first language, I had to use all my strength just to remove it. I wasn’t tight it was “over tight” for sure.
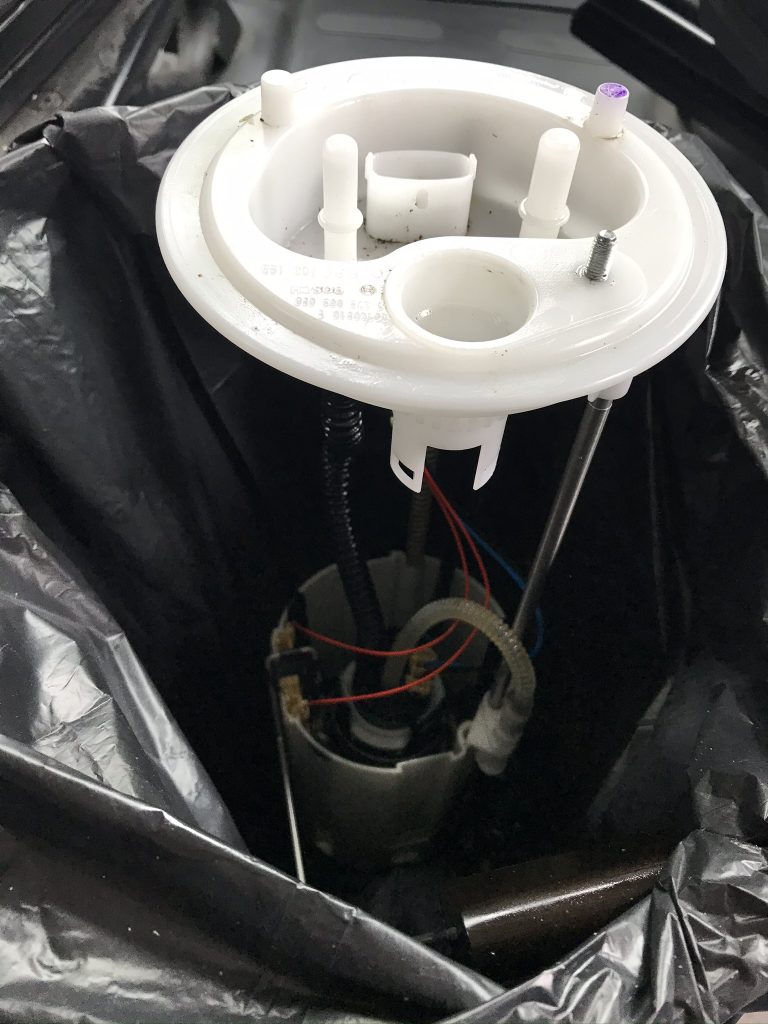
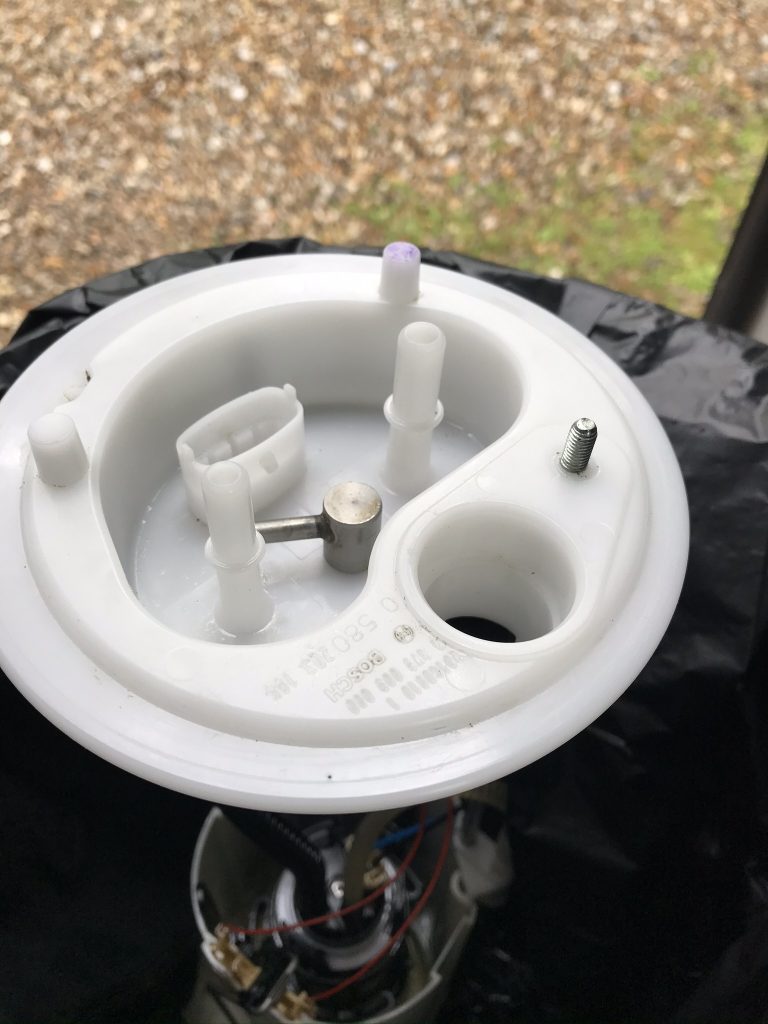
Below: A big round of applause, the Fuel Tank is finally open.
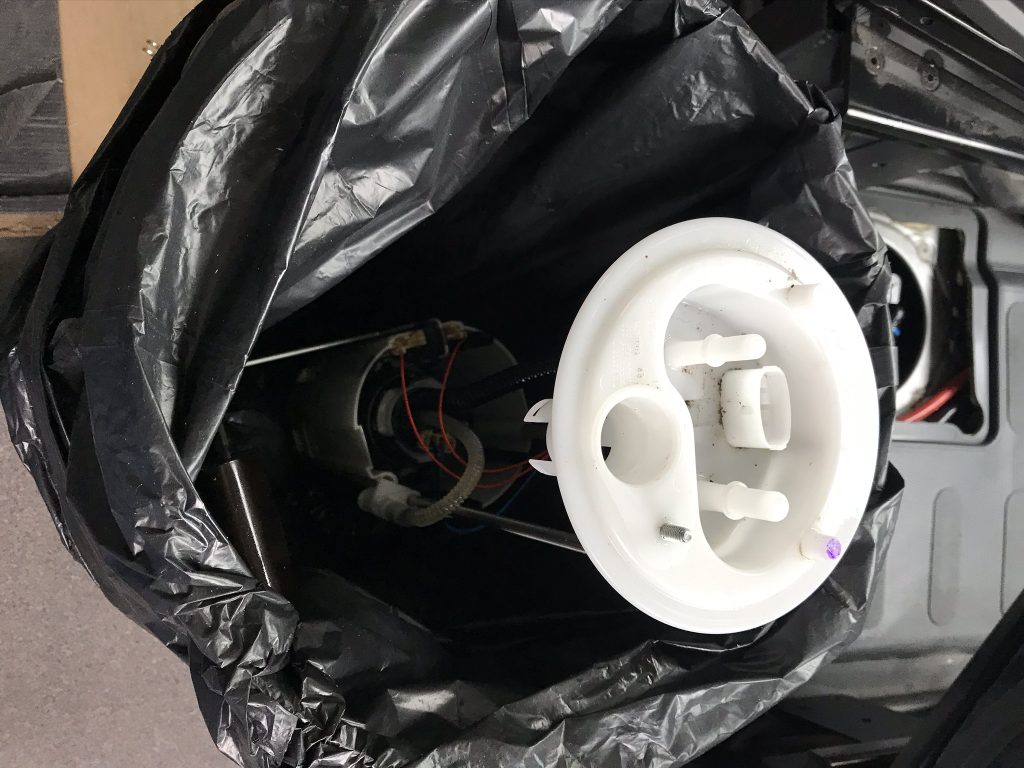
Below: I prepared a clean bucket with a clean bin liner to put it in
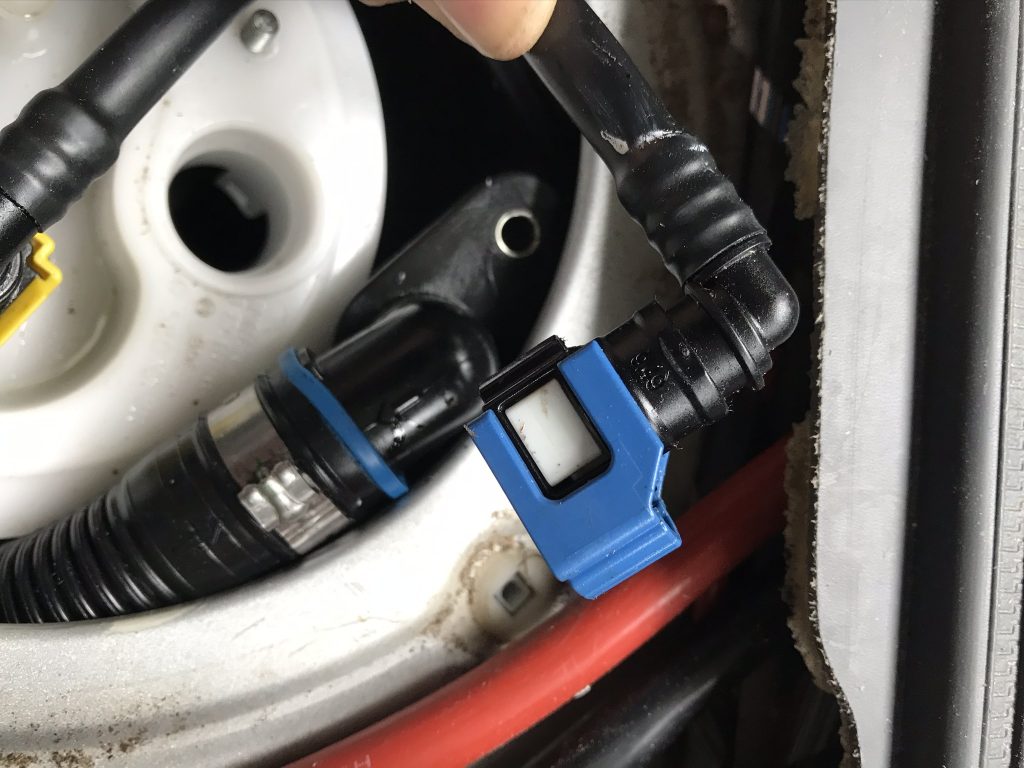
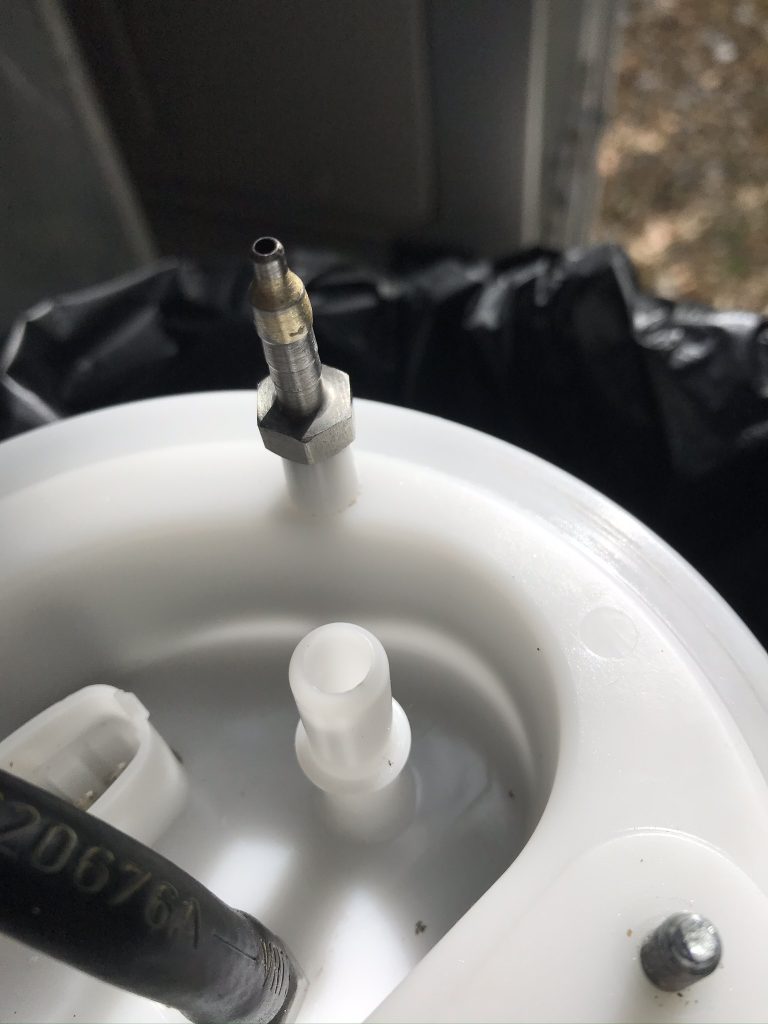
Below: The second fuel pipe didn’t fit. I bought another from EBay and guess what? That didn’t fit. What I mean by this is that the pipe catches the fuel line attachments. Looking at the image below it looks like its going to fit. The problems arises when you attach the Peugeot Fuel Pipes whilst they press on, you cannot use the Locking clip to lock them in place. The locking clips slides in and out and there is nowhere for it to go.
Solution Problem Solved: I had to order two Webasto Fuel Standpipe Kits – Fiat Ducato Part Number: RMB7654A from Butler Tecknic (link and address below). The price was £48.19 each. The EBay version was £9.18 each and in my opinion it was just as well constructed, if anything the EBay version was a little better. But only the Webasto version would fit, maybe there is an EBay version that is straight. I looked on EBay but at the time I couldnt find one. Only soloution, to bite the bullet and pay the money (4 times the costs of EBay version).
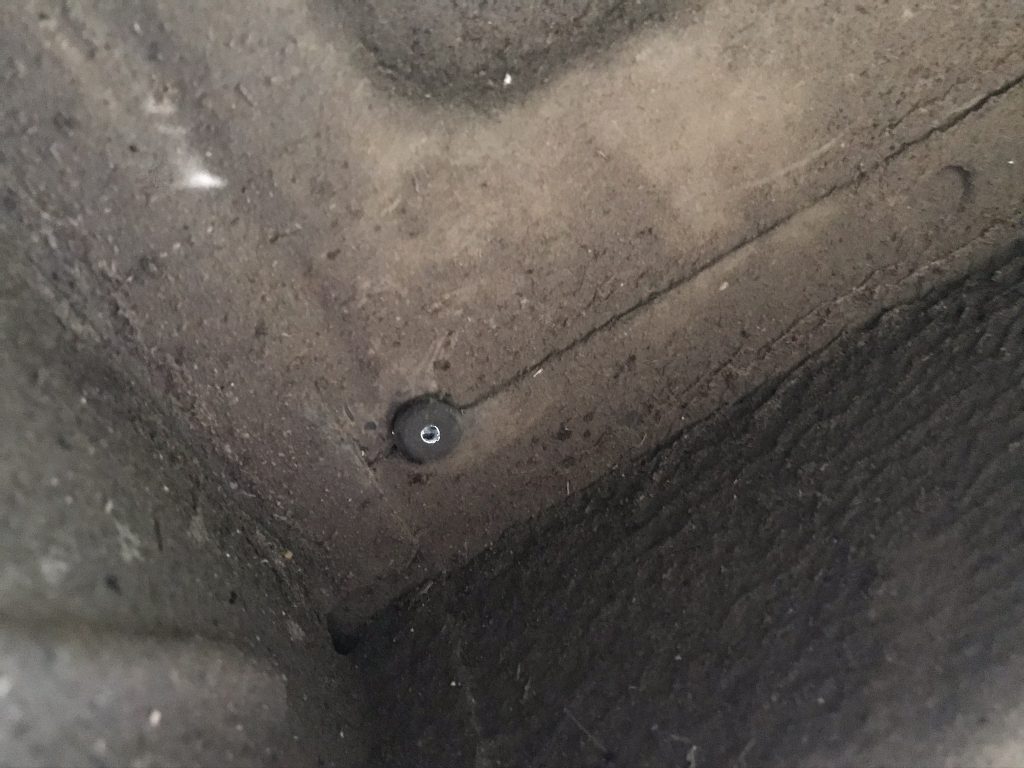
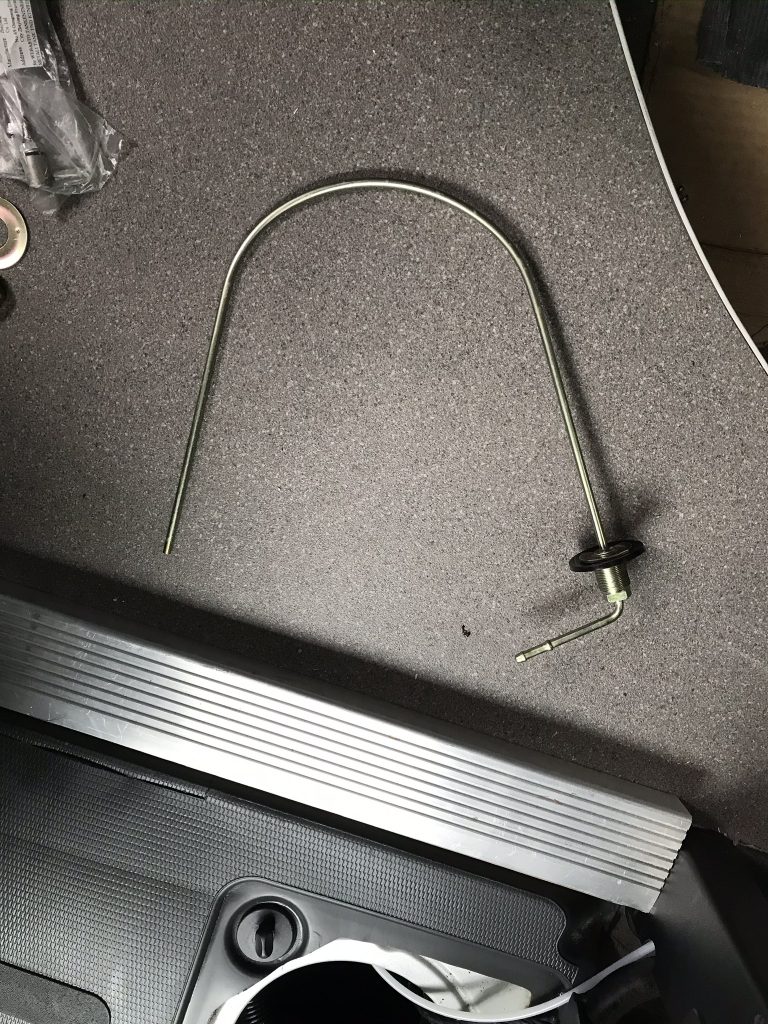
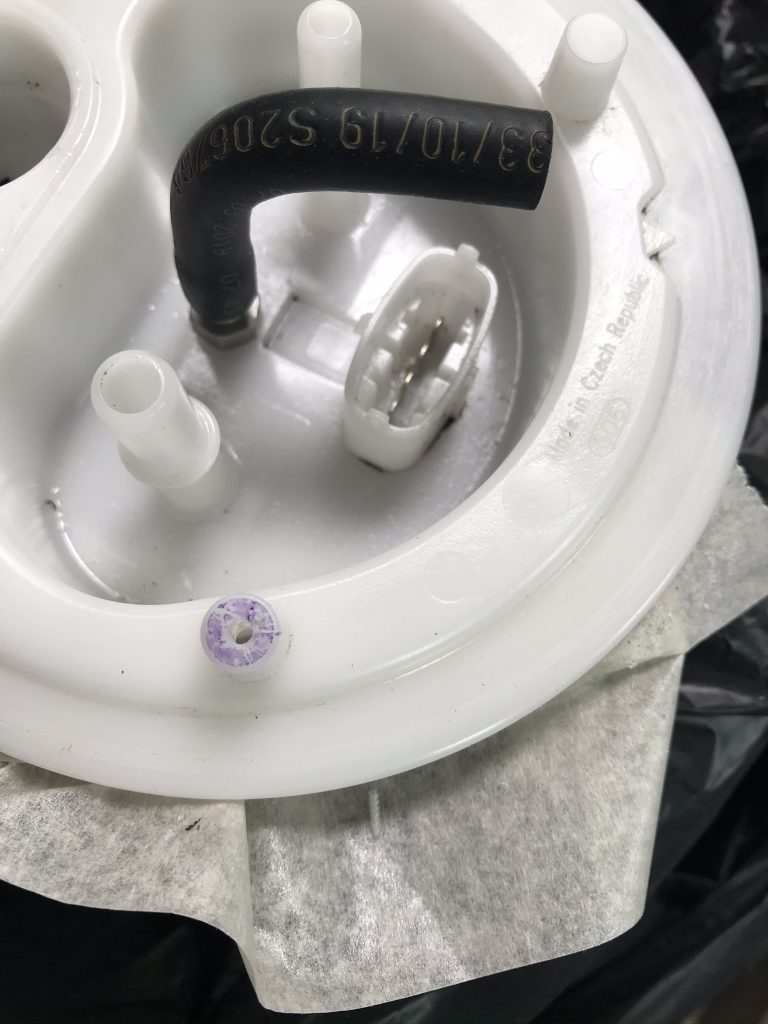
Below: The Webasto Fuel Standpipe from Butler Tecknic. I am testing the fit of this pipe on a piece of metal. Unlike the EBay pipes the Webastoe “self taps” into the plastic, I think it required a 4.5 or 4.7mm drill bit (check it I may be wrong). I didnt want to drill the hole over size so I tested the fit on a piece of metal to make sure it wouldnt fall through the hole. Its ok to drill the hole undersized but you mustn’t drill it too large, start small if you are not sure.
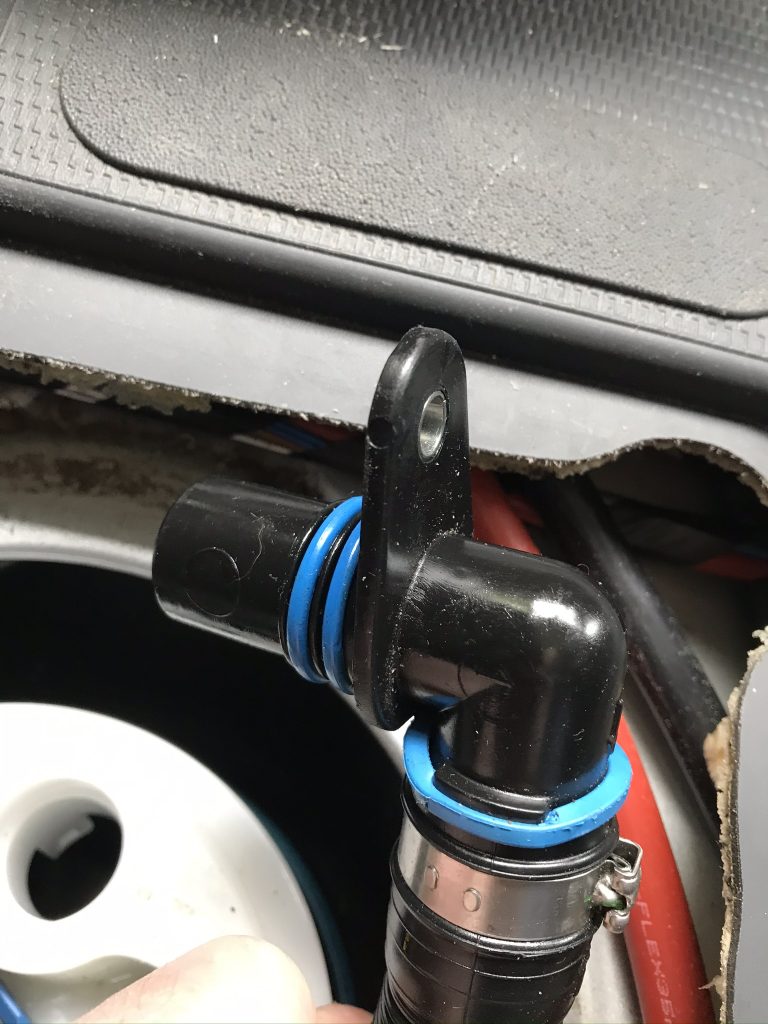
Below: The pipe is threaded (self tapping) into the top of the tank. Here you can see the 90 degree rubber pipe. Webasto recommend I fit the pipe in the Tall White piece of plastic that is sicking up in the image. I didn’t do this as I need to fit two pipes and I had already drilled a hole in the Tank Lid. The Webasto Pipe below is also secured with a locking nut on the opposite side just to make sure.
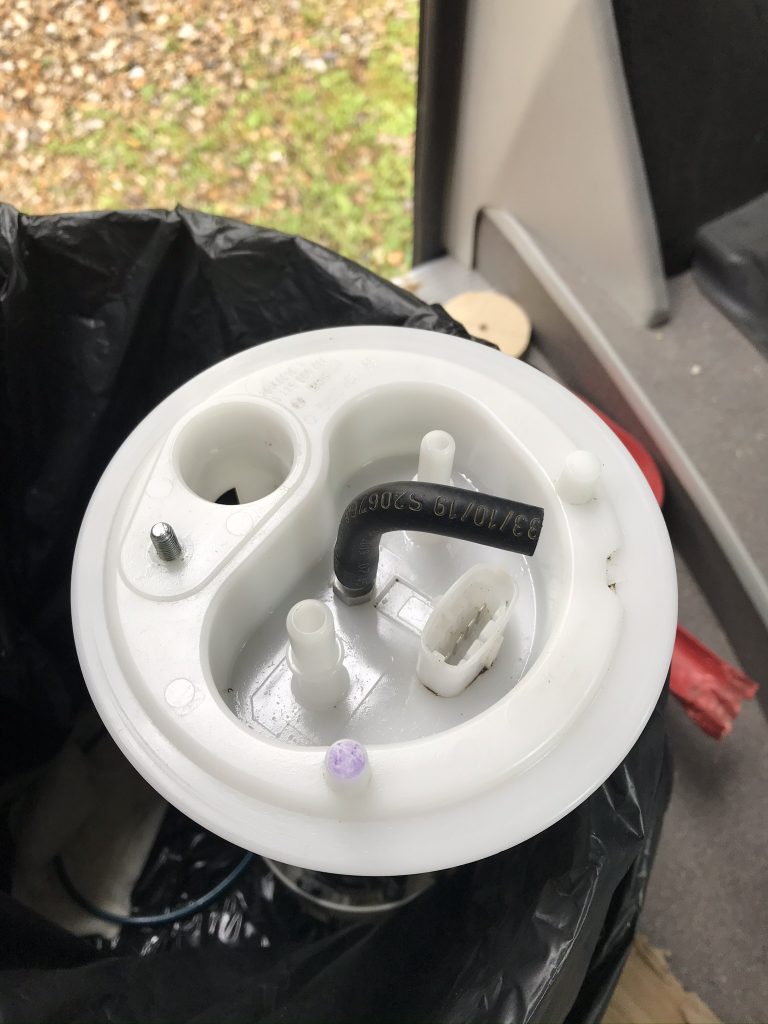
Below: Now to fit the second pipe using the method Webasto recommend. I’ve drilled the hole (4.7mm I think, check, its on the instructions) and I am screwing it in place.
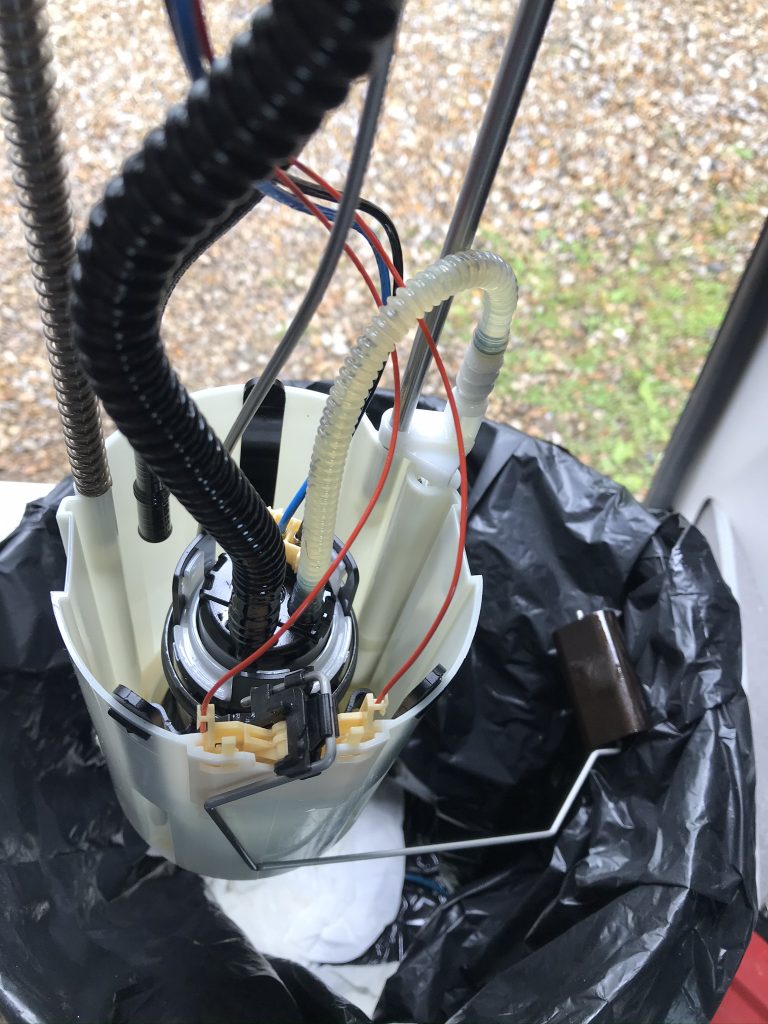
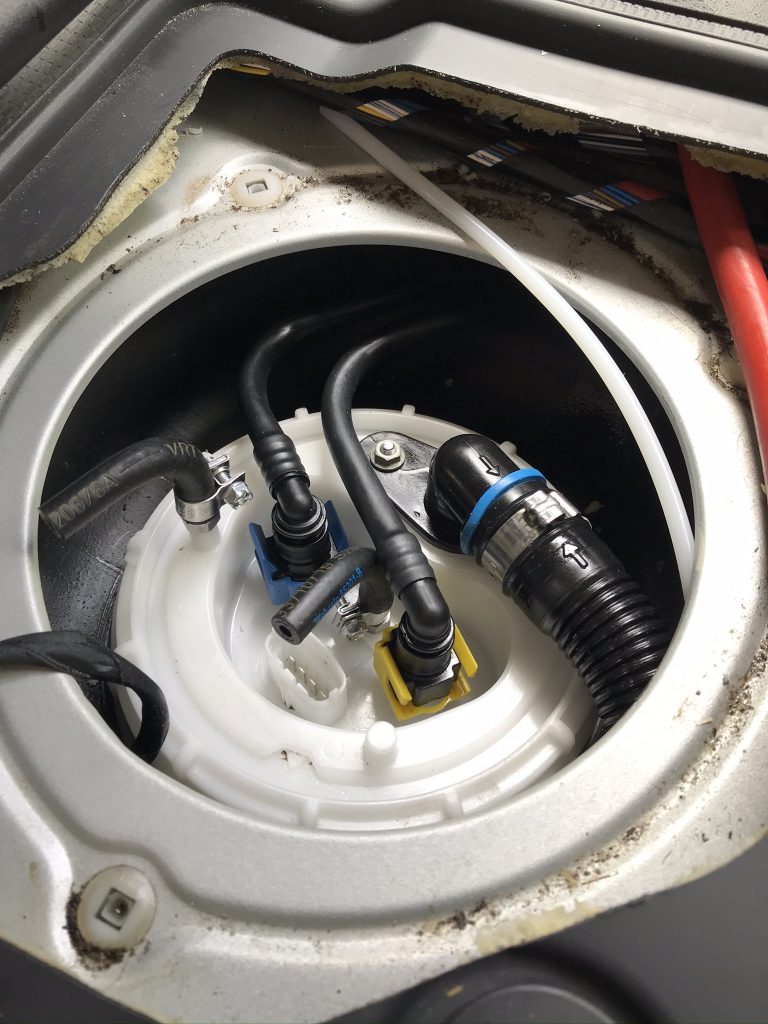
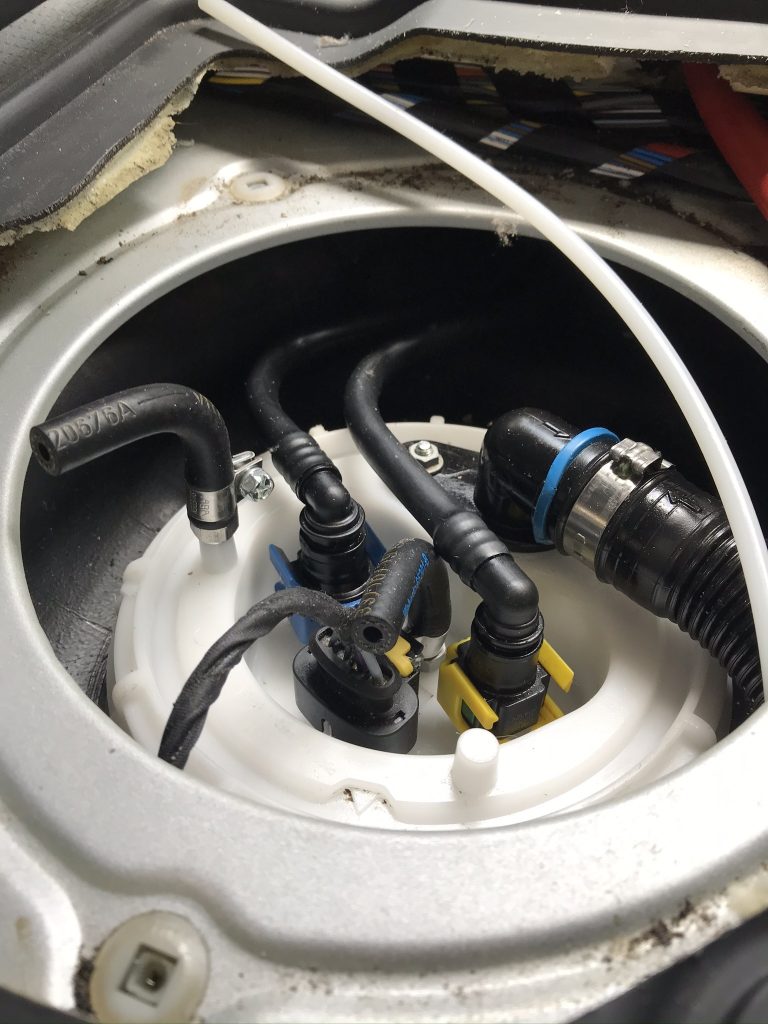
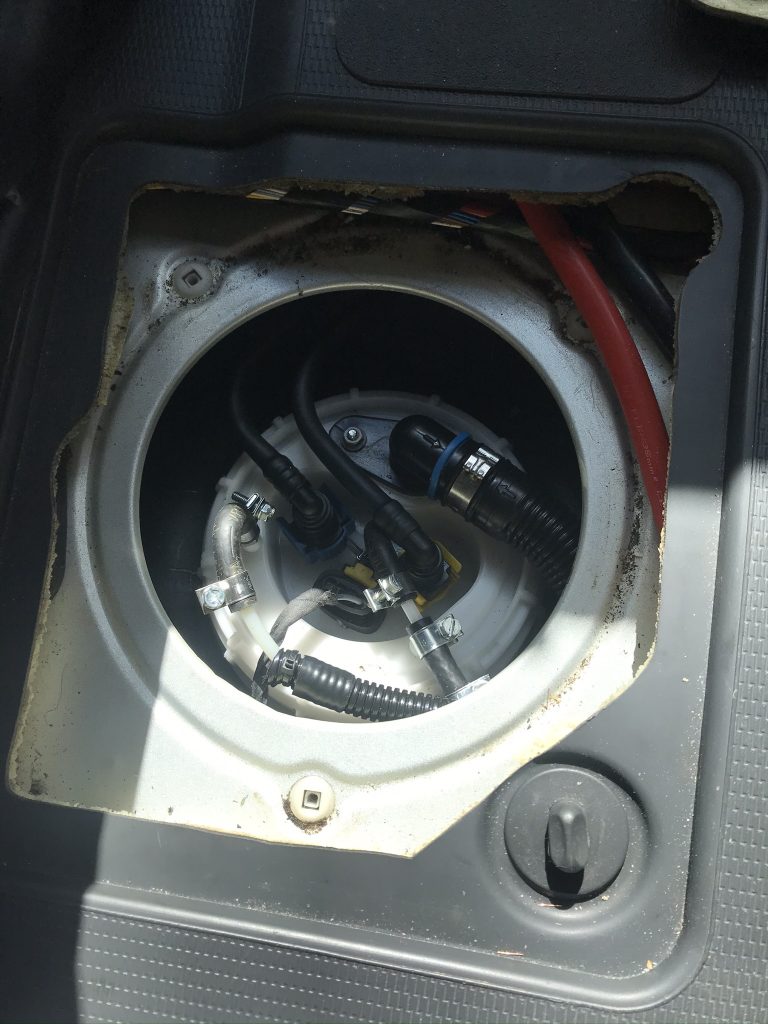
Below: Two pipes fitted now its time to start the assembly
Finally: Both pipes are fitted. I now have twin fuel lines attached to the Peugeot Boxer Fuel tank, one for the diesel cooker and one for the diesel heater and hot water heater.
Webasto Fuel Standpipe Kit – Fiat Ducato Part Number: RMB7654A
BUTLERBUS TECHNIK LTD Tillbridge Road Garage Sturton-by-Stow Lincoln LN1 2BP United Kingdom
The tiles says Peugeot Boxer but the instructions are the same for the Fiat Ducato and Citroen Relay. The van below is a 2016 model, I cannot say if these instructions apply to other Peugeot/Fiat/Citroen vehicles.
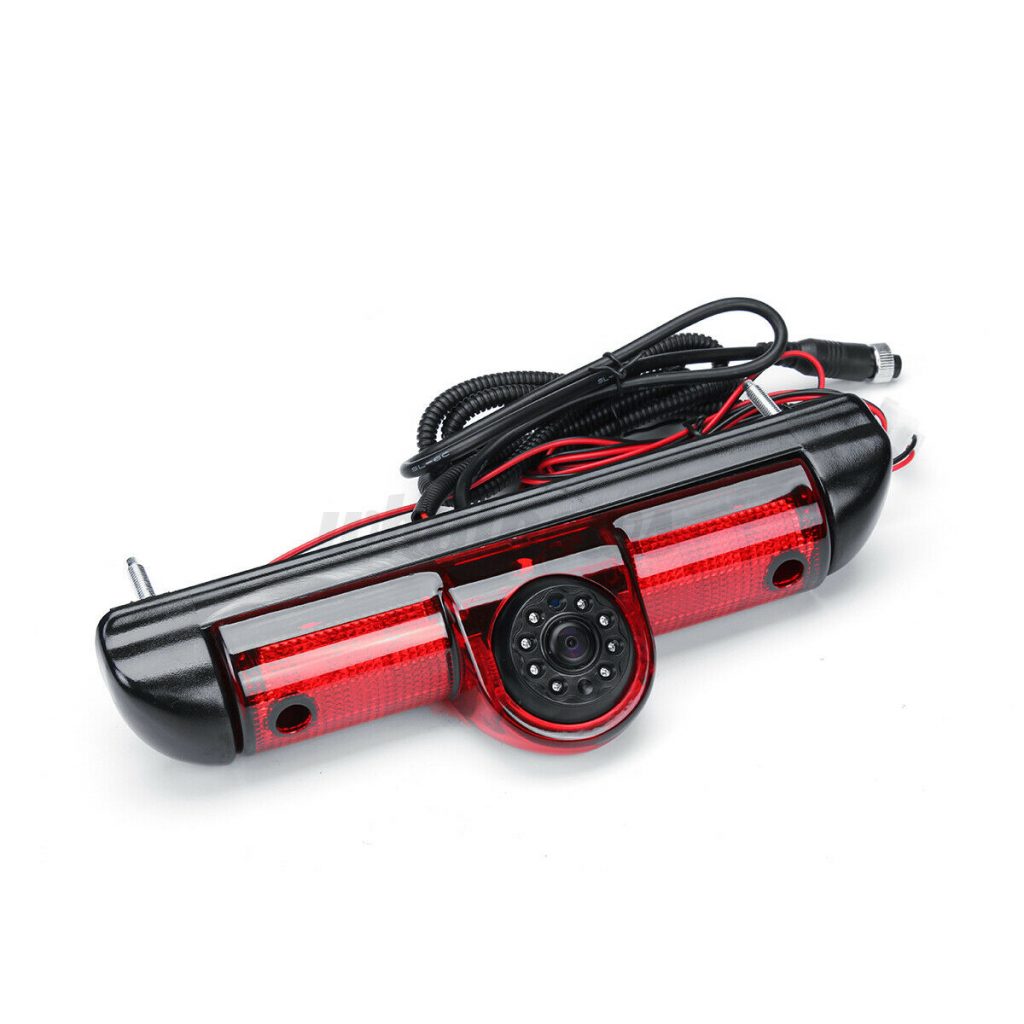
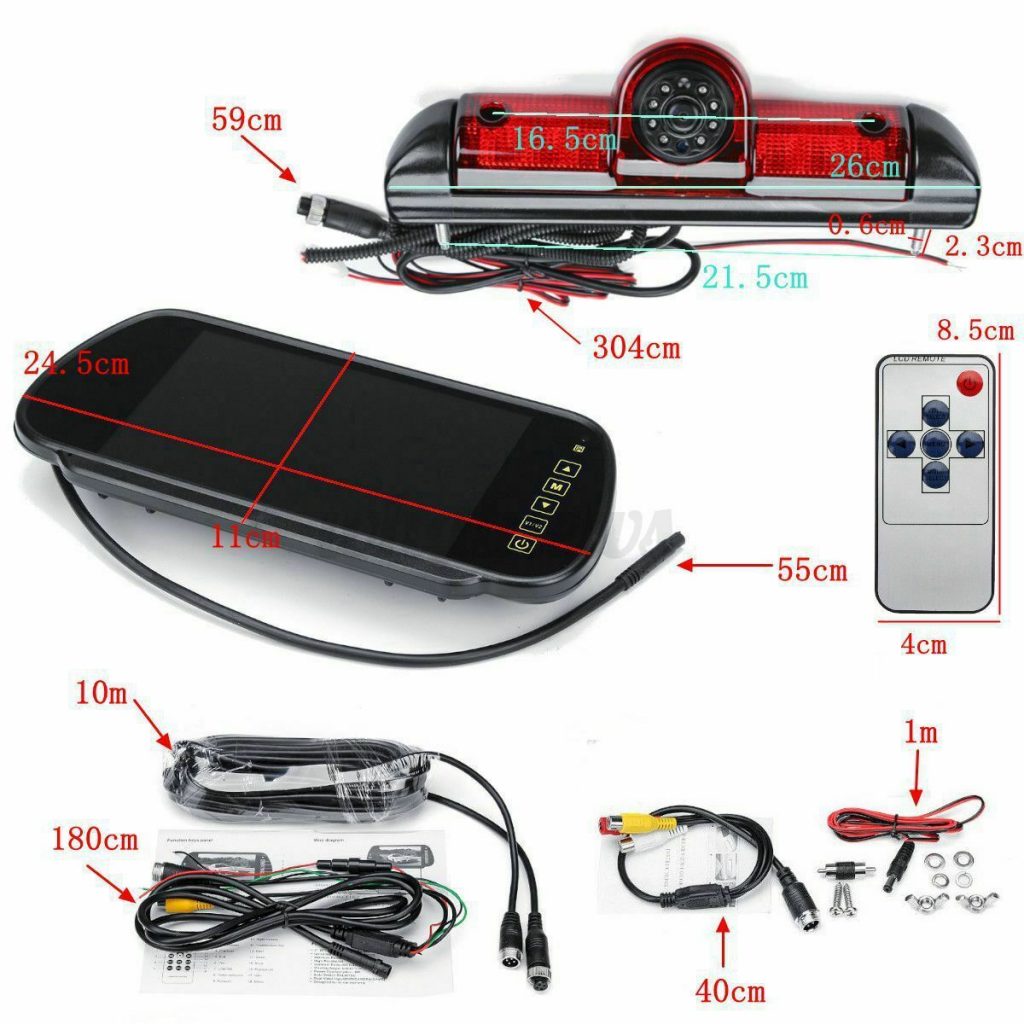
One of the first jobs I did on the van was to fit the reversing camera. I’ve had it for almost a year now and its been one of the best buys I made for the vehicle, I wouldn’t be without it. Kits are available on EBay and Amazon and a full kit will cost you about £70 today. Links where to buy are at the bottom of this page.
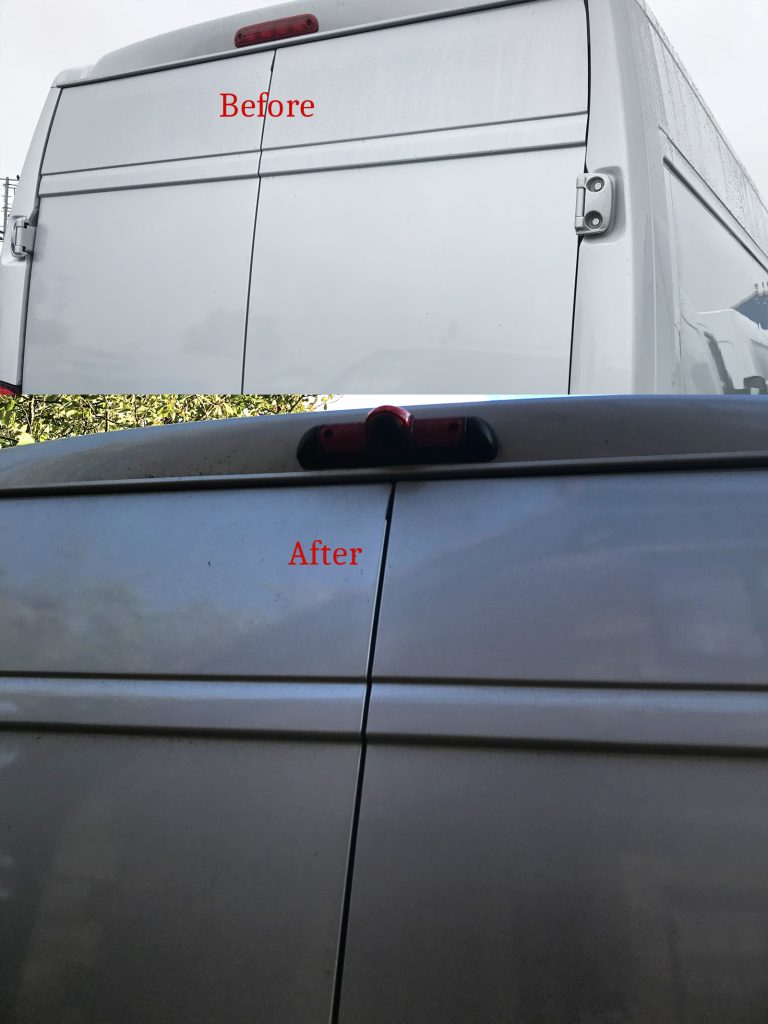
How to install: Its fairly easy to install the camera/rear light. All thats required is that you remove the original Peugeot Boxer, Fiat Ducato or Citroen Relay reversing light and replace with the one shown above. The sizes are the same and the screw holes line up perfectly.
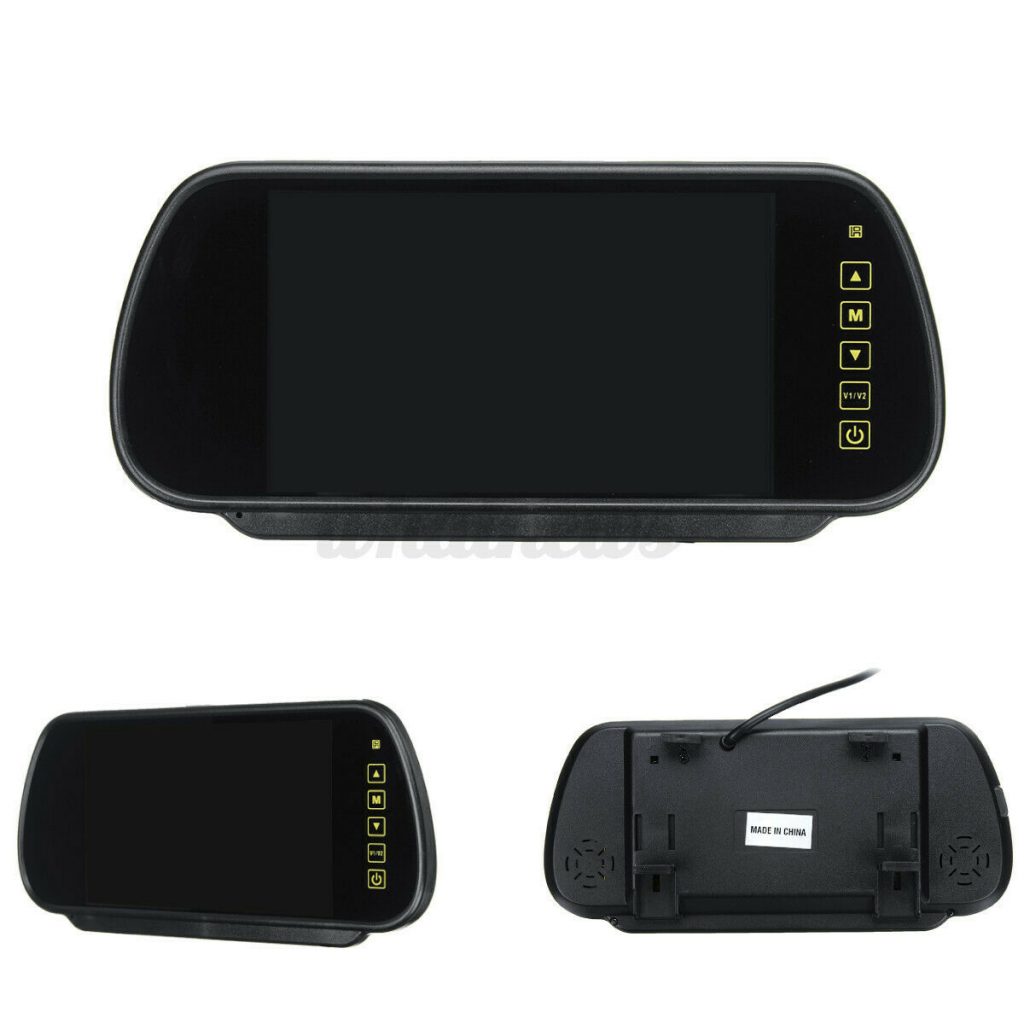
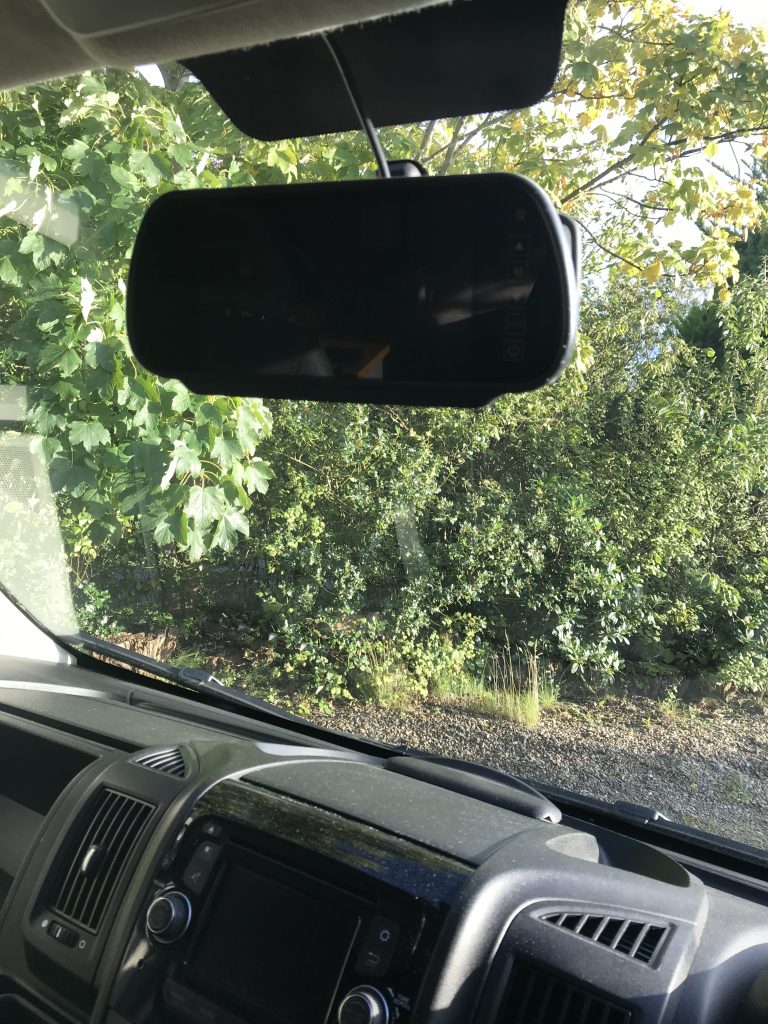
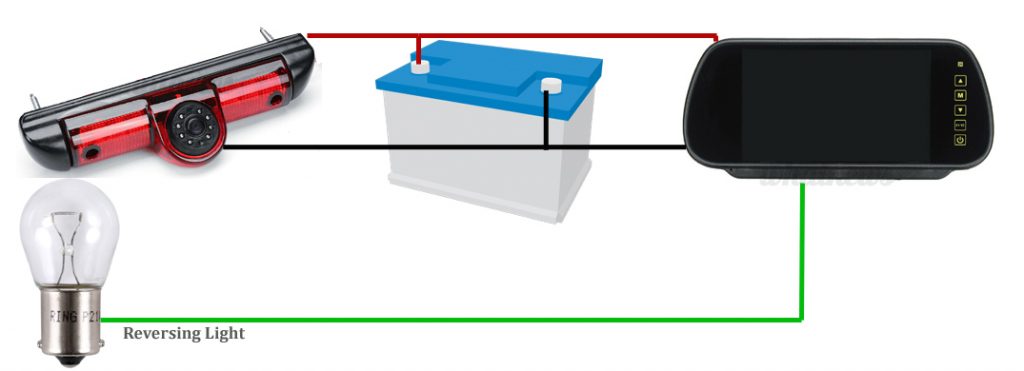
Decide were you want to position the monitor, you could wire directly into the Peugeot Dashboard Screen. However, I decided to use the monitor that came with the kit instead and fitted it were the rear view mirror is located on the windscreen.
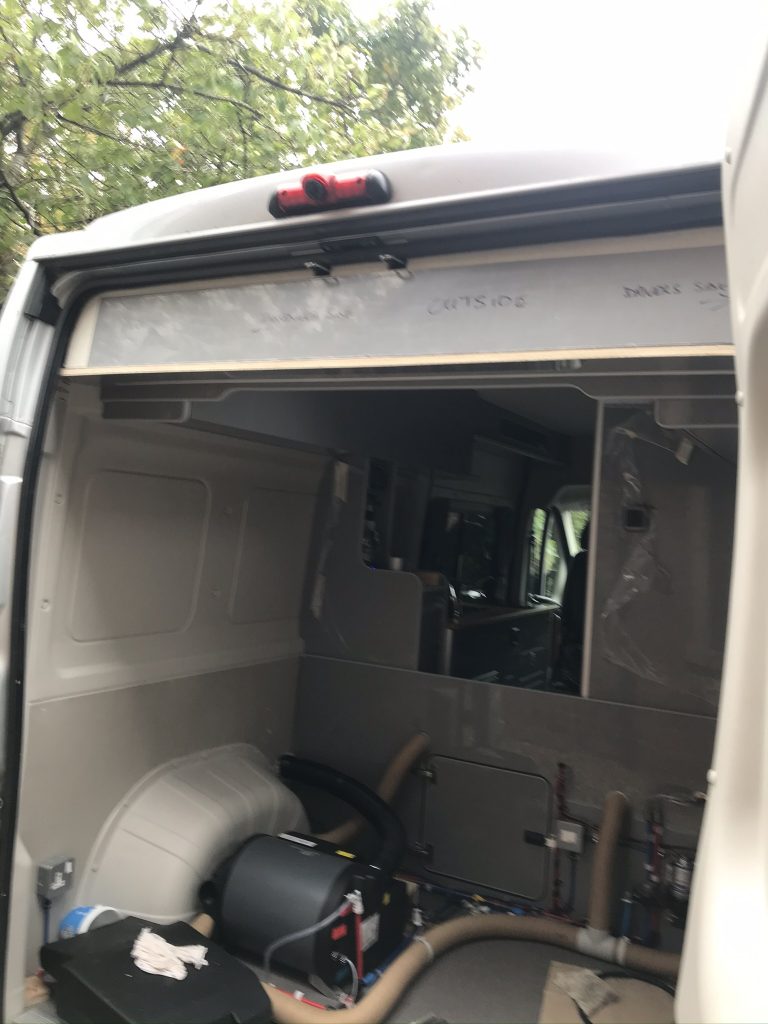
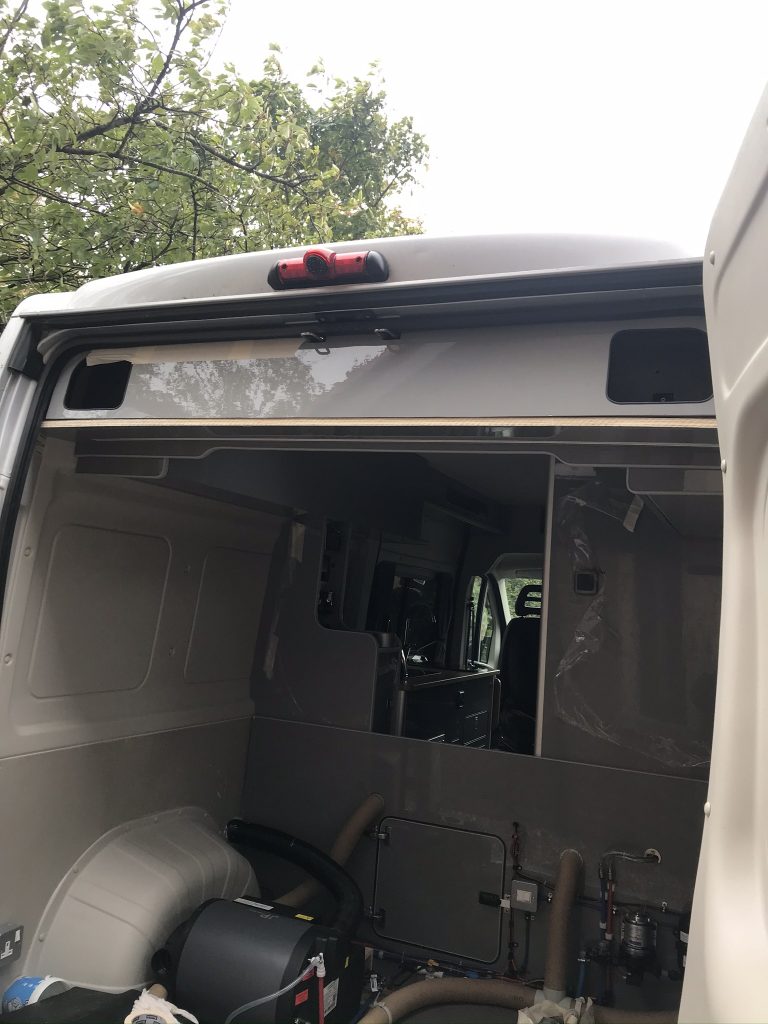
Below: Its time to locate your reversing light wire. You will find easy access by removing the small panel at the rear of your vehicle to gain access to your rear display light cluster. There are two large thumb screws, unscrew them and the rear cluster will come off.
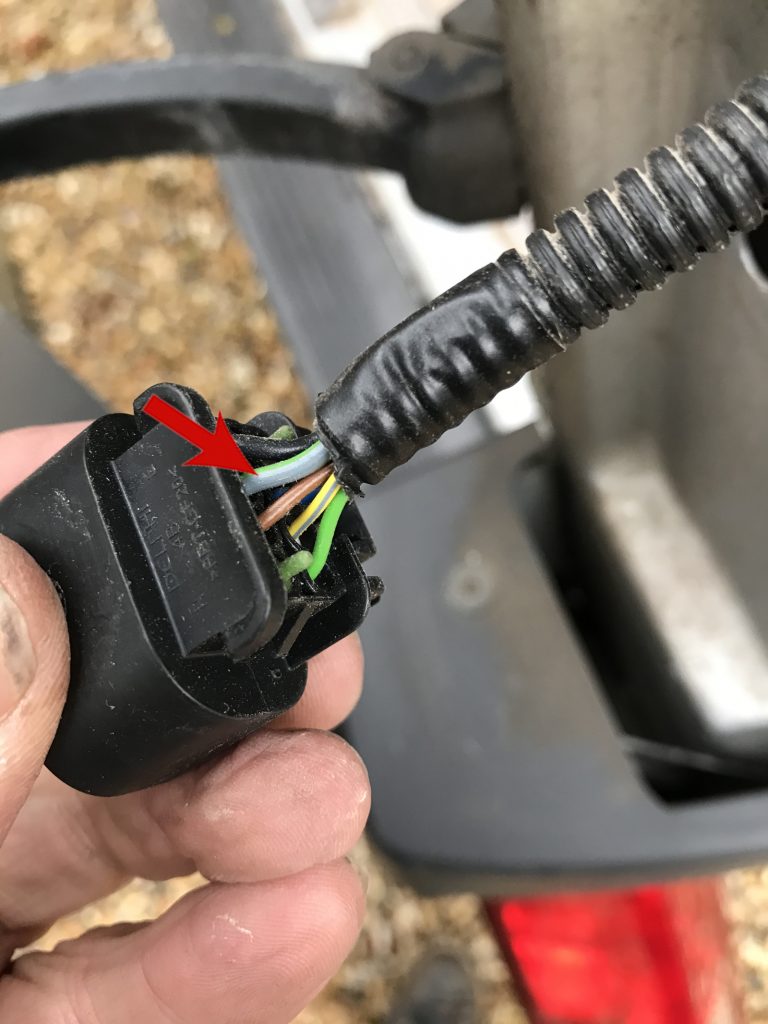
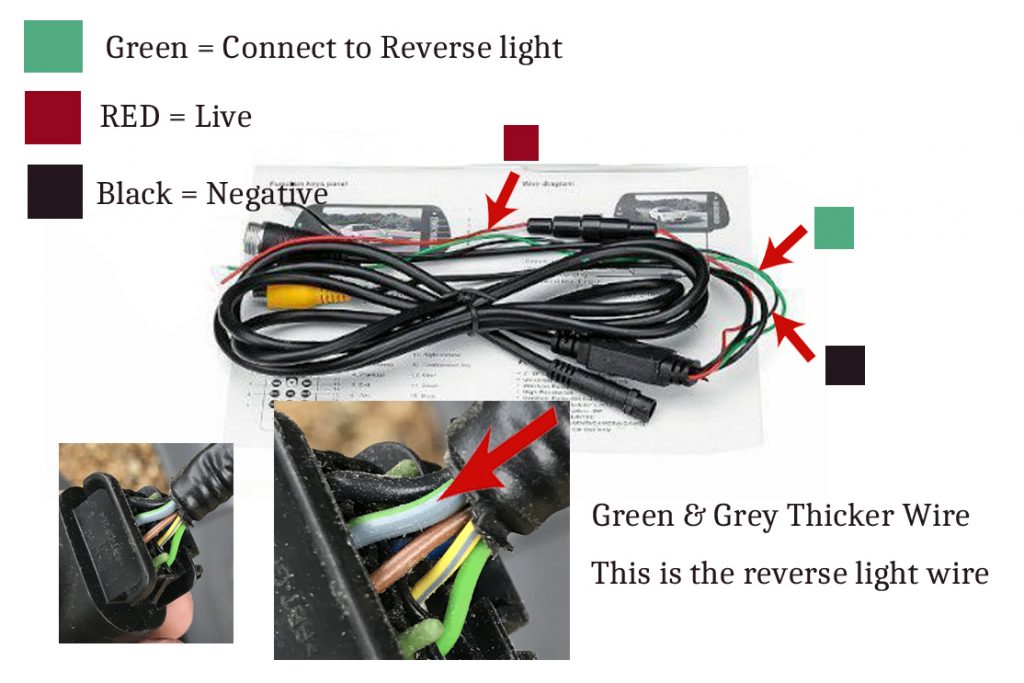
Once you remove the rear light cluster you can easily unplug the Cable Plug directly behind the reversing light. You may not need to remove the entire cluster but I found it easier to do it this way and less fiddly. On the 2016 Peugeot Boxer (I also believe the Fiat Ducato and Citroen Relay) the Reversing Light Wire is Green and Light Grey (or Grey with a Green stripe), its also a thicker wire than the rest. Mine was right at the bottom of the plug I had to turn the plug upside down to find it. See below
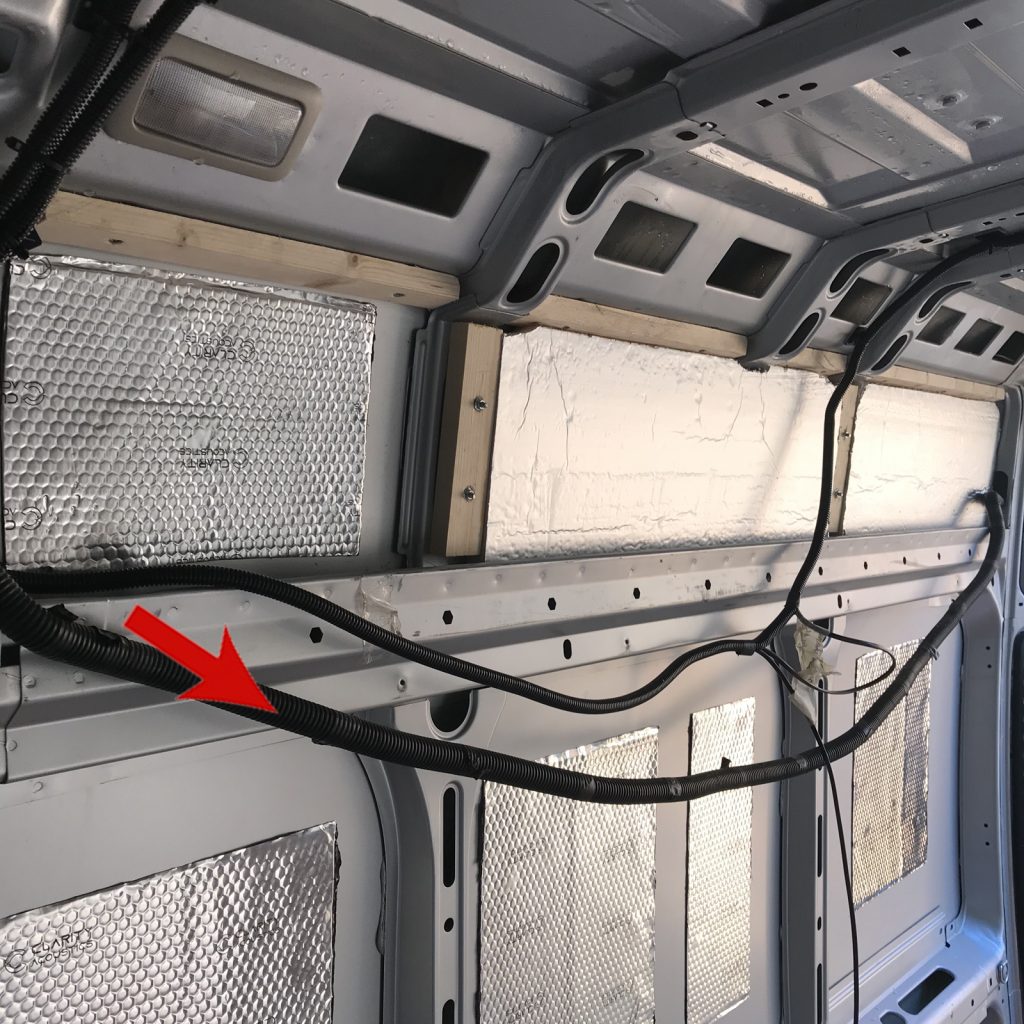
On my Peugeot Boxer I decided to take a live feed (12volts) from the middle interior light (I didn’t plan to use the light and later removed it).
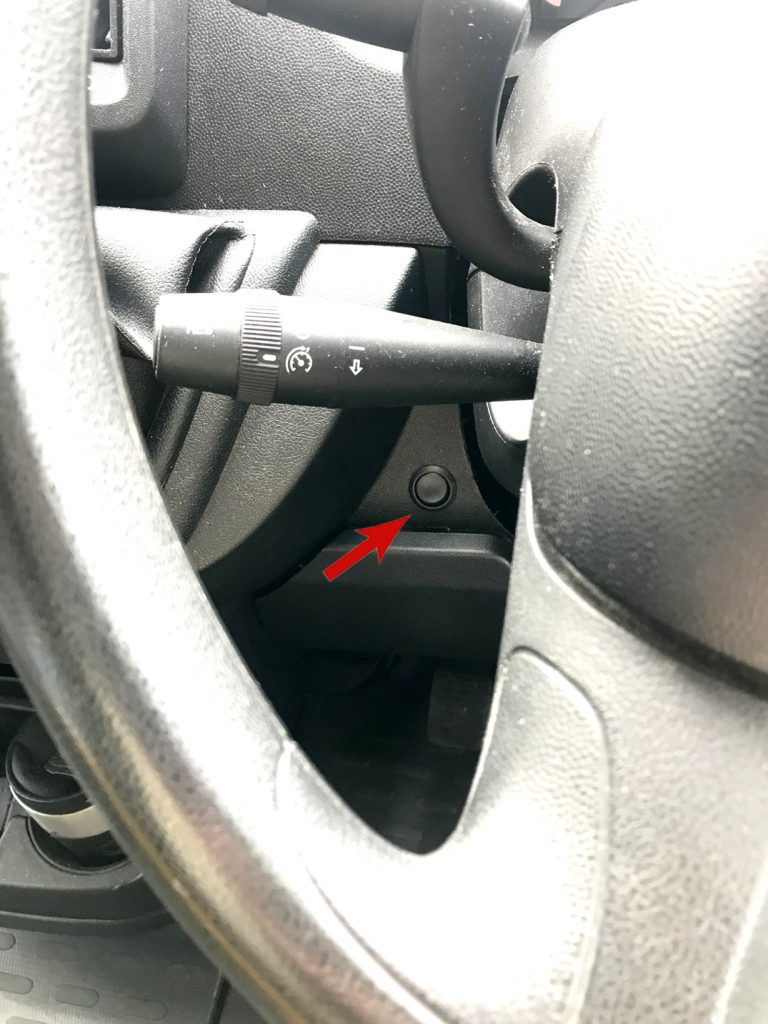
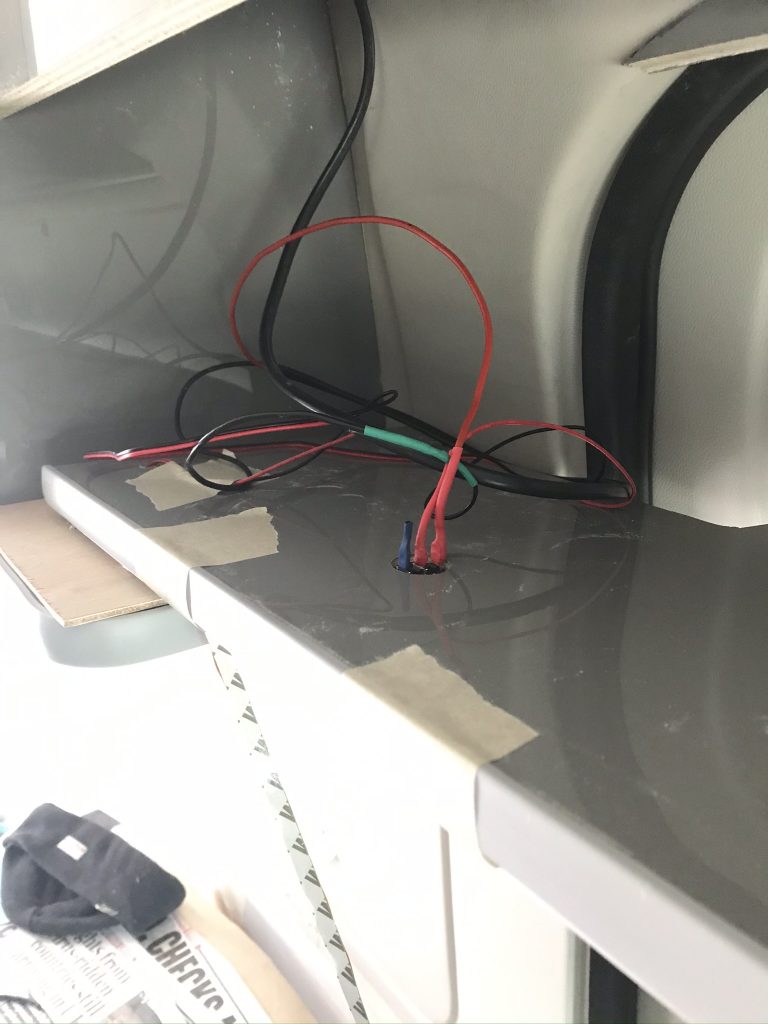
Note the Red Arrow below this is the wiring loom to the rear (ignore the smaller loom above I have added that). Open the conduit and look for the Green & Light Grey Wire (Light Grey with Green Stripe). There are a lot of wires dig deep it may be buried among them. Carefully remove some of the outer plastic on the wire, dont cut the copper wire.
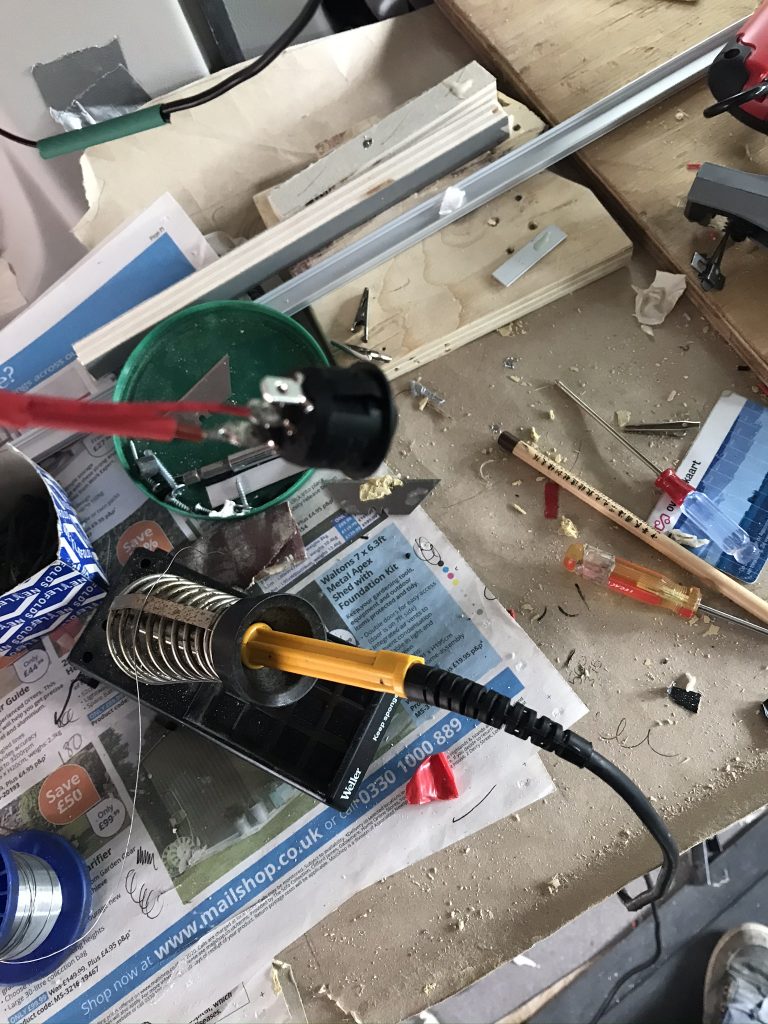
Next, go to your Reversing Camera kit and look for the Green Wire. The Green Wire connects to the Green & Grey Reversing Wire on your vehicle. I soldered mine to make a strong connection. I did this by separating some of the copper braids on the Green and Grey wire and hooking the green camera cable to them, then coating with solder. Connect the Red Wire to a permanent live (I used the middle interior lamp) and the Black to earth (negative).
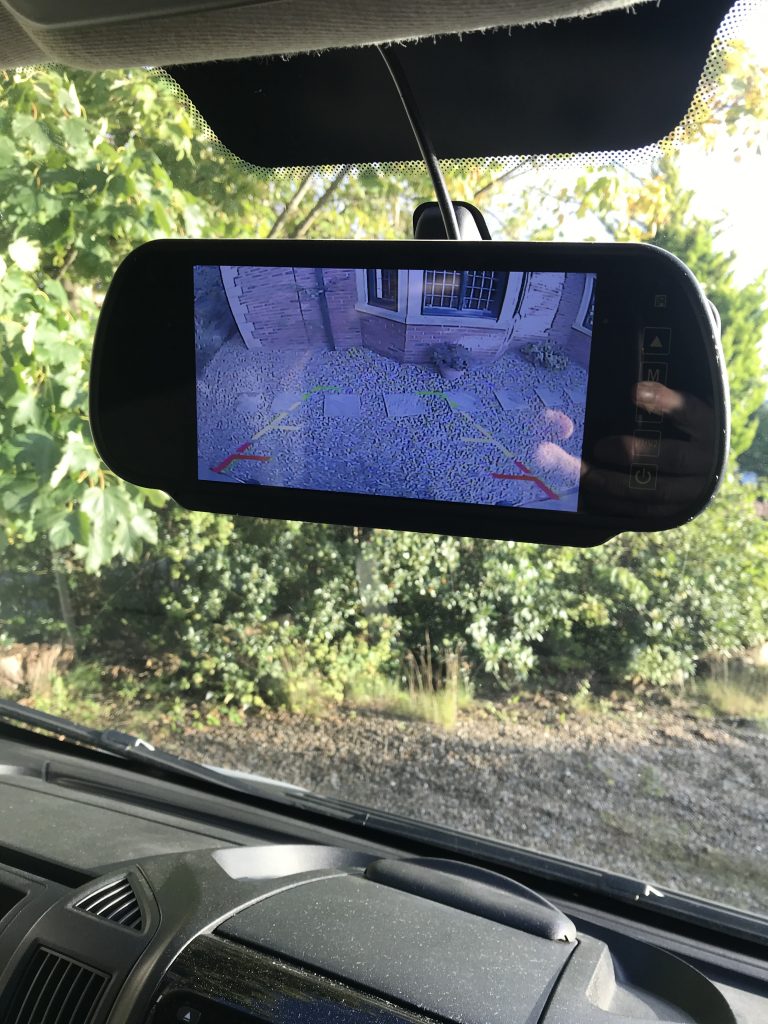
Now its time to turn on the ignition (you dont need to start the engine) and put it into reverse. As soon as reverse is engaged you should see your camera display. The displays on these kits are excellent, the quality is good both in day and night.
How to add a Remote Switch
This is a very useful feature to have because it enables you to turn the camera on or off anytime without the gear-stick being placed in reverse. Its particularly useful as a security feature, say you hear a noise at the back of the vehicle then simply switch the camera on to see what it is.
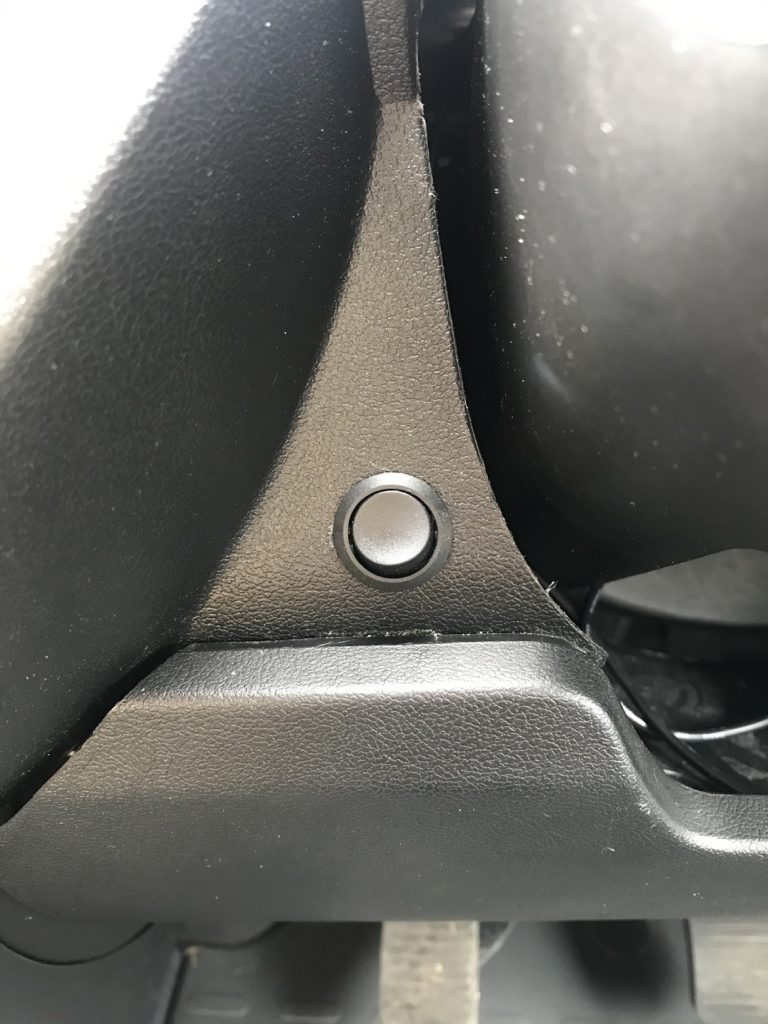
Below: I added a remote switch on the dashboard near the steering wheel, its quite discrete. I also use it when driving in traffic to see what is behind as I have no rear windows in this vehicle (by choice). The switch cost £1.95 (about $2.20)
Above: Adding the remote switch (fairly simple to do)
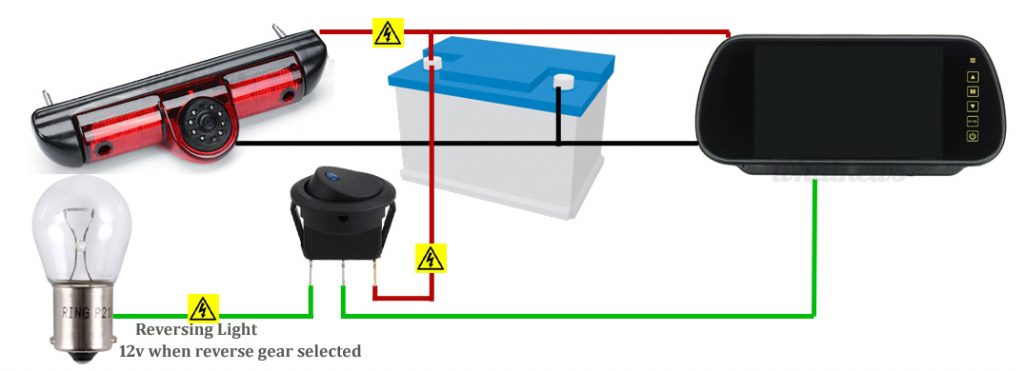
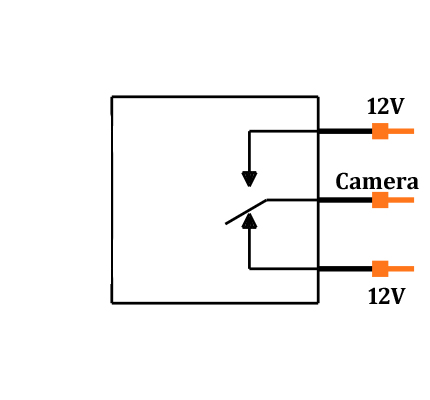
A) To add this switch you need to cut the feed coming from the Reversing light (Green wire) this is a 12v feed. Connect this to the top connector/terminal of the Switch (it doesn’t matter if its top or bottom).
B) Run another (extra) 12v line to the top connector of the switch.
C) The center connector goes to the camera. On this camera this is shown as a green wire.
Search Description (copy and paste into google).
7” Monitor + Rear Brake Light Reversing Camera Kit
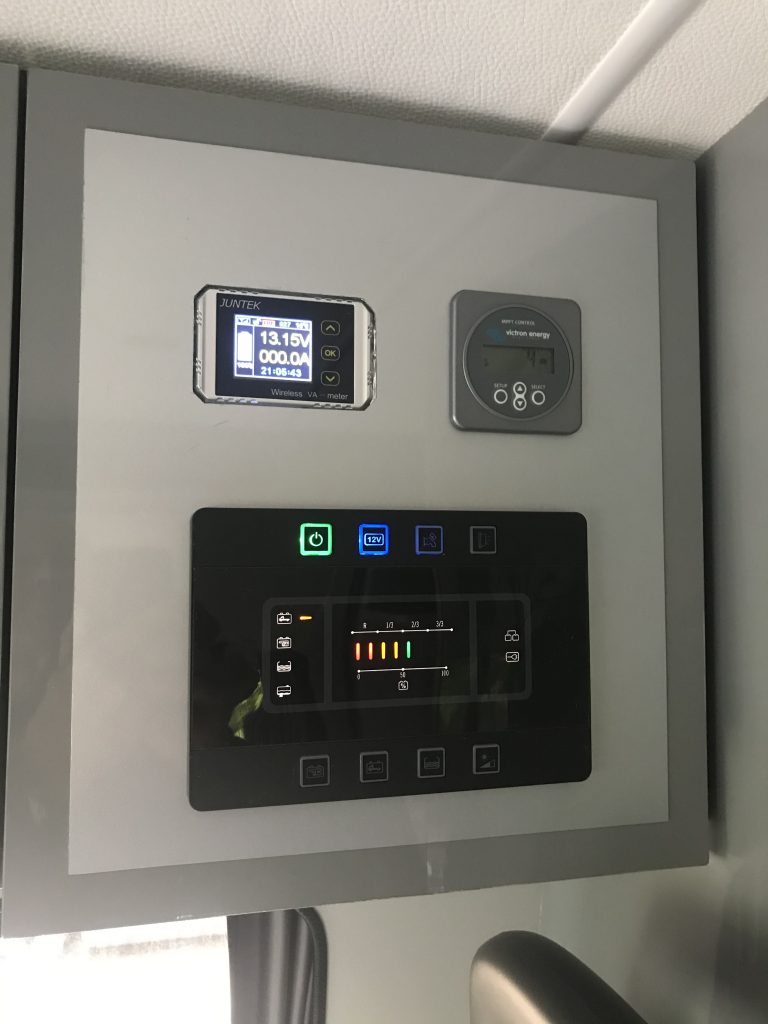
The first of two controls panels, this one is fitted into a door above the internal passenger seats. Rather than group all the control/display units together I decided to break them up into two control panels for ease of use and to prevent crowding. Here is the first one. Links for each of the controls are at the bottom of the page.
The control or Display Panel above is built into a cupboard next to the bathroom and above the inside passenger seats.
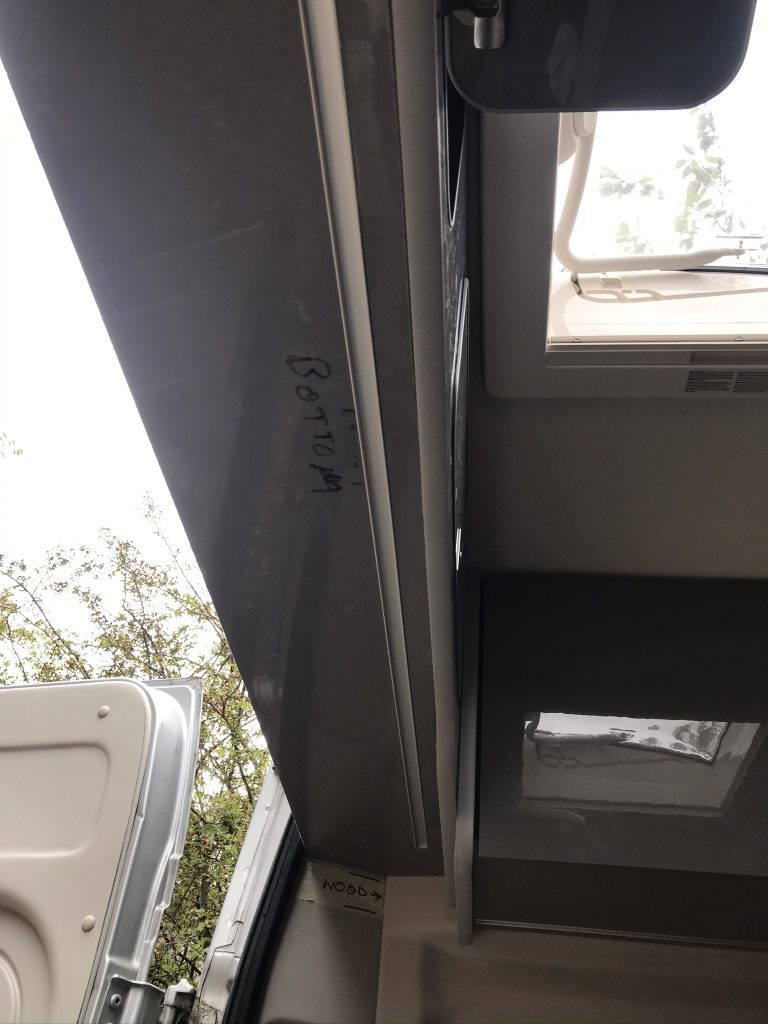
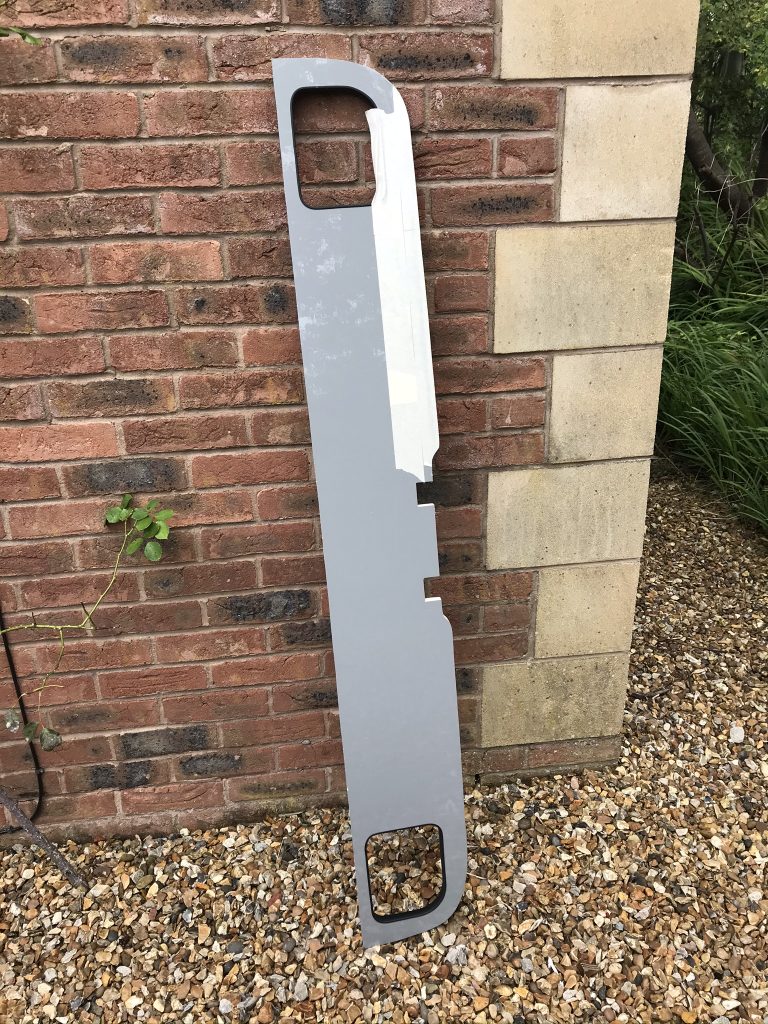
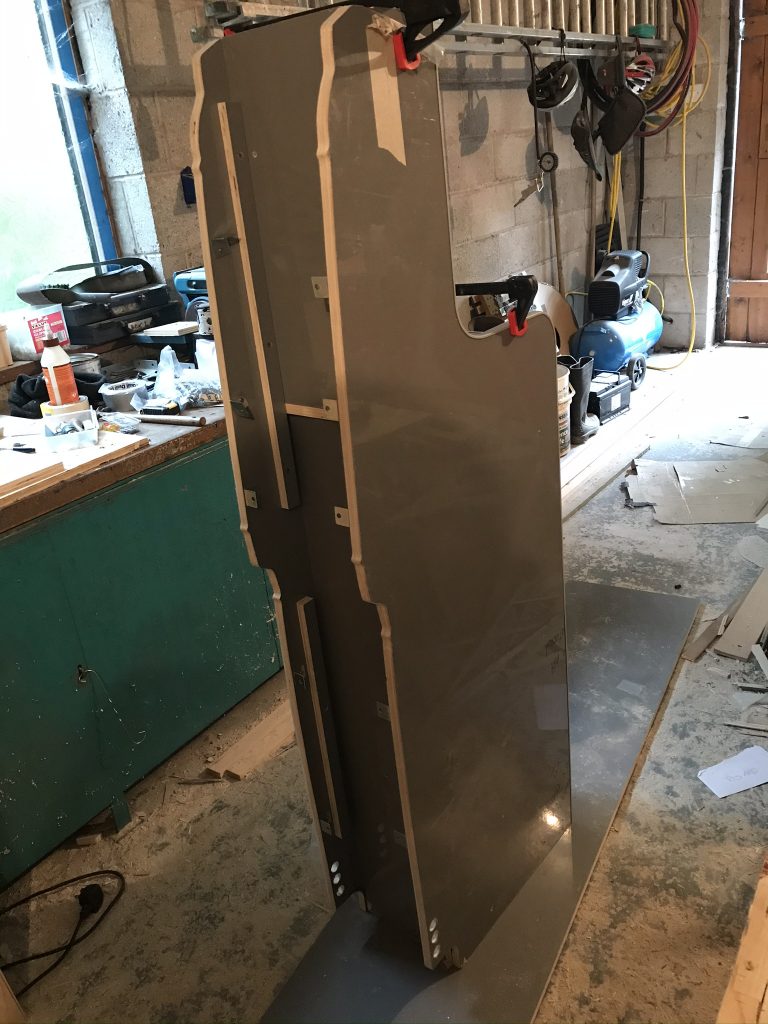
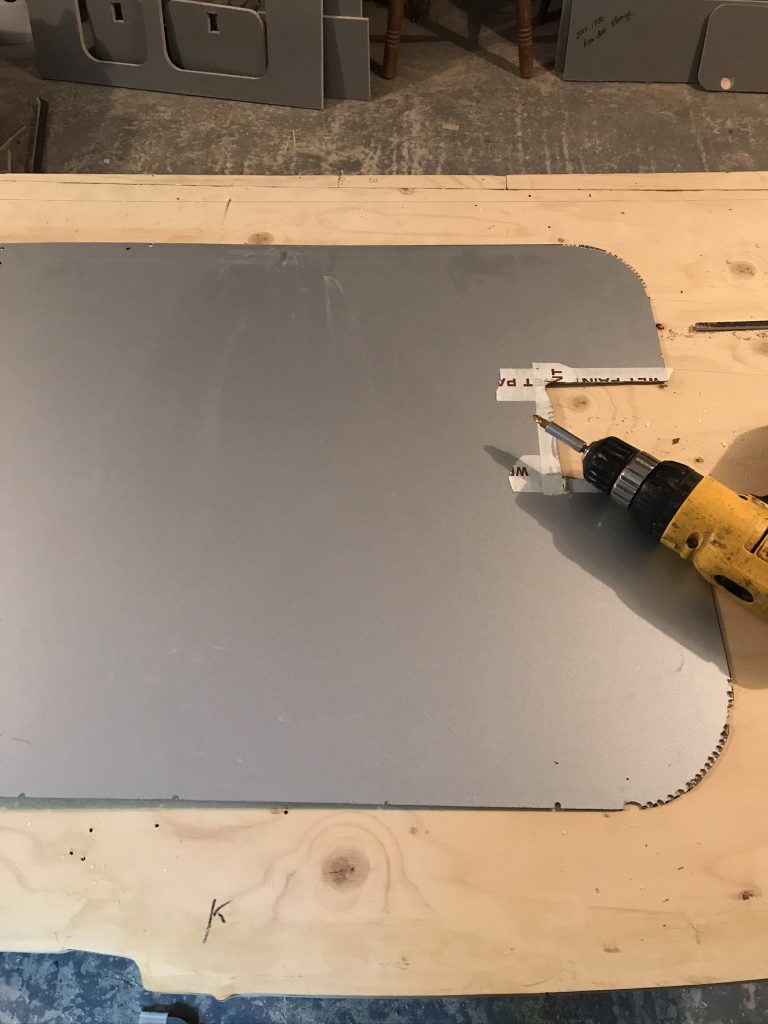
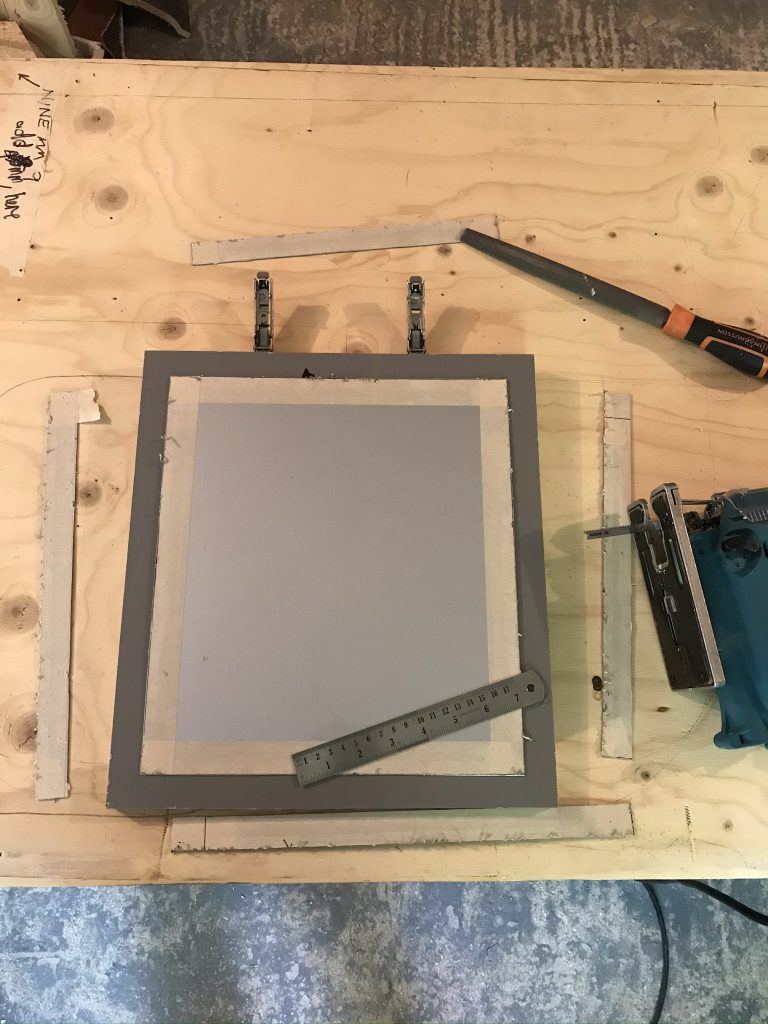
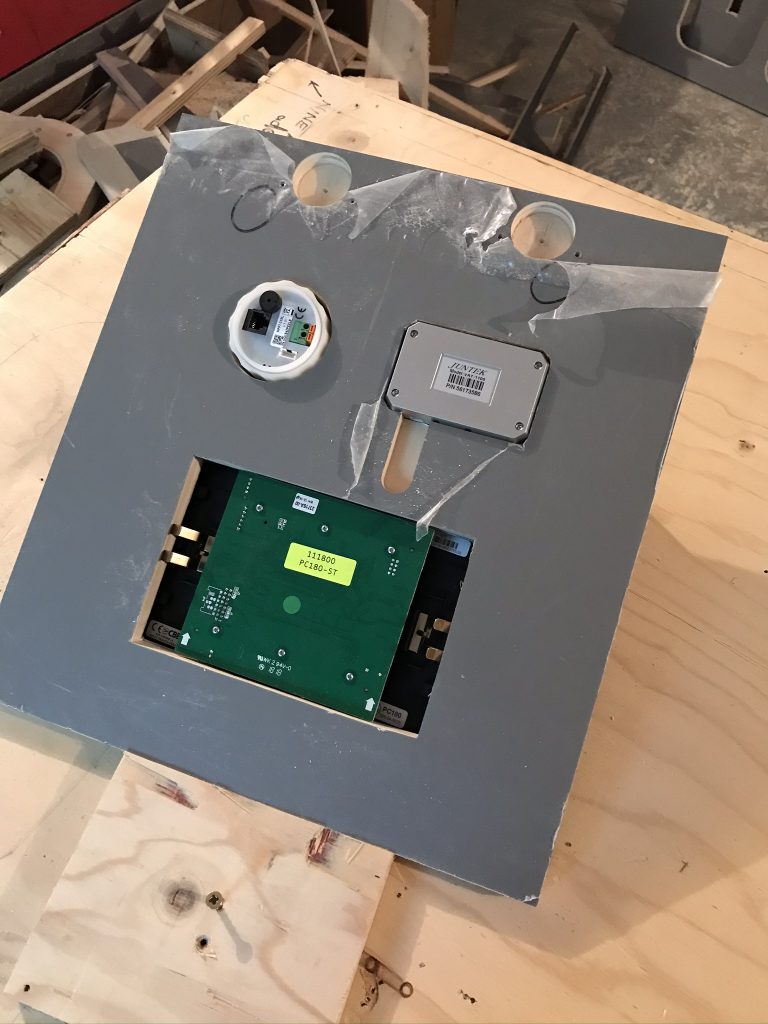
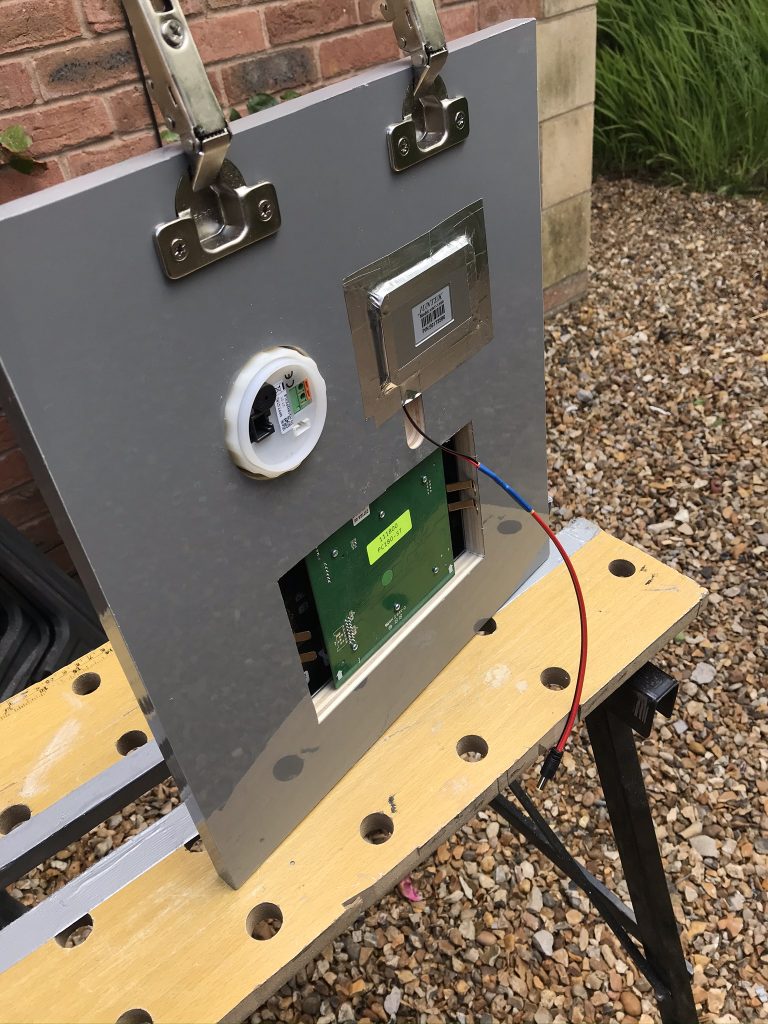
I have added a “panel on panel”, I’ll explain below with an image. The vehicle is metallic silver, the furniture is grey, I thought it would be a nice idea to use the surplus metal cut from the van when making the windows and use a piece inside the vehicle. Below is a scrap piece of metal that came out of the side of the van. I have already used it once to make a cover for the Hook-Up Hatch Cover.
Below: First, cut the metal to size.
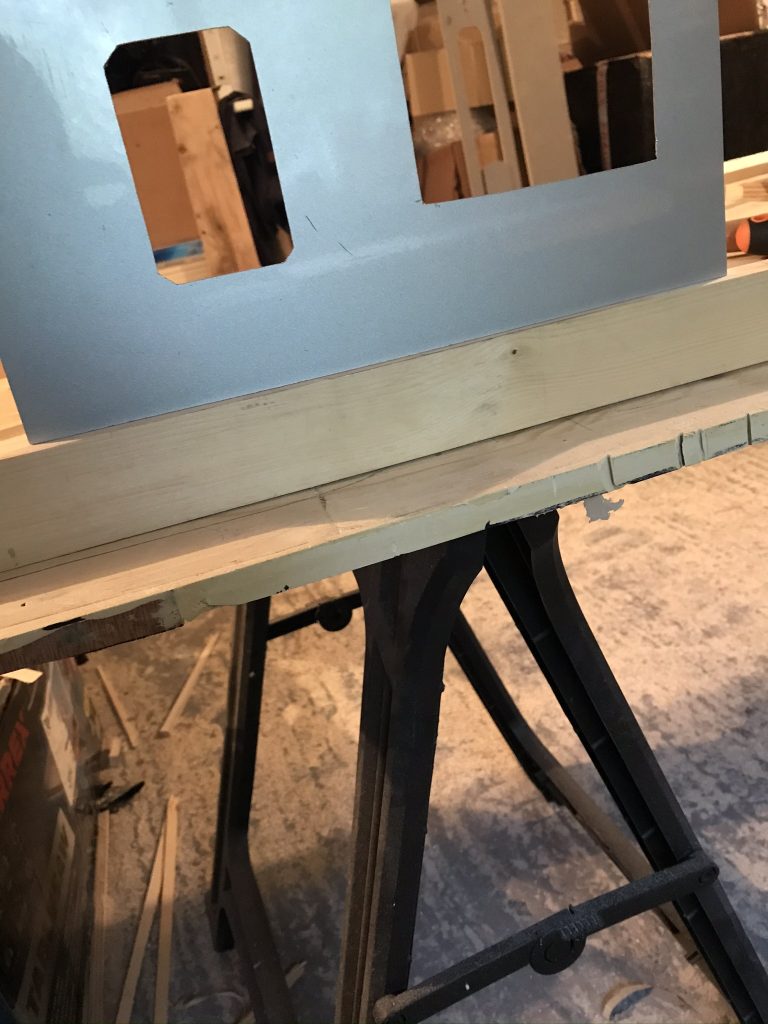
Below: Its important to make sure the edges are dead straight. Because this metal panel is sitting inside a square shape so any miss-alignment is going to stand out. To get the edges straight after using the jigsaw, (they were not perfect) I clamped the panel between two straight pieces of wood either side of the panel and filed the edges until dead level. I checked the edges for daylight (high or low areas). Only when the four edges were straight did I move onward.
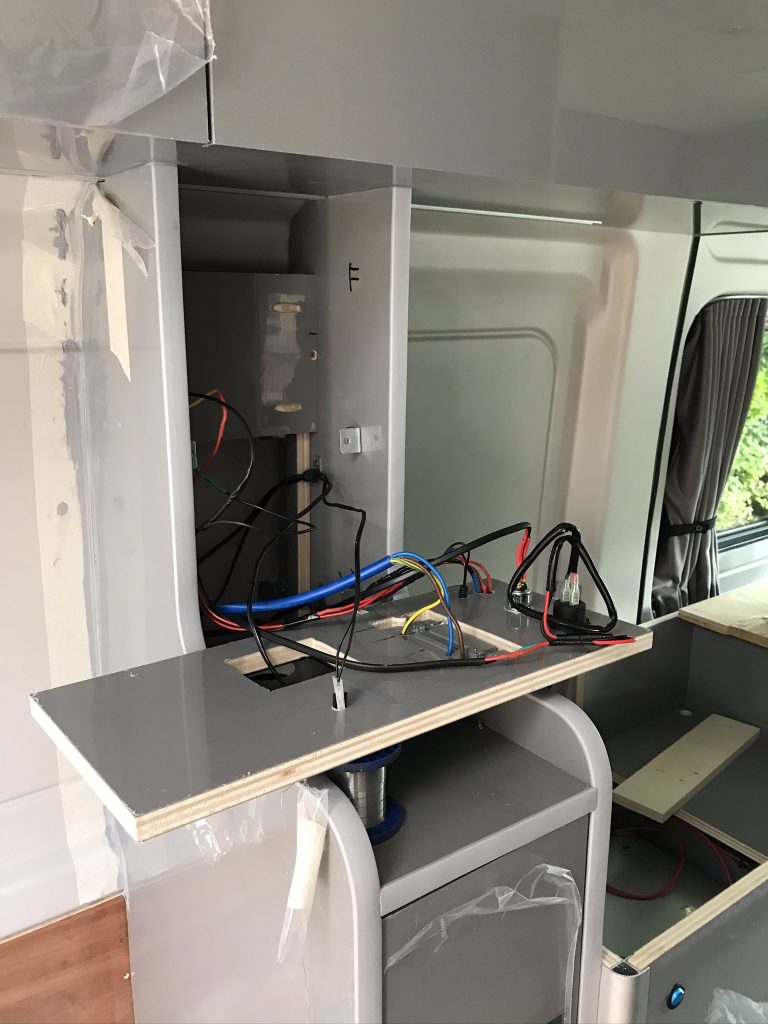
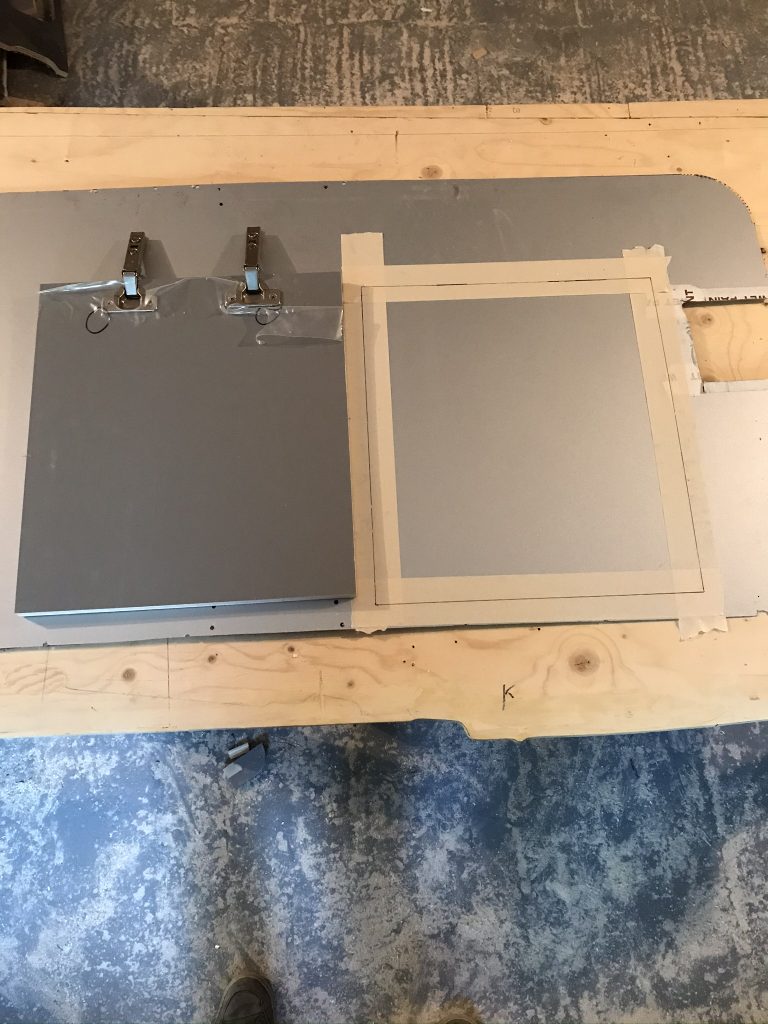
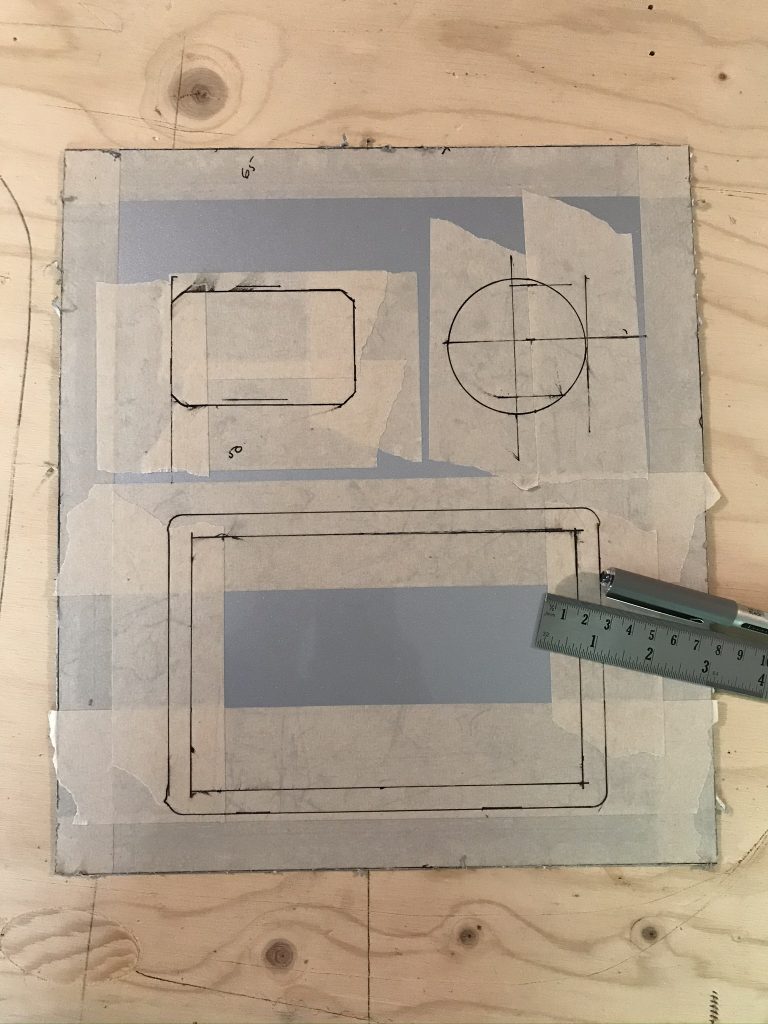
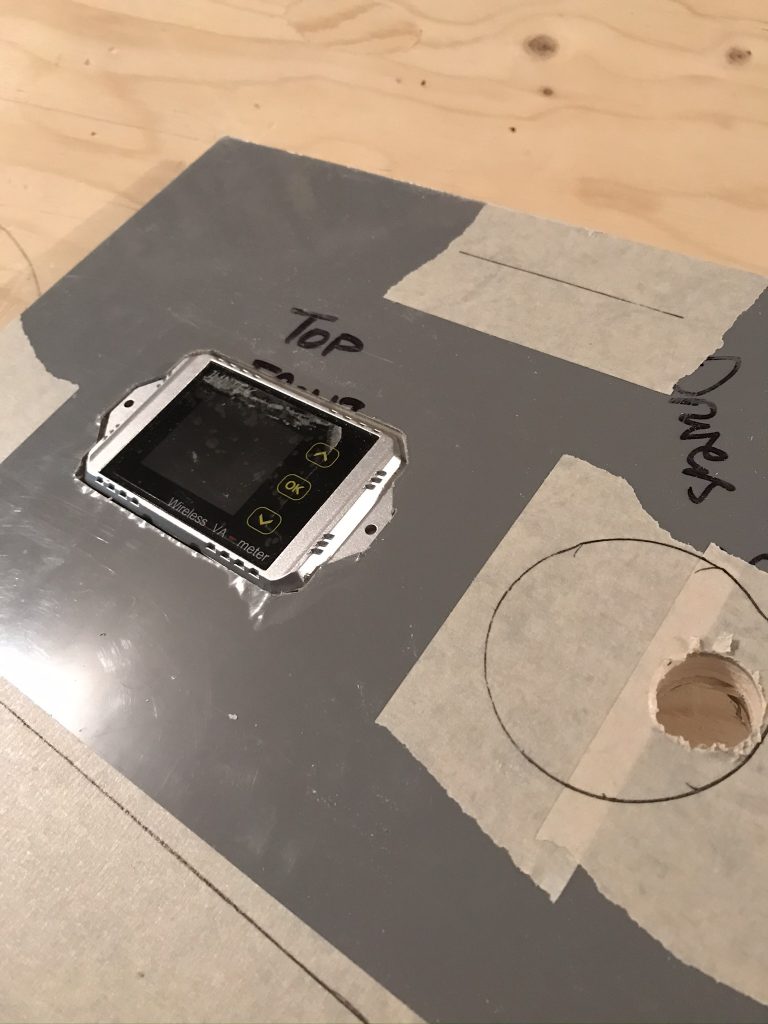
Below: The next stage is to position the individual control panels into the Display Panel.
Below: Using the metal panel I have just made I transferred the shapes onto the cupboard door ready for cutting
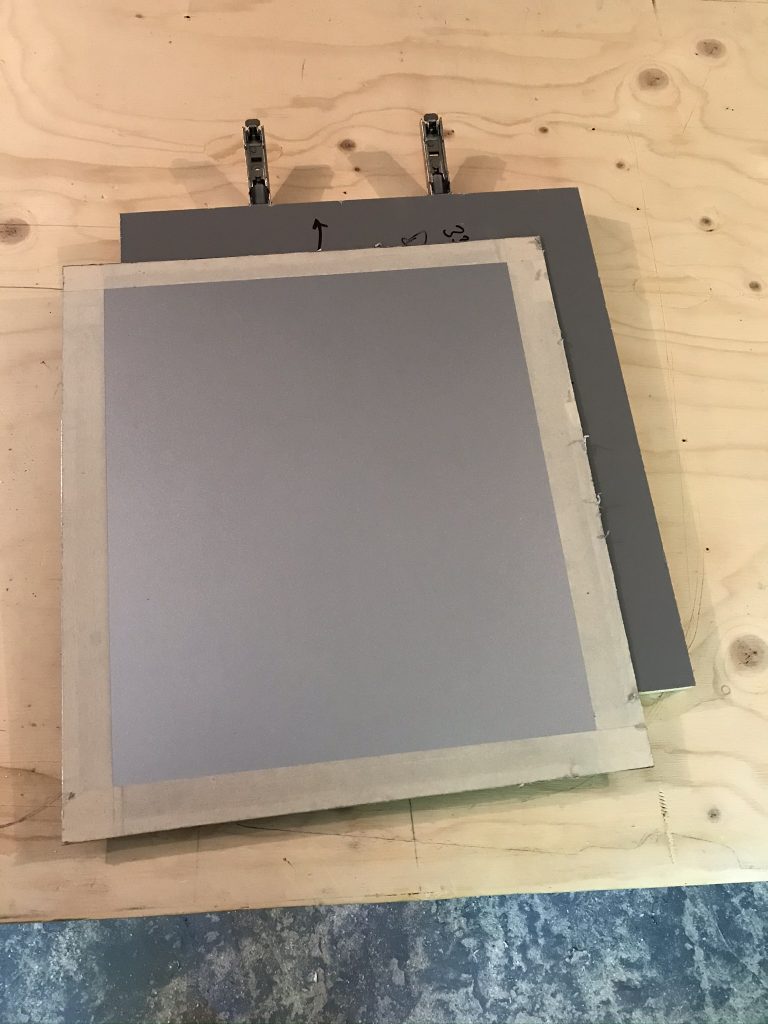
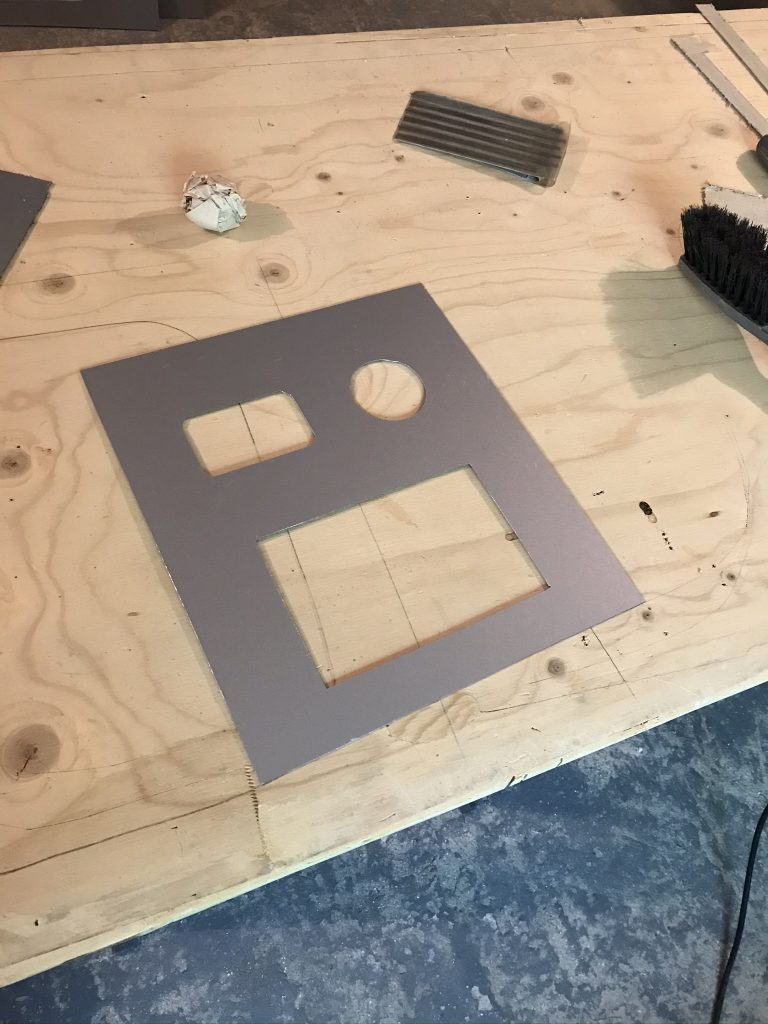
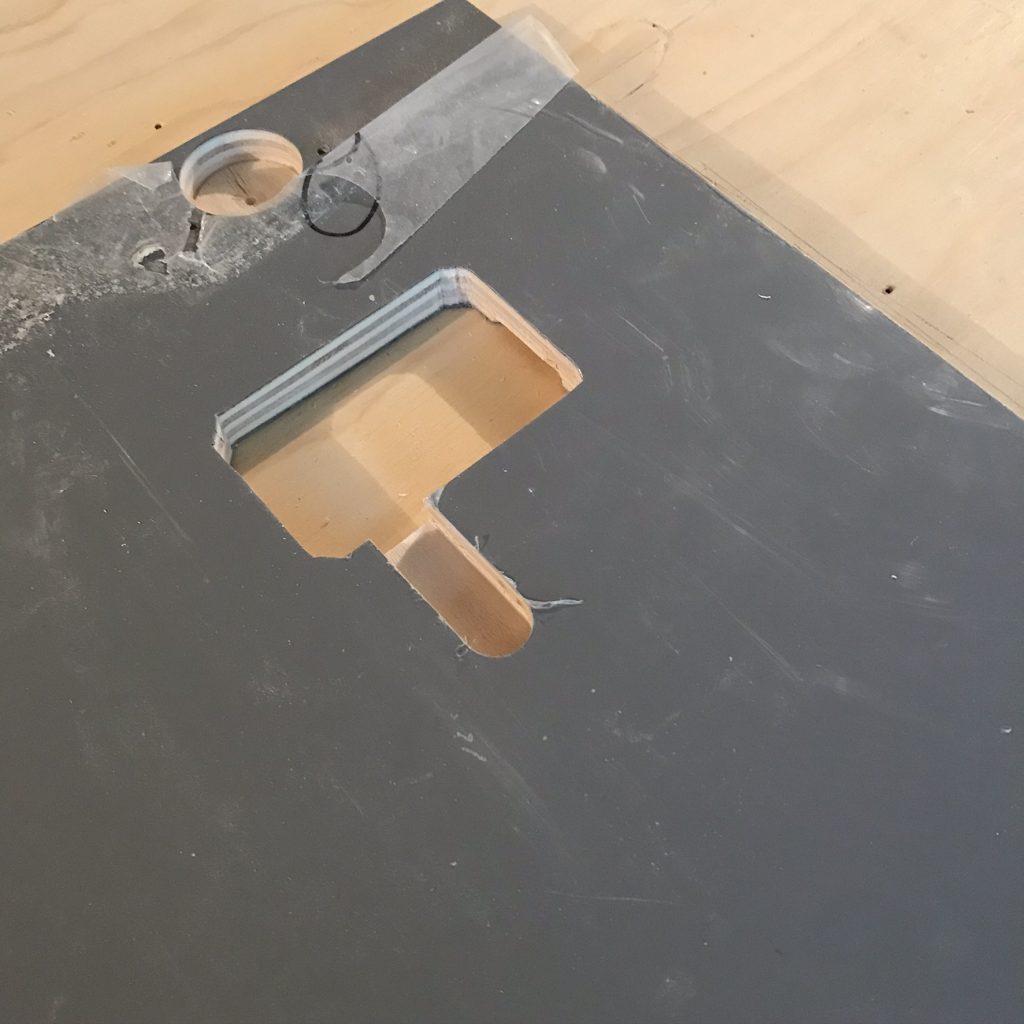
Below: I used a router to cut a recess into the back of the panel (but not all the way through it). This is so I could have access to unplug the power input.
Below: Checking the edge is flat, look for gaps or daylight (high or low spots)
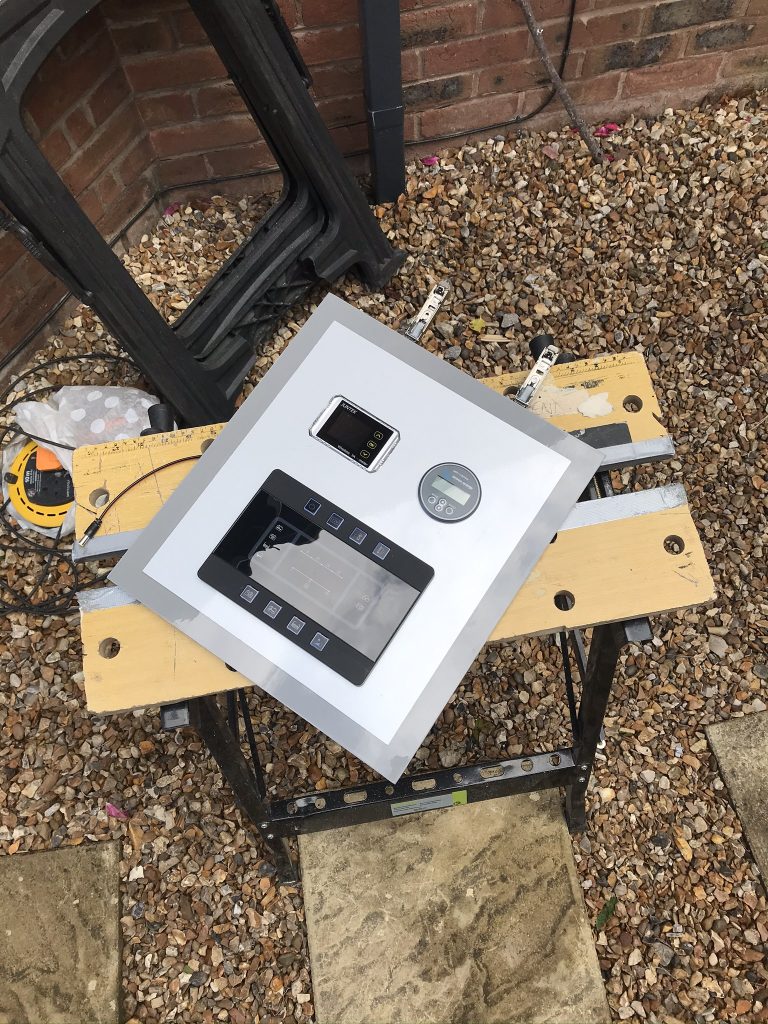
Below: The finished panel, I now have a piece of the van’s outside bodywork inside the vehicle which I think complements the grey wood door.
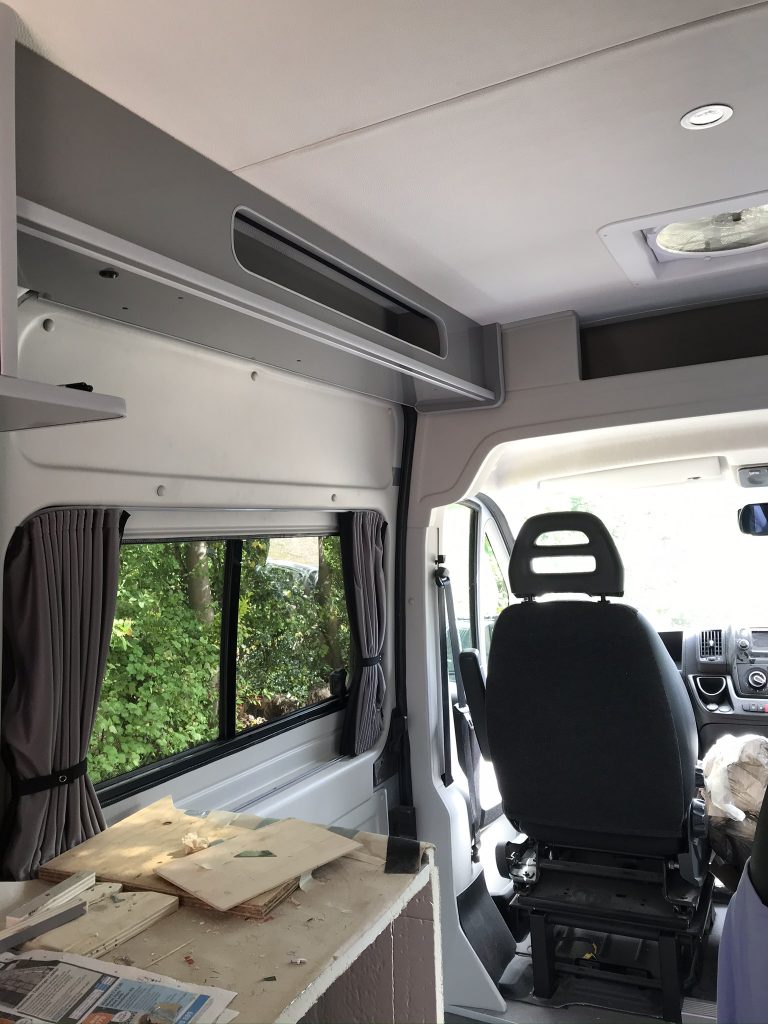
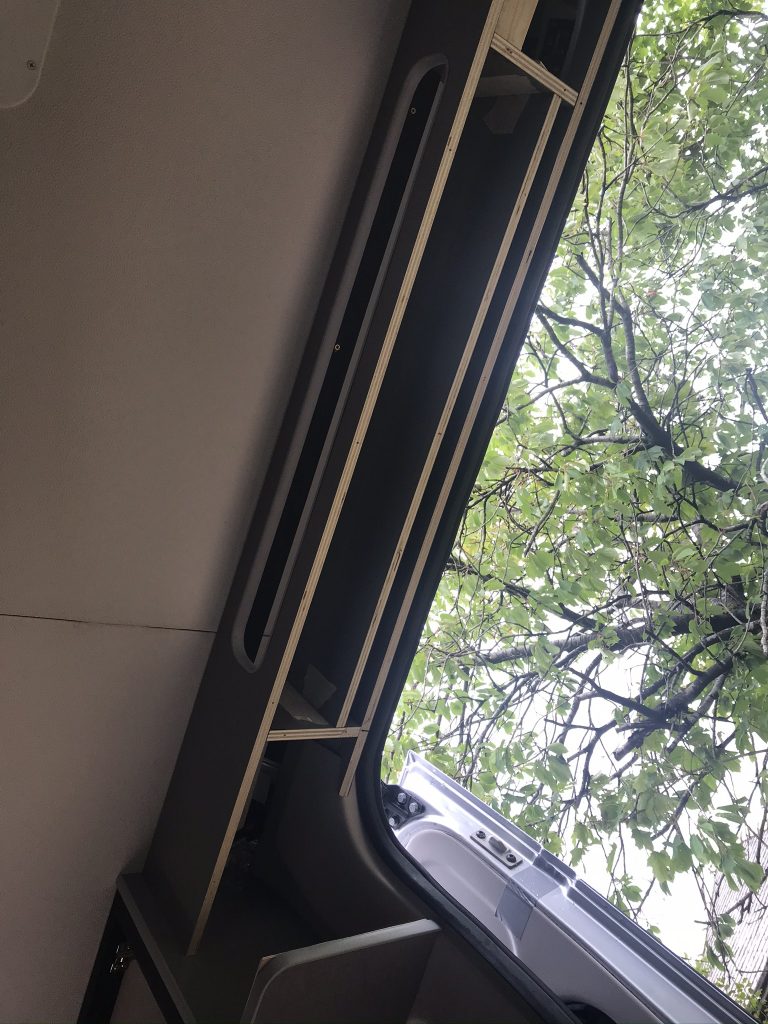
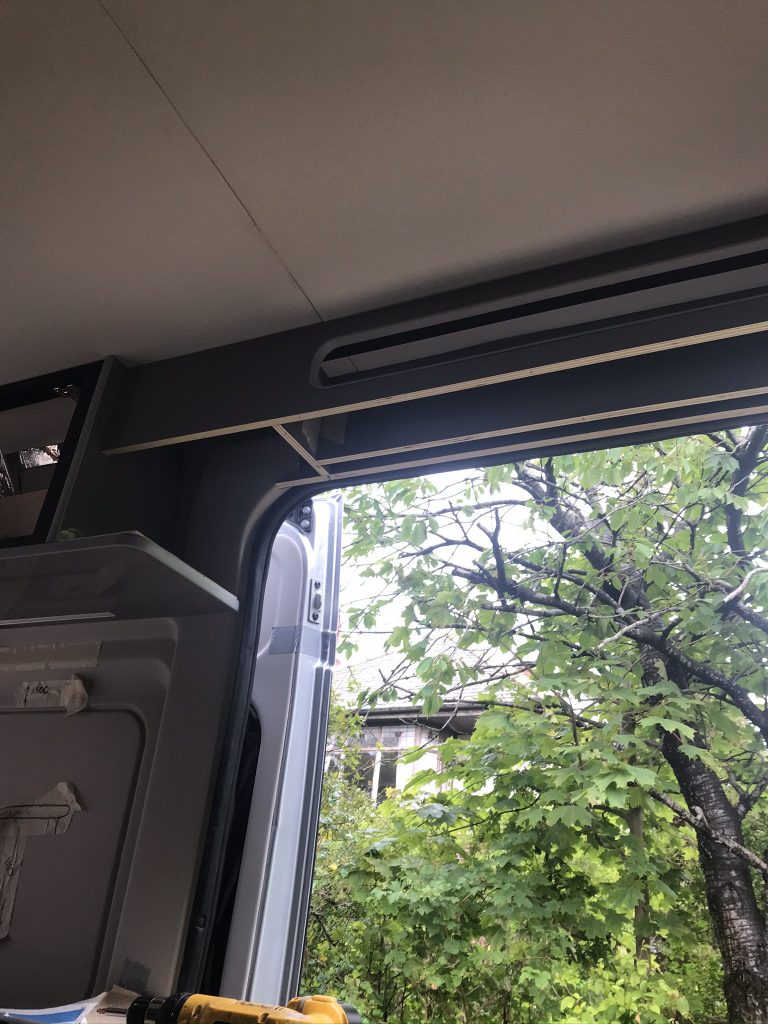
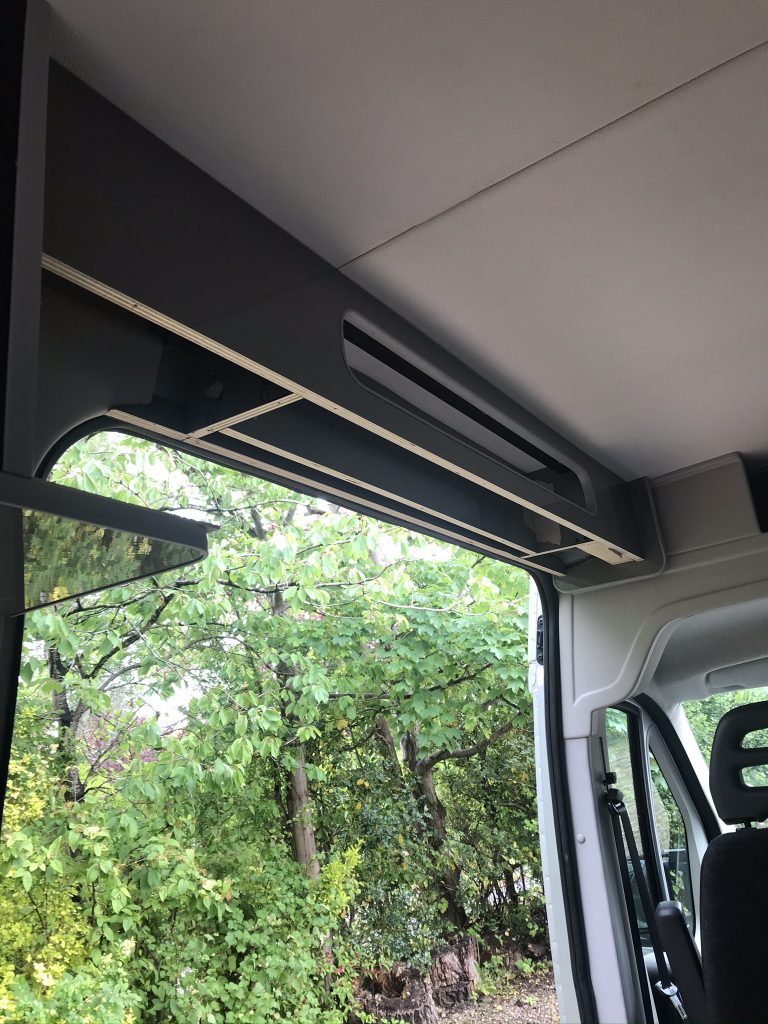
This area is directly above the Peugeot Boxer (Fiat Ducato and Citroen Relay) sliding door. Its a tricky area to build a wall panel because the metal van frame curves in all directions and certainly isn’t flat.