
Fitting an Angelus 240cal into a 47mm Case
Author Ross McSherry
This tutorial covers some of the basics of fitting an Angelus cal.240 to a 47mm watch case.
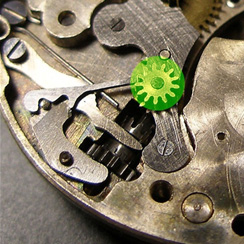
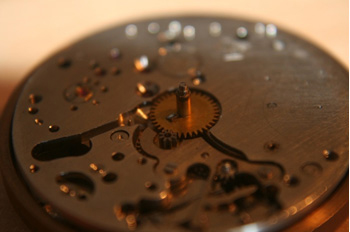
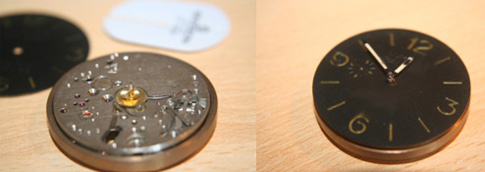
Assuming you’ve found an Angelus clock, you’ll have something that looks a little like this. Some of the movements are different to this; in which case you’re job is probably easier and some of these steps can be skipped.
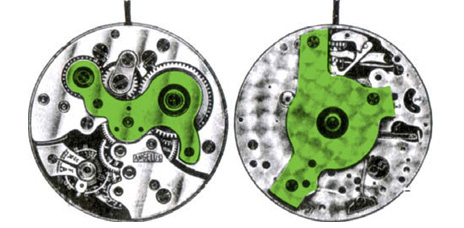
1. Remove the extra plates on the front and back. These are highlighted in green, and secured with 3 screws – you won’t be needing any of this anymore. On the back of the movement, a larger wheel may be over the hour wheel. This is for the alarm, you won’t be needing this either.
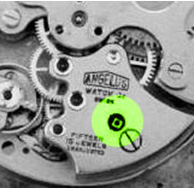
2. There may be a small winding pinion that extends through the train wheel bridge. This should pull out from the back and won’t be needed any more.
3. Now remove the levers shown in green on the movement above. This requires a small screwdriver; the alarm hammer shown on the left is sandwiched between the top and bottom plate. A small pair of wire snips will cut through its pinion, and it will simply drop out. Be careful not to create any unnecessary shocks on the movement, and collect clipped pieces of wire! If you’re feeling confident, taking the barrel bridge off from the front and removing this alarm mechanism is a better option.
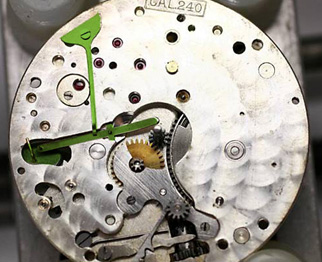
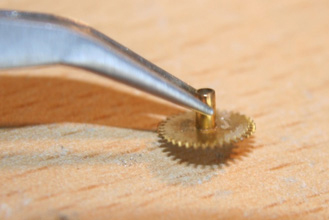
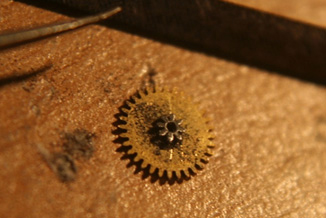
4. The intermediate wheel shown above may sit higher than the rest of the back plate. If this is the case, carefully remove the set bridge (if you don’t know how to do this, you shouldn’t be attempting this project!) and the intermediate wheel will be free. It looks very similar to a clutch at the moment, and will essentially need to be cut in half to allow a dial to fit this movement.
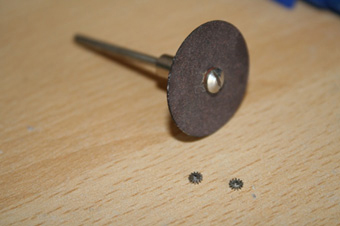
This is the wheel cut in half. To do this, it is best to thread a wire through the centre to ensure you don’t lose any parts, carefully clamp the side of the wheel that was exposed on the back of the movement, and slowly work around it with a very fine dremel cutting disk. You will then need to carefully file and sand the wheel flat, and thoroughly clean the wheel and store for later.
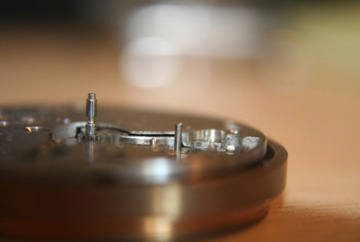
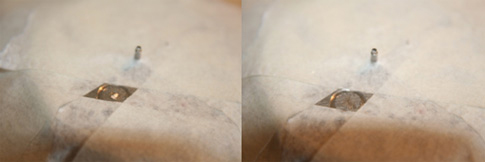
5. The pinion that held the intermediate wheel will also be sitting proud of the movement. This needs to be shortened. To do this, carefully tape the movement to a desk top using low tack masking tape. Allow this pinion (and possibly the canon pinion) to protrude through the masking tape. Ensure there are no gaps in the tape, as you don’t want metal filings in your movement.
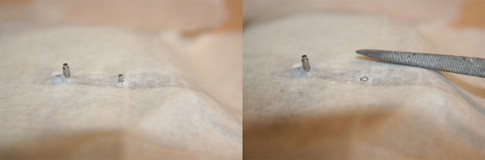
Slowly file this pinion down using a needle file. Ensure it is filed to just below the height of the backplate. Carefully bevel the edge of this pinion so that the intermediate wheel can be relocated onto it.
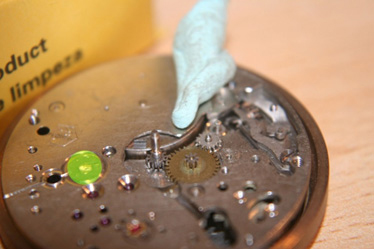
Dust off all filings and carefully remove the masking tape. Now use Rodico to clean up the keyless works and any other area of the movement. Note the brass pivot highlighted in green. This is a pivot for a calendar transfer gear, and is no longer required.
6. Once the movement is covered in low tack masking tape again (other than the pivot), slowly file with a flat needle file. Once it is flush with the plate, use 600 grit paper to tidy the movement up. Dust away any filings, and use rodico to clean the area before removing the tape.
7. Put the intermediate wheel back in place, and reassemble the keyless works. The back of the movement is nearly ready for a dial; the only part that sits proud is the small tab on the hour wheel and the extra tall minute wheel. If your movement has these features, they will also need to be filed down.
Remove the hour wheel. Using a needle file, slowly file down the brass tab. Be careful to to damage any teeth on the hour wheel or the brass tube. Once flush with the main gear, use 600 grit paper to leave a smooth and tidy finish.
File down the back of the minute wheel until it sits below the backplate. Do this in steps, and be sure keep checking how much filing is left to do. Keep the filing perfectly horizontal, and once it’s at the right height, use a small needle file / grit paper to clean up the teeth.
8. Now that the back of the movement is ready, reassemble everything, give one last clean with Rodico and check that everything is running as expected.
9. You will now need a dial. The subdial spacing is 8.9mm from the centre. If you would like to install a second hand, you will need a standard Panerai style second hand with an extra long tube.
You also need to find a case, custom made movement ring for an Angelus 240, plus a Crown and you’re ready to go. Here are the parts used for this project:
10. If you’ve gone to this much hassle, you may as well reshape the case to get a perfect finish. This tutorial will not cover that, but lots of filing, sanding and polishing are required!
11. You may want to lume the hands if required. I have developed a technique to create coloured, cracked hands to match the vintage style. To achieve this lightly cracked finish, mix white lume powder with a small amount of water colour (your choice of colour!) and a small amount of acrylic varnish / water to get a thicker consistency. When the hands are lumed, the thicker liquid will hold the lume together whilst the pigment tries to contract and dry – this cracks the hands and looks identical to a 1950’s watch!
12. The final step is to case the watch. You must find a combination of a case / dial that allows the stem to align correctly with the crown tube.