6152 Case Project – Top surface shaping.

There also a great step-by-step tutorial just above this post. To find it, go to “6152 Project” at the top of this page and look for the drop-down box. There are over 80 images that take you through every stage.

How to build the 6152 step-by-step using the Nightwatch 6152 Case:

This section shows how to shape the top surface of the 6152 Case

Tools: Its possible to do this work with very few tools in fact the 6152 Case in this article was built using only a few files and some wet and dry paper.

Dont I need a Polishing Machine and Dremel? No, you can use these tools of course but I will show you that you can get a better aged finish by not using the Polishing Buffer. As regards the Dremel then it can make life a little easier but its not essential.

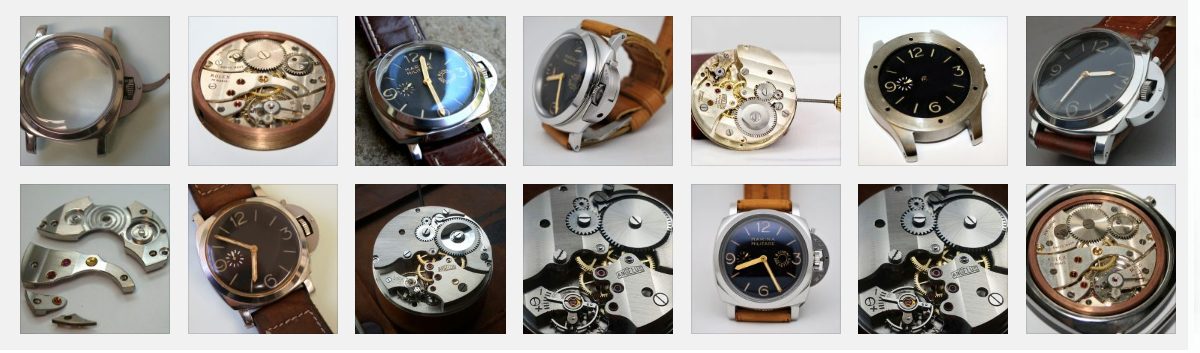
Below: These are Medium to fine grade files

Below: I will use 2 grades of wet and dry paper. Firstly P400 wet and dry paper and then P1200 wet and dry paper

Below: The Dremel is a handy tool for the edges of the case but with a few small Medium to Fine Grade Files I will achieve the same results. In many cases I prefer the files over the Dremel.

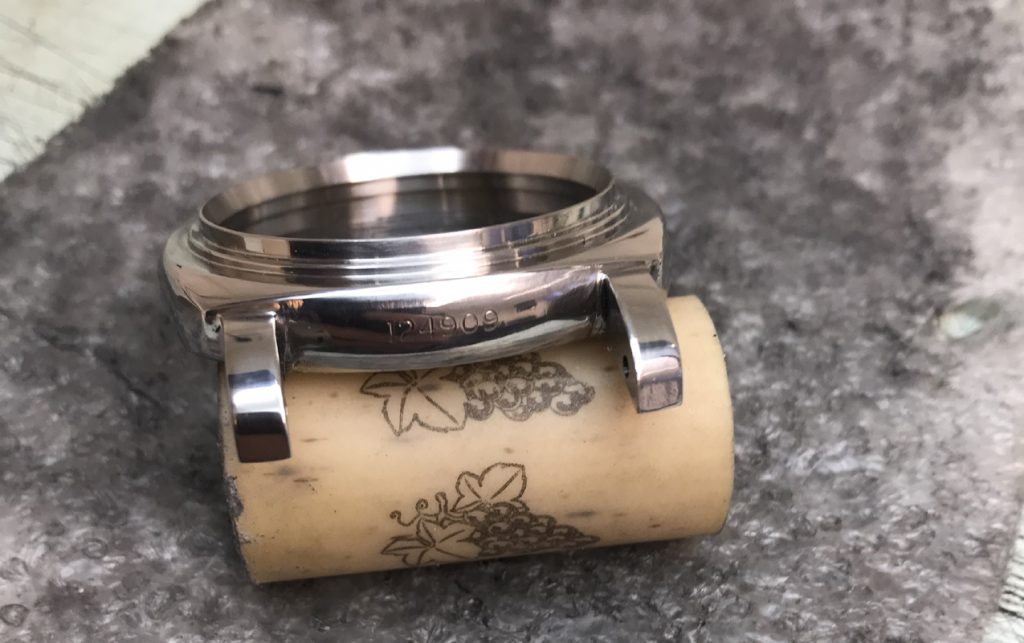
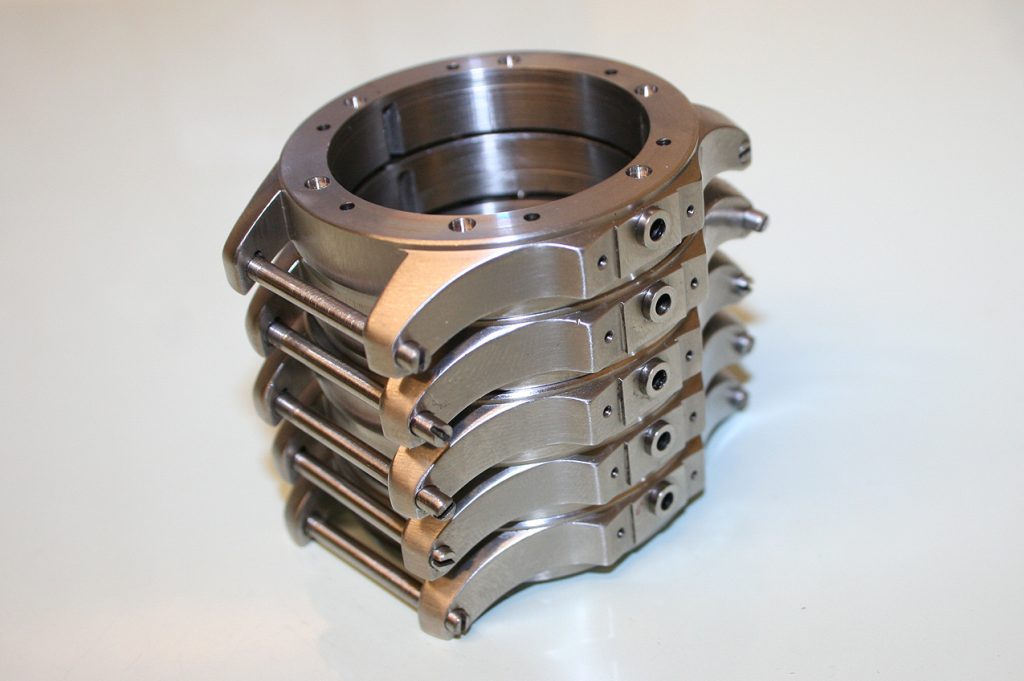
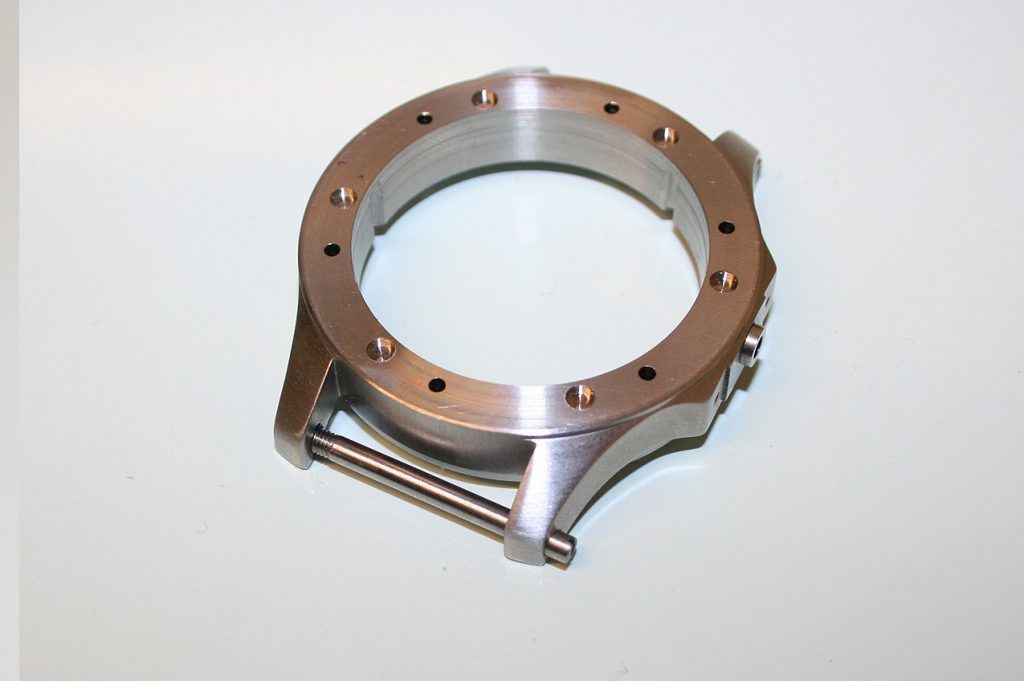
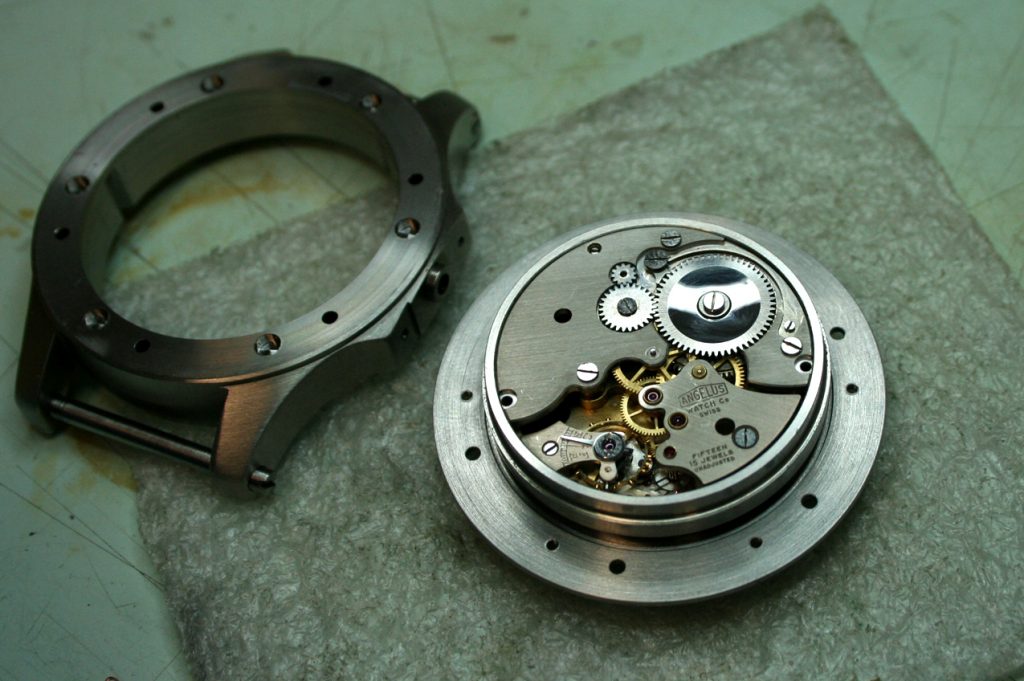
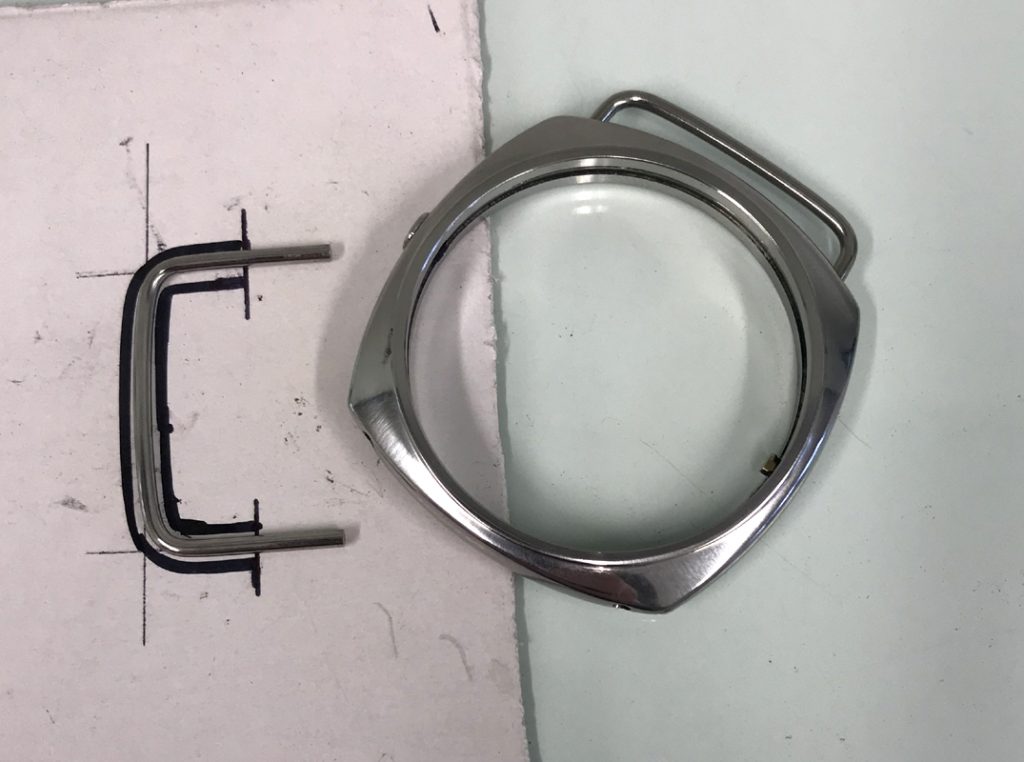
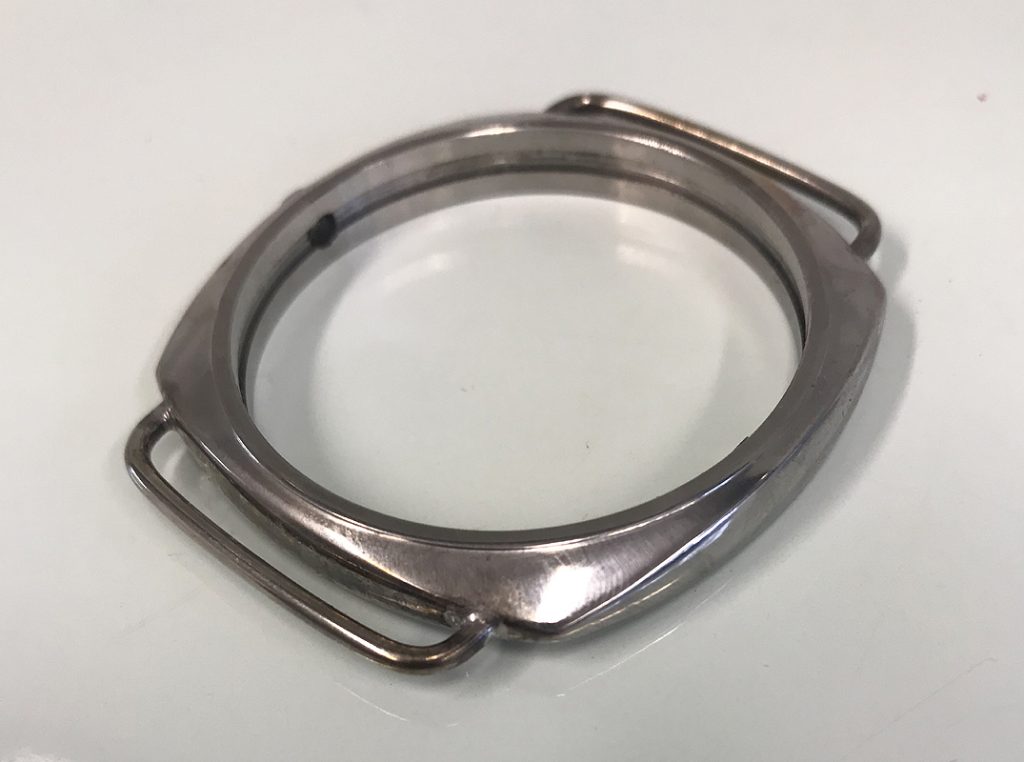
Important: Before we start its important to understand that the 6152 Case is very close to the shape we want to achieve. Therefore you should only be taking small amounts of metal off the case. NEVER take large amounts of metal from an area.

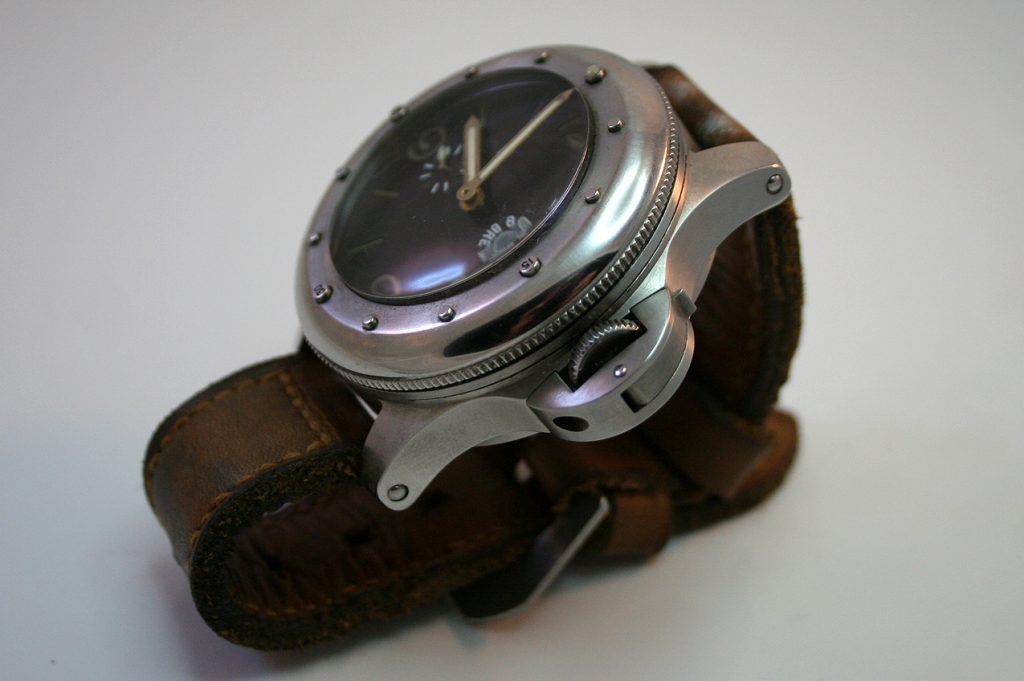
Why shape the case? This is how the authentic Panerai 6152 Cases were made back in the early 1950’s in fact some of the worlds most expensive watches are still finished this way today, its called Hand Finishing. The machinery used back in the 1940/50’s produced a 6152 Case but in order to completely finished the watch case a small team of “finishers” would shape some of the sharp edges and then polish the case. This made the case a little more comfortable to wear and also nicer to look at.

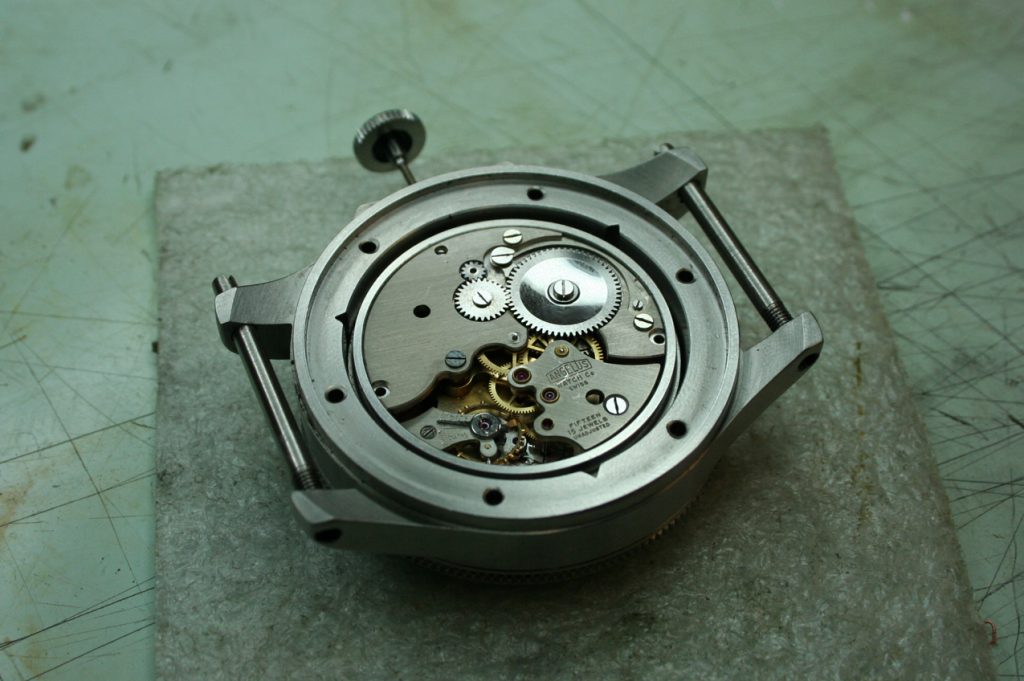
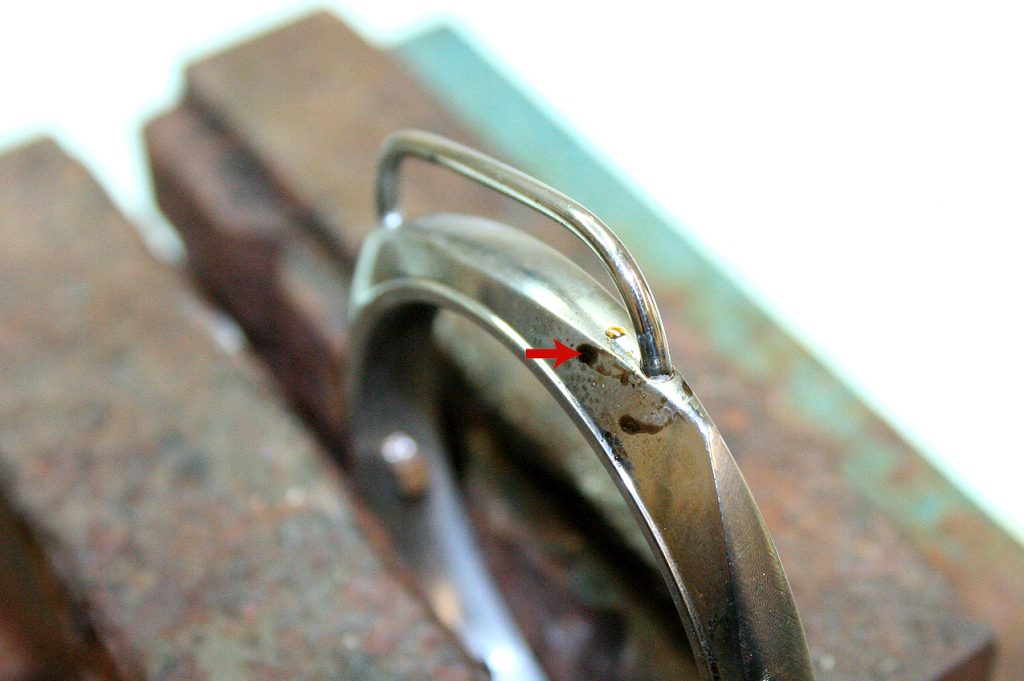
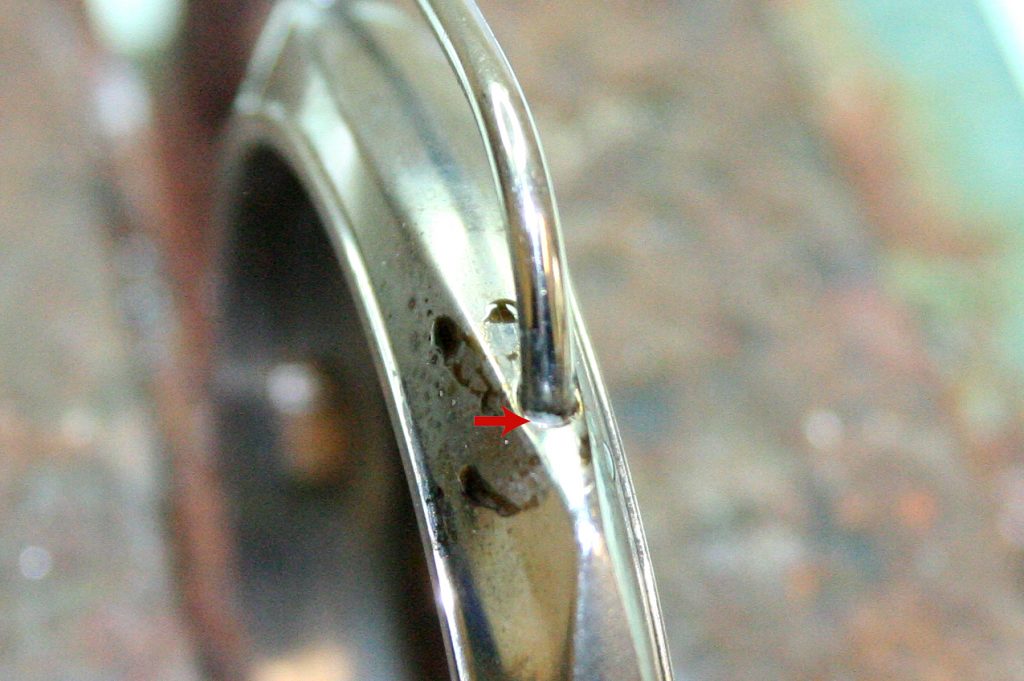
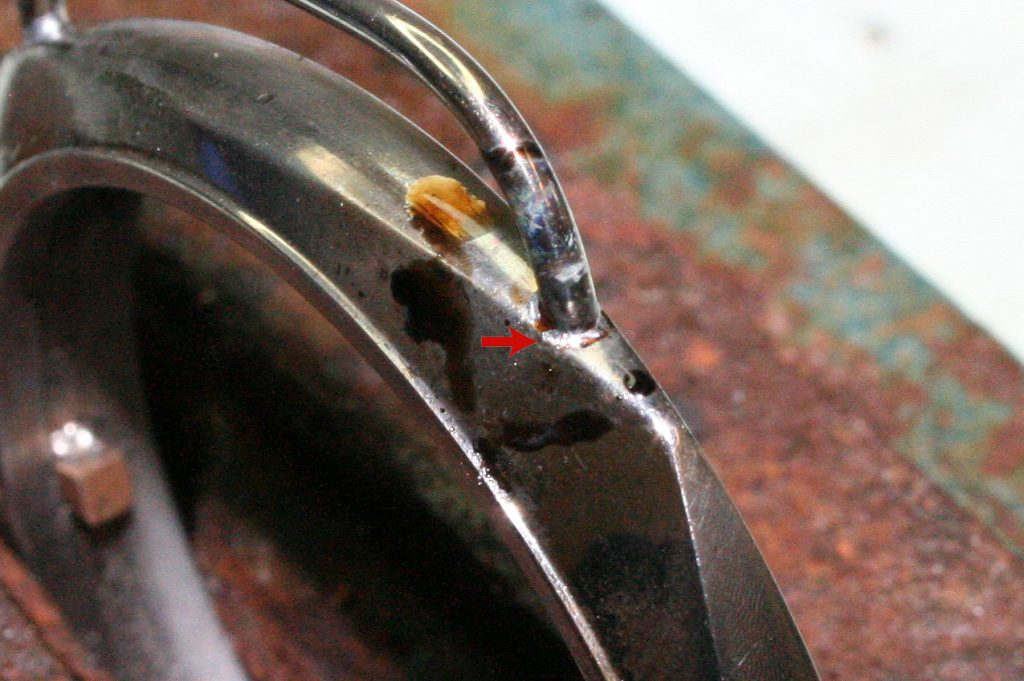
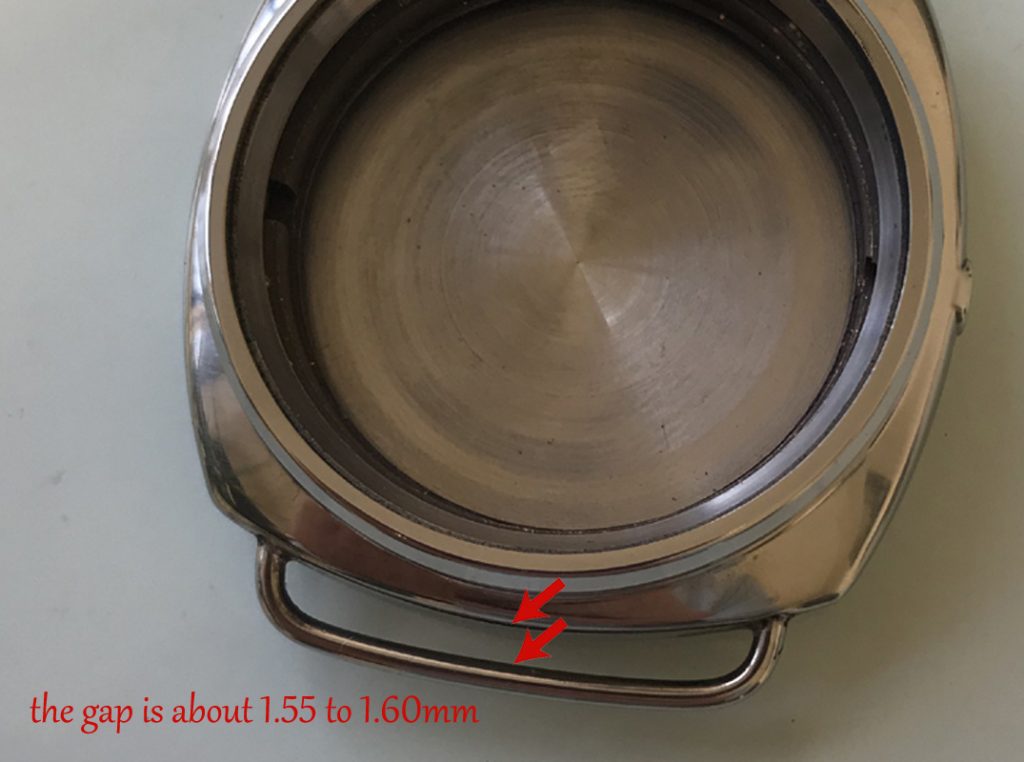
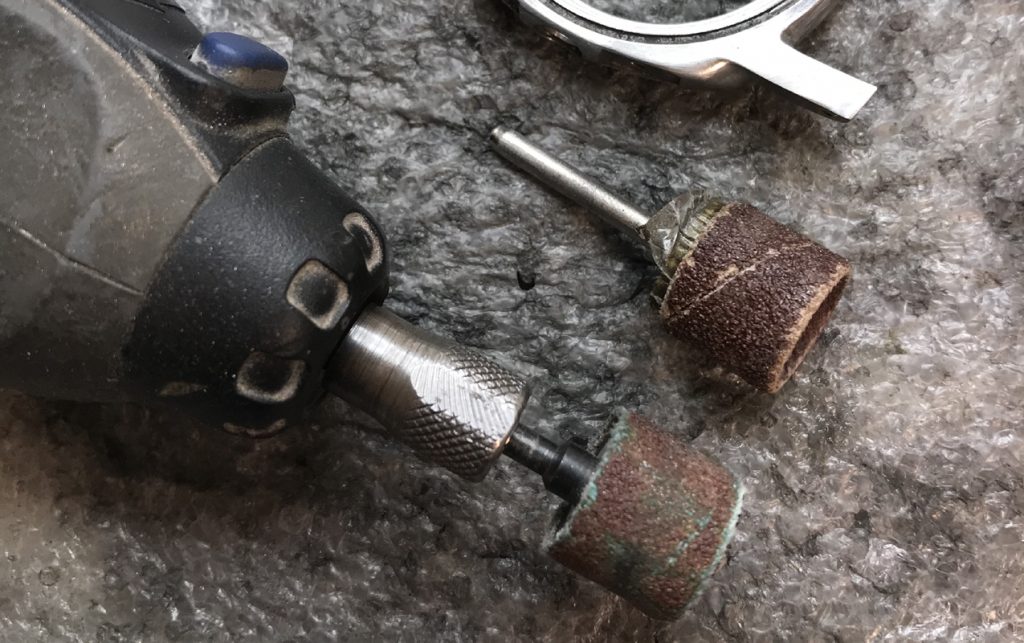
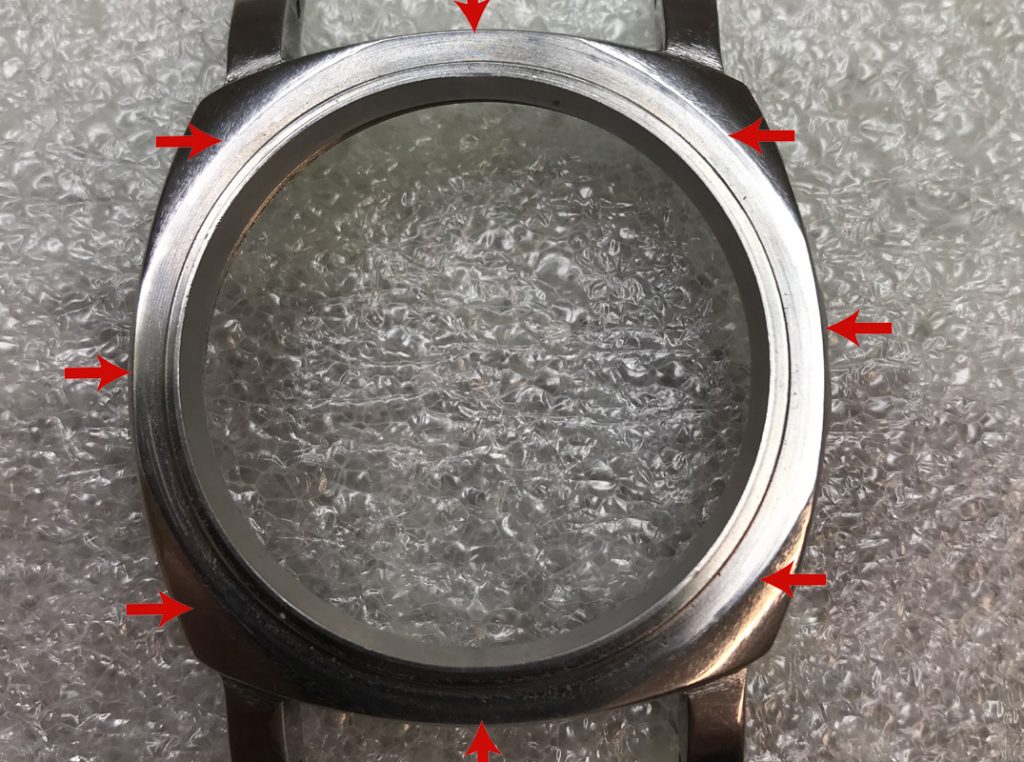
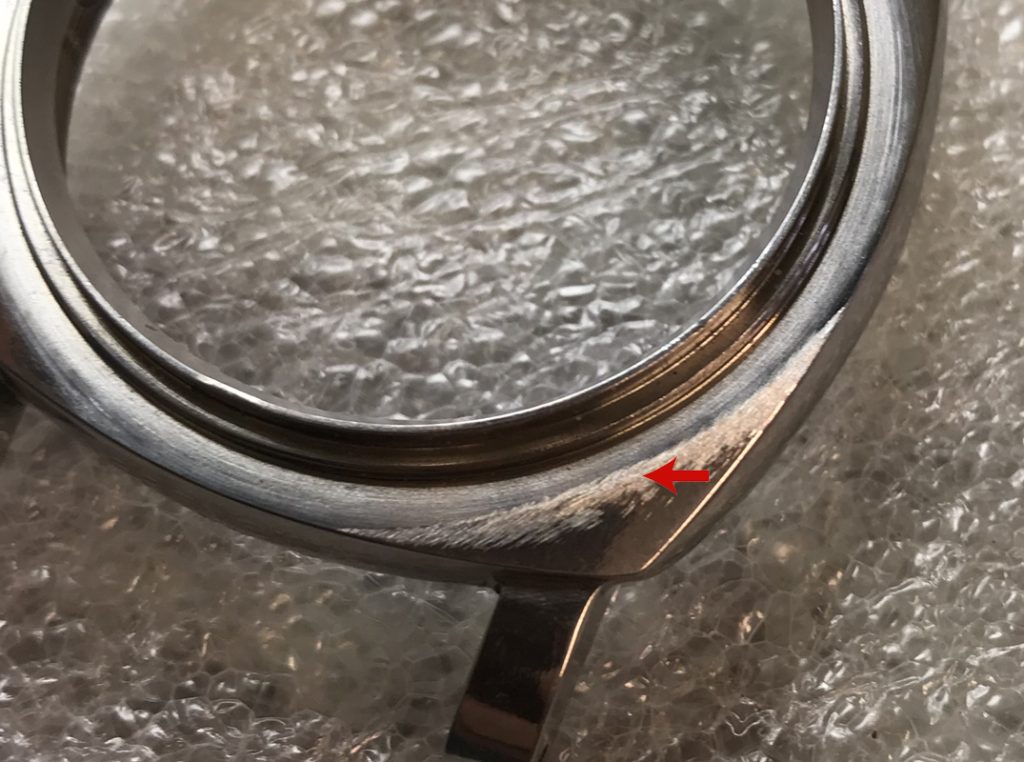
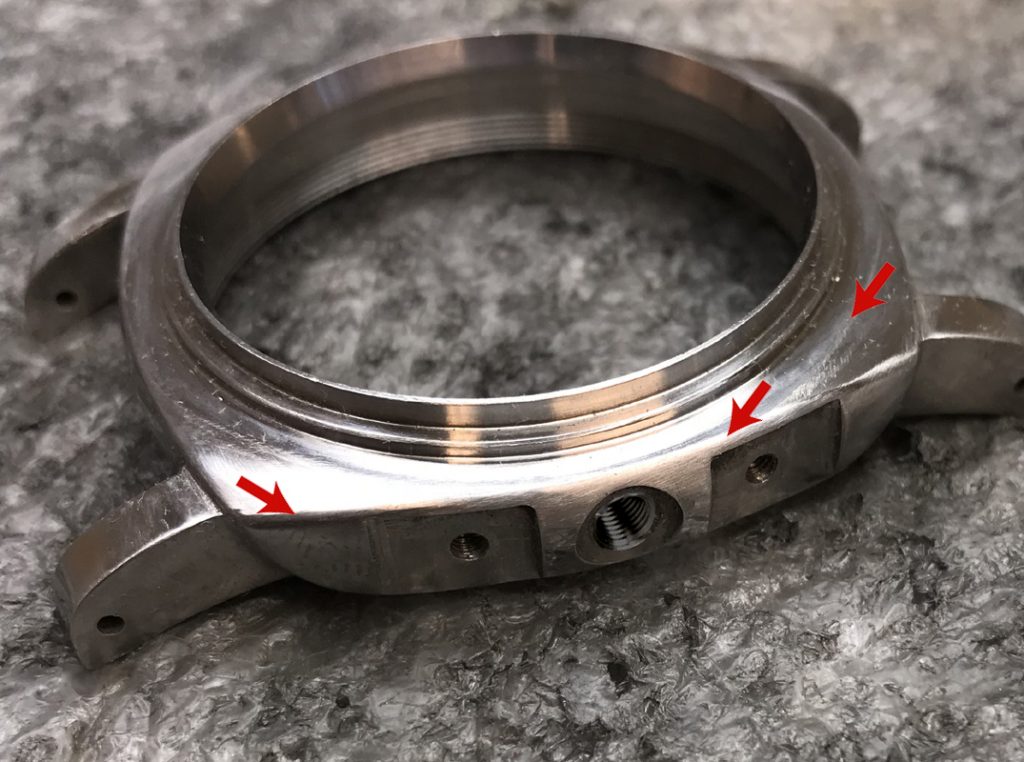
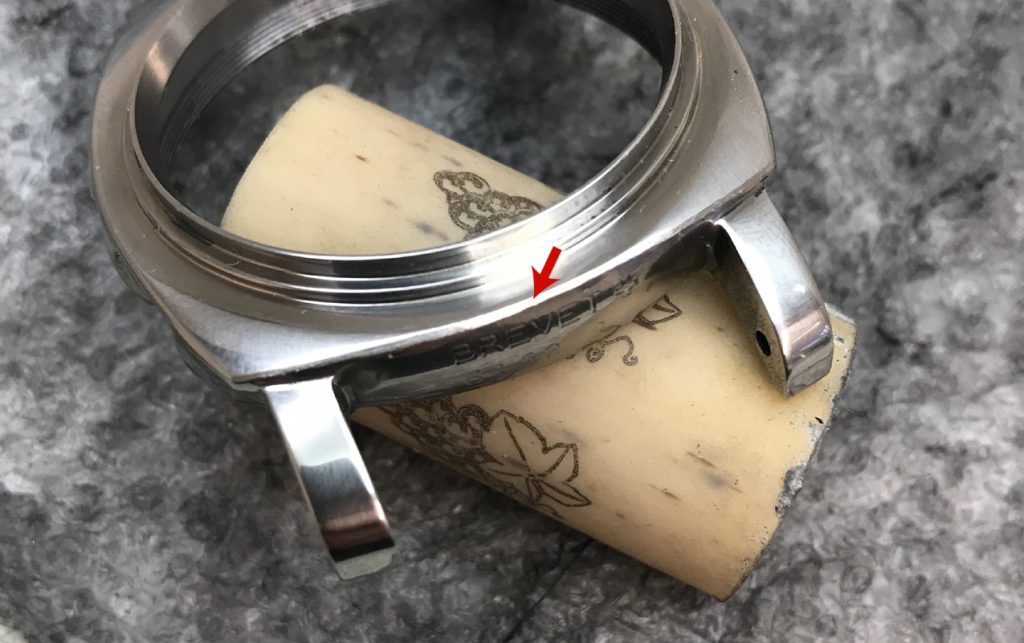
Getting Started: The red arrows below show the areas I will be targeting. These areas do not require a lot of metal removing so be careful. Take your time and remember, its better to take off less metal and correct it later than it is to take off too much metal.

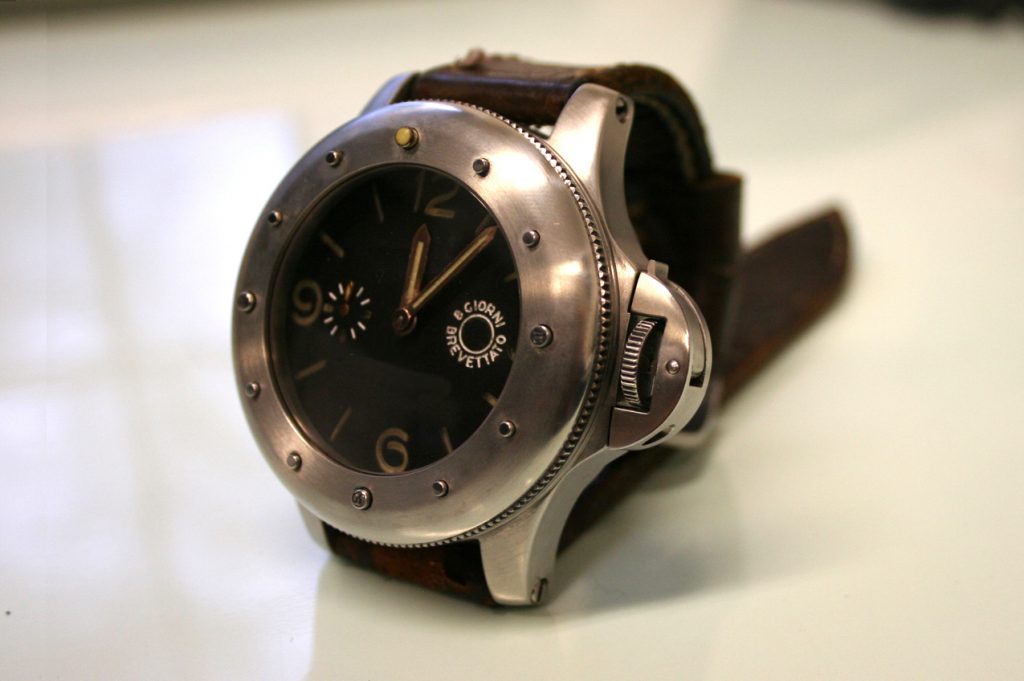
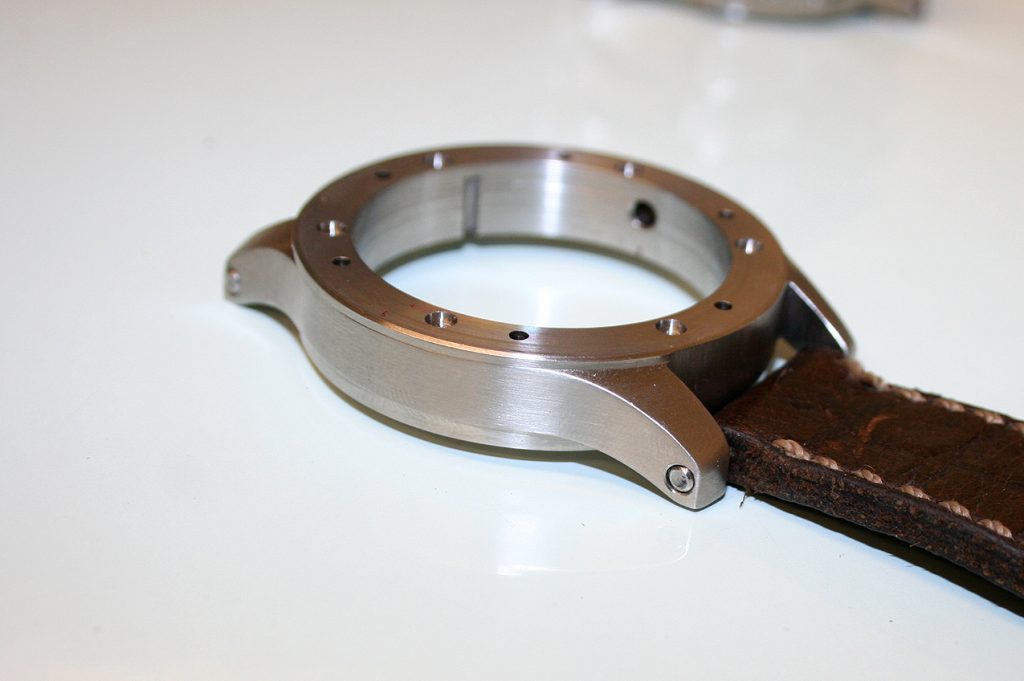
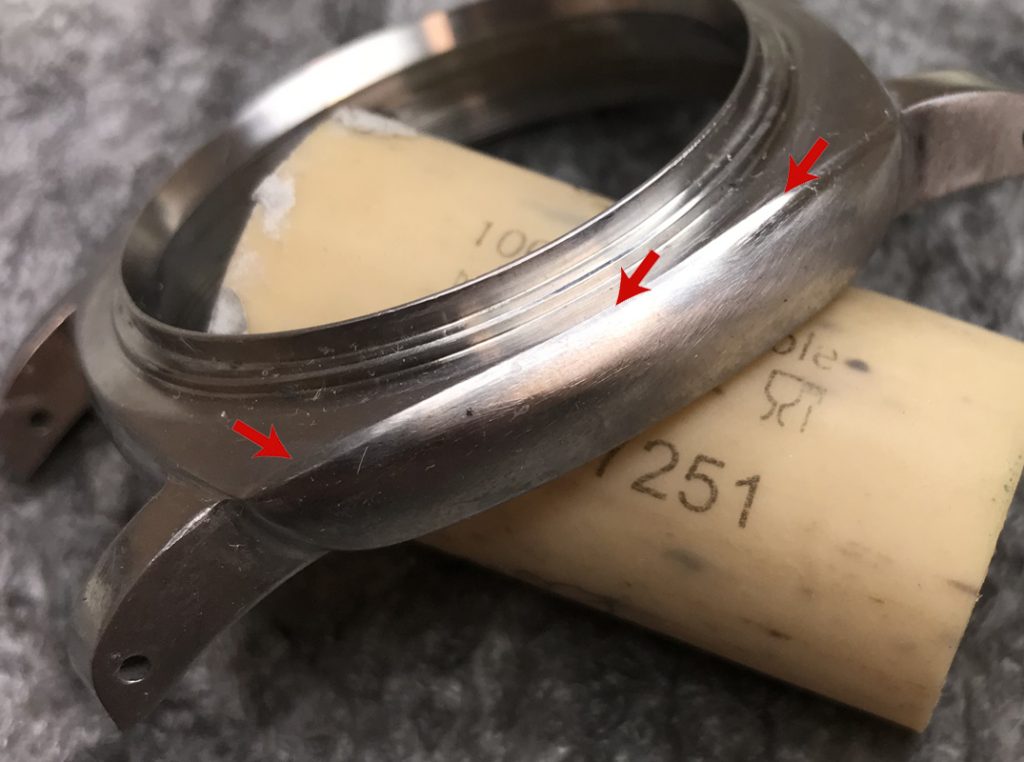
Below: Lets start by smoothing the top surface of the case a little. I have started to file the top surface on the four corners so that they are smooth (see below)

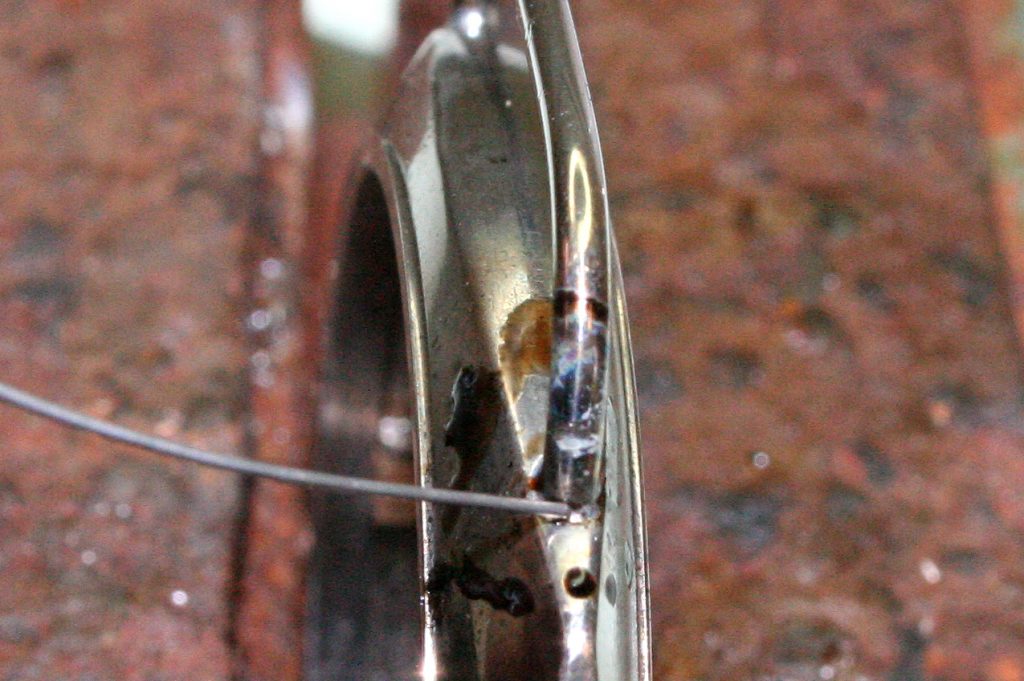
Below: This stage requires the edges to be made smooth around the case.

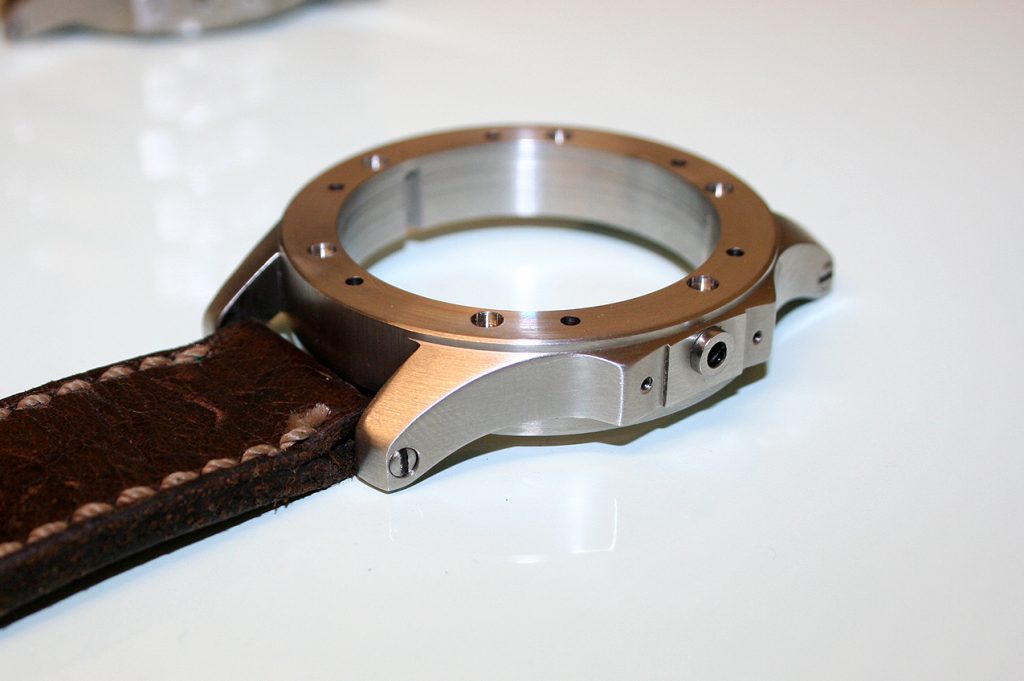
Below: Repeat the process on all sides of the case

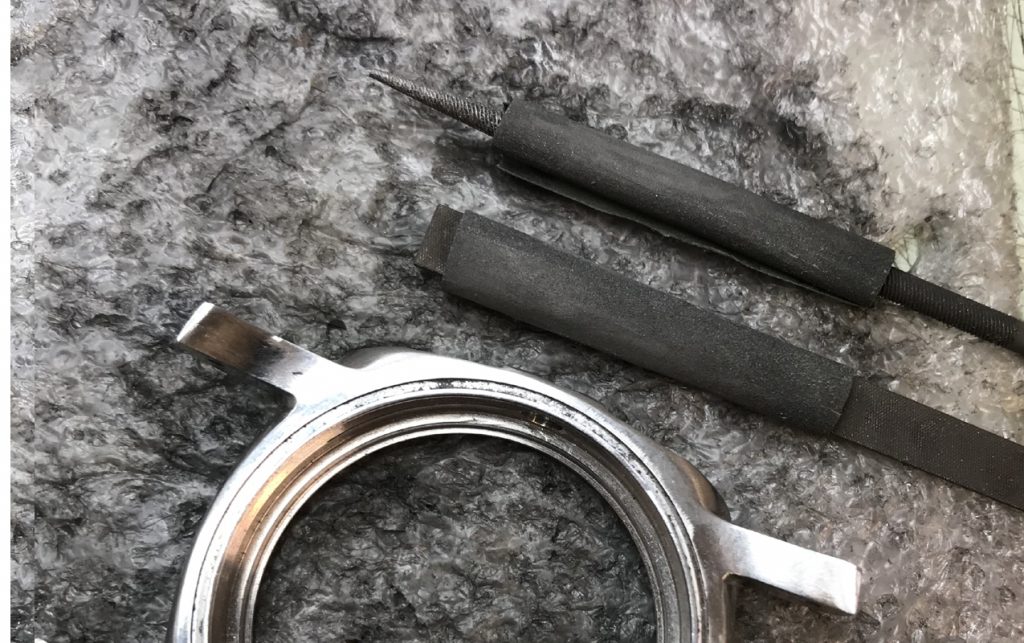
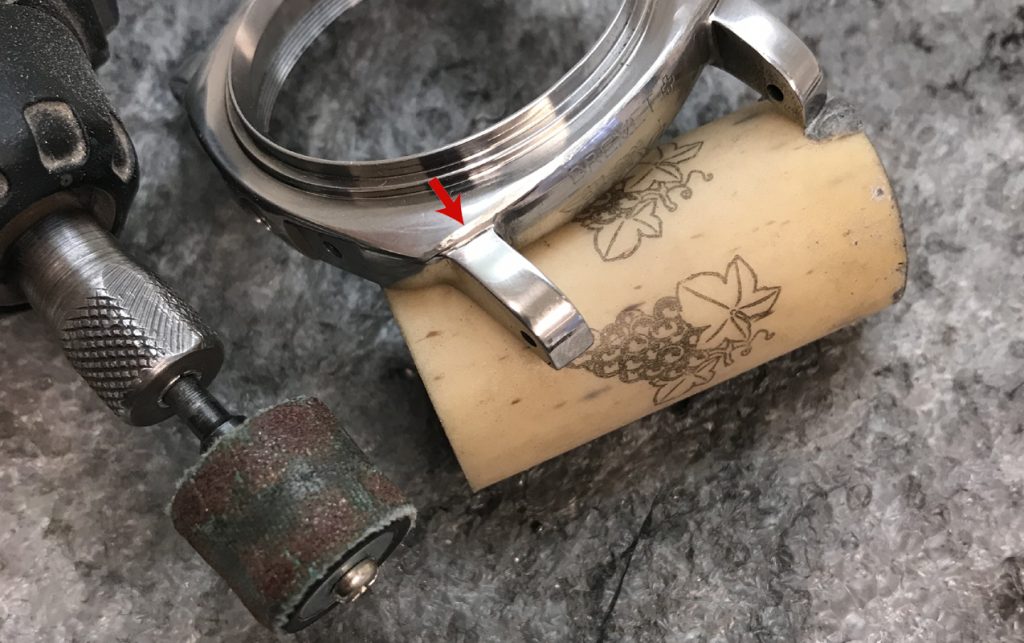
Below: I have added the image below for those that prefer to use the Dremel, This is one job were the Dremel is faster but the same results can be achieved with files. Just be careful not to touch the lugs if you are using the file.

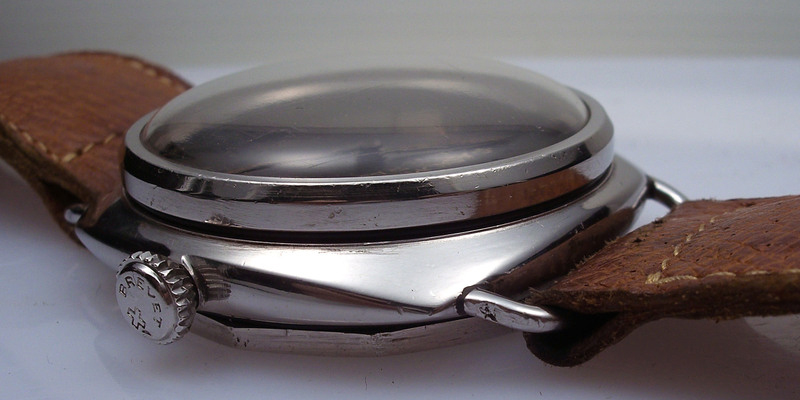
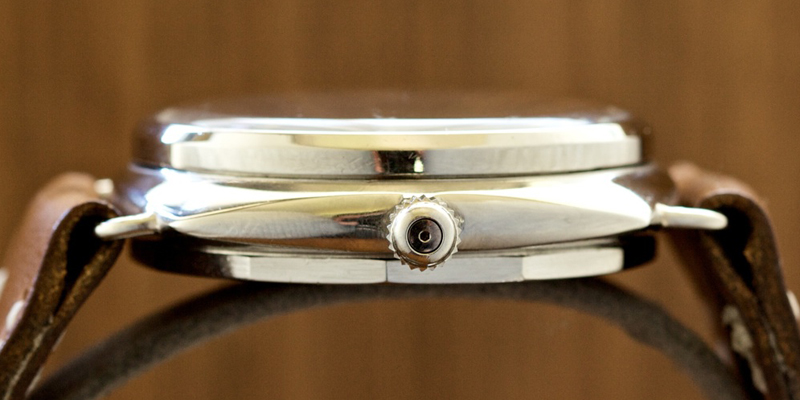
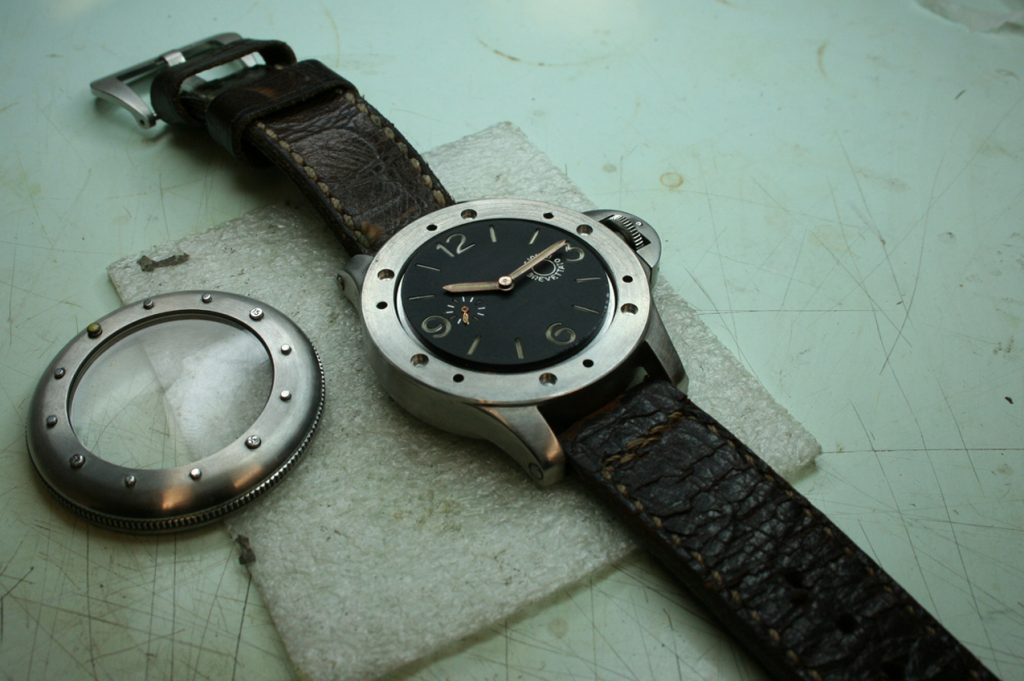
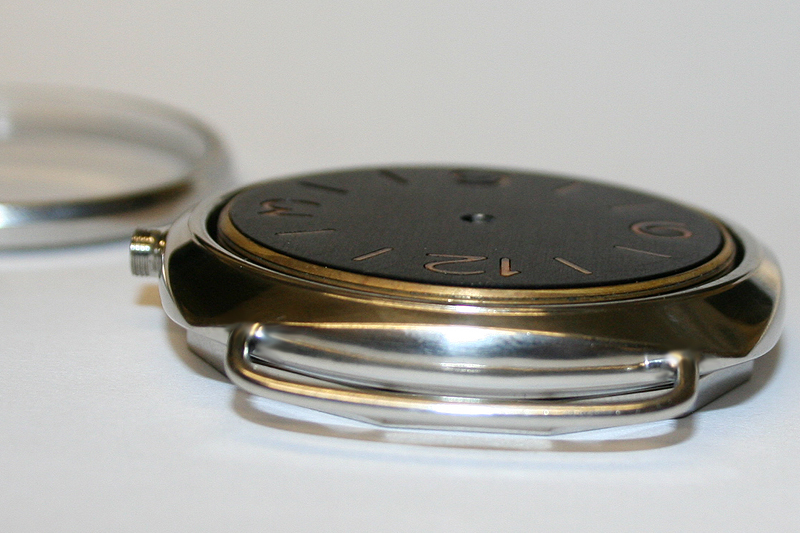
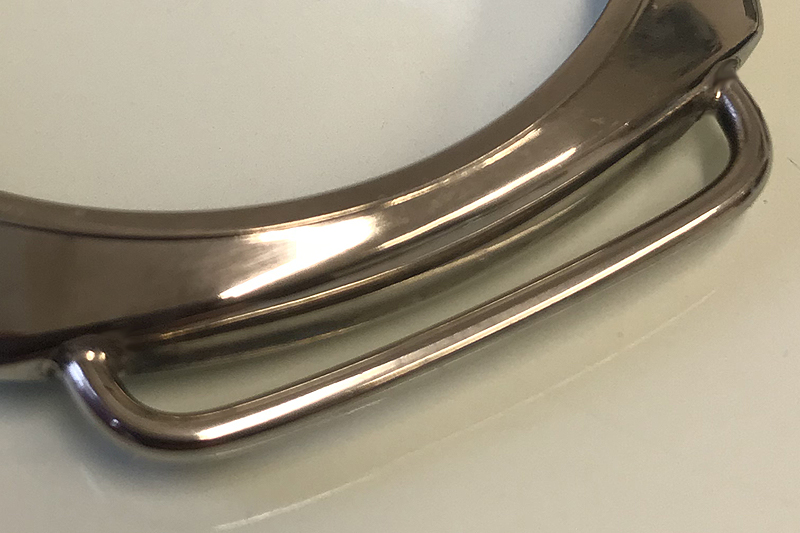
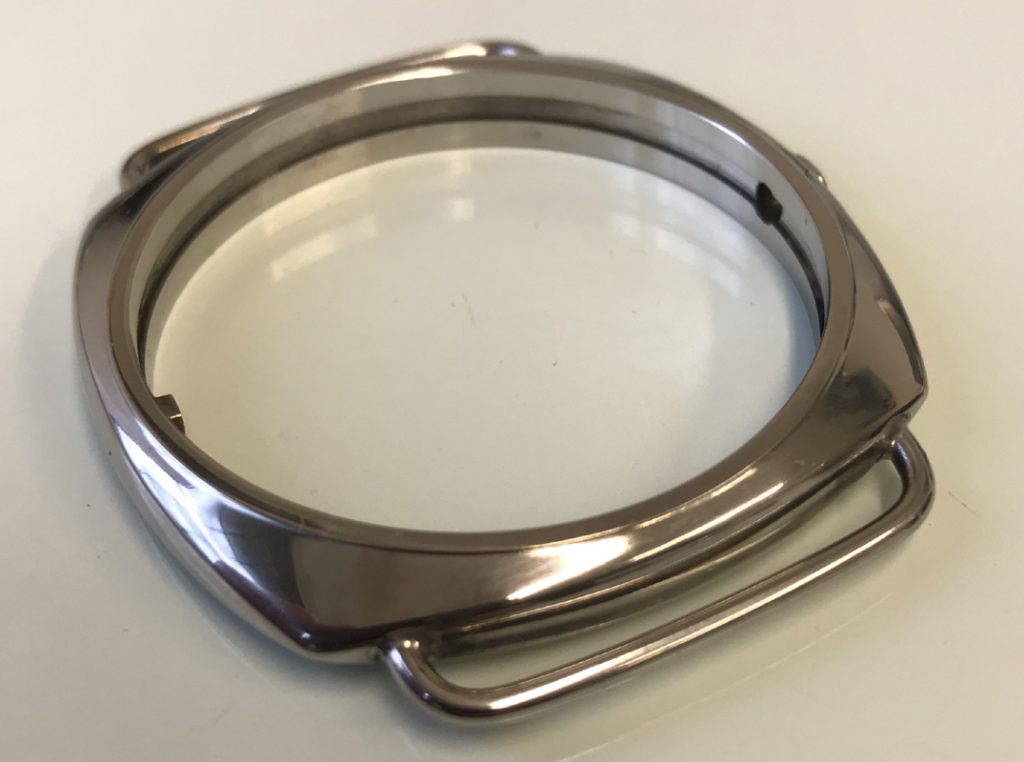
Below: The front edge above the lugs is now nicely rounded and less shape that it was.

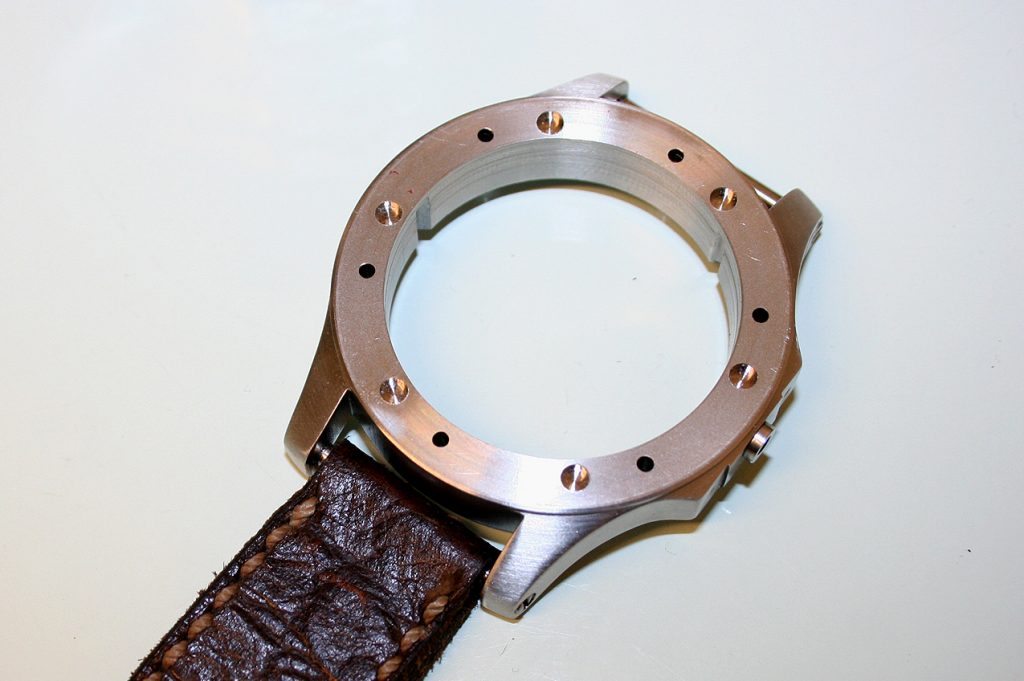
Below: Now go over the area you have filed with P400 wet and dry. Smooth the area until all the scratches have disappeared. If you have used the correct grade file (fine or medium) then this should only take a few minutes. Make sure all scratches are removed.

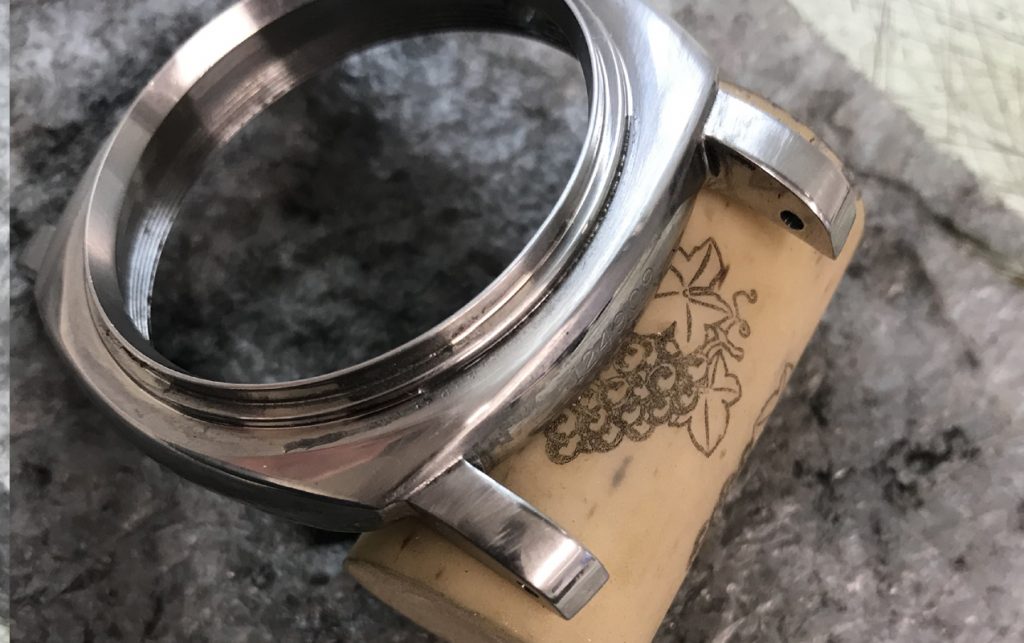
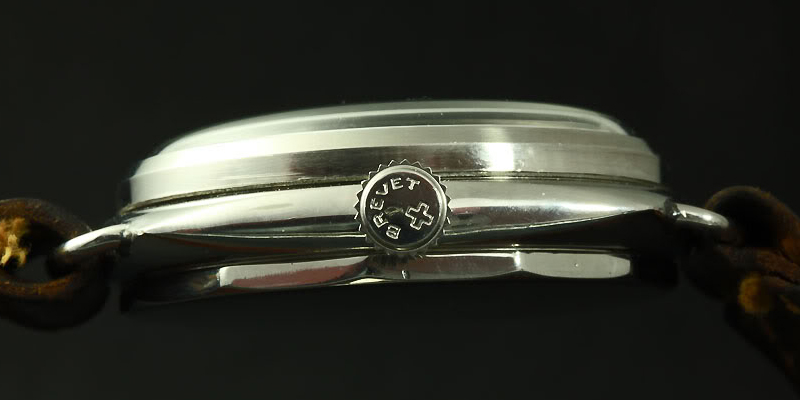
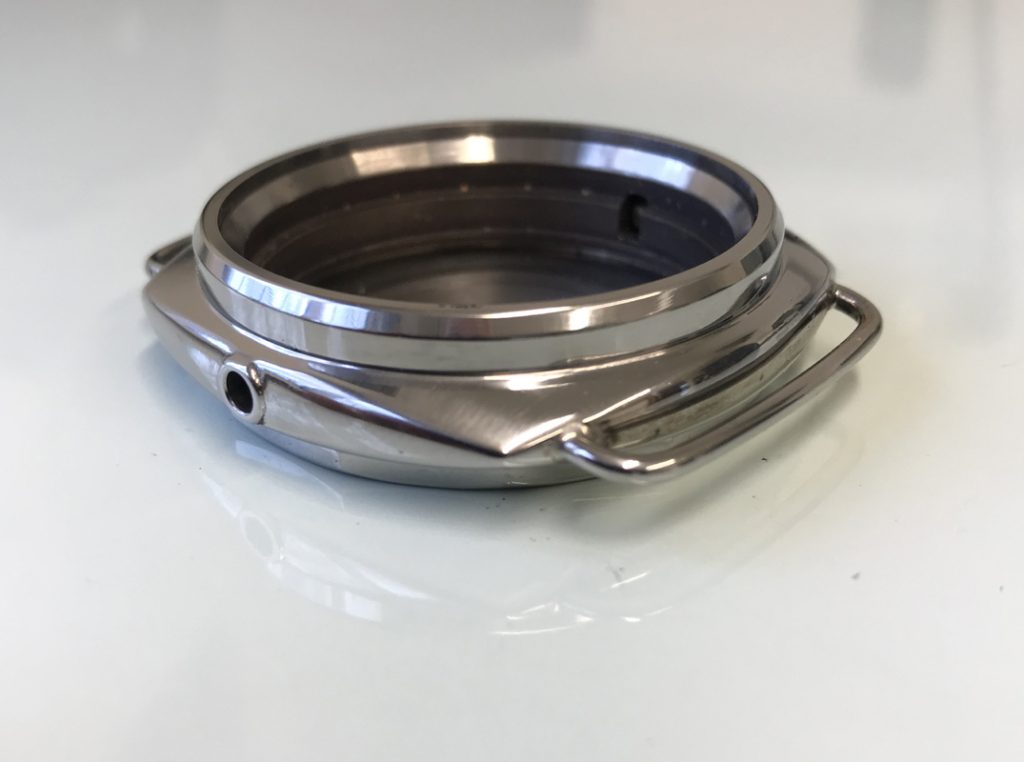
Below: The font top section of the case is now finished.

3646 Type C or Type D – symmetrical or non-symmetrical case shape?

There are two types of 3646 Case Main Bodies to consider when building a 3646 Project.

Types A,B and C:  The early Cases Type A, B, and C were non- symmetrical although I am informed that a few Type C were symmetrical. This means that the shape on the top of the Case is not the same as the bottom. The bottom of these cases are usually a little more flatter than the top. This case available on the Vintage Watch Parts website, its known as the Standard Bezel Case or Type C.

Type D,E,F,G:  These Cases were symmetrical, the top of the case is the same as the bottom although there is still a top and bottom to the case as the machined surface for the Bezel and the Case Back varies slightly. This case is also available on the Vintage Watch Parts website, its know as the Tall Bezel Case or Type D.

Lug Holes:  Lug Holes are “without internal bores” this means the lug holes are not drilled through the case but about half way through. I believe this was to ensure the Cases stayed water tight. The Lug Bars are 1.8mm thick, and are now formed on a small jig to ensure the radius of each curve are the same.

The images below show the various Case Shapes, both symmetrical and non symmetrical.

THE BIG EGIZIANO

Out of production and not available. This image shows one of the last EGI’s to be built using an 8 day Angelus 240 cal.

Below: The last of the last. The final batch of EGI cases being converted to take the 3 Piece Dial with Angelus 240 cal movement.

Below: One big improvement was to convert to large screw-in type lug bars. The cases were threaded on one side and a set of Stainless Steel Bars were made. The Lug Bar holes in the case were moved back so that the leather strap didn’t rub against the case (a previous design fault).

Below: many problems to solve, the first problem was how to get the thicker Angelus Movement to fit inside the case with a 2mm thick 3 Piece Dial. Quite a few parts had to be specially made.

Below: The first attempt at getting the Movement and Dial to fit

Below: Getting the movement and dial inside the case is easy, getting everything to align, for example the stem through the stem tube with the Case Back in place isn’t as easy as it looks.

Below: It works, everything aligns, there are no rattles and nothing is under pressure or stress.

Below: Shows some epoxy being mixed with lume to form the luminous marker dot you see on the bezel (better shown is the next but one image).

Below: The lume is bright and also note the marker “dot” on the bezel

Below: One EGI was built with a copper dial

Below: How much ageing was up to you. Cases were aged differently, some heavily aged and some aged but with polished areas around the bezel.

Step by Step Soldering (made easy)

This topic will show you how to solder the Lugs on a 3646 Case. Before you start its worth making sure you have the correct equipment, below are the items that I will use to solder the lugs in the images below

  1. Gas powered torch
  2. Good quality fine grade solder
  3. Good quality liquid Flux (important)

Solder: Using a good quality solder and also a fine grade (small diameter 0.5 to 1.0mm) will make the soldering easier for you. We are about to solder a set of 1.8mm diameter lugs to a 3646 watch case, we do not need a lot of solder. Thick or wide diameter solder can be difficult to work with as its easy to add too much. Your work should be neat, the soldering should be fine and tidy (not thick and heavy).

Above shows thick and fine solder, today we will use only the fine (thin) solder.

Flux:  Using good flux makes a difference. Make sure you have the best quality Flux for Stainless Steel (not all flux’s are the same). Below I am using “Stay Clean” Flux.

Step 1: Make sure all your parts are clean (its important). Before I start I have cleaned the Lug Bars with some wet and dry paper and also washed all the parts in warm soapy water, then allow to dry.

Cut the lugs to size. The gap between the Case and the Lugs should be around 1.55 to 1.60mm

Step 2: Below I have applied some Flux to the Lug Bar and allowed the flux to run into the case.

Step 3: Below, applying heat to the Lug and the Case, be careful not to overheat these parts (its important they are NOT too hot).

Step 4: Note how the Flux has dried and also become a “brown” colour. This is the correct temperature to add the solder. If your flux has gone very black (almost like dry carbon) then you have added too much heat.

What should happen, what should I see? When the temperature is right the solder will “sweat inside the case” (be sucked inside).

What happens when you add too much heat? If you add to much heat then it becomes difficult to solder. Instead of the solder flowing inside the case it will do the opposite and run down the outside of the case.

To be successful you need: Good Flux and not too much heat.

Below: You can see the Flux has turned a nice brown colour, it doesn’t take long before this colour is achieved. I will continue to add a little more heat to make sure that the case and the lugs are fully heated.

Step 5: Its time to add a little Solder. When the solder touches the Lug and Case it should flow quickly and easily INSIDE the case. The solder should be SUCKED into the case around the Lugs this is called “sweating”.

What to do if : Your solder wire doesn’t flow and you get a blob at the end of the solder wire (solder stays at the end of the wire and doesn’t run onto the case). Your case and lugs are too hot, cool and try again (try adding flux to cool).

Whats to do if : The solder runs down the outside of the case and not inside between the Case and the Lugs. Again your case is too hot, cool and try again.

Below: The solder has flowed inside the case, now I will build up this solder.

Step 6: Being careful not to get the case too hot, add a little more solder until the area around the Lugs (inside the case) is full of solder (very little solder is required).

Step 7: Its time to build up a little solder around the lug on the outside of the case. I will add some more Flux, this will cool the case a little but it will also help the solder run neatly around the lug on the outside of the case. Be careful not to add too much solder, only a little should be added so that the work is neat.

Completion: The case is now completed. Note how the solder is only around the Lugs. There is no excess solder so there is no solder to clean up. The solder should be neat and even around the Lugs.

Below: Note how the solder is even on the top on all sides and the gap between the case and lugs is around 1.55mm to 1.60mm