Dials – Adding Resin

Step-by-Step Instructions: The following information will show step-by-step images and instructions on how to successfully add resin to a dial. Some people have had difficulty doing this type of work so I will show how easy it can be whilst avoiding mistakes.

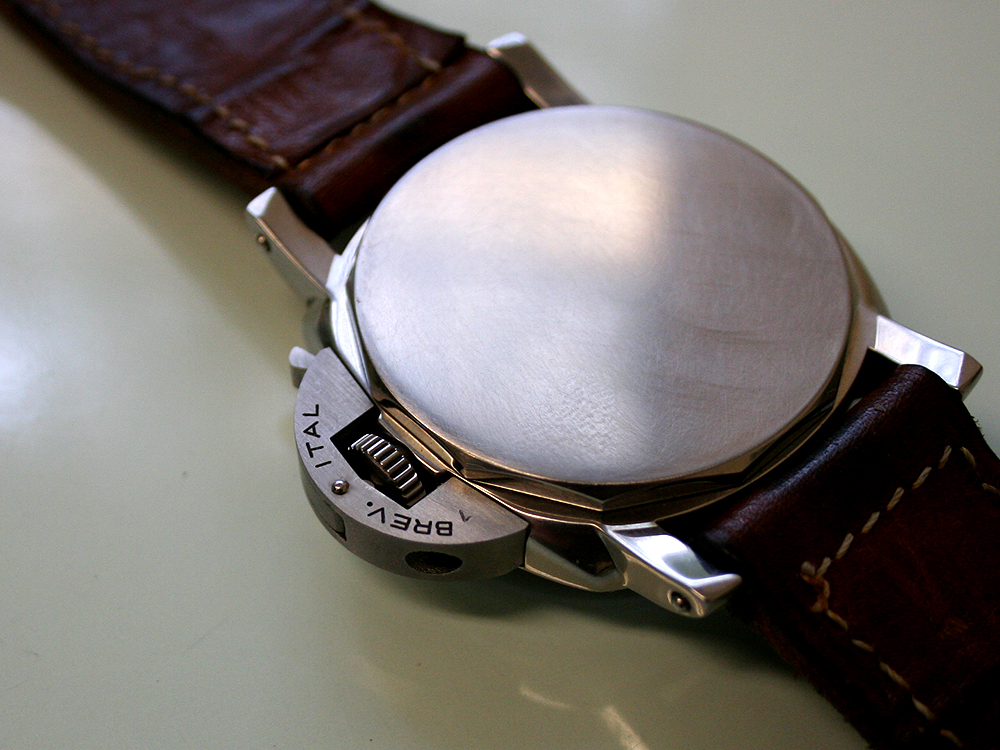
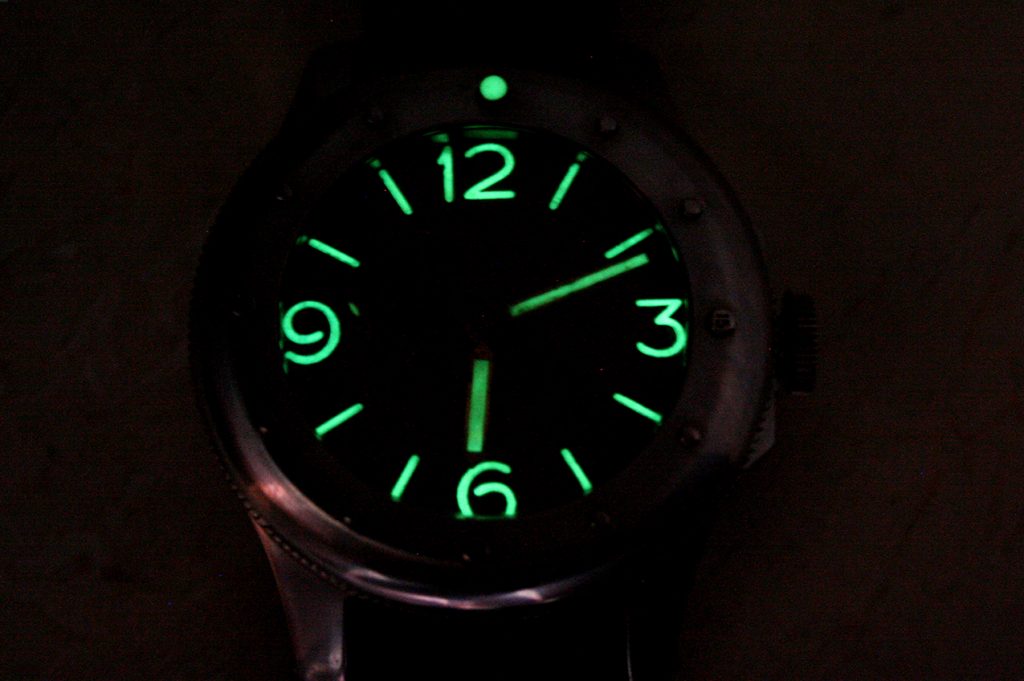
History (Why Add Resin?): Its believed that when the Italian Navy ordered watches from Panerai they insisted that the Lume be encased or sealed inside the Dial. The Lume they used in those days was Radium (which of course is radioactive). Panerai achieved this by applying Resin to the dial numbers (to seal the dial front), then they added the Lume to a Plexi Holder that was inserted into the center of the dial and finally they sealed the dial with a Backing Plate. Thus the Lume was completed sealed inside the dial.

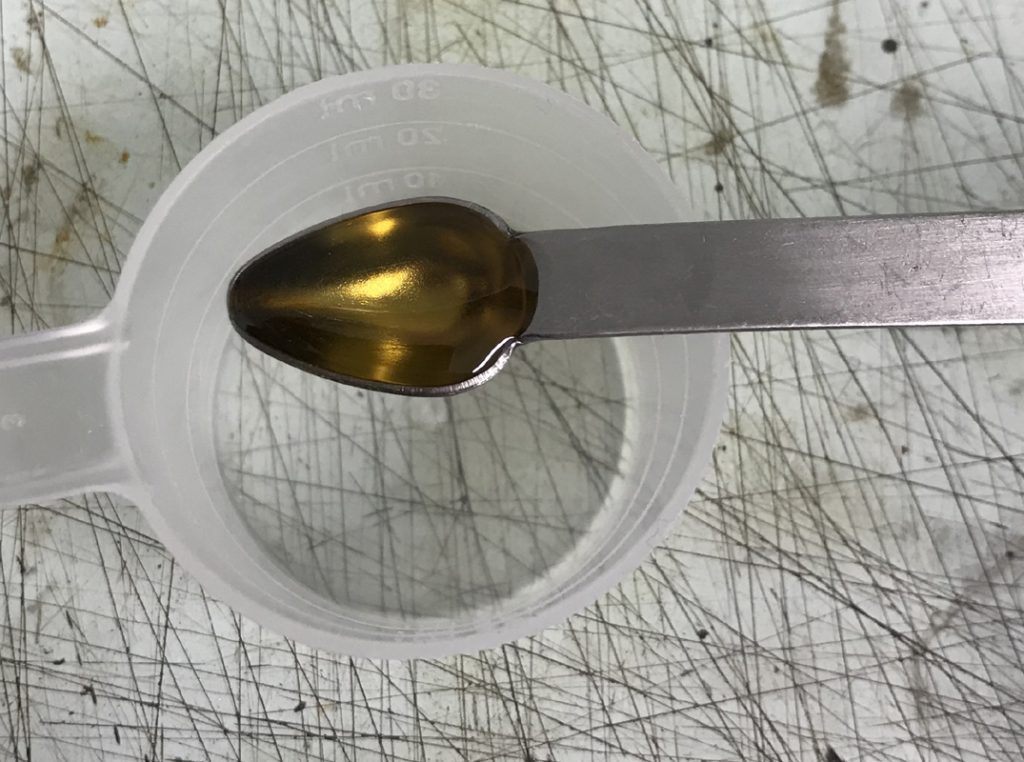
Which Resin is Best? First decide which resin you want, Clear or Amber. Use clear if you want a super clear glass-like finish. The correct type of resin is IMPORTANT. The type I will use above has a “working time” of about 3 hours, it takes 24 hours to dry and 36 hours to become fully hard (very hard). The finish is superb and a lot better than the standard resins normally used in the glass-fiber industry (I do not use this type they can be too dense). Use the very best resin you can, this is important when working is very small areas.

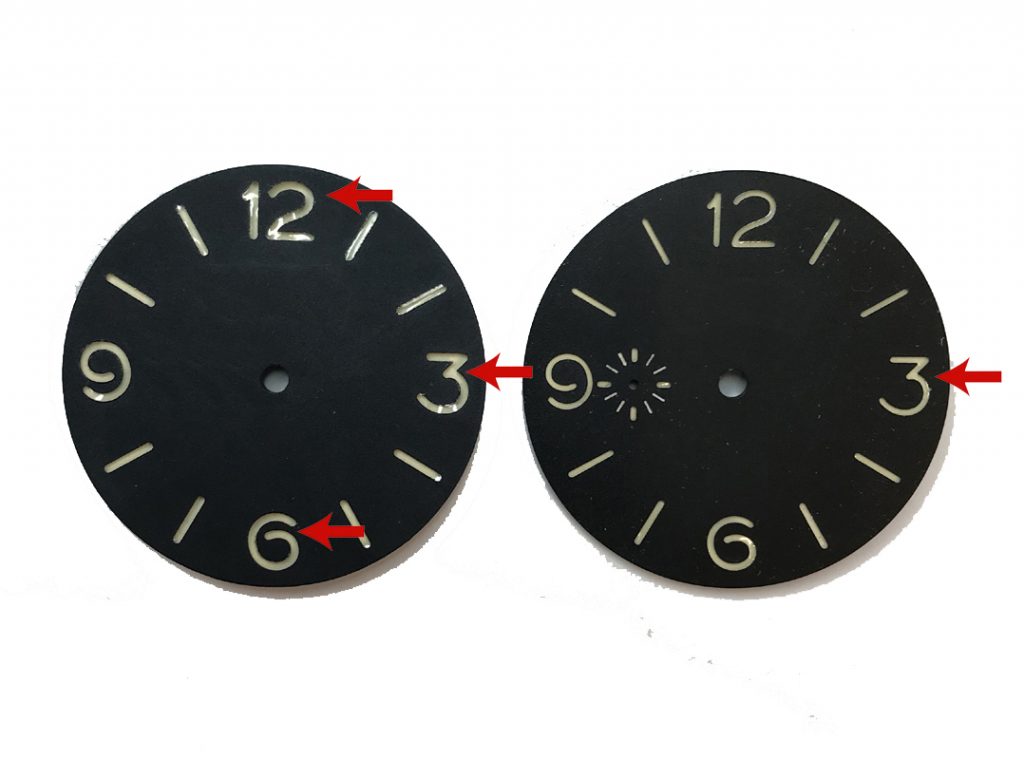
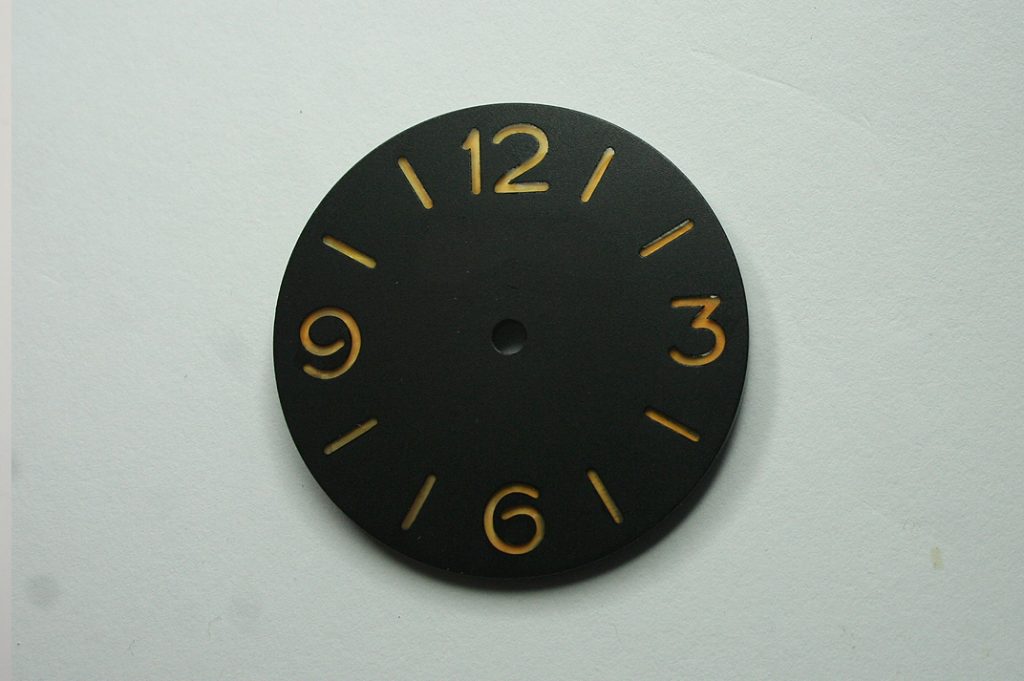
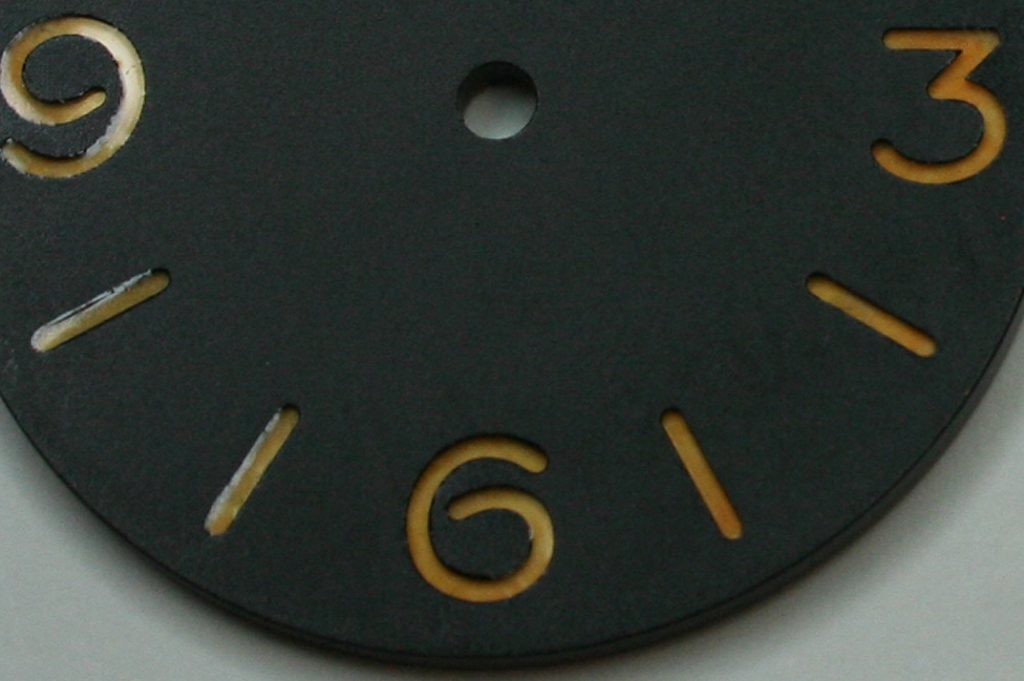
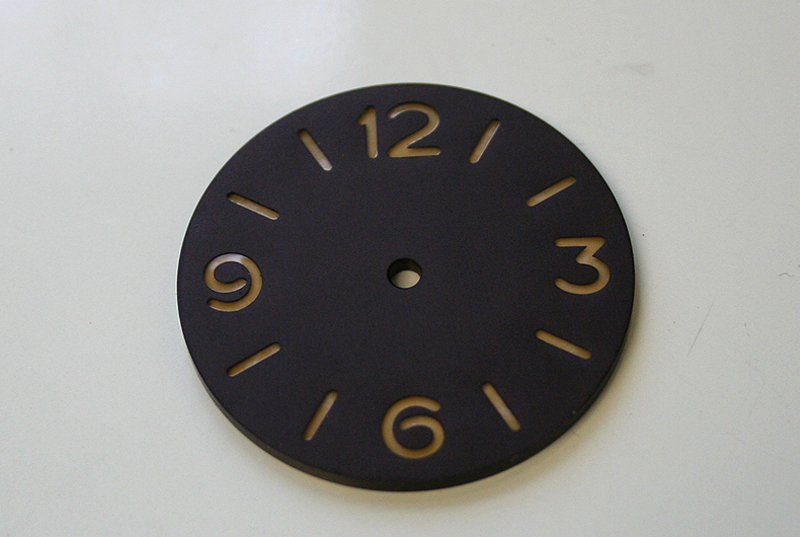
Amber Resin: The image above shows the Amber version. You would expect the resin when applied to make the Dial Indices (numbers) really amber, even on a white background. This is NOT true. The Amber will add a small “amber tint” and will not be very visible. This is why its often used on the 6152 Dial that normally has very white indices (numbers). It will “not” make a white dial numbers amber or yellow, it will only make them a little less white. It is perfect for the 6152 and will keep the numbers looking white with no signs of yellowing.

3646: Amber is used on the 3646 but to get the yellow or orange type indices (numbers) then the user must add colour to the Luminous pigment (Lume) that is applied behind the resin.

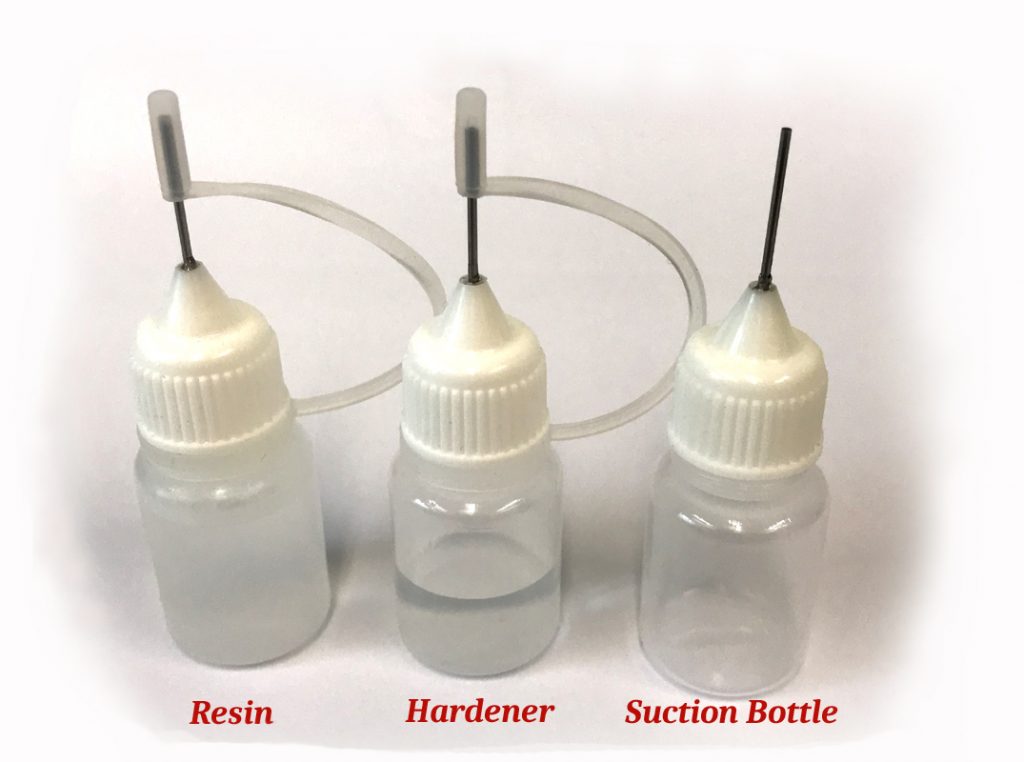
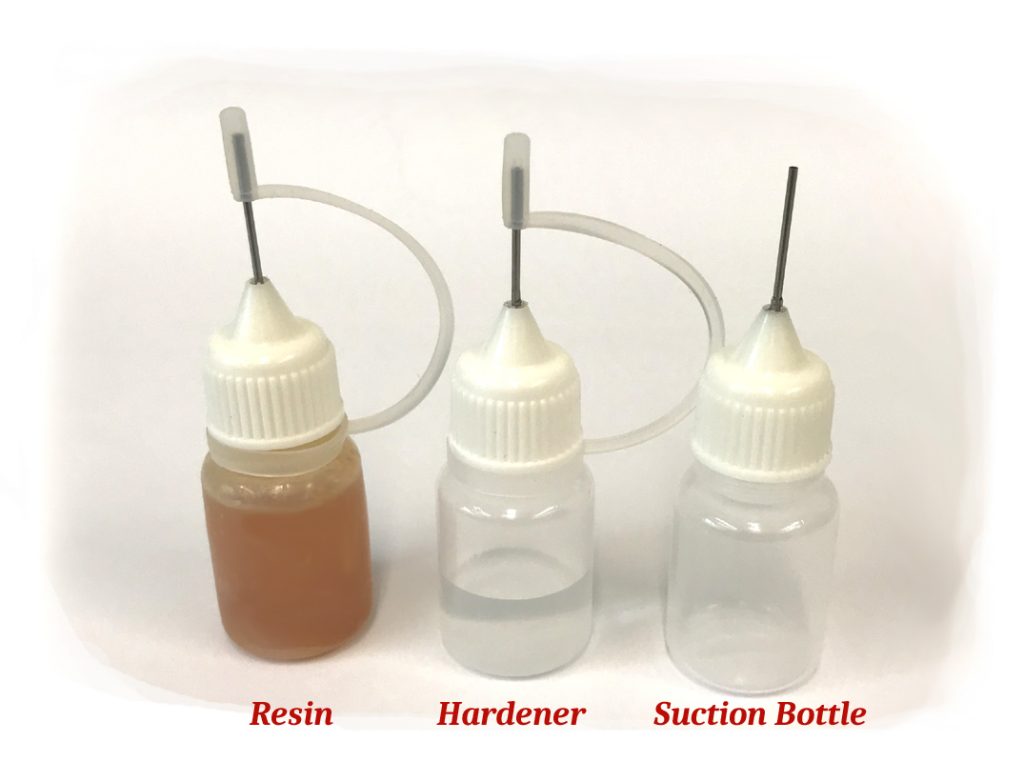
Getting Started: Measure out Two Parts of Resin to One Part Hardener

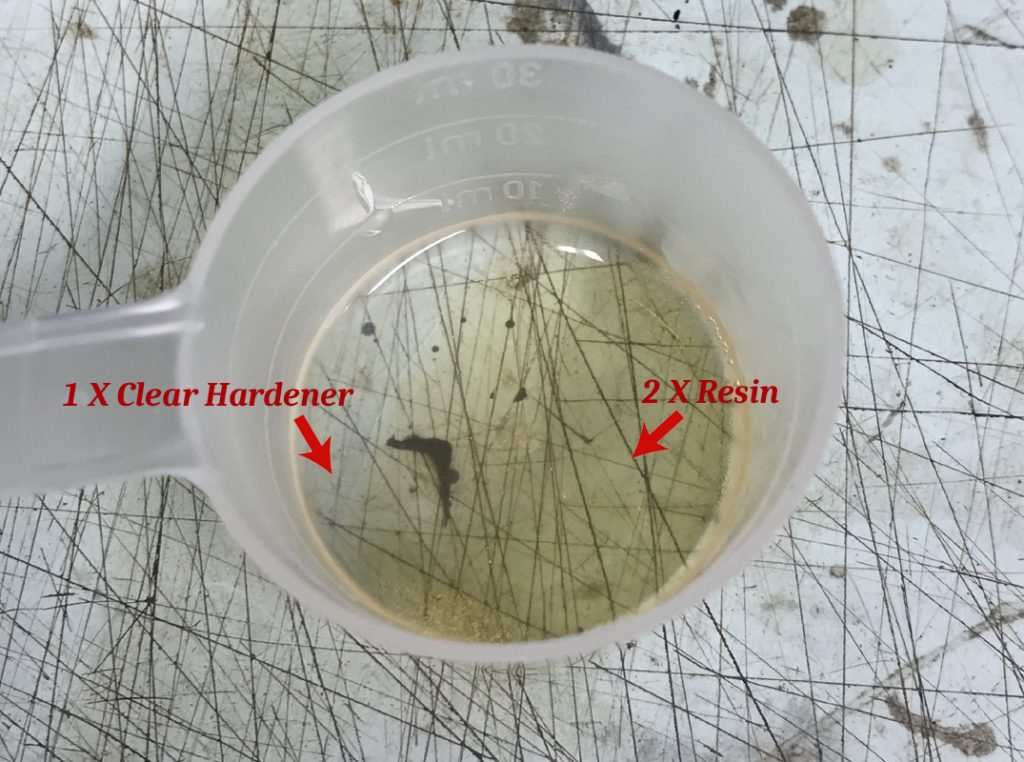
You only need a little: Above we can see 2 X Parts Resin and 1 X Part Hardener. Do NOT use too much (do not use all the bottle). A little Resin goes a Long Way! The cup above contains enough resin to make about 7 to 10 dials.

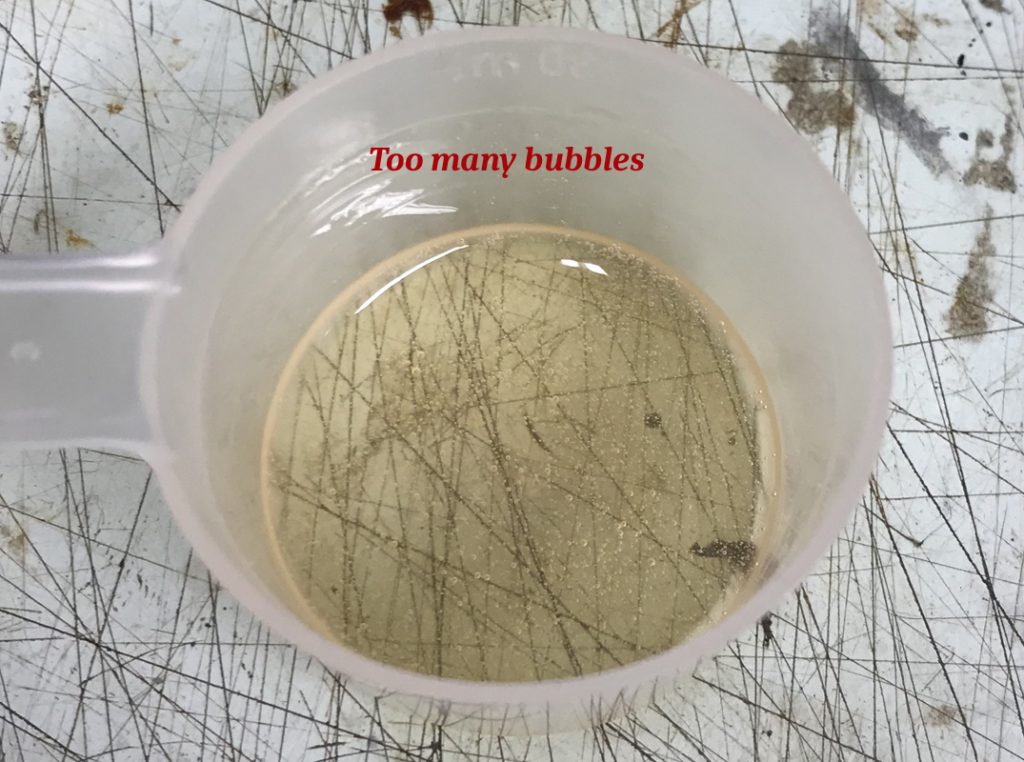
Oh Those Bubbles! Mix the resin well and then wait. Allow 30 minutes and the bubbles will clear on their own. The Resin has a “working-time”of 3 hours so there is no hurry.

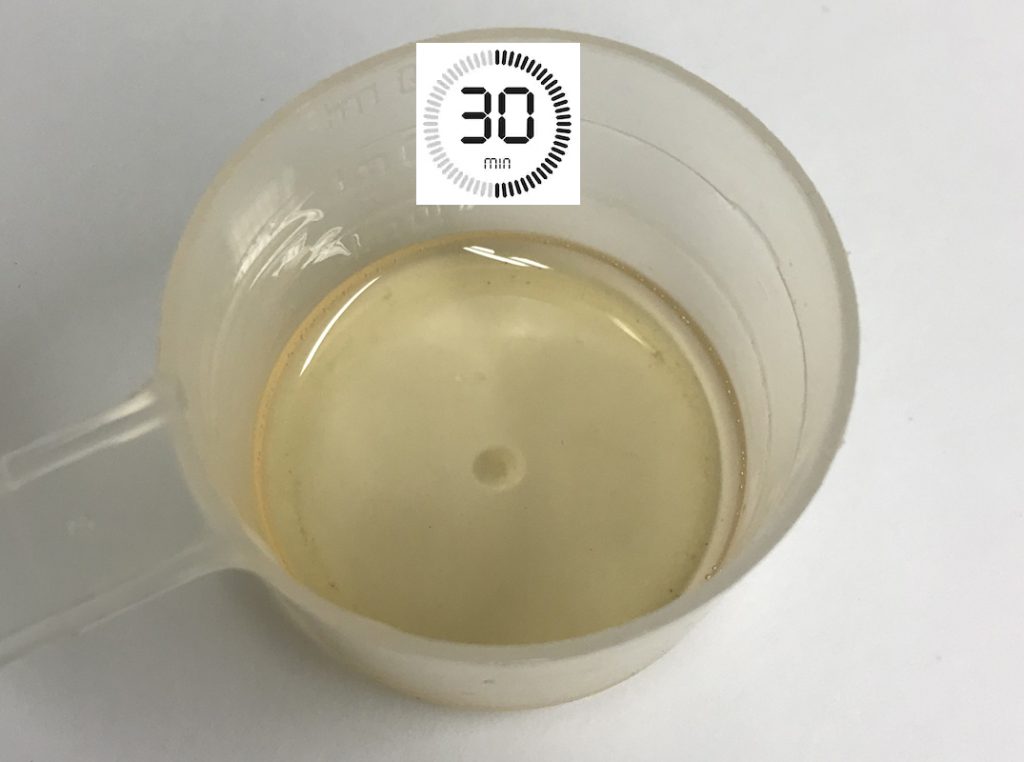
The 30 Minute Wait or Coffee time: After waiting only 30 minutes the Resin now has very few bubbles.

How Long Should I Wait Before I add Resin to the Dial? Its better if you can allow the resin to sit for 2 hours. Its tempting to start work right away but if you wait for a couple of hours the resin will thicken a little and also become tacky. This makes it easier to apply but also it makes the Resin Flow and LEVEL much better.

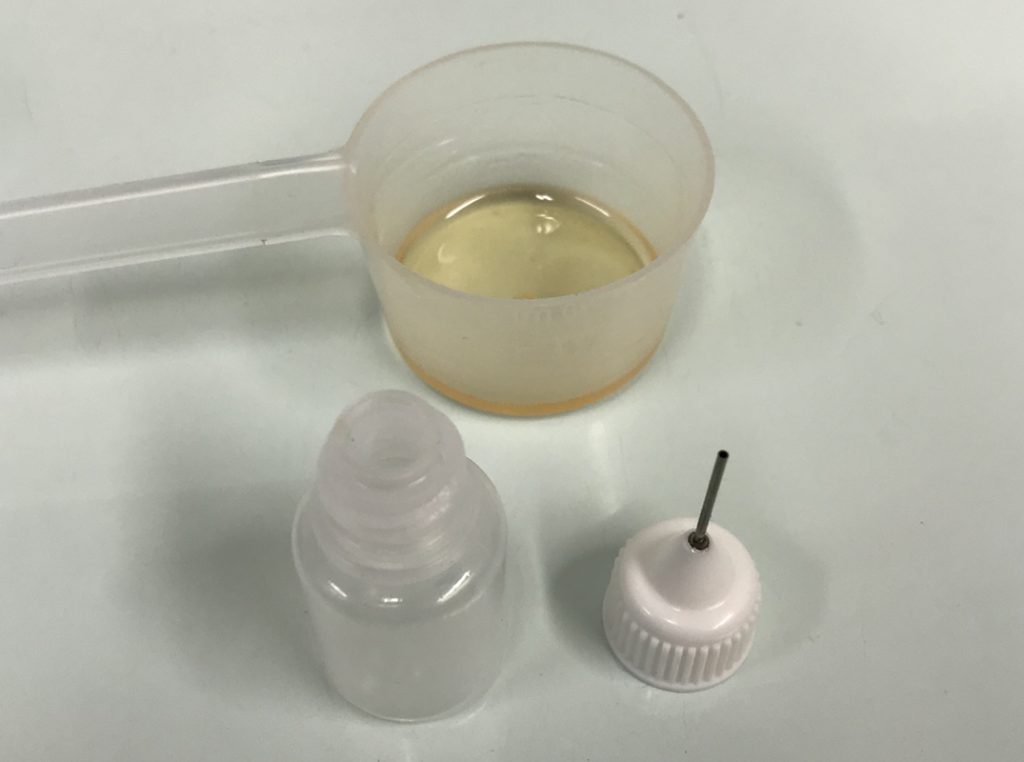
The Magic Applicator: Well its not magic but it will make a big difference in helping make the perfect resin dial. This applicator allows controlled amounts of resin to be applied to the dial. Its probably the secret to making a good resin dial. I have tried many various applicators, brushes, tools etc but none work as well as this applicator bottle.

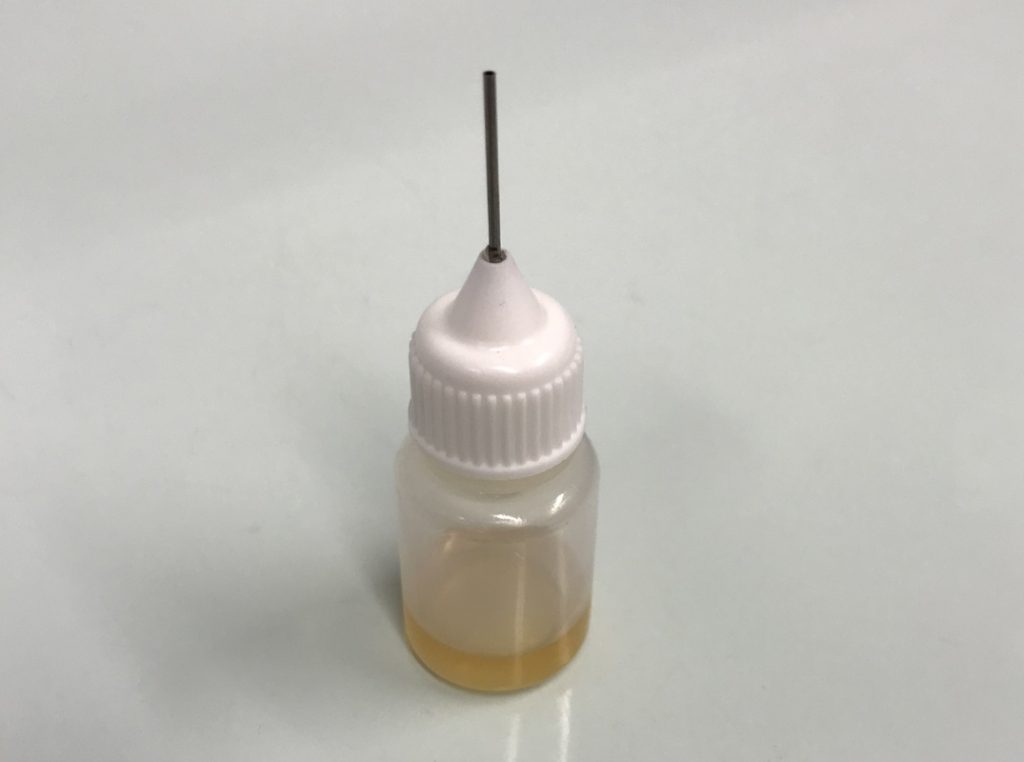
Remember not to use all your Resin: Only use some of your Resin, save the rest for later in case you want to make more dials or make a correction. There is enough in the bottle above to make about 5 dials.

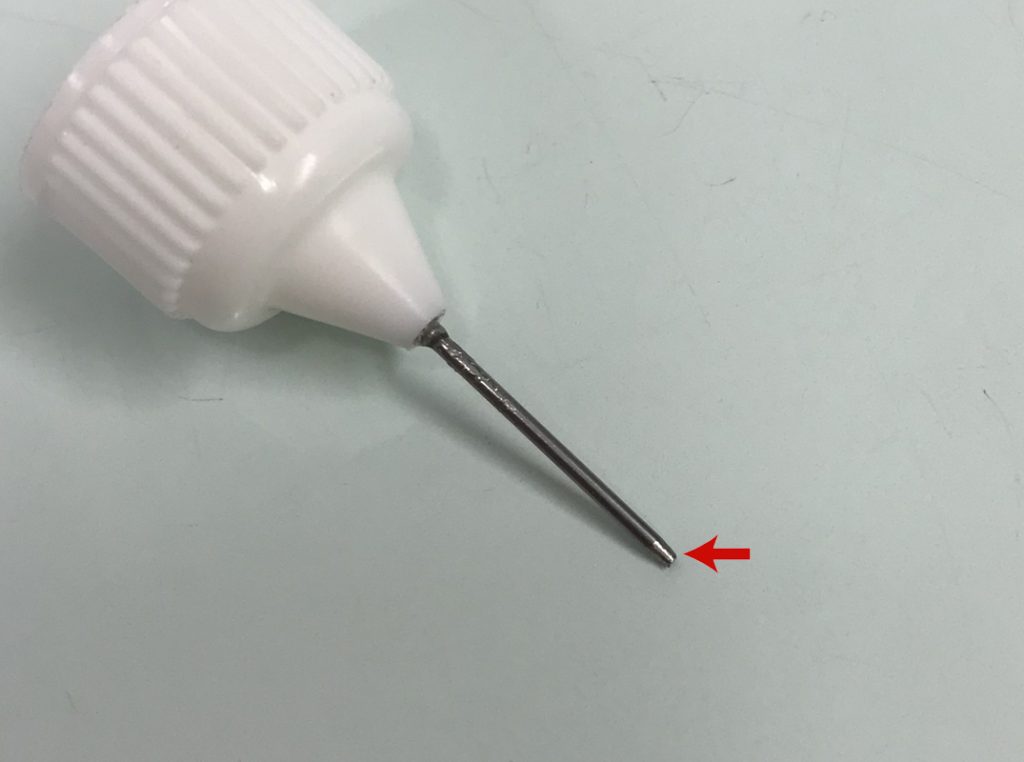
Hot Tip: I sometimes file the tip of the applicator tube, it just makes the application a little neater but you dont need to do this, the standard applicator works just fine.

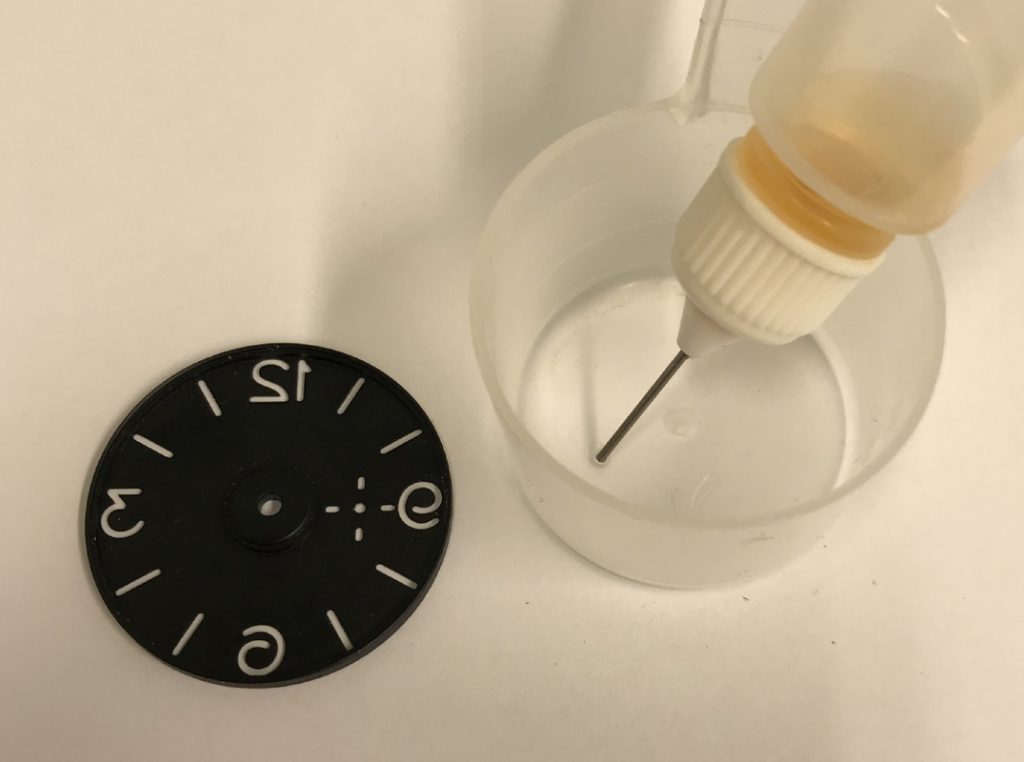
Keep it upside down: Standing the bottle upside down in a container will help prevent air mixing with the resin.

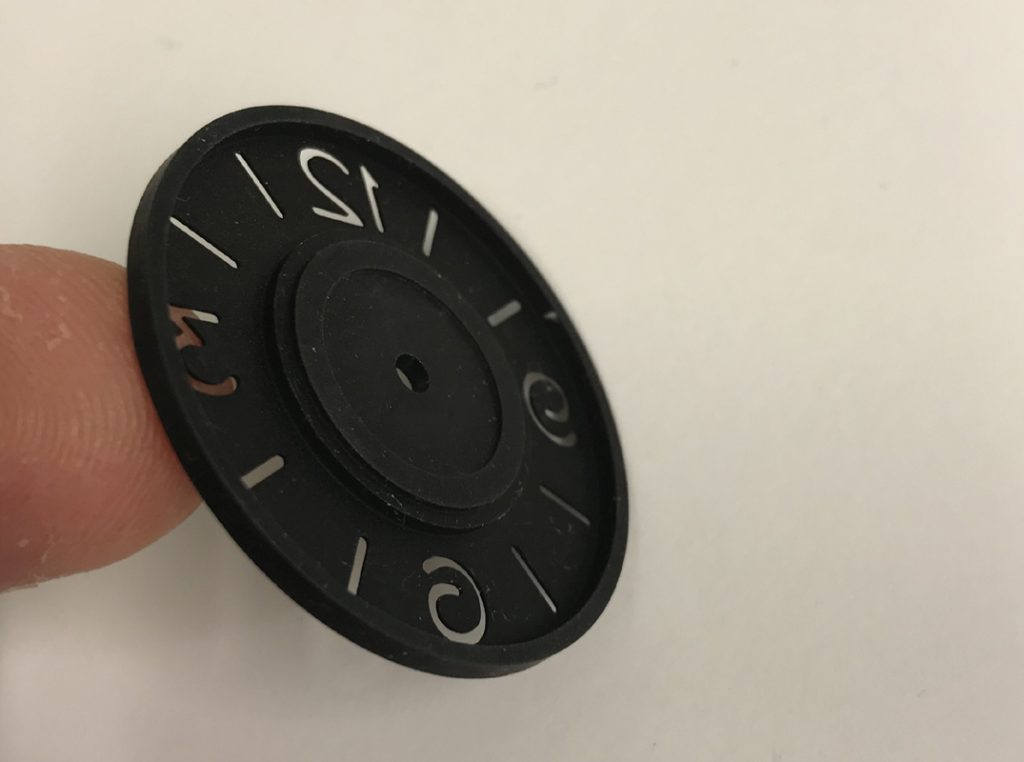
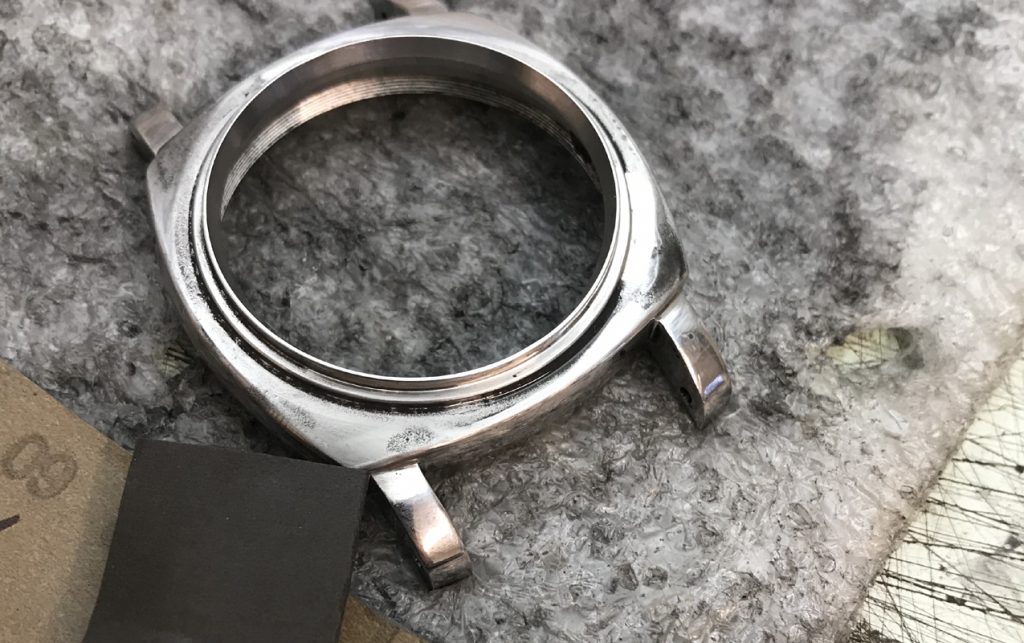
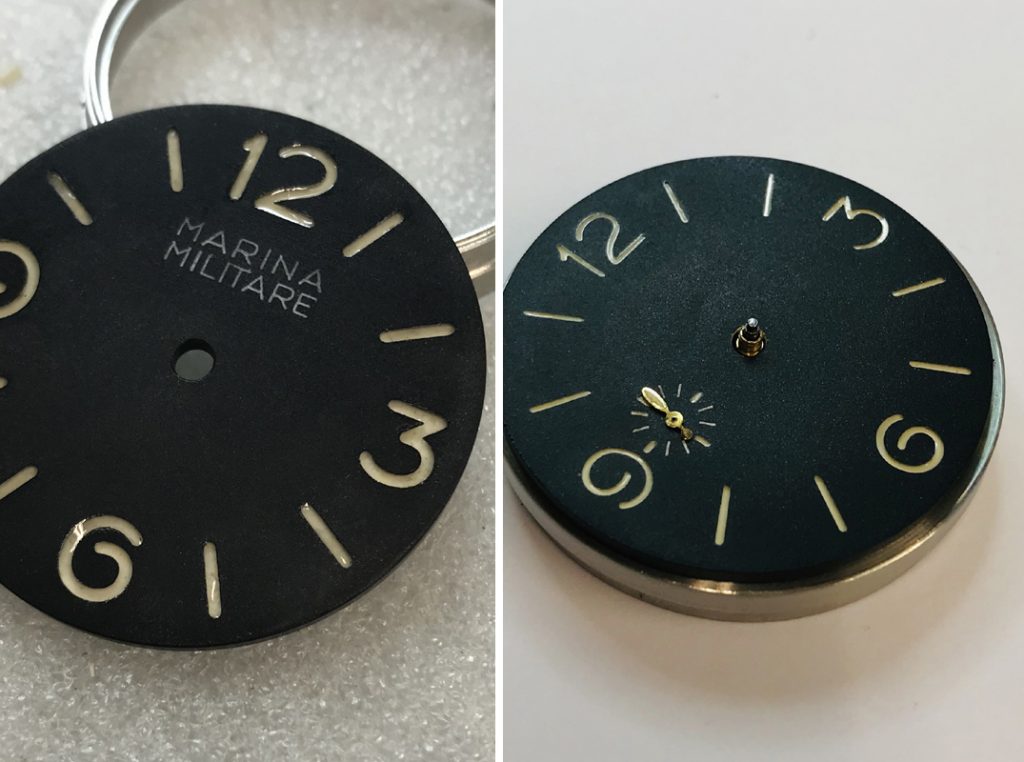
Lets get started: Above I will start with a 3646 Three Piece Dial (2mm thick). But you can use any type of dial, later in this article I will apply resin to a thin Two Piece Dial (about 0.8 thick).

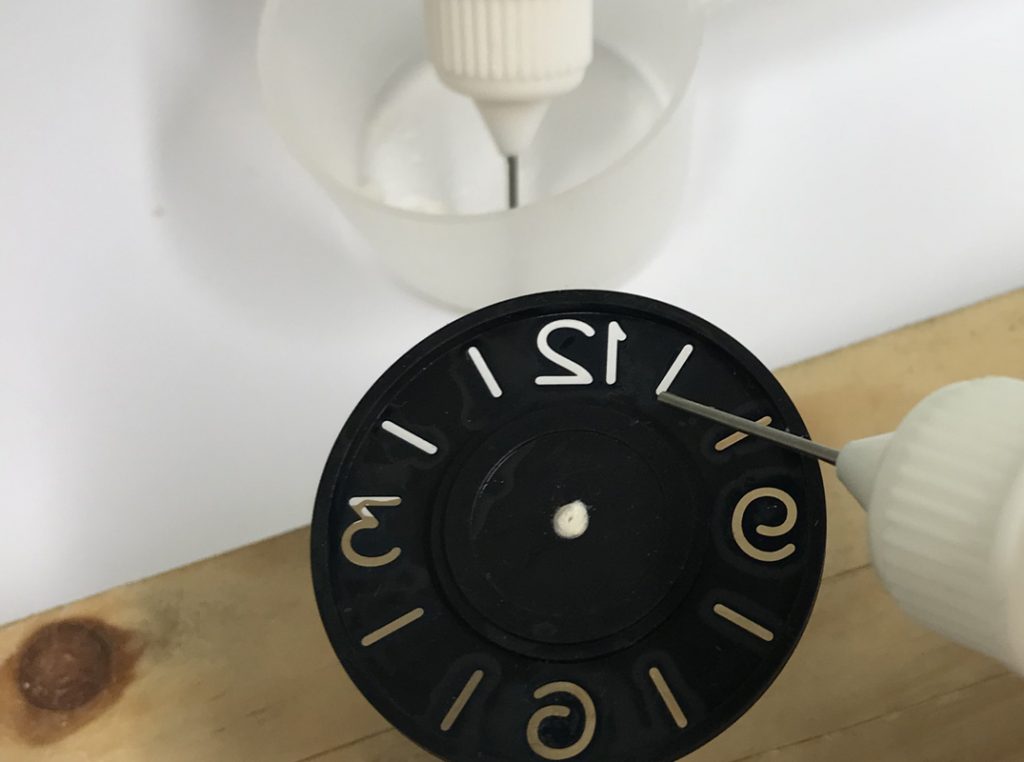
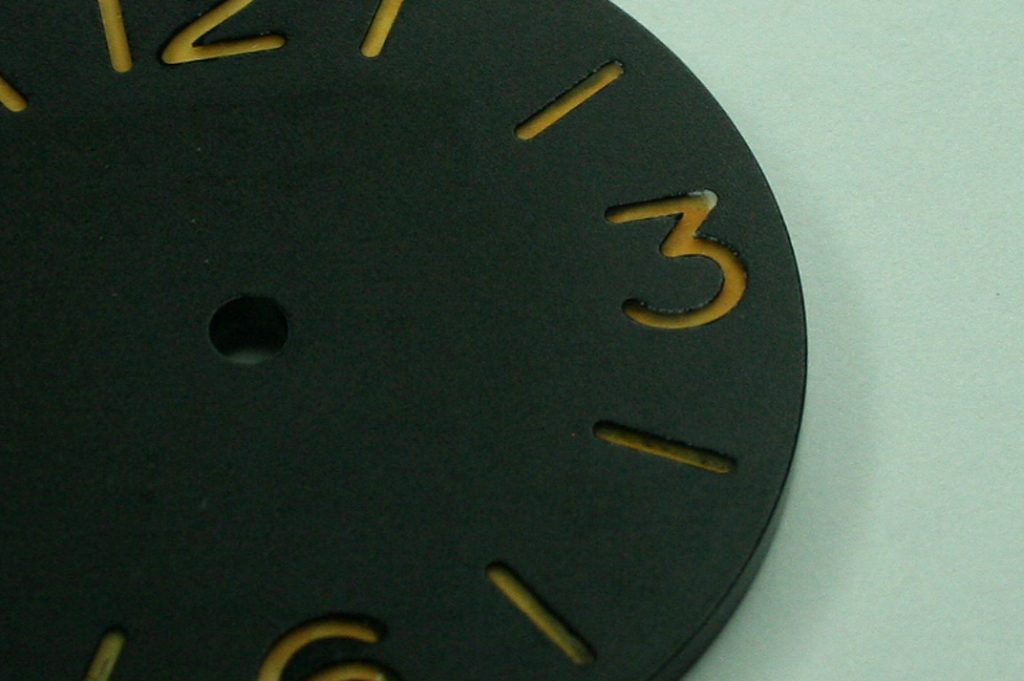
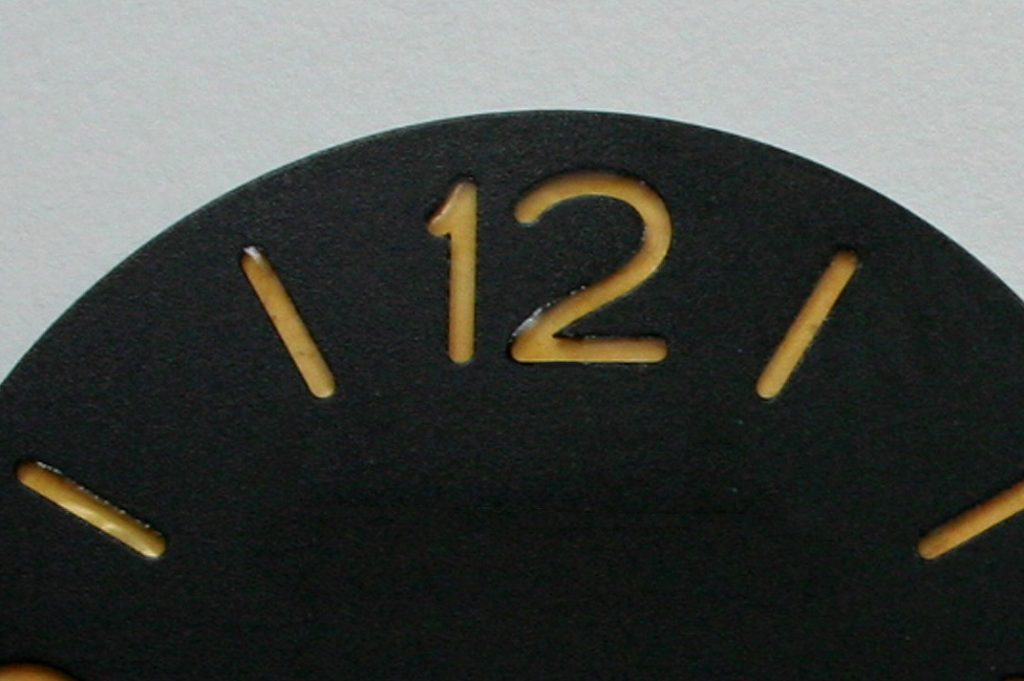
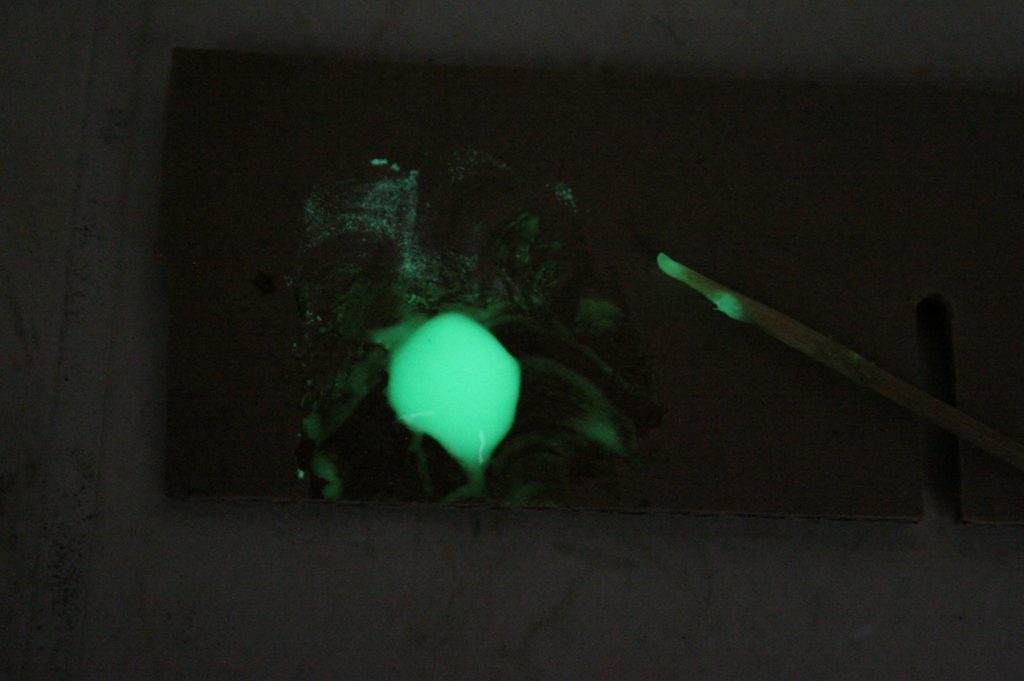
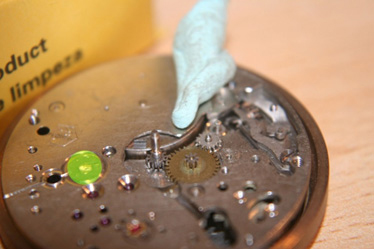
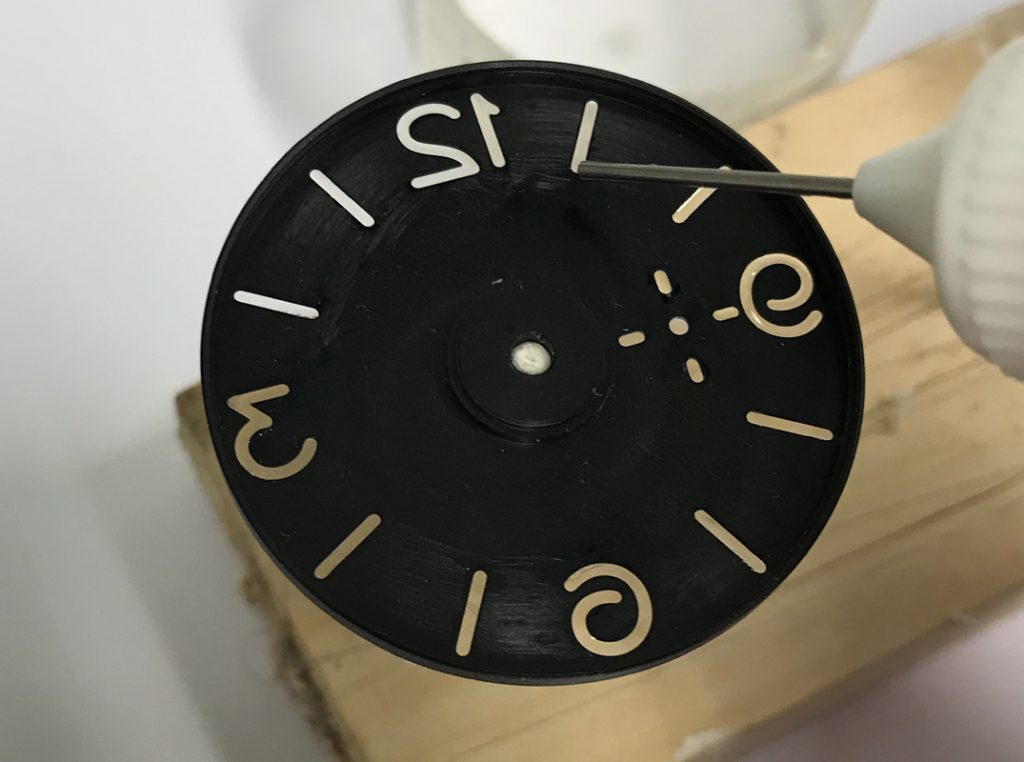
How to apply, this is the part you need to get right: First clean the tip of the metal applicator (you do NOT want any excess resin). Next start by squeezing the applicator bottle so that a tiny amount of resin becomes visible at the end of the tip. Apply a tiny amount of resin into the Number, the DRAG the resin back to the other side of the number so that the number is filled. You may need to practice this a few times so be prepared to clean off any errors and start again. (Use paint thinner to clean). DO NOT USE TOO MUCH RESIN….KEEP IT THIN. Numbers “3”, “6”, “9” and “2” are the most difficult so take your time. Dont expect it to be perfect first time, it may take a little practice but once you achieve good results then it becomes quite easy.

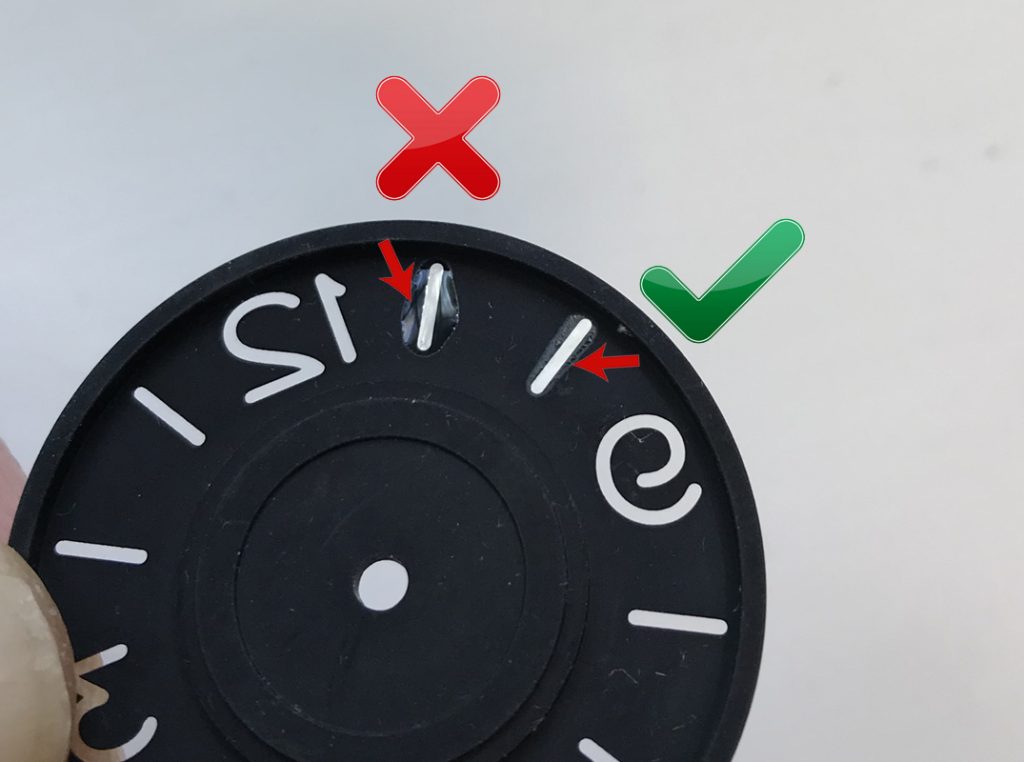
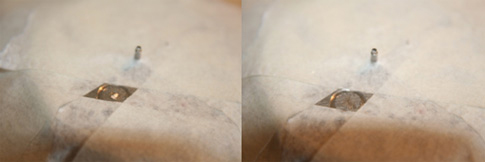
Disaster! Above you can see I have added too much resin to the dial. If you do this then the Plexi that holds the Lume may not fit. Also the resin will probably run to the edge of the dial and drain the number making the number look concave. (too little resin). Clean off any excess Resin with Paint thinners and start again. Dont waste time trying to correct it, its quicker to remove and start again.

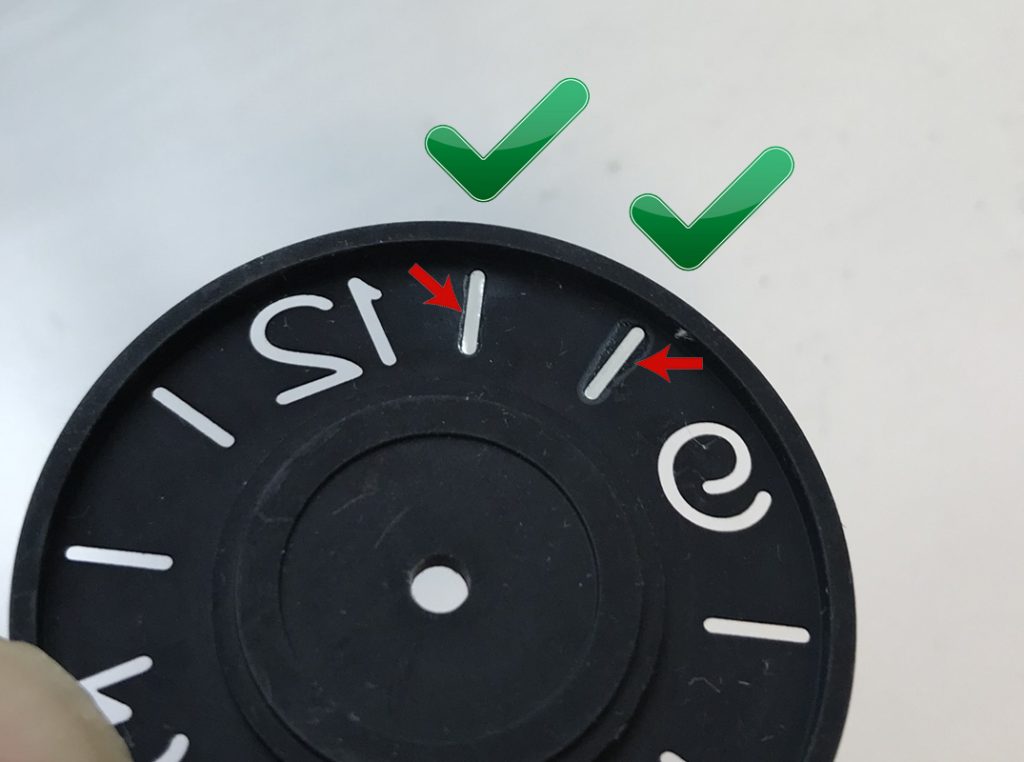
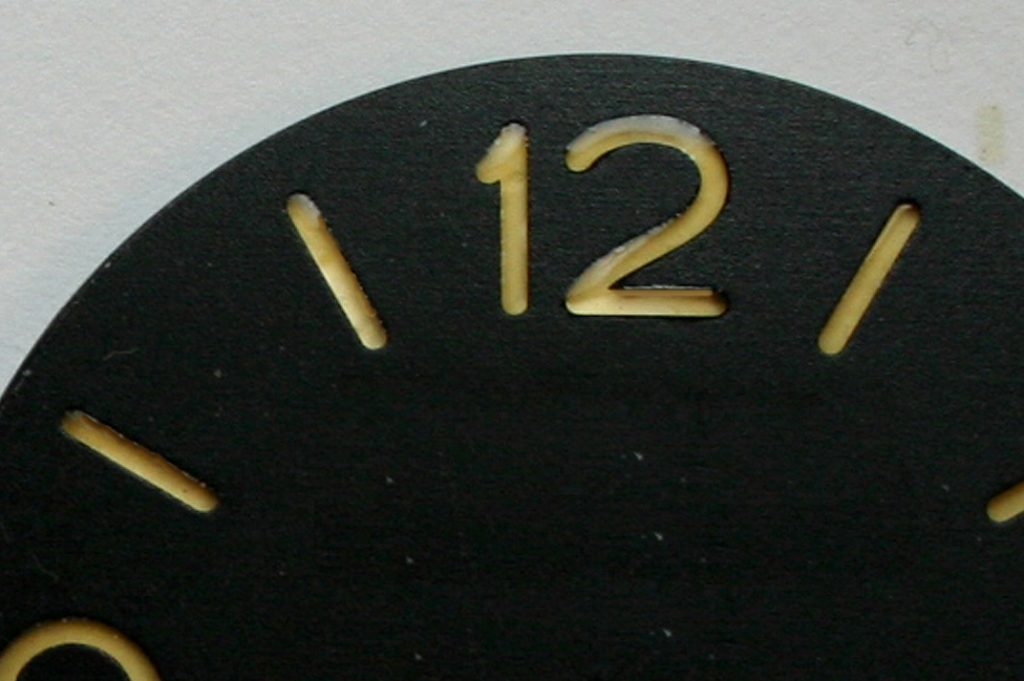
That looks better! Above the dial has had the excess resin removed (cleaned) and new resin applied.

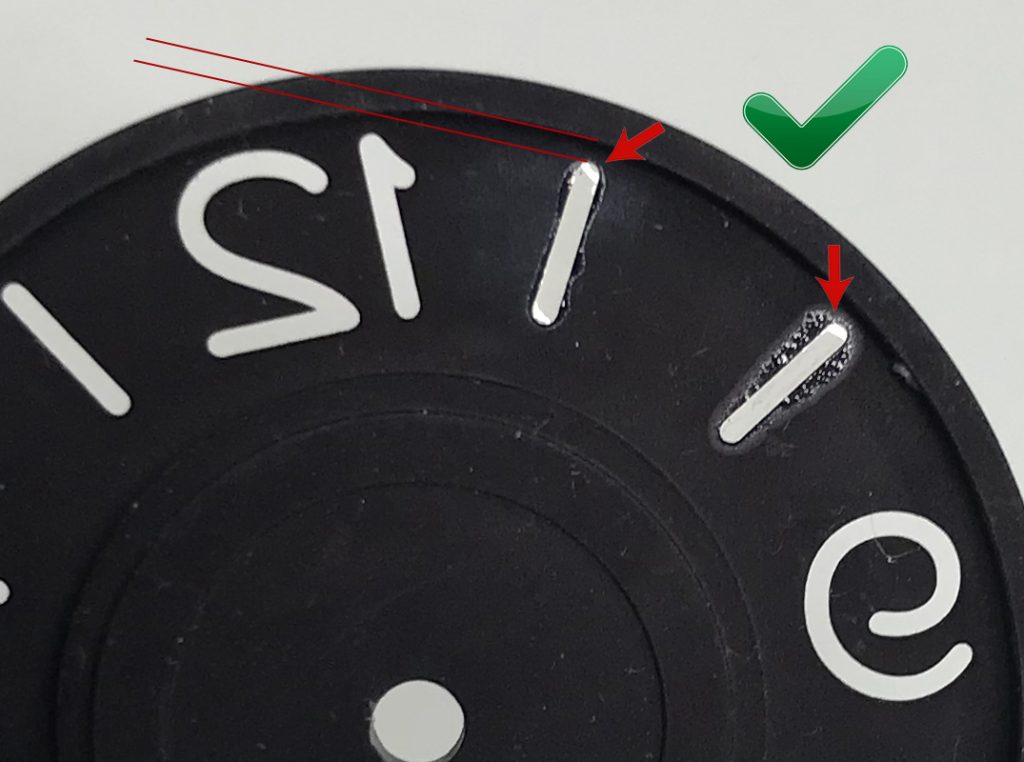
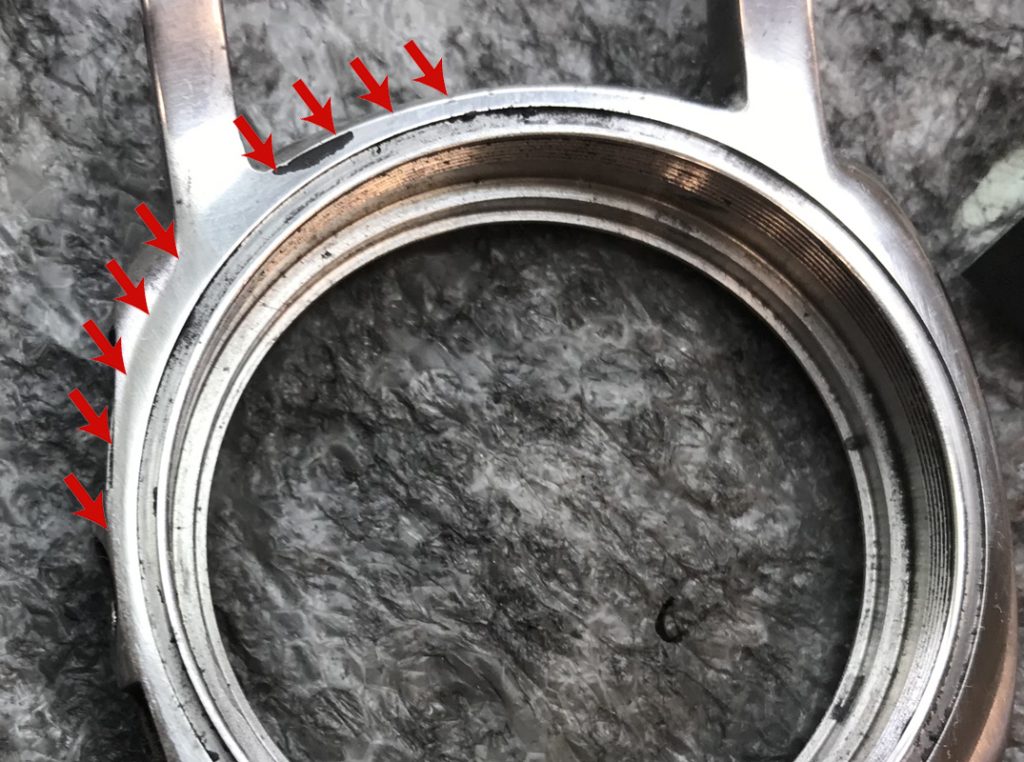
Do not fall into this trap! Note the two red lines. Never let your resin run into this area. If you do the resin will run around the inside edge of your dial and your number will end up almost empty of resin. Its ok to have a little excess on the sides of the number (but NOT too much).

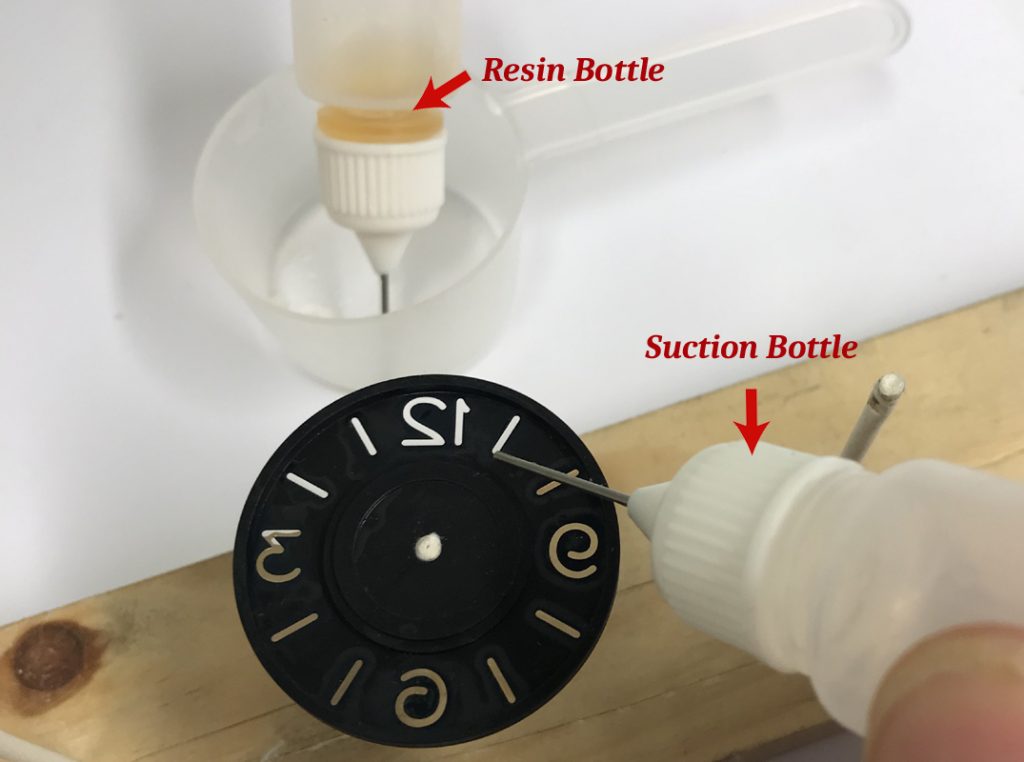
What is the suction bottle for? Sometimes you can add a little too much resin to the number and the resin will look convex. This suction bottle when squeezed will suck up small amounts of resin. However, its NOT suitable for cleaning up excess resin, if you have excess resin then use paint thinners, clean and start again.

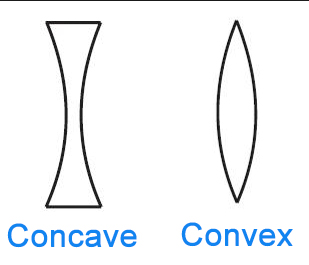
Less is best: It better to add too little resin rather than too much because you can always add a tiny drop more later. Allow the resin time to flow and settle. If you add too much then your numbers will be convex ie the resin will act like a “lens” (not good).

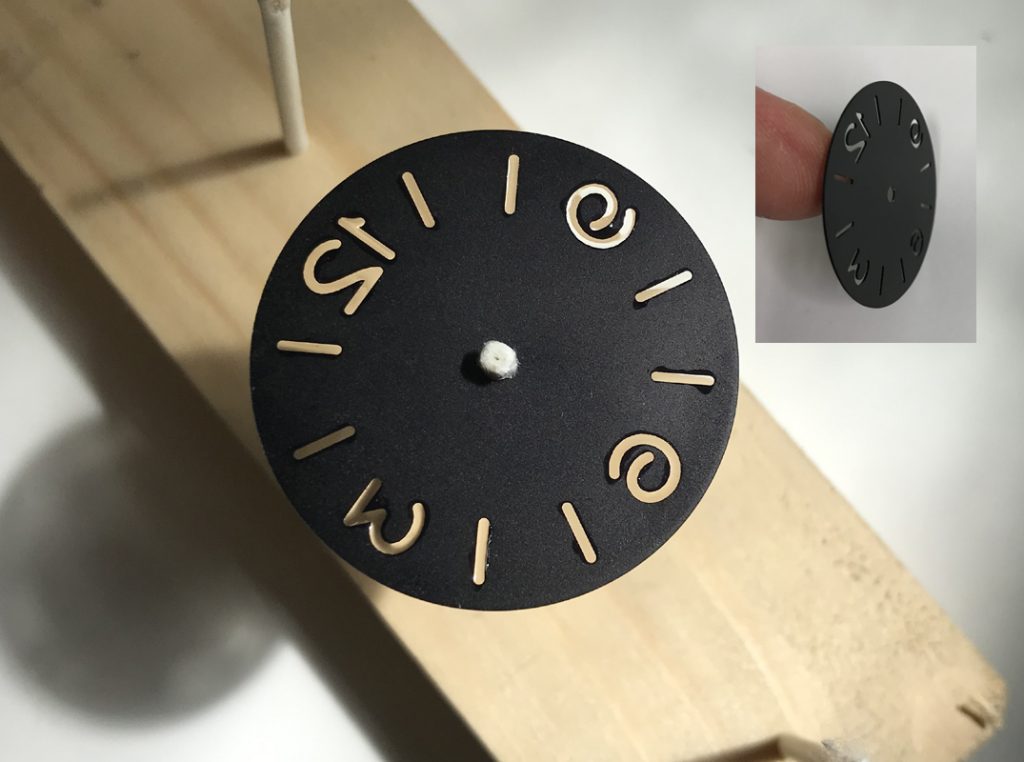
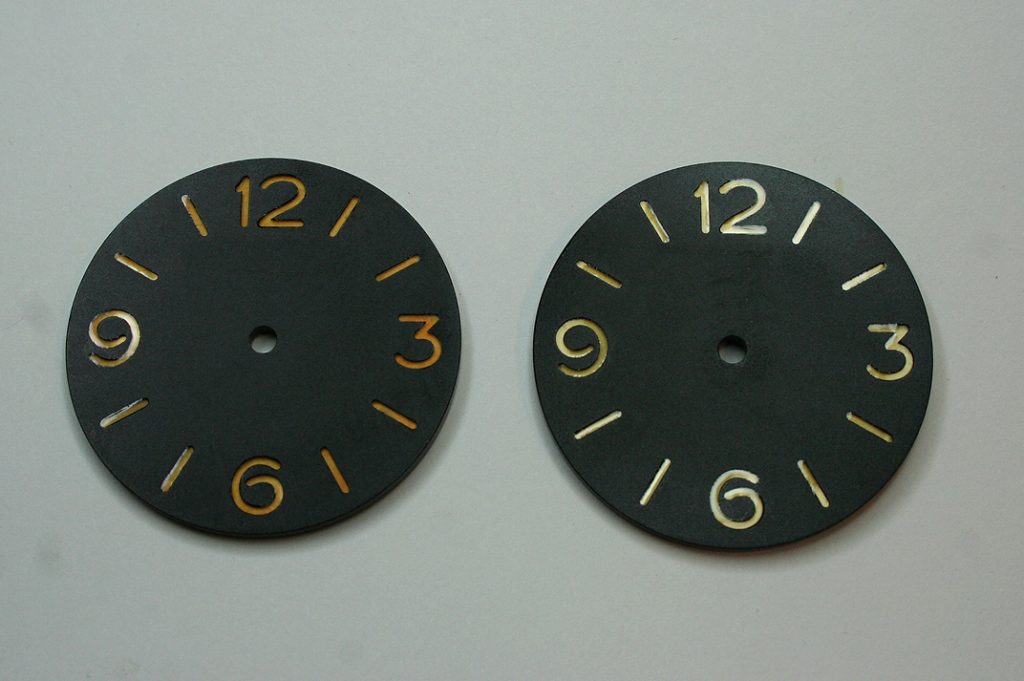
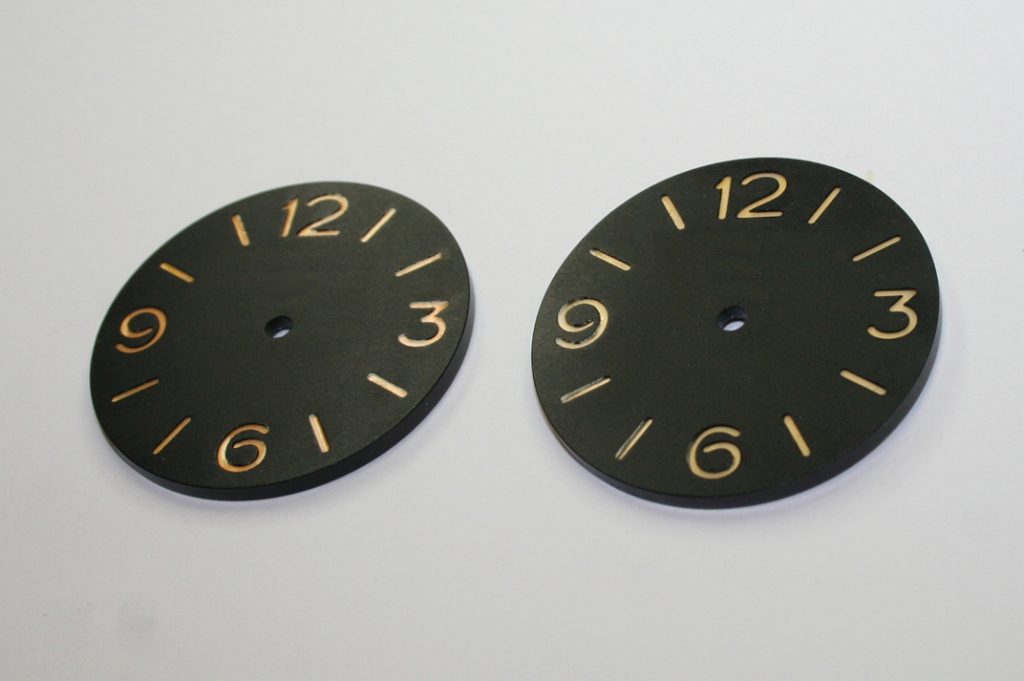
You can add resin to any type of dial: Above I am adding Resin to a 2mm thick Dial and also a 0.8mm thick Dial. Both dials will look better for the resin.

5 Minute Resin: After mixing etc it took probably less than 5 minutes to add the Resin. This was without making any mistakes. Dont expect to achieve this if this is your first attempt. I always suggest starting by practicing on an old dial.

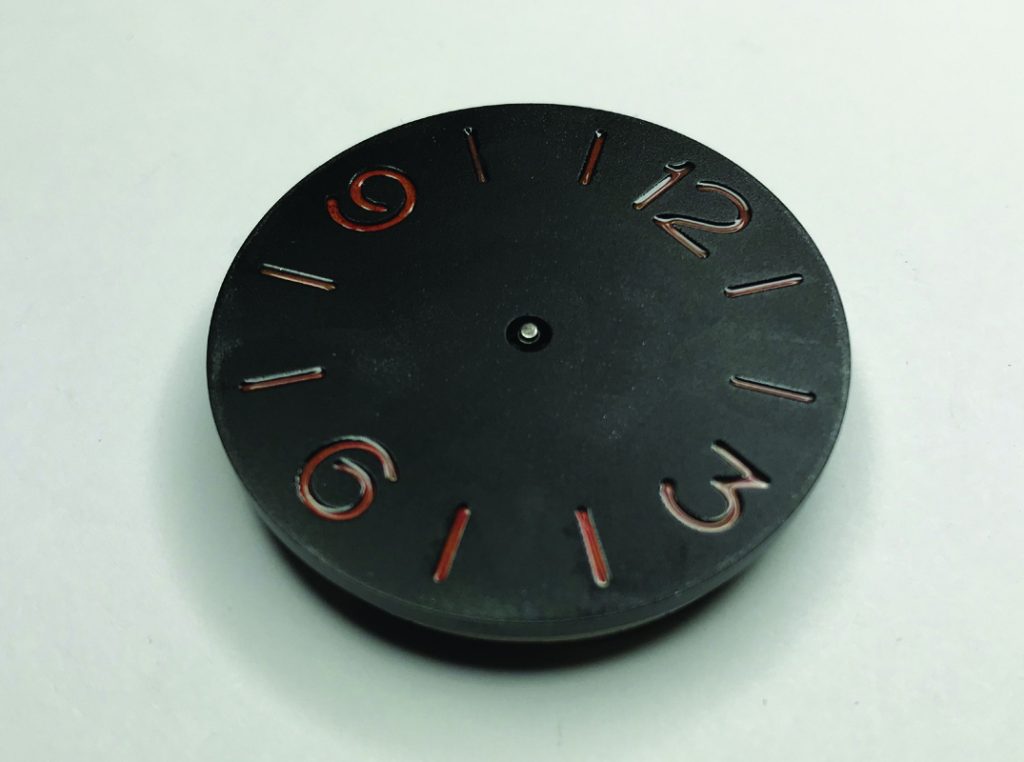
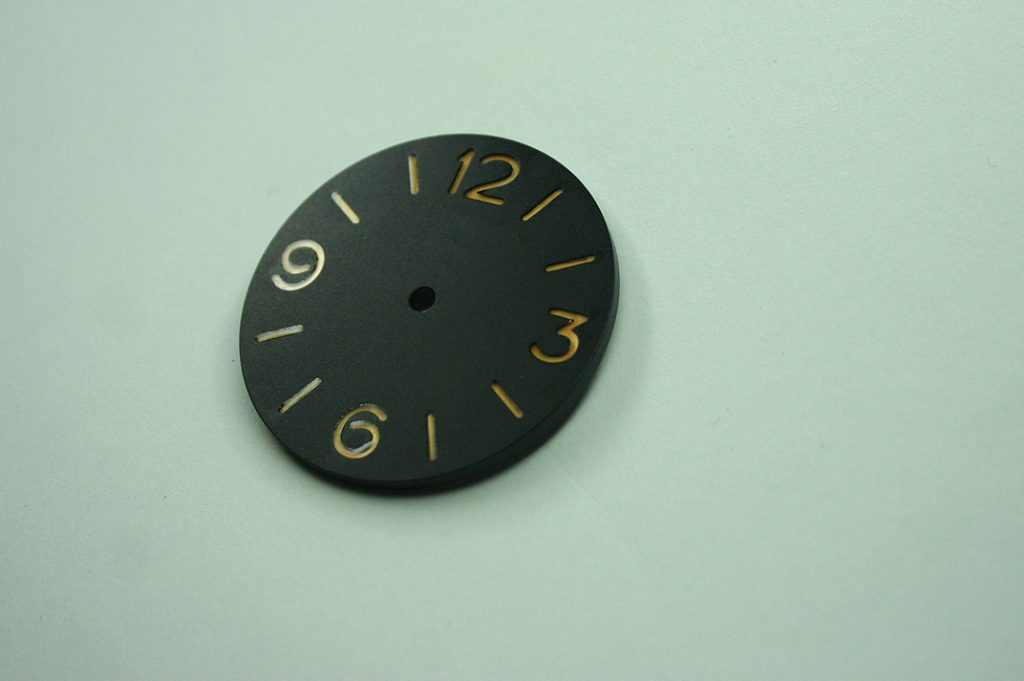
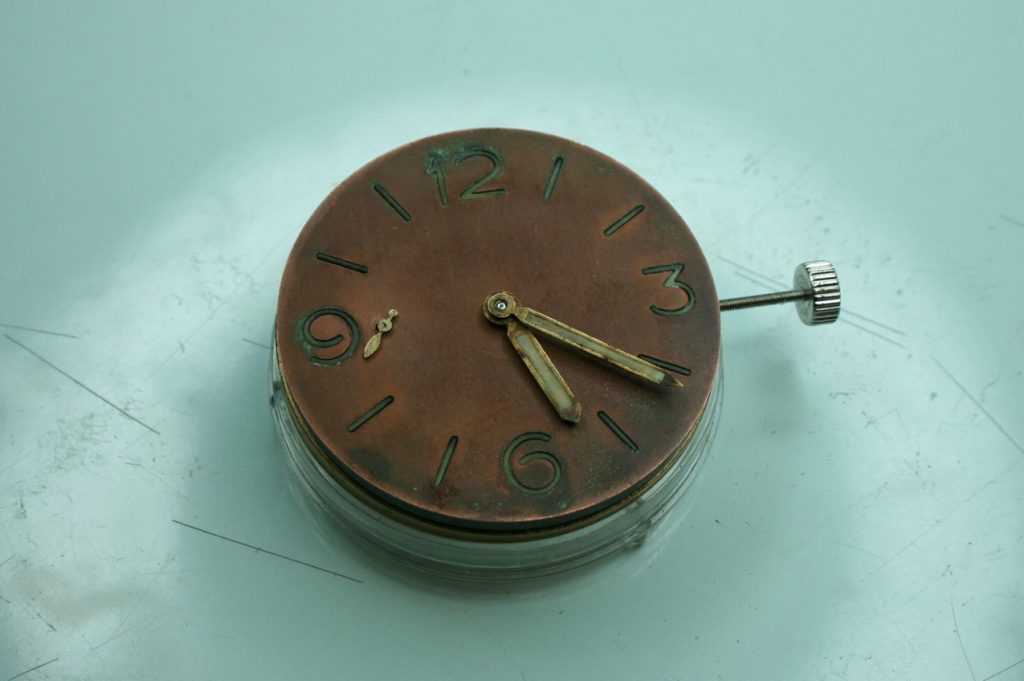
Surely the Dial above is an Error, theres NOT enough Resin! True, there isn’t enough Resin but Panerai did do this. I believe it was a factory error but quite a few dials were issued like this. The owner of this dial requested I make it with too little resin to form the “concave” resin indices you see above. However most Vintage Panerai Dials had resin that was flat.

6152 Case Polishing

There also a great step-by-step tutorial just above this post. To find it, go to “6152 Project” at the top of this page and look for the drop-down box. There are over 80 images that take you through every stage.

How to build the 6152 step-by-step using the Nightwatch 6152 Case:

This section shows how to polish and age the case

Paper is all you need: You can use an industrial polisher to finish your case but this will give a “brand new shine” depending on which grade of buffing wheel you use. Below I will finish this case using only wet and dry grit paper. When done correctly it will give a low-level shine as you would expect on a watch that is over 50 year old

Below: Start by rubbing the case with P400 wet and dry

Below: This image shows a case thats been polished using a machine. This is fine but it does look too new.

Below: When you polish the case you will start to see any errors you have made. Get them all out.

Below: The case has had P400 wet and dry and now its had P1200 wet and dry (a very fine grade paper). I usually rub the p1200 on itself  (rub 2 surfaces of p1200 together) to make it even finer. Then rub the case, you will find that the paper on its own will polish the case to a nice level (not too shiny).

Below: Polished with only paper

Ageing the Case Further using acid and making it look 50 years old

I have separated these stages as some people will not have acid or prefer not to work with it. Acid will add very fast aging to the case. Here is how its done.

Below: The case is being prepared with P1200 wet and dry. You can skip this process as shown above if you have already polished your case with p1200, simply dont polish the case too much and make it too shiny

Below: Make the case shiny but not too shiny (a little dull)

Below: This is what the finish should look like before acid

Below: The case has been dipped into hydrochloric acid for around 5 minutes (test first with a piece of stainless steel as acid come in different strengths).

Below: 5 minutes later

Below: later the case will be lightly polished in places, this image shows the case not polished straight after acid.

Below: Now its time to polish some areas with a cloth to remove some of the acid ageing. Do not used wet and dry paper.

Below: The inside of the case is nicely aged and is left as it it.

6152 Case Project – Rear Case

How to build the 6152 step-by-step using the Nightwatch 6152 Case:

Important: Try not to get the shape around the edge perfectly round. If you look at the image below you can see that the Case Edge on the authentic case doesnt follow the exact curve of the Case Back Edge.

Below: The red arrows show the areas to be filed.

Below: Use a small flat file to do this work

Below: Start by working the curve with your file this will shape the following

  1. The outer back edge of the case
  2. The bottom curvature of the case

Below: Note how its even and smooth, remove the file marks with P400 wet and dry paper.

Below: This is an important image because it shows the curvature of the rear of the case. The case is already shaped well so all you are doing is adjusting it a little to get the same curve as shown in the image below.

Below: The case is starting to take shape. At this stage its been finished with P400 wet and dry

Below: Look carefully and you can see it needs a little more metal taking off. Dont worry if you dont get it right first time and always remember not to take too much metal off if this is your first time.

Below: After some adjustment we have the correct shape, this shape compares well with a genuine case.

Below: The adjustments that have been made have also shaped the rear a little.

Image Above: shows an authentic Vintage Panerai 6152 watch.

6152 Case Project – Lug shaping.

How to build the 6152 step-by-step using the Nightwatch 6152 Case:

Important: The 6152 has added metal to the top surface of the Lugs. This is so that you can shape the lugs to the desired dimensions, to give the “step” you see in the images below. Remember, try not to remove too much metal, if you want to remove more you can always do this later.

Below: I am going to use a small fine/medium flat file. Note the edge of the file, make sure that the smooth side is the side you use near the top surface of the case.

Below: This is the side you should NOT use. Keep this side away from the case

Below: Start by filing down the top surface of the lugs.

Below: Start with one lug and try and get it right before starting on the next

Below: When you remove metal from the top surface you will see a small curve of metal starting to form in the corner of the lug (see red arrow). Use a small square file to remove this

Below: This is an image of the type of file you require

Below: The “step” has been formed to the depth that is required. The case comes with a “step” and for some people this may be enough. However, because extra metal has been added in this area you have the opportunity to make the step as small or as deep as you wish.

Below: We can now compare our case with a genuine case. Tip: Lighting can play tricks, what you see in the image isn’t always accurate so compare different images.

Below: If you look at the case from the side, the step doesn’t look as deep. This is because the top surface edge of the case curves down towards the top of the lug.

Below: Now its time to smooth out the rear of the lugs, the image below shows the area to be filed flat.

Below: It doesn’t take long and with a little filing the area is soon flat.

Below: Dont forget to finish smoothing the area using P400 wet and dry paper (or grit paper).

Below: This area has not been polished on a polishing machine. Instead you can get great results just by using P1200 wet and dry paper. This gives more of an aged finish and not the super bright finish that the polishing machine gives.

How to cut a stem and fit a Crown Guard

Below are some tips on setting up the Crown Guard Lever so that it closes just right. The lever should close firmly so that it applies some pressure to the Crown. Panerai used this design so that their watches remained water tight in deep water.

1) Winding Stem: Cut the Winding stem so that you are able to set the hands (adjust the time of the watch). Be careful!…. do NOT try to cut it accurately first time. Often I have to adjust the winding stem a few times so that its the perfect length, do this by cutting a very little, even filing or grinding the stem. Cut a little, try it, cut a little, try it…take your time do a little each time. If you cut it too long then you will not be able to set the hands when inside the Crown Guard. If you cut it too short then when you set the hands it wont go back into the winding position. Do this first BEFORE you adjust the Crown Guard lever.

2) Crown Guard Lever: These are always made to be a little larger than is required. This is because the lever can be filed to be the correct size for all the different movements that are used to build projects. Do NOT file the lever until you have cut the winding stem to the correct length! When you try to close the lever for the first time it will not close as the lever will be too large. File a little off the “point of the lever”, then try… do NOT try to get it correct first time. Repeat over again and adjust it a little each time until you get it just right. The lever should close firmly and apply some pressure to the crown, but it should not be too tight that its difficult to close.

Here are some Step by Step Imaged and Instructions

Below:  You may want to file the Crown Guard first. Normally there is a small step on the Top Front and Bottom Front of the Crown Guard. Theres also a little filing along the edges near the crown, see arrows below.

Below: The lever will be too large at first. All levers should be filed to the exact size for a nice firm fit when the crown guard closes. Movement stems are not the same, so the lever is made a little larger than is normally required. DO NOT File this lever until the crown and stem are 100% correct!

Below: A good crown guard will use 2mm screws, check that it aligns correctly with the case.

Below: Also check that the lever sits nicely against the case. There should not be a large gap.

Below: To fit, mark and then cut your stem so that it is “close” do NOT try to cut it perfect first time, you will probably fail. Cut it a Little Too Large!

Below: The stem is too long the Crown does not close fully. This is ok, we now need to adjust the length of the stem carefully. Do a little at a time.

Below: Now we can grind a little off the stem. Do a little (not too much ) and test, repeat until perfect.

Below: Now the stem is close to the Crown we can test the Crown Guard to see if the Crown will open inside the Crown Guard. If it doesnt, grind a little more off the stem.

Below: What happens when you have made a mistake and taken too much off the stem! The crown will not close, the stem is now too short. Dont worry there is a solution.

Below: here is a nice tip. We cannot make the stem longer but by adding a little cold solder into the crown then screwing the stem into the crown it will crush the solder so that the stem is a little longer. Dont heat up the solder simply cut a little off with a sharp knife. Dont add too much solder if there isn’t enough simply add a little more.

Below: Now we can test the crown and the lever. The lever should close firmly (not too firm) and the crown should pull out easily inside the crown guard.

Below: The completed crown guard and stem correctly fitted.

Dials – 3 Piece Dials Info

The making of the 3 Piece Dials:

Quick Points:
1) Many 3 Piece Dials are not 2mm thick
2) The indices (numbers) do not have a Plexi
3) Indices (numbers) on the 3646 and 6152 dials were not the same
4) Engraving had more than one font type on the same dial!

6152 LP:
The 6152 Dial was anodized before the Indices (numbers) and engraving were cut.

1) Dial machined from a solid aluminium bar
2) Dial surface textured
3) Dial then anodized
4) Dial indices (numbers) cut into the anodized surface using Pantograph Machine (hand operated)
5) Dial engraving (text added)
6) Resin added to Indices by hand (numbers)
8) Internal plexi machined on a lathe from a solid bar
9) Plexi recesses cut by Pantograph
10) Plexi filled with lume
11) Backing plate cut from brass
12) Dial feet soldered to backing plate
13) Backing plate nickel plated

Note the different Indices (Numbers) thicknesses between the Non Sub-Dial version and the Sub-Dial version. This is probably because of the different time periods the dials were made. For example the early MM Non-Sub Dial with Rolex Movement has thicker Indices. The later (1950’s-60) MM with Sub-Dial using the Angelus 240cal Movement has thinner Indices.

3646 RP and Sterile:
The 3646 Dial was anodized after the Indices (numbers) and engraving were cut.

1) Dial machined from a solid aluminium bar
2) Dial surface textured
4) Dial indices (numbers) cut into the surface using Pantograph Machine (hand operated)
5) Dial engraving (text added)
3) Dial then anodized
6) Resin added to Indices by hand (numbers)
8) Internal plexi machined on a lathe from a solid bar
9) Plexi recesses cut by Pantograph
10) Plexi filled with lume
11) Backing plate cut from brass
12) Dial feet soldered to backing plate
13) Backing plate nickel plated

Backing plates are made from brass the dial feet are then soldered

The Backing plates are then nickel plated

Below the assembled 240 type dial with backing plate

Below: the assembled 3646 dial with backing plate

6152 Case Project – Top surface shaping.

There also a great step-by-step tutorial just above this post. To find it, go to “6152 Project” at the top of this page and look for the drop-down box. There are over 80 images that take you through every stage.

How to build the 6152 step-by-step using the Nightwatch 6152 Case:

This section shows how to shape the top surface of the 6152 Case

Tools: Its possible to do this work with very few tools in fact the 6152 Case in this article was built using only a few files and some wet and dry paper.

Dont I need a Polishing Machine and Dremel? No, you can use these tools of course but I will show you that you can get a better aged finish by not using the Polishing Buffer. As regards the Dremel then it can make life a little easier but its not essential.

Below: These are Medium to fine grade files

Below: I will use 2 grades of wet and dry paper. Firstly P400 wet and dry paper and then P1200 wet and dry paper

Below: The Dremel is a handy tool for the edges of the case but with a few small Medium to Fine Grade Files I will achieve the same results. In many cases I prefer the files over the Dremel.

Important: Before we start its important to understand that the 6152 Case is very close to the shape we want to achieve. Therefore you should only be taking small amounts of metal off the case. NEVER take large amounts of metal from an area.

Why shape the case? This is how the authentic Panerai 6152 Cases were made back in the early 1950’s in fact some of the worlds most expensive watches are still finished this way today, its called Hand Finishing. The machinery used back in the 1940/50’s produced a 6152 Case but in order to completely finished the watch case a small team of “finishers” would shape some of the sharp edges and then polish the case. This made the case a little more comfortable to wear and also nicer to look at.

Getting Started: The red arrows below show the areas I will be targeting. These areas do not require a lot of metal removing so be careful. Take your time and remember, its better to take off less metal and correct it later than it is to take off too much metal.

Below: Lets start by smoothing the top surface of the case a little. I have started to file the top surface on the four corners so that they are smooth (see below)

Below: This stage requires the edges to be made smooth around the case.

Below: Repeat the process on all sides of the case

Below: I have added the image below for those that prefer to use the Dremel, This is one job were the Dremel is faster but the same results can be achieved with files. Just be careful not to touch the lugs if you are using the file.

Below: The front edge above the lugs is now nicely rounded and less shape that it was.

Below: Now go over the area you have filed with P400 wet and dry. Smooth the area until all the scratches have disappeared. If you have used the correct grade file (fine or medium) then this should only take a few minutes. Make sure all scratches are removed.

Below: The font top section of the case is now finished.

THE BIG EGIZIANO

Out of production and not available. This image shows one of the last EGI’s to be built using an 8 day Angelus 240 cal.

Below: The last of the last. The final batch of EGI cases being converted to take the 3 Piece Dial with Angelus 240 cal movement.

Below: One big improvement was to convert to large screw-in type lug bars. The cases were threaded on one side and a set of Stainless Steel Bars were made. The Lug Bar holes in the case were moved back so that the leather strap didn’t rub against the case (a previous design fault).

Below: many problems to solve, the first problem was how to get the thicker Angelus Movement to fit inside the case with a 2mm thick 3 Piece Dial. Quite a few parts had to be specially made.

Below: The first attempt at getting the Movement and Dial to fit

Below: Getting the movement and dial inside the case is easy, getting everything to align, for example the stem through the stem tube with the Case Back in place isn’t as easy as it looks.

Below: It works, everything aligns, there are no rattles and nothing is under pressure or stress.

Below: Shows some epoxy being mixed with lume to form the luminous marker dot you see on the bezel (better shown is the next but one image).

Below: The lume is bright and also note the marker “dot” on the bezel

Below: One EGI was built with a copper dial

Below: How much ageing was up to you. Cases were aged differently, some heavily aged and some aged but with polished areas around the bezel.

How the Angelus 240 is prepared for use in a watch

Fitting an Angelus 240cal into a 47mm Case
Author Ross McSherry

This tutorial covers some of the basics of fitting an Angelus cal.240 to a 47mm watch case.
Assuming you’ve found an Angelus clock, you’ll have something that looks a little like this. Some of the movements are different to this; in which case you’re job is probably easier and some of these steps can be skipped.

1. Remove the extra plates on the front and back. These are highlighted in green, and secured with 3 screws – you won’t be needing any of this anymore. On the back of the movement, a larger wheel may be over the hour wheel. This is for the alarm, you won’t be needing this either.

2. There may be a small winding pinion that extends through the train wheel bridge. This should pull out from the back and won’t be needed any more.

3. Now remove the levers shown in green on the movement above. This requires a small screwdriver; the alarm hammer shown on the left is sandwiched between the top and bottom plate. A small pair of wire snips will cut through its pinion, and it will simply drop out. Be careful not to create any unnecessary shocks on the movement, and collect clipped pieces of wire! If you’re feeling confident, taking the barrel bridge off from the front and removing this alarm mechanism is a better option.

4. The intermediate wheel shown above may sit higher than the rest of the back plate. If this is the case, carefully remove the set bridge (if you don’t know how to do this, you shouldn’t be attempting this project!) and the intermediate wheel will be free. It looks very similar to a clutch at the moment, and will essentially need to be cut in half to allow a dial to fit this movement.

This is the wheel cut in half. To do this, it is best to thread a wire through the centre to ensure you don’t lose any parts, carefully clamp the side of the wheel that was exposed on the back of the movement, and slowly work around it with a very fine dremel cutting disk. You will then need to carefully file and sand the wheel flat, and thoroughly clean the wheel and store for later.

5. The pinion that held the intermediate wheel will also be sitting proud of the movement. This needs to be shortened. To do this, carefully tape the movement to a desk top using low tack masking tape. Allow this pinion (and possibly the canon pinion) to protrude through the masking tape. Ensure there are no gaps in the tape, as you don’t want metal filings in your movement.

Slowly file this pinion down using a needle file. Ensure it is filed to just below the height of the backplate. Carefully bevel the edge of this pinion so that the intermediate wheel can be relocated onto it.

Dust off all filings and carefully remove the masking tape. Now use Rodico to clean up the keyless works and any other area of the movement. Note the brass pivot highlighted in green. This is a pivot for a calendar transfer gear, and is no longer required.

6. Once the movement is covered in low tack masking tape again (other than the pivot), slowly file with a flat needle file. Once it is flush with the plate, use 600 grit paper to tidy the movement up. Dust away any filings, and use rodico to clean the area before removing the tape.

7. Put the intermediate wheel back in place, and reassemble the keyless works. The back of the movement is nearly ready for a dial; the only part that sits proud is the small tab on the hour wheel and the extra tall minute wheel. If your movement has these features, they will also need to be filed down.

Remove the hour wheel. Using a needle file, slowly file down the brass tab. Be careful to to damage any teeth on the hour wheel or the brass tube. Once flush with the main gear, use 600 grit paper to leave a smooth and tidy finish.

File down the back of the minute wheel until it sits below the backplate. Do this in steps, and be sure keep checking how much filing is left to do. Keep the filing perfectly horizontal, and once it’s at the right height, use a small needle file / grit paper to clean up the teeth.

8. Now that the back of the movement is ready, reassemble everything, give one last clean with Rodico and check that everything is running as expected.

9. You will now need a dial. The subdial spacing is 8.9mm from the centre. If you would like to install a second hand, you will need a standard Panerai style second hand with an extra long tube.

You also need to find a case, custom made movement ring for an Angelus 240, plus a Crown and you’re ready to go. Here are the parts used for this project:

10. If you’ve gone to this much hassle, you may as well reshape the case to get a perfect finish. This tutorial will not cover that, but lots of filing, sanding and polishing are required!

11. You may want to lume the hands if required. I have developed a technique to create coloured, cracked hands to match the vintage style. To achieve this lightly cracked finish, mix white lume powder with a small amount of water colour (your choice of colour!) and a small amount of acrylic varnish / water to get a thicker consistency. When the hands are lumed, the thicker liquid will hold the lume together whilst the pigment tries to contract and dry – this cracks the hands and looks identical to a 1950’s watch!

12. The final step is to case the watch. You must find a combination of a case / dial that allows the stem to align correctly with the crown tube.

Deciding which movement to add to your project?

What movement should I use? Once you have decided on which Case you plan to use you then need to consider what movement you would like to add. Its a good idea to select a movement that is going to be compatible with the Case and Parts you will use in your project. For example you make decide to use an usual movement only to find that none of the upgrade parts are compatible. Here are a list of compatible movements.

  1. Unitas 6497
  2. Molinja 3601/2
  3. Cortebert 616
  4. Angelus 240 cal
  5. Rolex 618

The next step is to decide how much you want to pay.

Asian 6497: The lowest price is likely to be an Asian 6497. A good Asian Movement from a good supplier is likely to be a very reliable movement. Prices vary from $40 to $60

What to watch for: Some 6497 are being sold without oil. These are probably from a large consignment that were supposed to be used in a factory and the factory was planning to oil then check the QC. Most Asian movements are very good ask the supplier whether the movement has been oiled and passed QC

Molnija 3601/3601: Prices vary widely. In 2010 the 3602 could be easily bought for $28. Because so many people are using this movement for projects the the price can be as high as $100 and more. The Cannon Pinions on the 3601 and 3602 are quite short however the 3602 does have a slightly taller Cannon Pinion and has a jewel center wheel bearing (visible in the center of the movement on the backside).  Many people prefer a brass center wheel bearing on the 3601 as its similar to the Vintage Panerai movement).

What to Watch For: excess old poured into the keyless system. Its very common to see some of these movements almost flooded with standard oil thats been poured into the keyless system. Also look for excessive wear and “wobble” on the balance wheel. Unfortunately many have not been properly serviced over the years, always ask the seller how accurate it is for example Plus or Minus (+ or-) how many minutes/seconds per day. If the seller wont say then be careful (its easy to check just wind it up and see how it runs over 24 hours).

Cortbert 616: Cortebert sold the machine tooling to Molinja Russia when they closed the Coretbert Swiss Factory. There is no doubt when compared to the Russian Molnija that the Coretbert is a better movement. Not all Cortebert are perfect but most seem to run well, I have seen fewer problems with the Cortebert than I have with the Molinja. Maybe this is because people serviced the Cortebert more often. Prices for the Cortebert have been fairly stable over the years expect to pay around $350 to $400

Angelus 240 cal: This is an 8 day travel clock movement that was once used by Panerai around 1961, this movement came without and alarm and is stamped Juni 61. Most Angelus 240 that are for sale will not be quite the same as the Panerai version. They will either have an alarm system or will have the alarm function removed and sometimes the Bridges converted to look like the authentic Vintage Panerai,s often many look very good.

There are many points to look for on the 240 cal but you need to be aware whether the movements is Incablo or Non-Incablo. Incabloc is shock protection and suitable to use as a watch. Do not be put off buying Non-Incabloc, they are fine, just don’t wear the watch if you plan to chop wood with an axe (if you know what I mean).

Things to check on the Angelus 240:

  1. Is the movement keyless or do you need a key to wind it (not suitable)
  2. Is it Incabloc or Non-Incabloc (look at the balance wheel adjuster)
  3. Is the Hour Wheel over 3.25 tall (spare wheels are available)
  4. When was it last serviced
  5. Is it accurate to + or – 2 to 3 minutes a day
  6. Has it been converted to fit inside a watch (see how to convert on this website)
  7. Are conversion plates fitted (some will have the bridge pillars turned down).

Price for the Angelus vary widely from $800 for a on Incabloc unserviced to $2300/$2400 for something thats had a lot of conversion work, servicing etc. If you can find a 240 cal with the original plates then prices can be even higher. The most expensive would be the genuine Juni61 (June 1961) movements, these are rare and will be the most expensive.

Rolex 618: As this movement was used by Panerai then often the movements will not need any conversion parts. The true 618s as used in the Panerai are very rare and batch numbered. However, you may find a nice Rolex pocket watch with a 618 inside that would make an ideal movement for your project. For the pocket watch type movement expect to pay $2800 to $3000

Basic Rule: Ask when the movement was last serviced, if the seller doesn’t know then assume it hasn’t been serviced. A good clean and service will cost around $100. However a skilled watchsmith can often take a movement with say + or –  2mins lost or gain a day and tune it to a few seconds a day. Not many watchsmiths can do this so its worth asking around and expect to pay around $200 for his time (its often worth it if you plan to keep it). Always ask how accurate the watch is and dont assume because its cheap it will be a bargain.